
As a JoomlArt Moderator and Support Team Member, I frequently see questions and issues within the Community Forum and Support Tickets from Members with regard to some having difficulty to successfully perform a QUICKSTART INSTALLATION. Many users simply want to either replicate a virtual clone of a template's demo showcase, or have just certain aspects of their site to look/function "just like the demo."
The value of a Quickstart Installation
In a nutshell ... being able to begin the modification/customization process from a virtual clone of the template demo as a starting point.
Admittedly, when first starting to work with Joomla, it is easy to be resistant to utilize a Quickstart installation for a template. Some don't like the thought of having to install another complete installation of Joomla - be it locally with XAMPP/WAMP or on one's web server. It is also understandable why more intermediate/advanced Developers might prefer to start with more of a "blank slate" insofar as a feeling of "complete control" over the creation of their own structures and content from scratch.
Nevertheless, assuming that an attraction to a particular template's demo presentation is what encouraged/inspired one to become a JoomlArt Template Club (JATC) Member and use the template in the first place, the greatest value of utilizing the Quickstart installation – especially for the novice-to-intermediate level user – is being able to begin the modification/customization process from a virtual clone of the template demo as a starting point.
After all . . . why re-invent the wheel?
Moreover - for the Joomla beginner - an even greater value of the Quickstart installation method is being able to view, study and learn from a working visual clone of how the JA Template Developers designed and configured various elements of the template (as showcased within the template's demo) . . . learning not only how to understand such configurations, but how to create one's own customizations - such as CSS styling, new custom modules and creative navigation (as a mere tip of the iceberg).
How to perform a Quickstart Installation
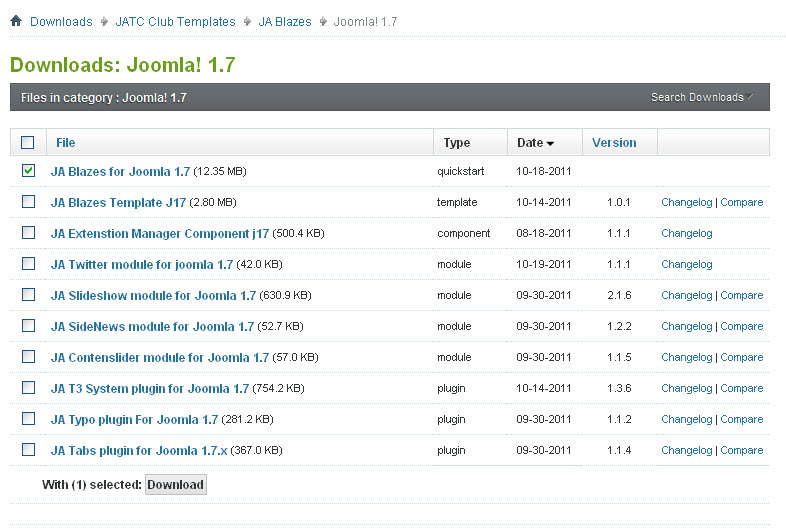
STEP 1 Download the template quickstart file
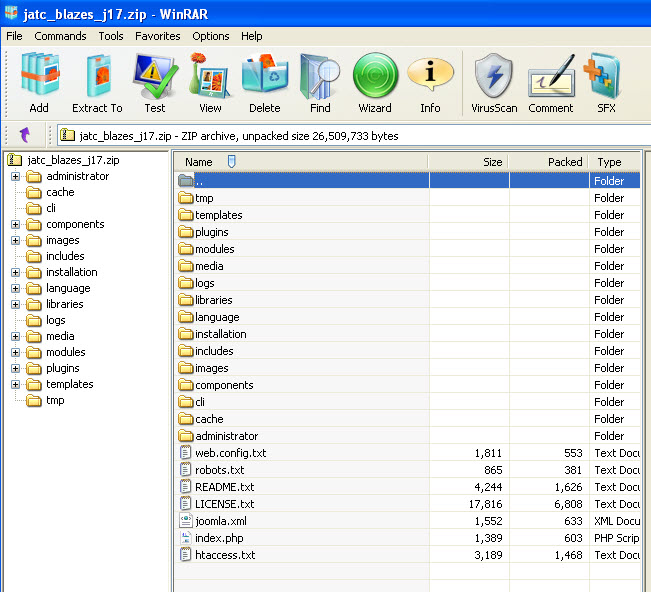
STEP 2 Extract the zipped template files to a folder on your desktop.
The files you extract will be very similar to this - INCLUDING a file called "installation."
STEP 3 Transfer files to server
This next step is premised on using an FTP client - such as FileZilla for transferring files to a webhost server account. If you need assistance on how to use FileZilla (or really, most any FTP client), here is a handy-dandy video tutorial for ya . . .
Upload all of the files you extracted from the quickstart zip/package to your webhost server account. Though some webhosts have a different structure, in MOST cases, you will upload them into a folder called "public_html." (When in doubt, consult your webhost support staff).
STEP 4 Once you have uploaded all of the files/folders from the quickstart folder into your public-html folder, you need to then navigate (via your web browser) your url (i.e http://www.yoursite.com )
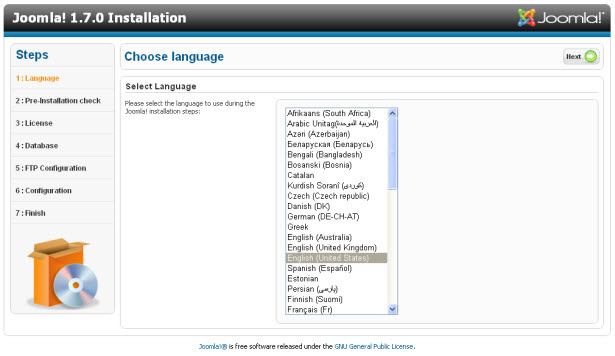
Once the page opens it should look something like the image below.Select the language you want to use with your installation and press next.
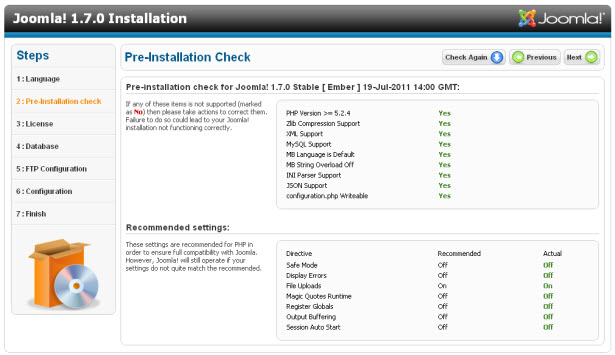
STEP 5 The next page will give you a sense of your server compatibility. You will need to troubleshoot any of the flagged areas that are unsuitable for a Joomla installation before you continue here. Once you get the all clear ... click next again.
(To be honest, I have never experienced a problem - so I always click "next" right away)
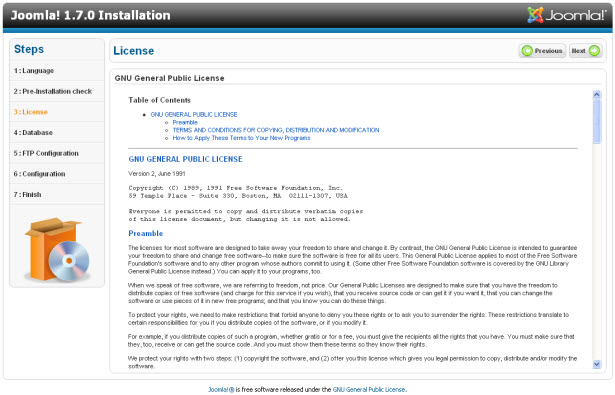
STEP 6 The next page is the GNU/GPL page .. you need to agree to the terms before continuing.
(NOTE -just click "next" right away)
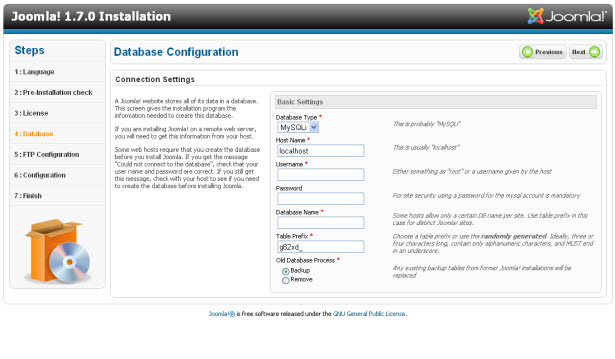
STEP 7 Install page 4 is the database page. The details you enter here are important as this is where the actual information for your Joomla installation are going to be stored. In a nutshell you need to create a mysql database, a user for the database and then assign that user to the database you created.This step requires a slight detour and we need to open up cpanl on our server.
STEP 7.2: If you haven't already set up your database!
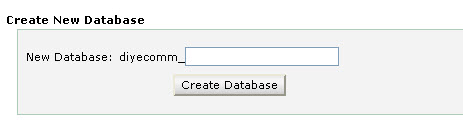
Open the Cpanel account on your server. Once you have logged in navigate to the database area of the cpanel account. This may look different on your server depending on the theme ... but the image below shows you what it looks like on many webhost Cpanel accounts.

You can use the database wizard to step through the process - but if, for some reason, you don't have the wizard on your CPanel, click on the mysql database icon and write the name of the database you want to use for your site in the window provided. You can use any name you want to here. Click on the Create database button and you should receive a success message telling you that the database has been created.
Navigate back to the mysql database page and scroll down to where the Create new mysql user input boxes are.
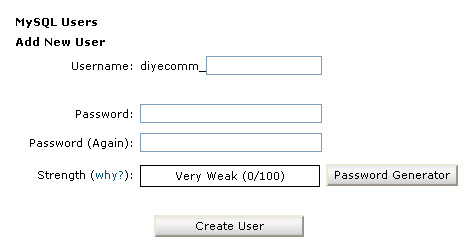
The username and password you put in here are really up to you, but for your Joomla site security its advisable that you use the random password generator if you have it on the page.
After clicking Create New User you should receive the success message and you should then be able to navigate back to the mysql page and scroll down the page again. Take a note of the username and password - as we will need this later.
You now need to assign the user to the database. So where it says "Add user to database" select the database and the user you have just created and make sure they appear in the top and the bottom drop down boxes.
Once you have the new user and new database in the select boxes click add.
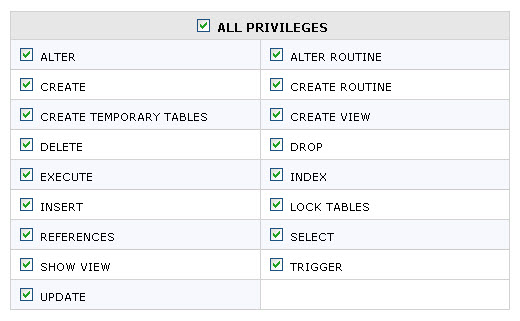
The next screen you will see is the "User Privileges" settings. Assign full or all privileges to the user and click "make changes," submit or add user or whichever submit button you have there. You should receive another success message telling you that your user ha been added to the database. You need to pay close attention to the names they use here as the database prefix and user prefix will be needed when filling out the information in the next step.
STEP 7.3:
You are now ready to enter the information into the fourth installation screen. It gives you the option of choosing whether to use mysl or mysqli - in most cases you will choose MYSQL.In the label where it says host name you need to write the name provided by your host for your hosting plan. In most cases this should be localhost but on other server environments this may be different. (I always use "localhost")
In the username and password field enter the details from the previous step. Don't forget to put in the prefix to the database. Next is the database name field - grab the name of the database and put it in that field - when ready press next.
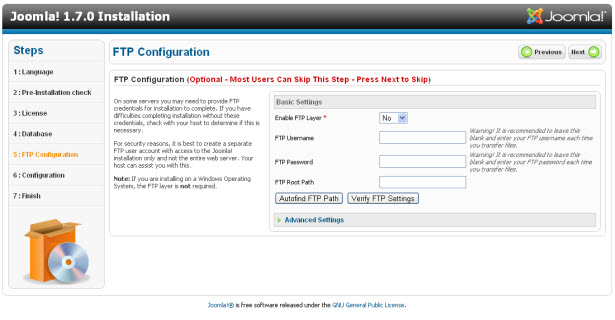
STEP 8 The next page is where you configure the ftp settings for the site. The ftp layer was brought into J1.5 as way of helping out with file permissions in some server configurations. Using it is optional and can be initiated later on when using your site. So you can either fill out the details and click next or simply click next. (Don't hassle with this one . . . simply click "next.")
STEP 9 - IMPORTANT
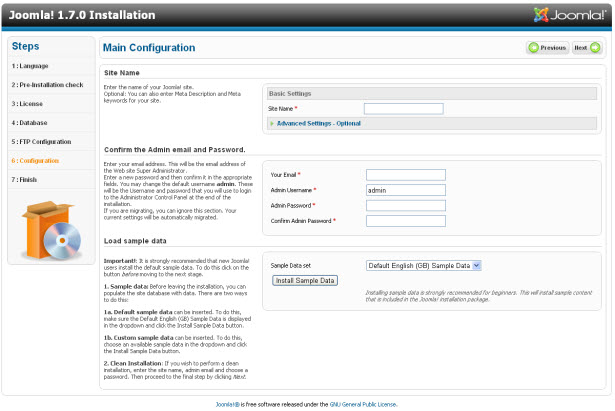
The next page is the sample data page and when using the quick start packages its really very important to install the sample data. Fill out the site name, email, admin name and password and then scroll down to the button that says "Install sample Data" and click it.
You should get a success message shortly afterwards which means all of the content from the demo site has been loaded into the database you created.
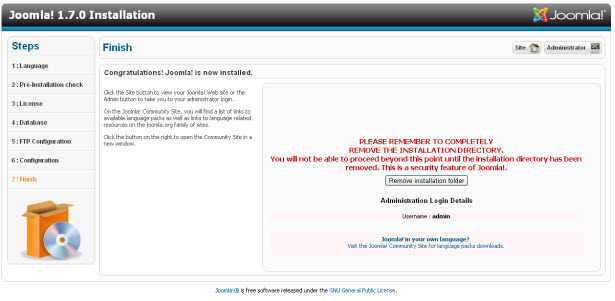
STEP 10 After clicking next you should reach the final page that tells you that you have successfully installed the package. There are two links on the top right hand corner that will take you to the front end and back end of your site but before you do that you need to remove or rename the instllation file in the Joomla directory. Navigate to the folder on your server and delete or rename.
(I usually delete ... but it's completely up to you)
J1.7 NOTE:
As I mentioned initially, the most notable difference (I've seen) between the J1.5 and J1.7 quickstart installation process is that - with J1.7 - when you reach Step 10, you can simply click a "remove installation folder" button rather than having to manually delete the folder from your server account. (Not a big ole' difference if you ask me - moreso one of convenience).
FINISH:
Once you have reached this step, you should successfully be able to navigate to the front end of your site and see the template set up exactly the same way as the demo site.You are now free to edit, change and add to the site to personalise it and start to market your Joomla web presence.
SUPPLEMENTAL VISUAL RESOURCE:
As I've always found (for myself) that seeing a process performed - visually - always helps me to better understand and learn to do it myself. Therefore the following is a video resource for just that purpose ... which I hope will assist you to see and better understand how the quickstart installation process works. (This is how I learned, incidentally)
NOTE:
While the video discusses uploading files to a localhost server, the principles/process remain the same for uploading to the public-html folder on your webhost server account.
So, for those of you who are new to Joomla and/or are not yet fully comfortable with creating various site elements from scratch – and if you really like some (or all) of the showcased elements within the JoomlArt Template/Theme demos - we encourage you to utilize the Quickstart installation process (including installing the sample data) and see if it helps to make your own learning and customizing your new website a little easier.
As always … BEST OF LUCK with your website development journey.