JA Masshead module
JA Masshead module is used to display the masshead title like the JoomlArt masshead. With this module, the Masshead can be configured to be in any pages with different titles, descriptions as well as background images.
Each masthead includes 3 elements:
- Masthead title
- Masthead description
- Masthead background image
Module Back-end setting
Module position: masthead
Module Suffix: NOT USED
Here is the format to add content for masthead:
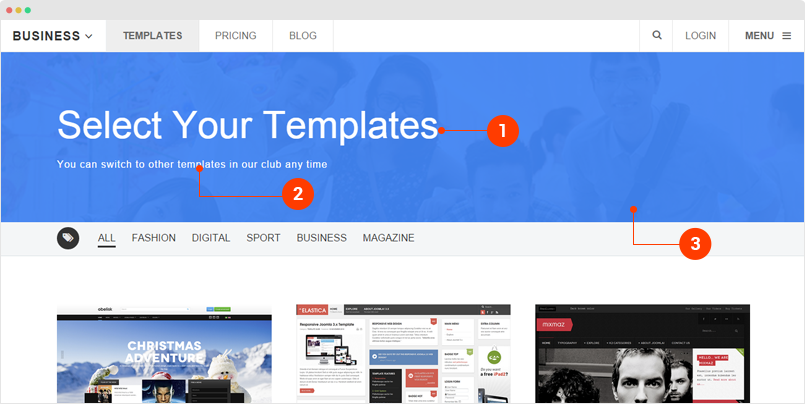
[Masshead Itemid="470,517" background="images/joomlart/masthead/blog.jpg" title="Select Your Templates" ]You can switch to other templates in our club any time[/Masshead]
The ItemID is the Menu Item ID, you can add multiple IDs, separate them with comma.
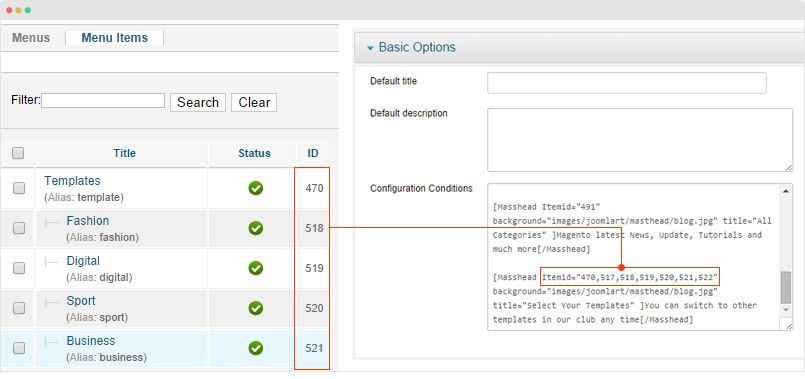
You can add multiple mastheads, each masthead is in a line.
[Masshead Itemid="490,502,503,504,528,529,530" background="images/joomlart/masthead/blog.jpg" title="Blog" ]Magento latest News, Update, Tutorials and much more[/Masshead]

[Masshead Itemid="492" background="images/joomlart/masthead/blog.jpg" title="Category Blog" ]Magento latest News, Update, Tutorials and much more[/Masshead]
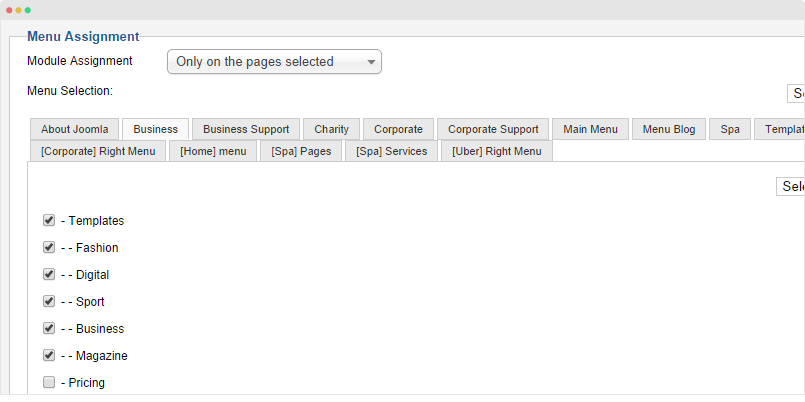
Next, assign the module to the pages you want.
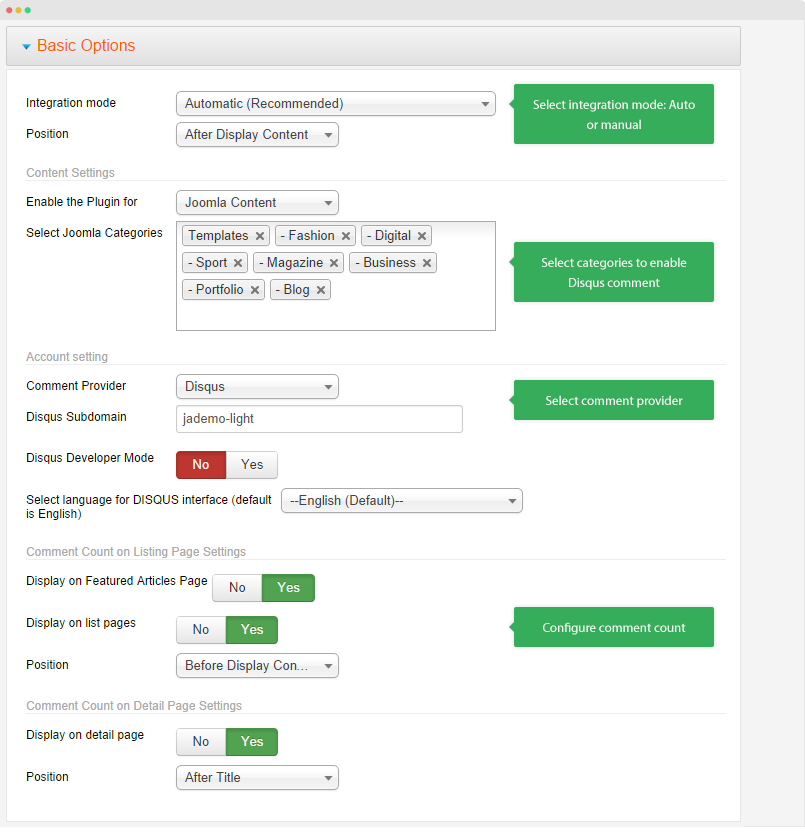
JA Disqus Debate plugin
JA Disqus Debate Echo plugin allows you to integrate Disqus or IntenseDebate commenting systems into your Joomla site.
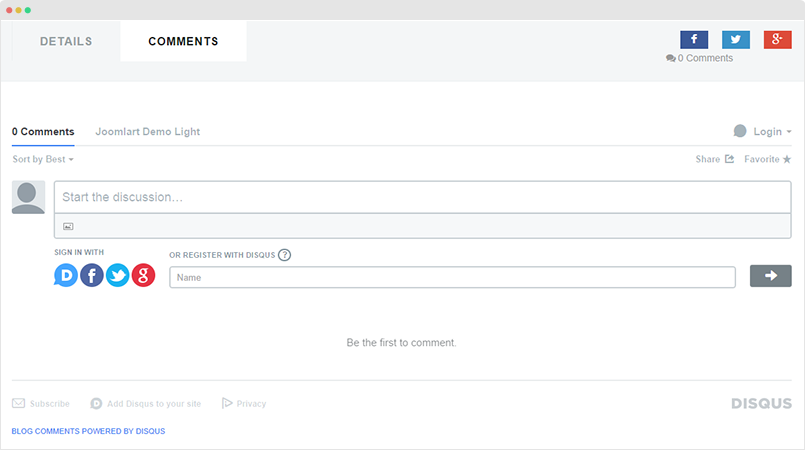
Plugin configuration
To enable this plugin, please go to "Extensions → Plugin Manager" find JA Disqus plugin, open its configuration panel then configure. The following screen-shot provide you the configuration of the plugin in Uber demo site.
JA Bookmark plugin
JA Bookmark Plugin helps your visitors to promote your site and allows visitors to bookmark your pages easily with many popular services.
Plugin configuration
1. Enable the plugin
Go to "Extensions → Plugin Manager", find JA Bookmark plugin, open its configuration panel, enable the plugin
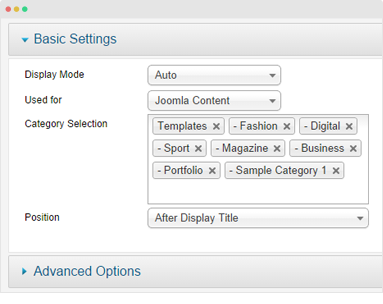
2. Basic Setting
The panel includes the following settings:
- Select Display Mode: auto or manual
- Used for: enable the plugin for Joomla content or K2 content
- Category Selection: select categories that the plugin is enabled in
- Position: select position to display the bookmark buttons
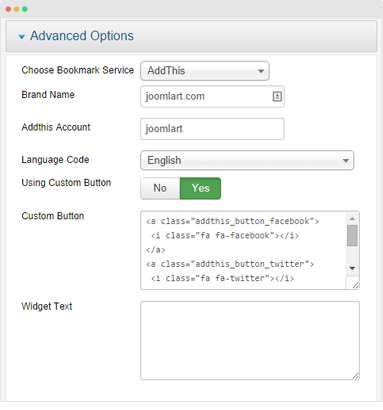
3. Advanced Setting
The Advanced setting is to configure Bookmark service (AddThis or AddToThis), your AddThis account, language, custom button and widget text.
Custom button code:
<a class="addthis_button_facebook">

 <i class="fa fa-facebook"></i>

</a>

<a class="addthis_button_twitter">

 <i class="fa fa-twitter"></i>

</a>

<a class="addthis_button_google">

 <i class="fa fa-google-plus"></i>

</a>
JA Google Map plugin
JA Bookmark Plugin helps your visitors to promote your site and allows visitors to bookmark your pages easily with many popular services.
Plugin configuration
Go to "Extensions → Plugin Manager", find JA Map plugin, open its configuration panel.
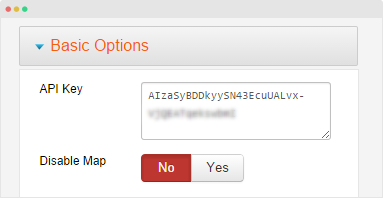
Step 1 - Basic setting
Add Google API key: in the basic setting panel, add your Google Map API key. If you do not have Google Map API, sign up for free at: https://developers.google.com/maps/.
If you enable option "Disable Map", all embed Google map in your site will be removed with their embed Google map code
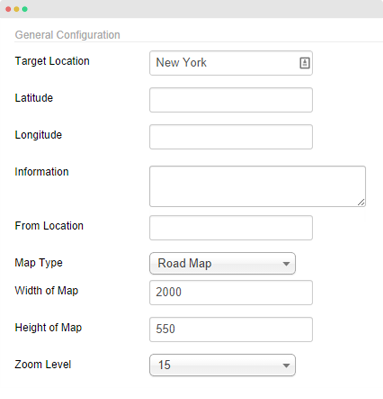
Step 2 - General Configuration
The panel is to configure your default location of your map, map type, map size but all the settings can be overridden with embed code adding to your content.
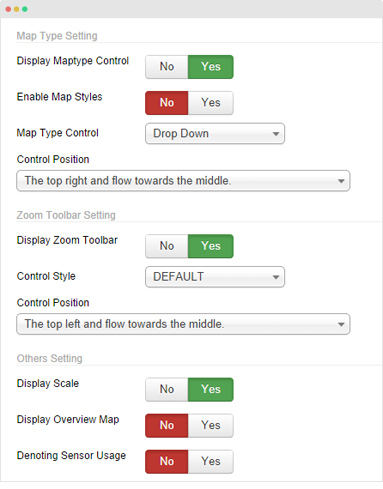
Step 3 - Map Type setting
You can enable, disable the Maptype control, Map styles, Map type and the position of Control button.
Step 4 - Zoom Toolbar Setting
The panel includes setting for Zoom Toolbar, Control type and position of the Control button.
Step 5 - Other Setting
Enable, disable Map display Scale, map overview and the sensor usage.
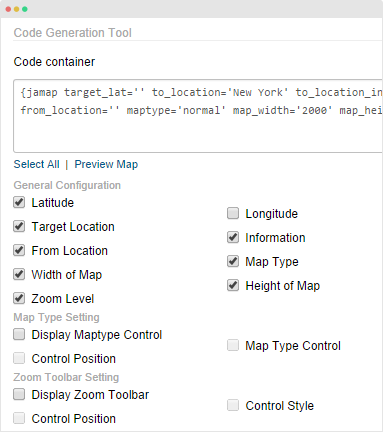
Step 6 - Code Generation Tool
Select the attribute that can be included in the map then the Generation tool will help you create the embed code to add to your content.
Here is a sample of embed code generated by the tool
{jamap target_lat='' to_location='New York' to_location_info='' from_location='' maptype='normal' map_width='2000' map_height='550' zoom='15' }
Embed Google Map in your content
You can add the code generated to articles, modules you want to embed Google map for. In Uber template, we used it in JA ACM module: Tabs, Contact content types.
JA ACM module
This is the core of Uber template so we put it in an independent page to give you detail instruction of how to build content blocks with the module. Please check out JA ACM module detail documentation →
Joomla Default Extensions
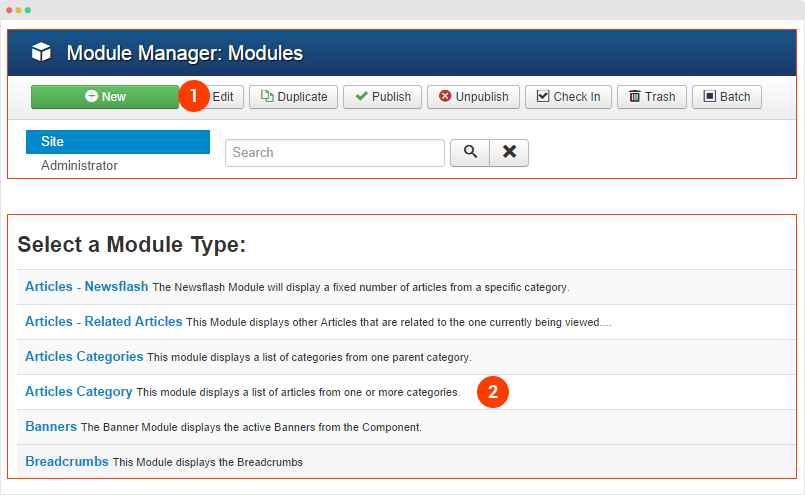
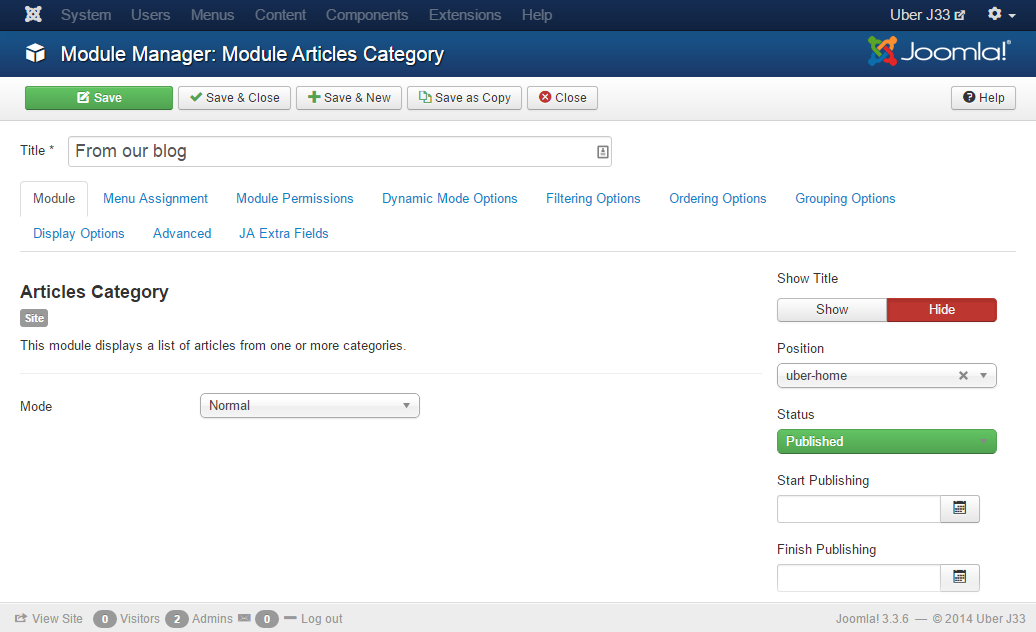
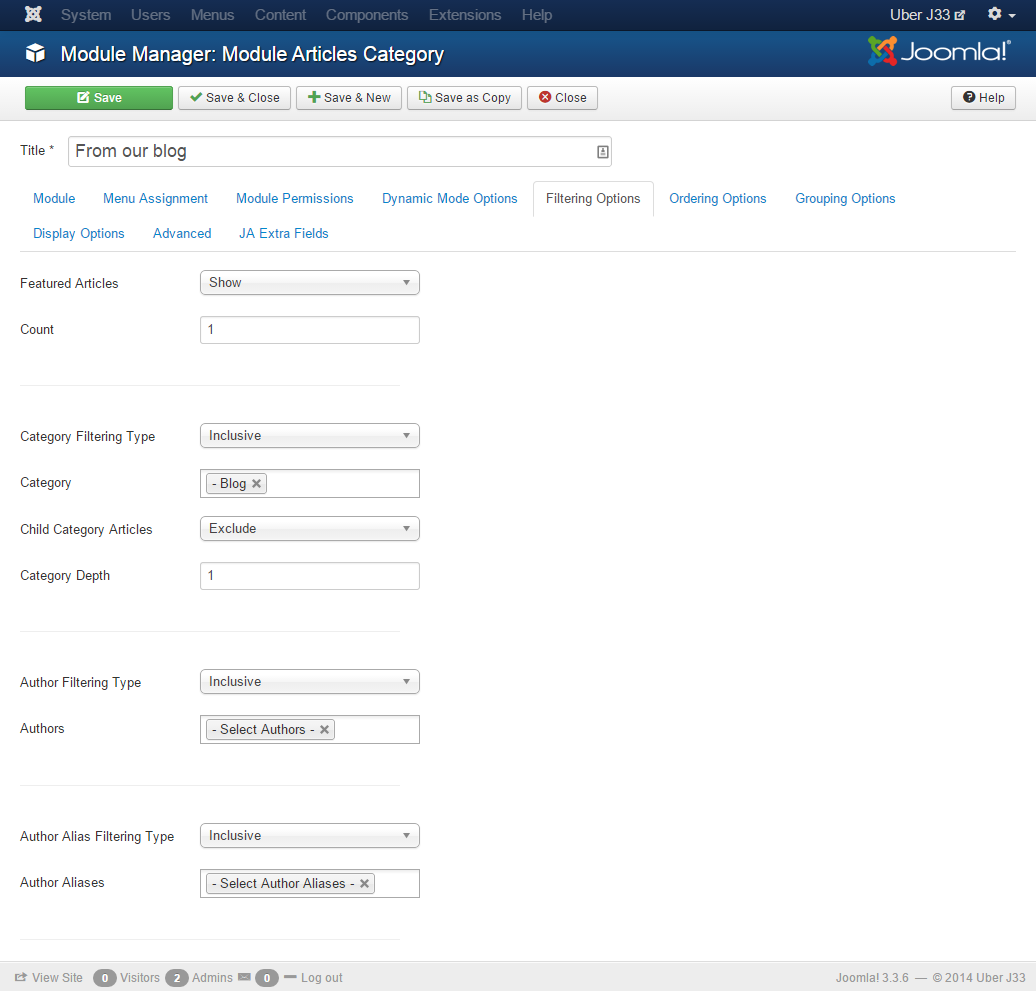
Articles Category Module
Go to Extensions → Module Manager then hit the "New" button, select Articles Category menu type.
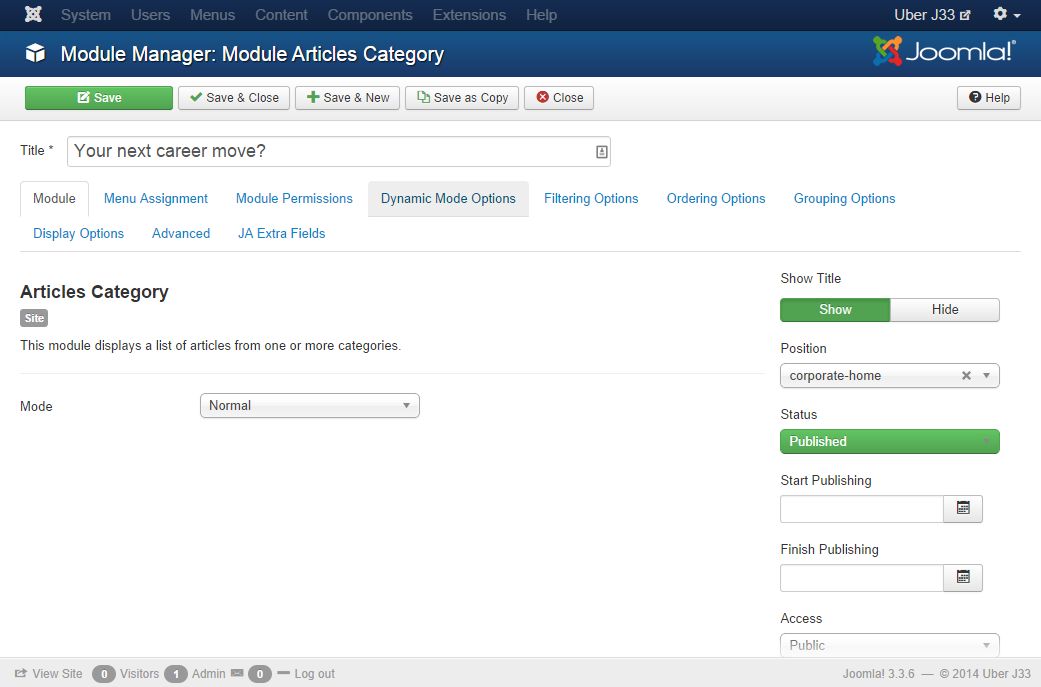
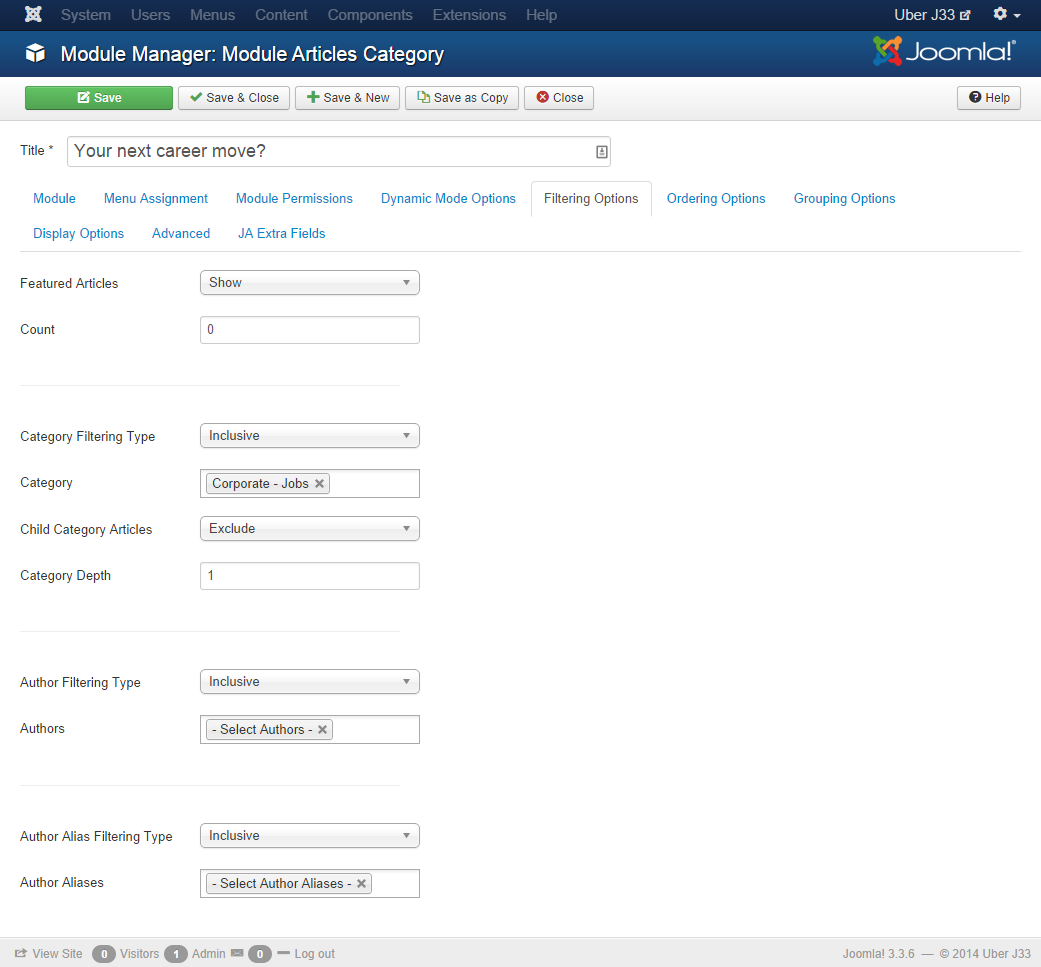
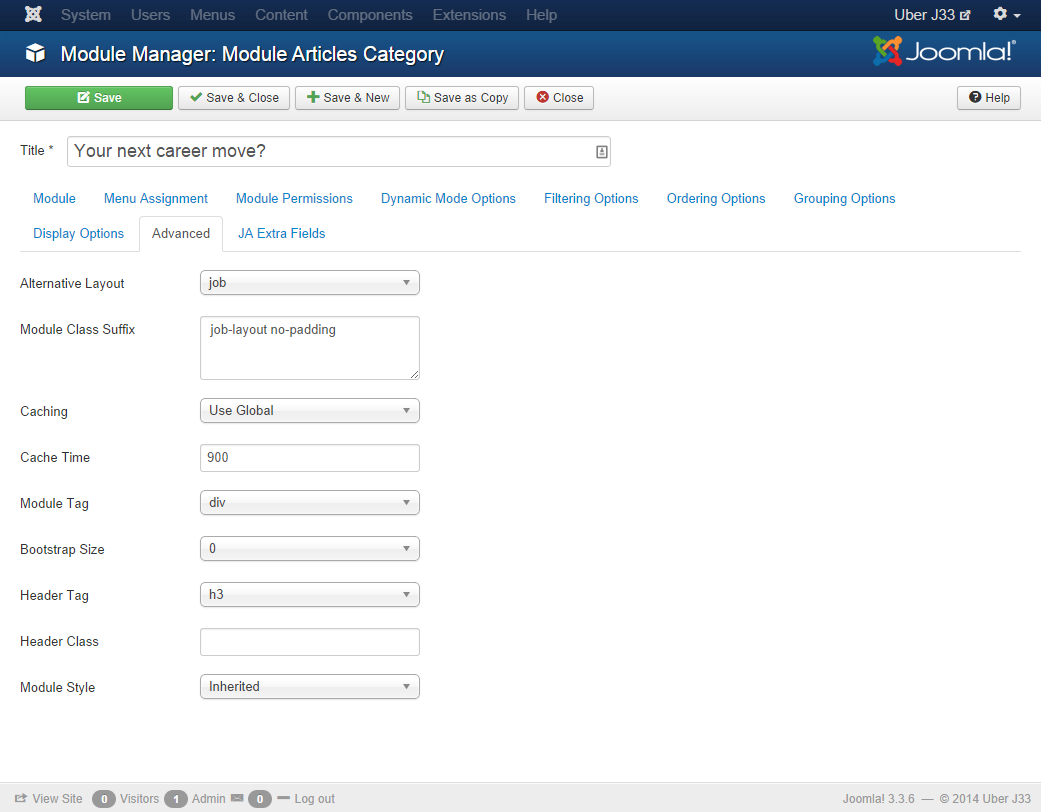
1. Your next career move?
Module position: home-corporate
Module Suffix: job-layout no-padding
Alternative layout:  job
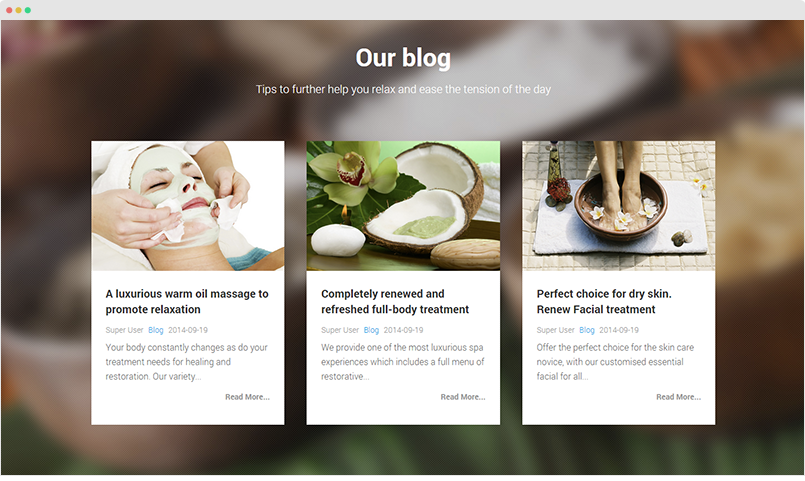
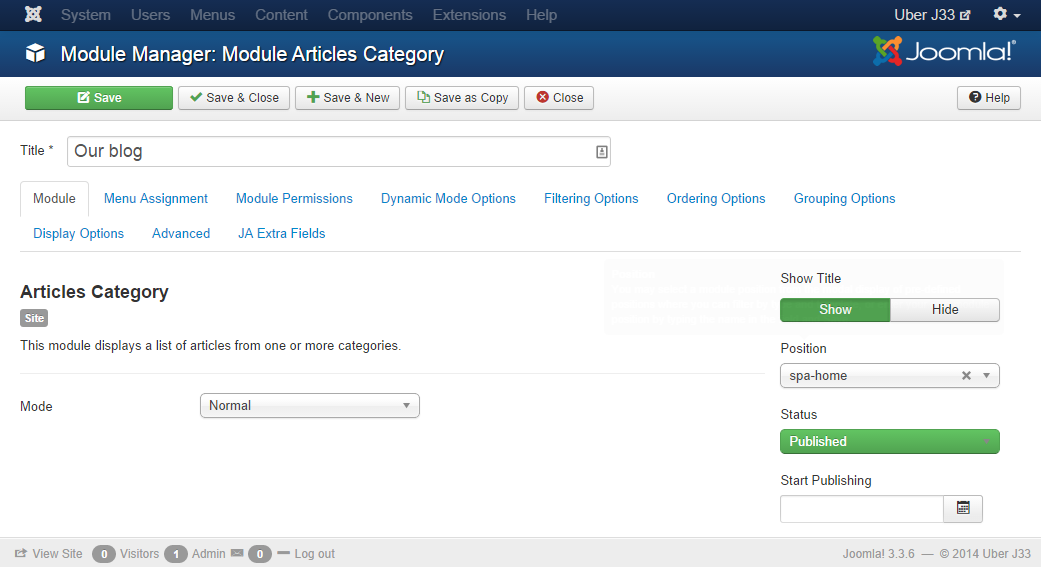
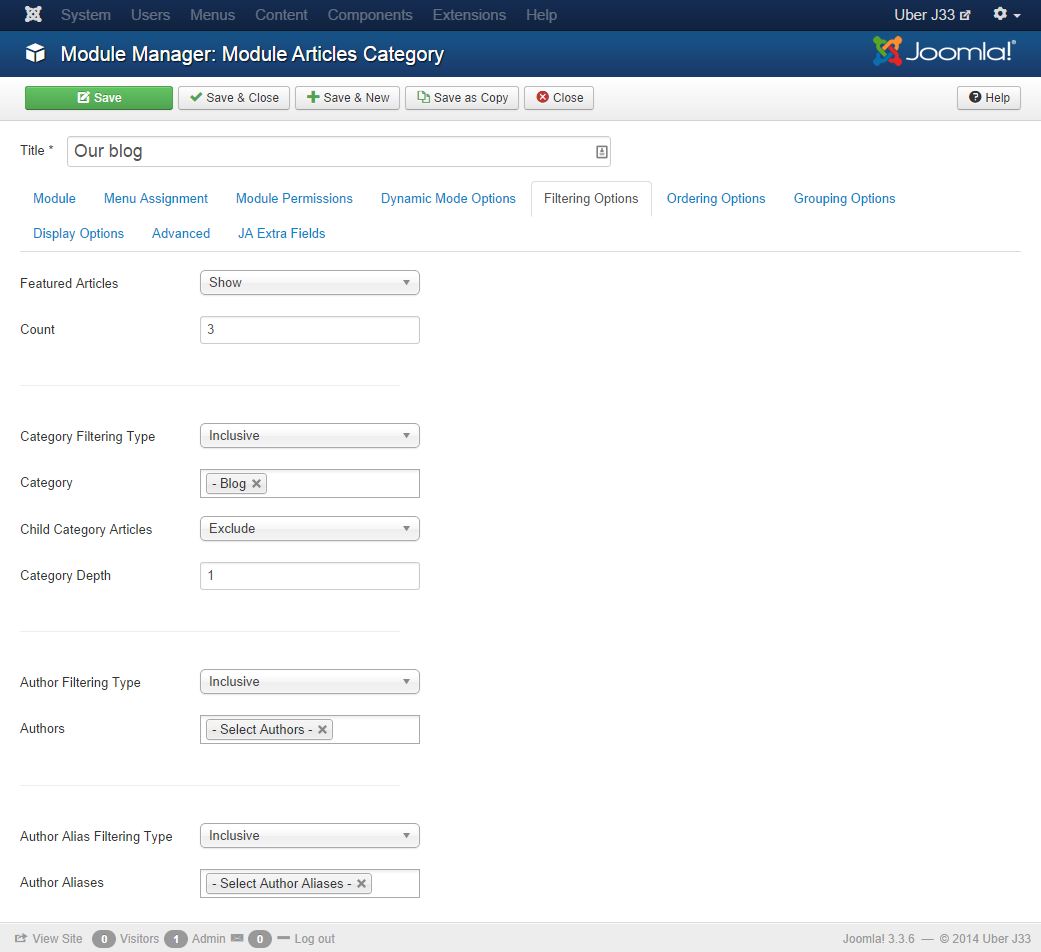
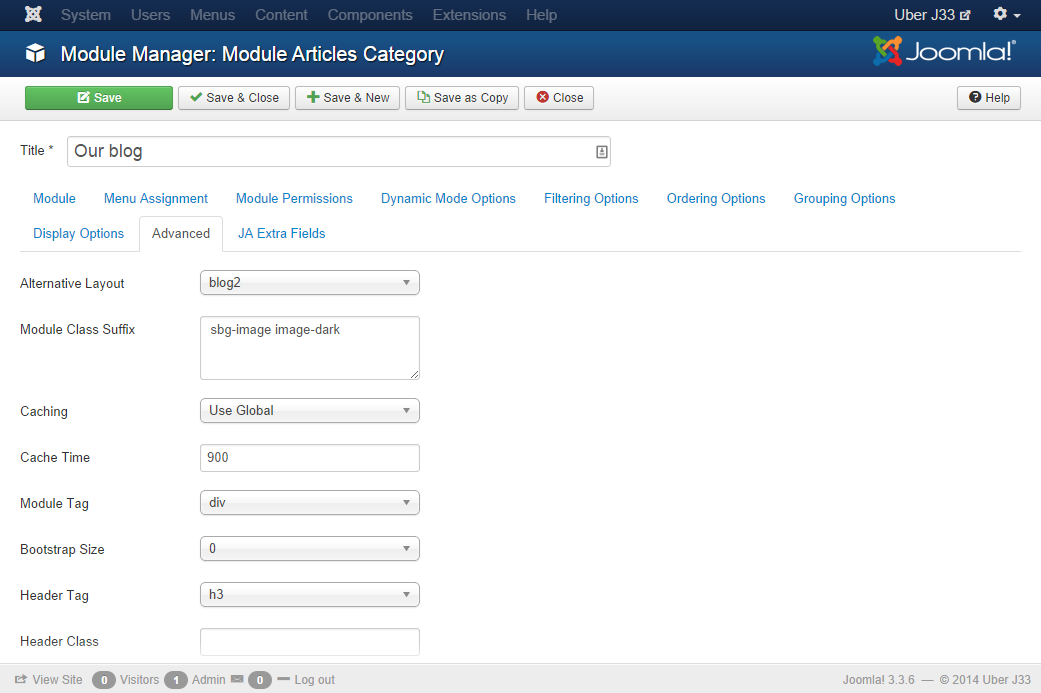
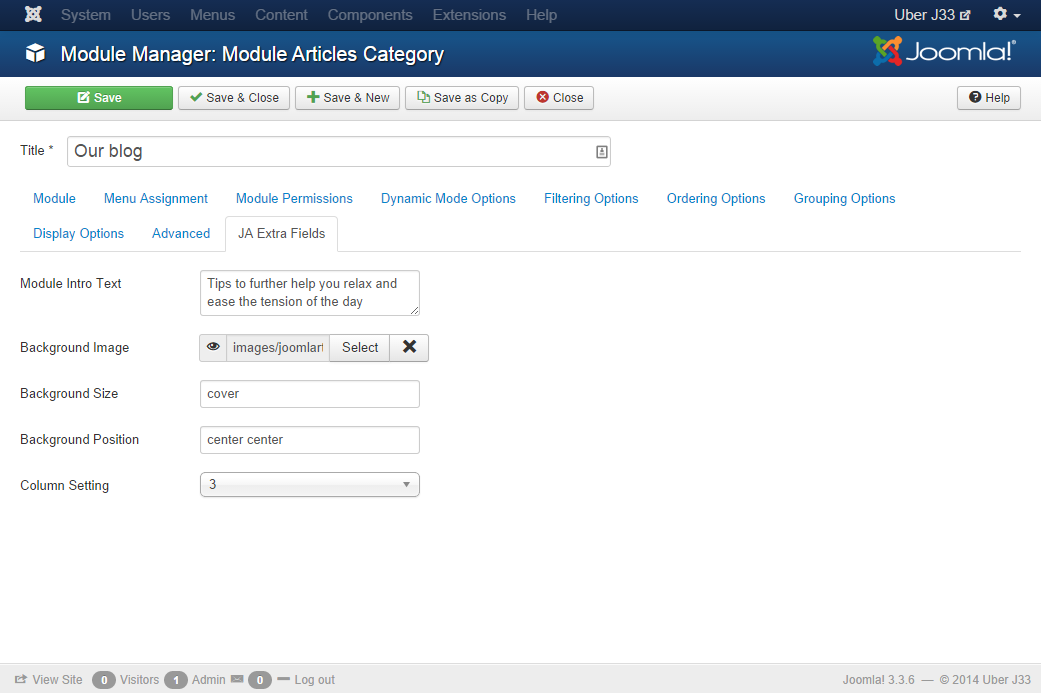
2. Our Blog
Module configuration
Module position: home-corporate
Module Suffix:  job-layout
Alternative layout:  job
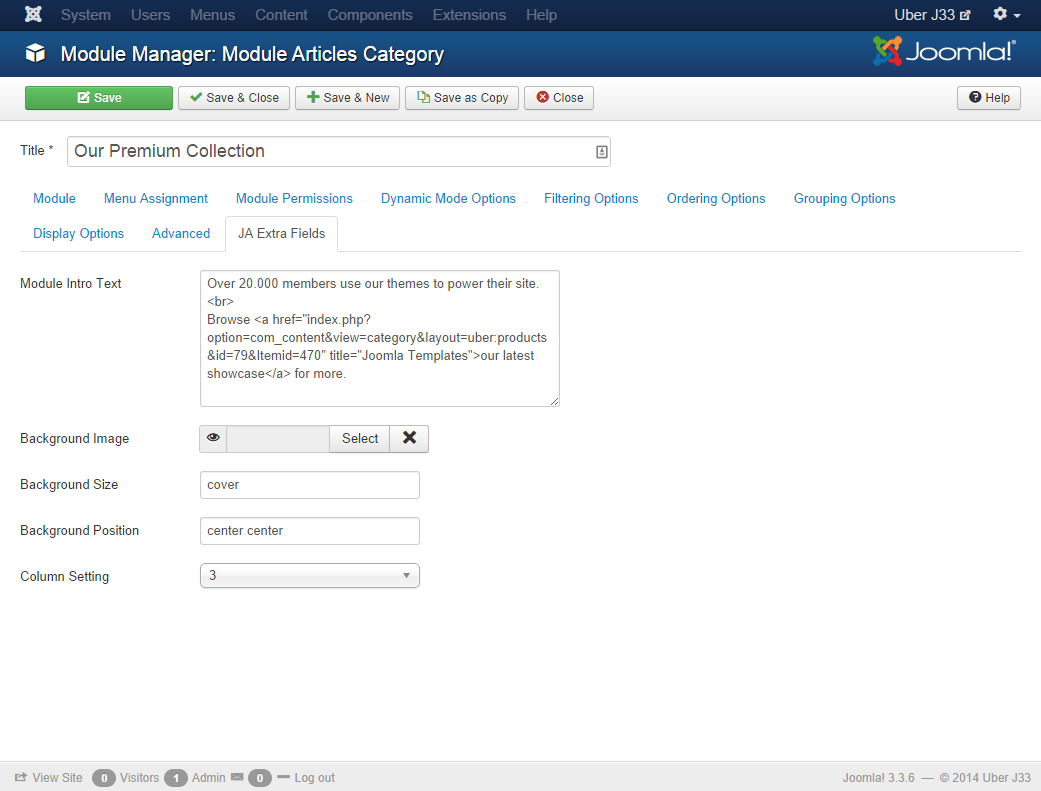
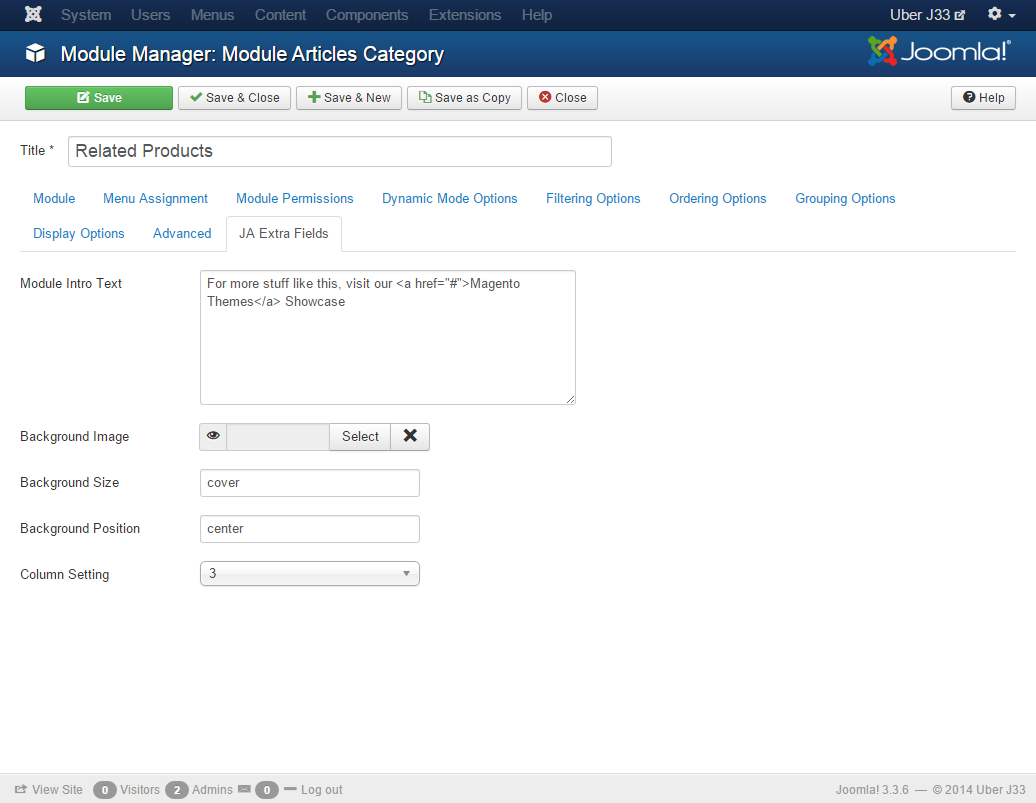
The module description, background image and number of columns are configured in the JA Extra Fields settings panel.
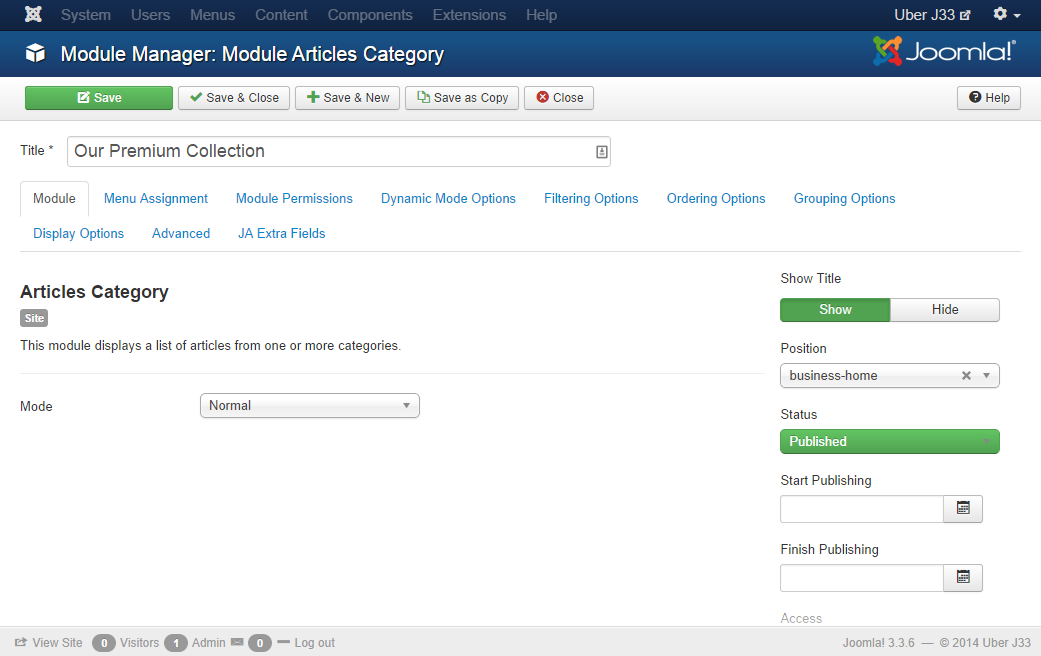
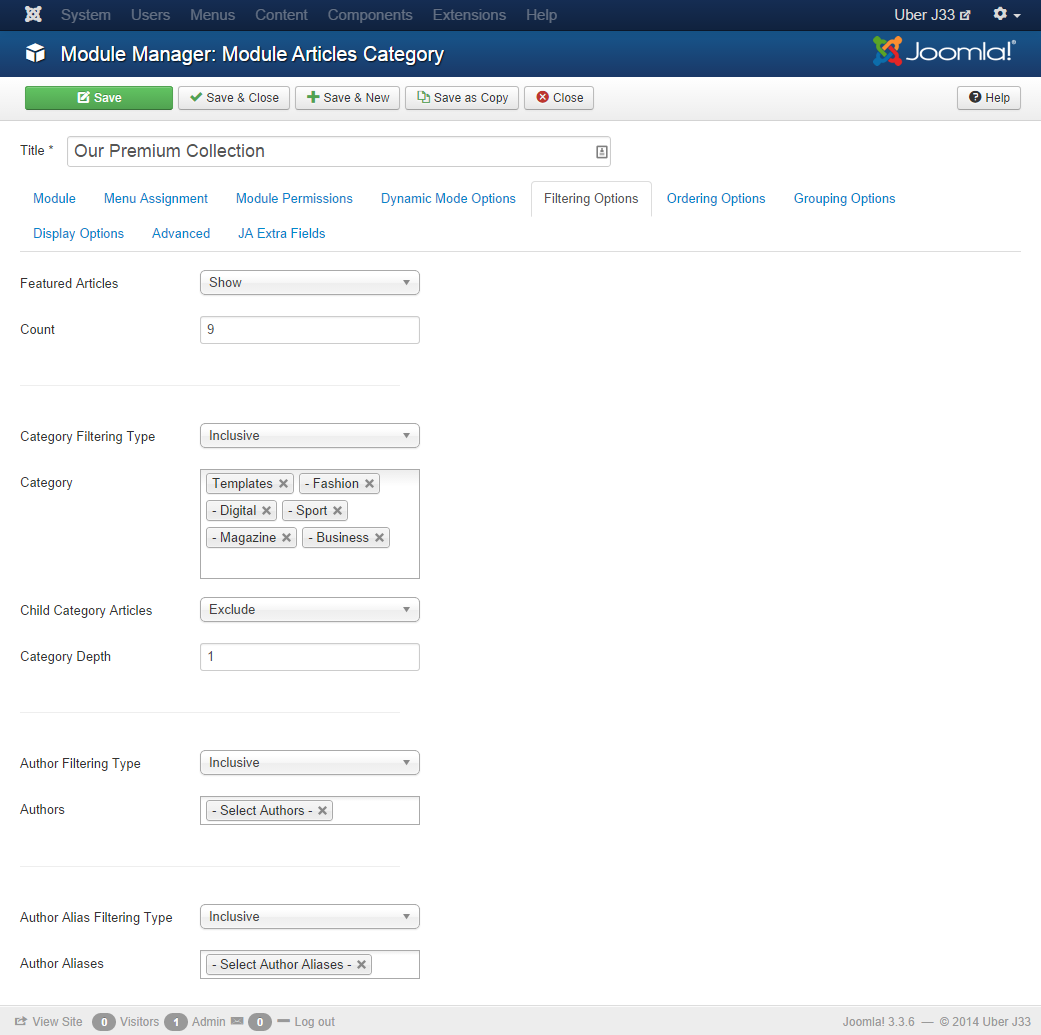
3. Our Premium Collection
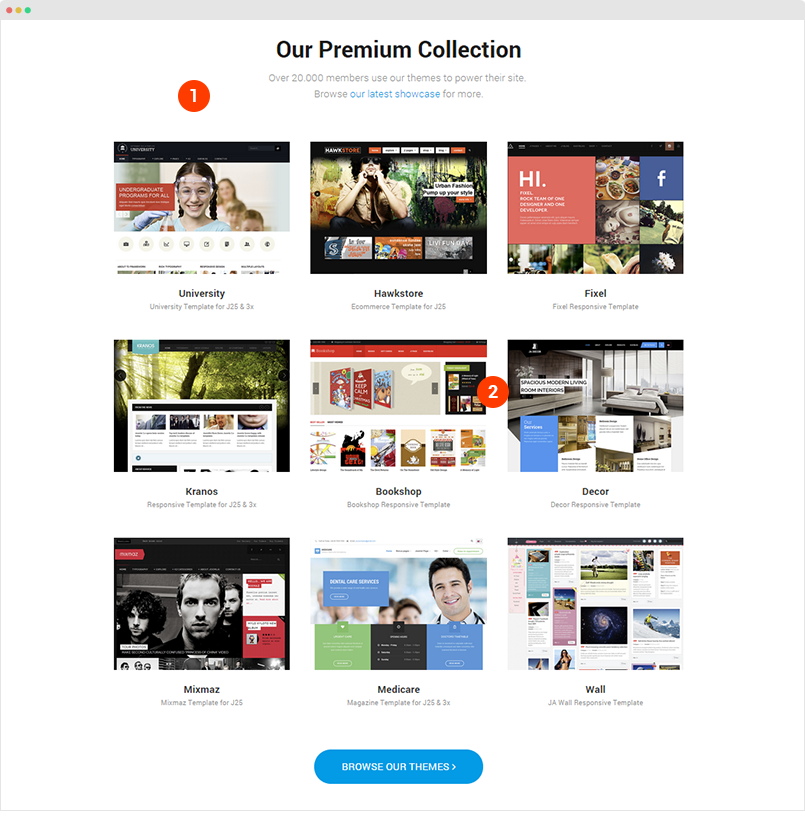
Module configuration
Module position: business-home
Module Suffix:  text-center
Alternative layout: swiper
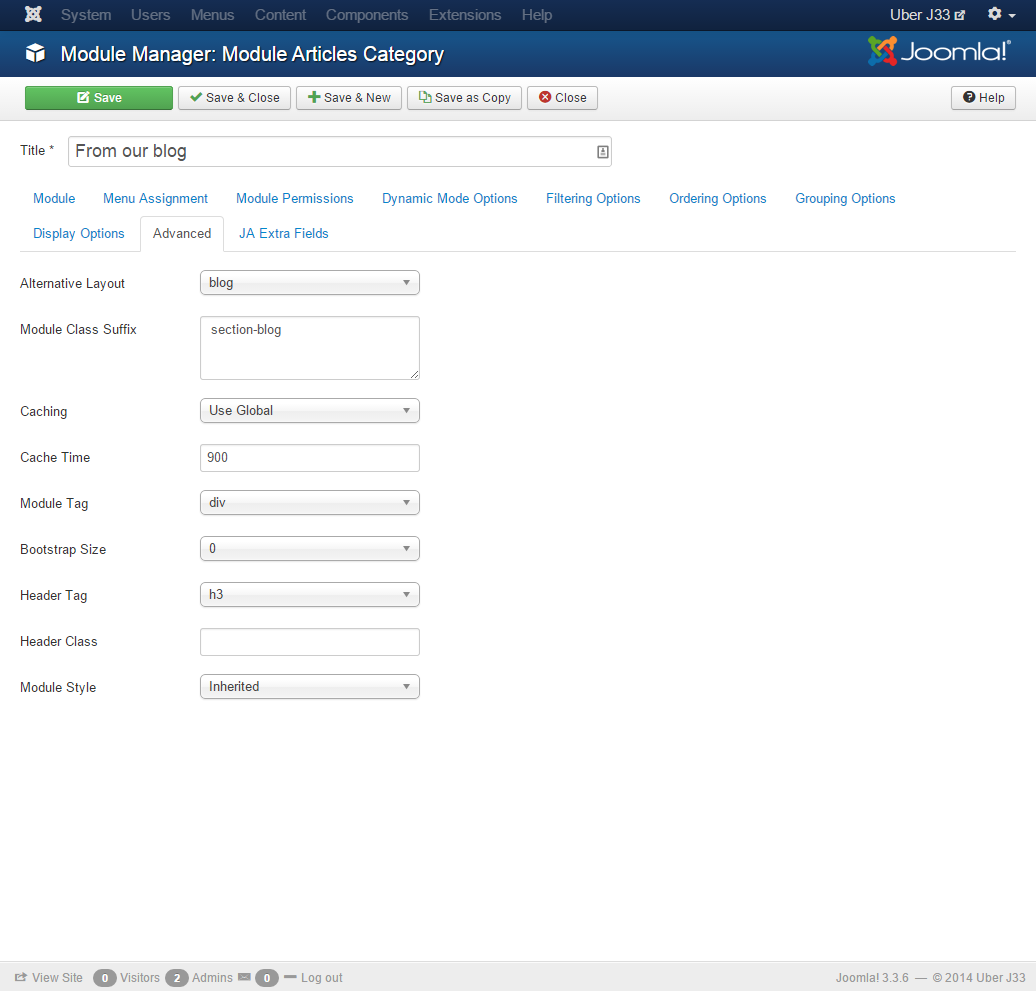
4. From Our Blog
Module configuration
Module position: business-home
Module Suffix:  section-blog
Alternative layout: blog
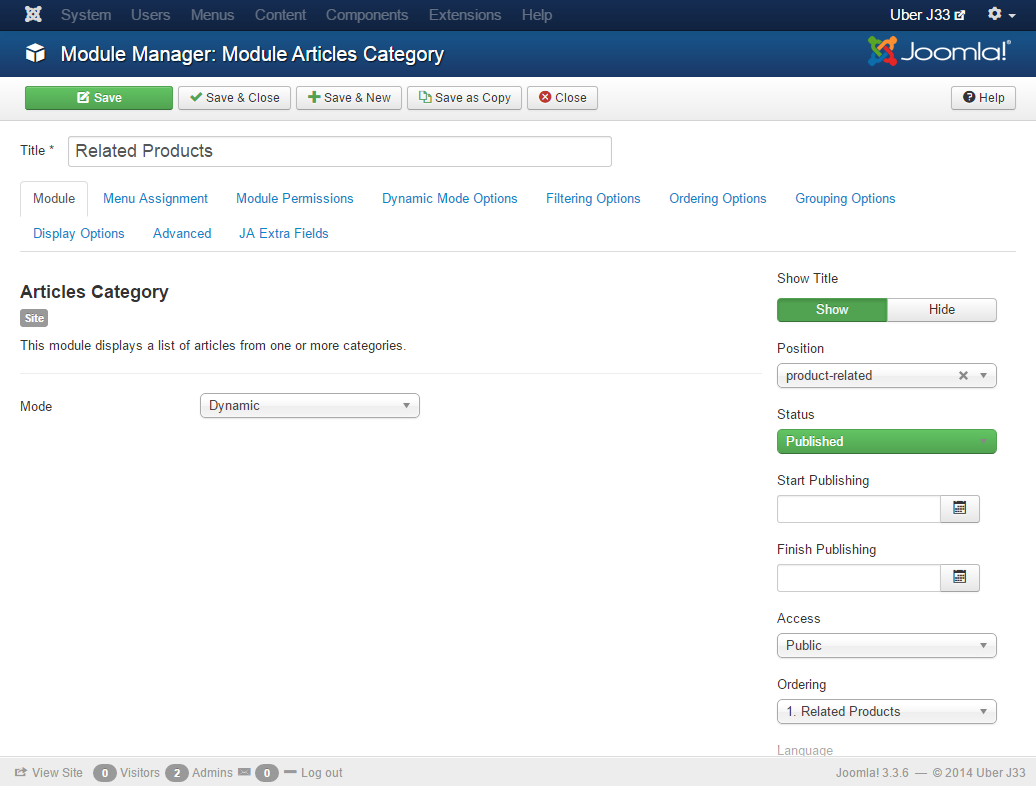
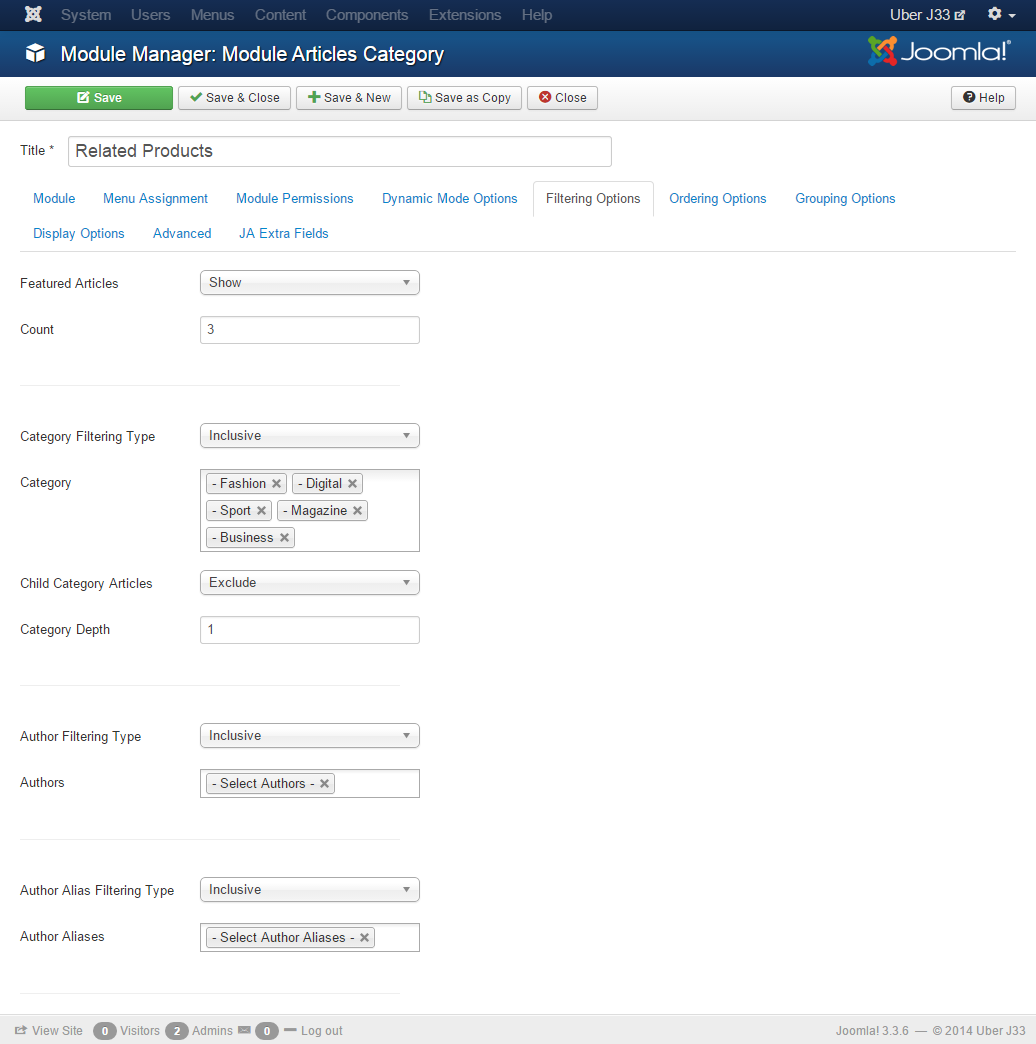
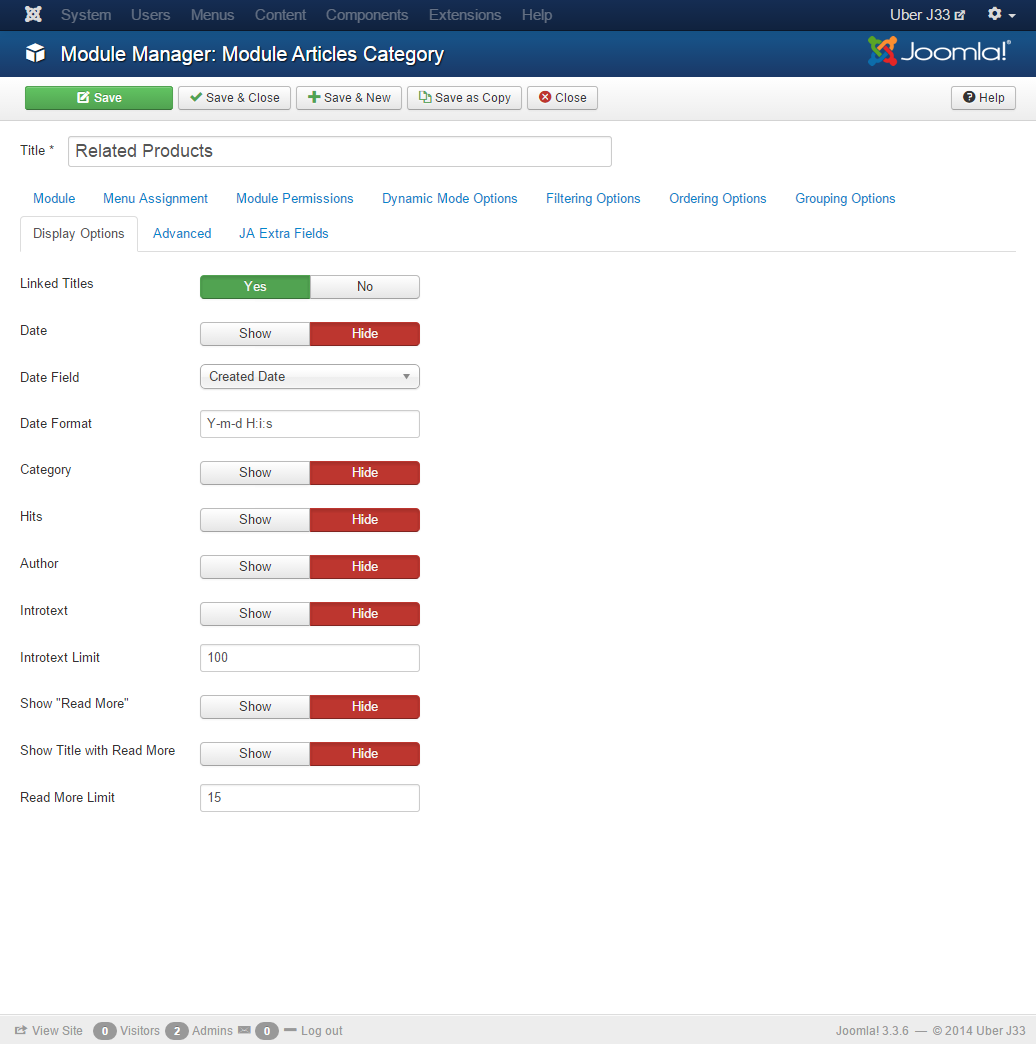
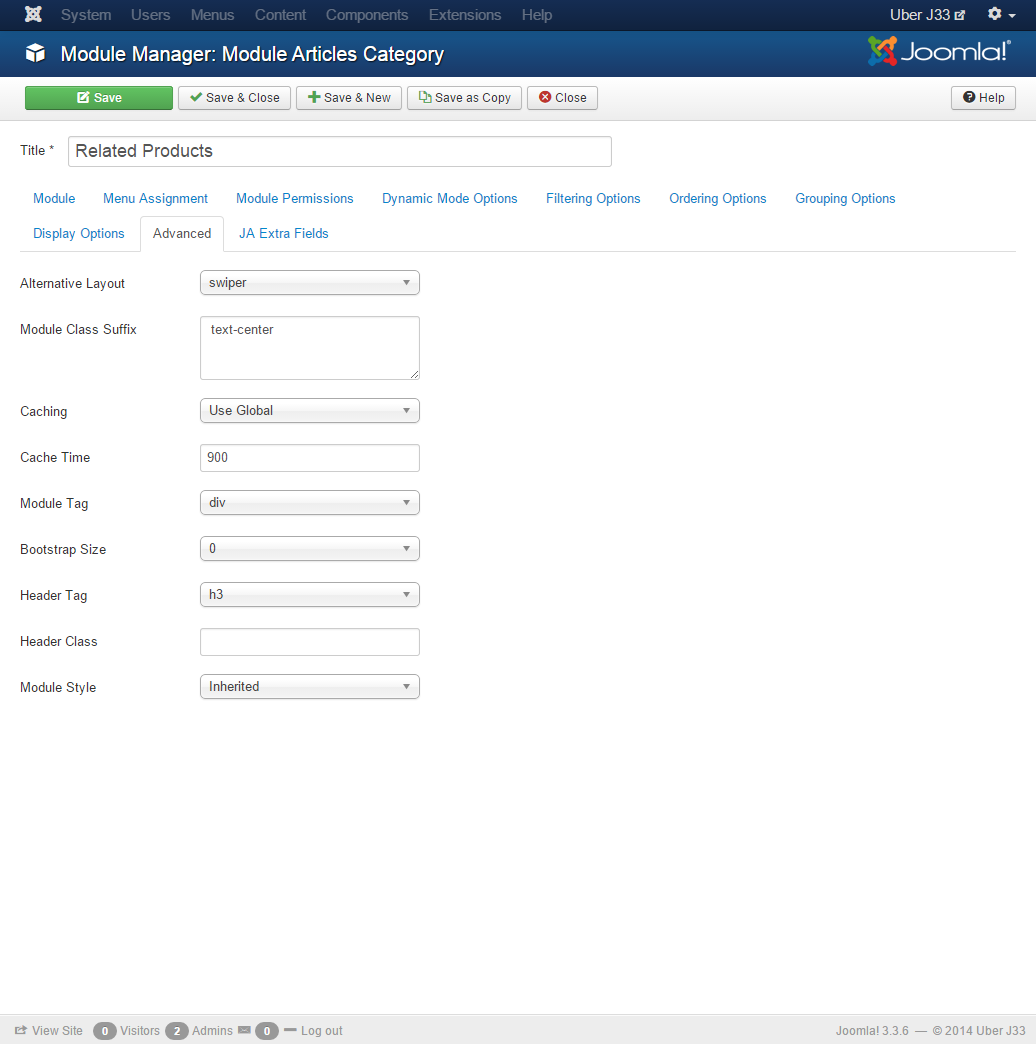
5. Related Articles
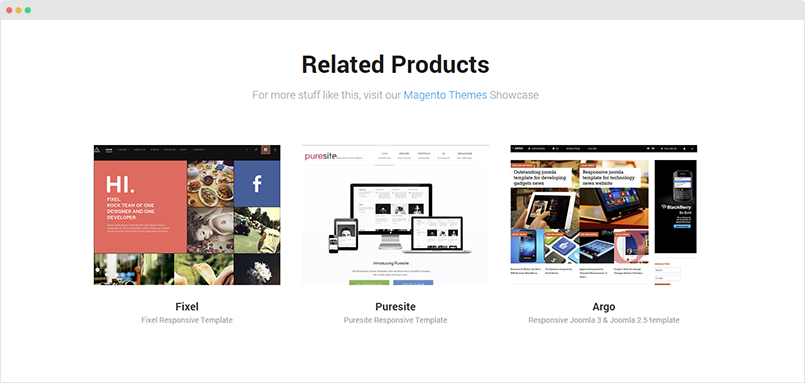
Module configuration
Module position: product-related
Module Suffix:  text-center
Alternative layout: swiper
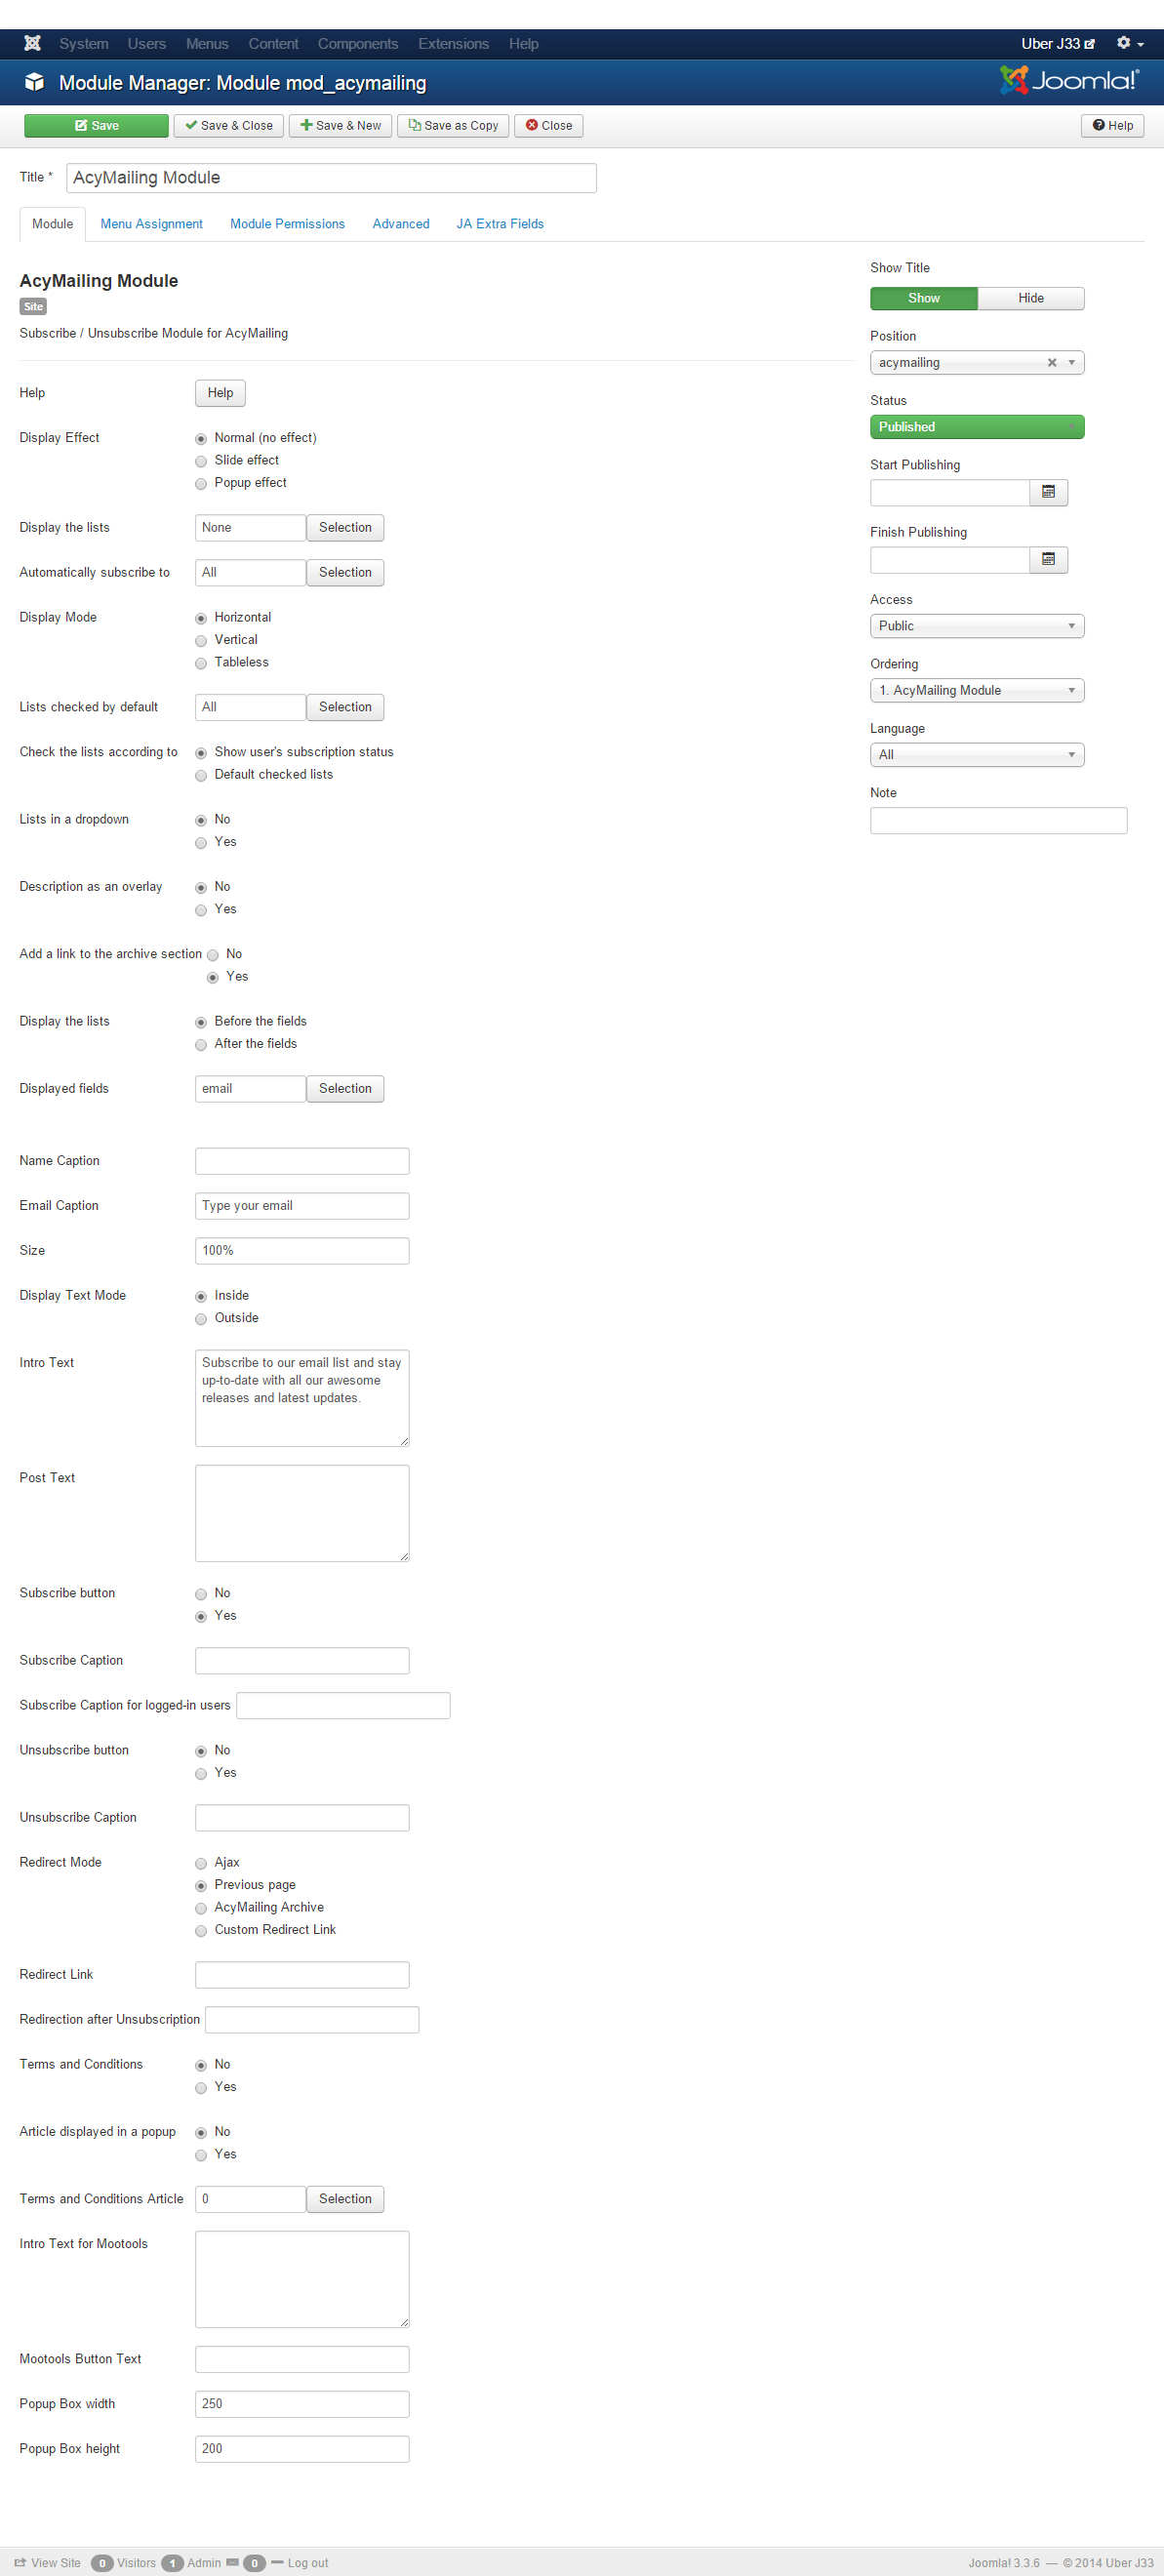
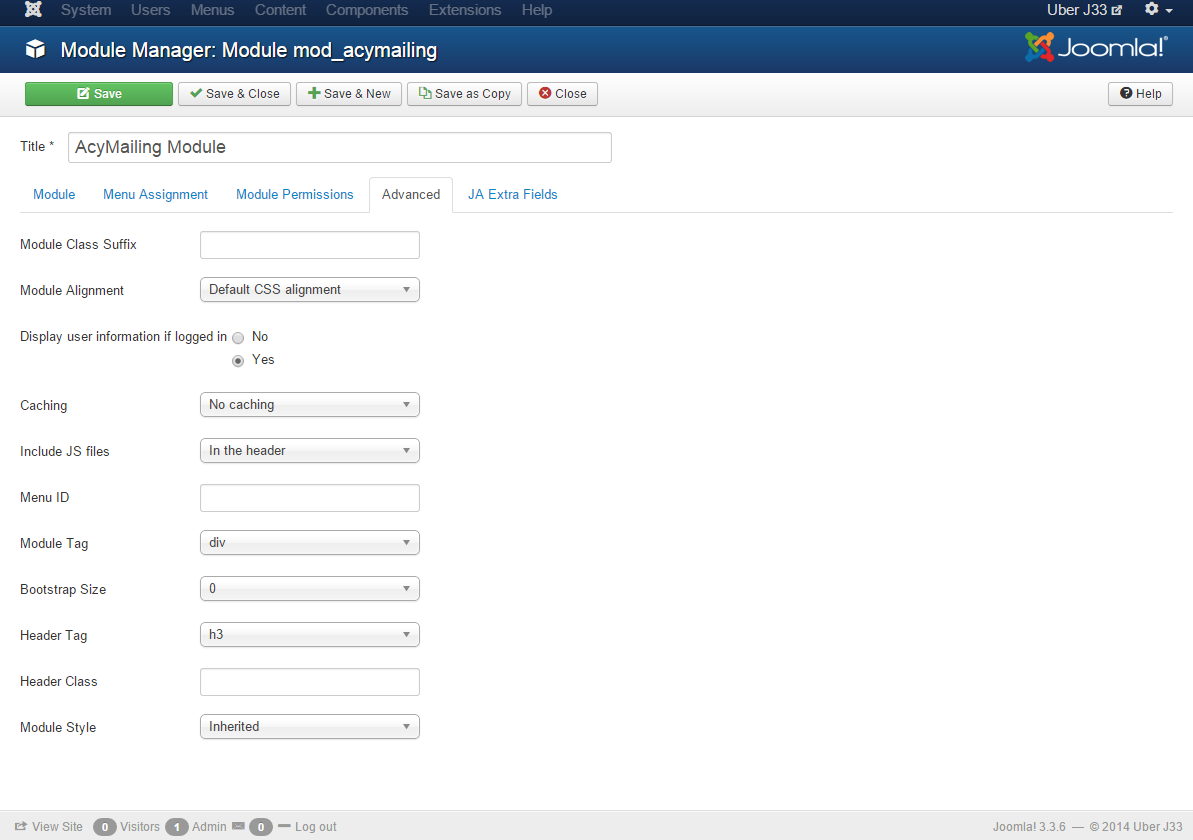
Acymail Module
Module configuration
Module position: acymailing
Module Suffix: NOT USED
Custom HTML module
1. Social
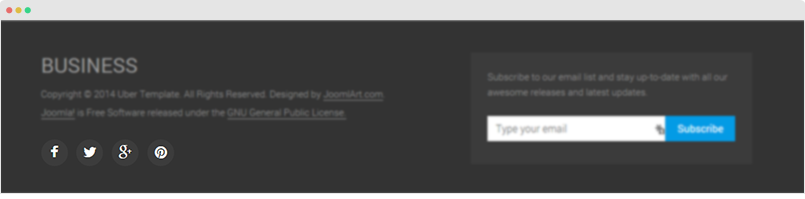
Module configuration
Module position: ja-social
Module Suffix: NOT USED
Custom HTML
The module embed AddThis service, replace userid with your AddThis userid. If you haven't got account, sign up for free at: http://www.addthis.com/
<div class="addthis_toolbox">

	<a class="addthis_button_facebook_follow" addthis:userid="joomlart"><i class="fa fa-facebook"></i></a>

	<a class="addthis_button_twitter_follow" addthis:userid="joomlart"><i class="fa fa-twitter"></i></a>

	<a class="addthis_button_google_follow" addthis:userid="+joomlart"><i class="fa fa-google-plus"></i></a>

	<a class="addthis_button_pinterest_follow" addthis:userid="+joomlart"><i class="fa fa-pinterest"></i></a>

</div>

<script type="text/javascript" src="//s7.addthis.com/js/300/addthis_widget.js#pubid=ra-52c4eb2a034cad83"></script>

<!-- AddThis Follow END -->
2. Our clients

Module configuration
Module position: spa-home
Module Suffix: NOT USED
Custom HTML
<div class="container">

<h2 class="section-title text-center">

<span>We partner with the best</span>

<p class="section-intro hidden-xs">To deliver to you a diverse range of the best services</p>

</h2>


<div class="row">


<div class="col-sm-2">

<img src="/images/joomlart/spa/home/partner-1.png" alt="Sample partners" class="img-responsive" />

</div>


<div class="col-sm-2">

<img src="/images/joomlart/spa/home/partner-2.png" alt="Sample partners" class="img-responsive" />

</div>


<div class="col-sm-2">

<img src="/images/joomlart/spa/home/partner-3.png" alt="Sample partners" class="img-responsive" />

</div>


<div class="col-sm-2">

<img src="/images/joomlart/spa/home/partner-4.png" alt="Sample partners" class="img-responsive" />

</div>


<div class="col-sm-2">

<img src="/images/joomlart/spa/home/partner-5.png" alt="Sample partners" class="img-responsive" />

</div>


<div class="col-sm-2">

<img src="/images/joomlart/spa/home/partner-6.png" alt="Sample partners" class="img-responsive" />

</div>


</div>


</div>
3. Support
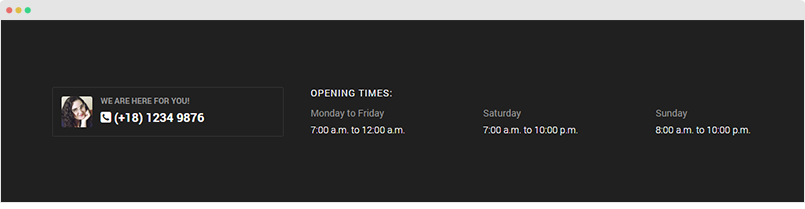
Module configuration
Module position: spa-home
Module Suffix: no-padding bg-dark
Custom HTML
<div class="container open-time">
<div class="row">
<div class="col-md-4">
<div class="bubble">
<img src="/images/joomlart/spa/avt.jpg" alt="Avatar" />
<h4>We are here for you!</h4>
<span class="phone"><i class="fa fa-phone-square"></i> (+18) 1234 9876</span>
</div>
</div>
<div class="col-md-8"><div class="row">
<div class="col-sm-12"><h2>Opening Times:</h2></div>
<div class="col-sm-4">
<h3>Monday to Friday</h3>
<time>7:00 a.m. to 12:00 a.m.</time>
</div>
<div class="col-sm-4">
<h3>Saturday</h3>
<time>7:00 a.m. to 10:00 p.m.</time>
</div>
<div class="col-sm-4">
<h3>Sunday</h3>
<time>8:00 a.m. to 10:00 p.m.</time>
</div>
</div></div>
</div>
</div>