Install Hikashop component
JA Jason template supports Hikashop by default with customized style. Here is the steps to install Hikashop component into your Joomla system.
Step 1: download Hikashop component
Hikashop has 3 versions: Starter - Free version and Essential and Business - Paid version. In JA Jason template, we support free version - Starter so that everyone can use the component. The Quickstart package include Hikashop starter version with sample data that help you build a site exactly the same with our demo site.
Download Hikashop Starter version →
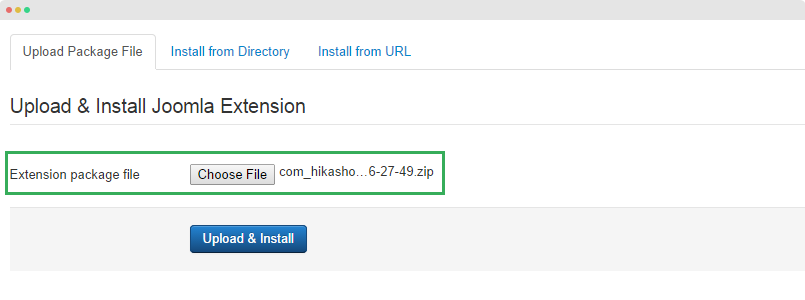
Step 2: install Hikashop in your Joomla system
From back-end of your site, go to: "Extensions → Extension Manager", browse the Hikashop installation package then install.
Global configuration
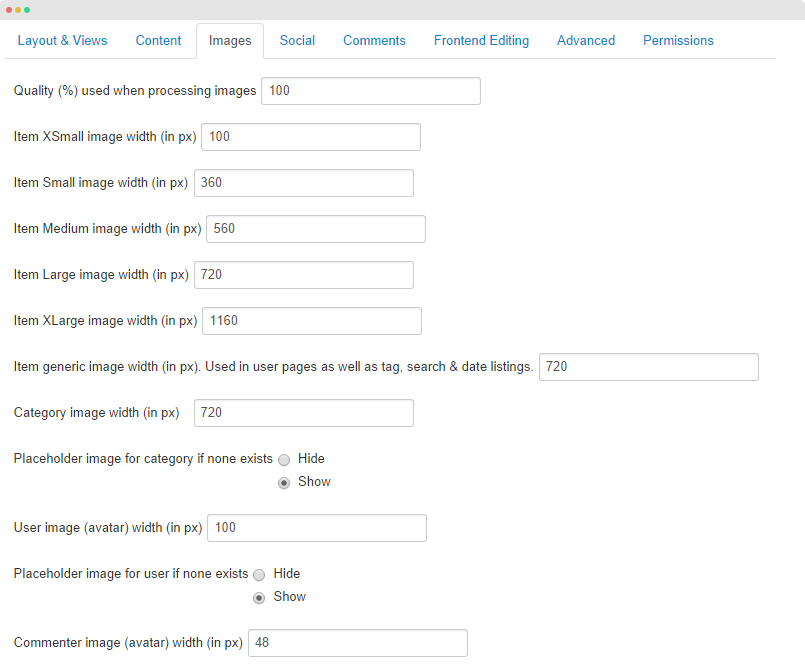
Hikashop has ton of settings so it's hard to cover all the setting, we will provide the settings that we have changed in JA Jason demo site.
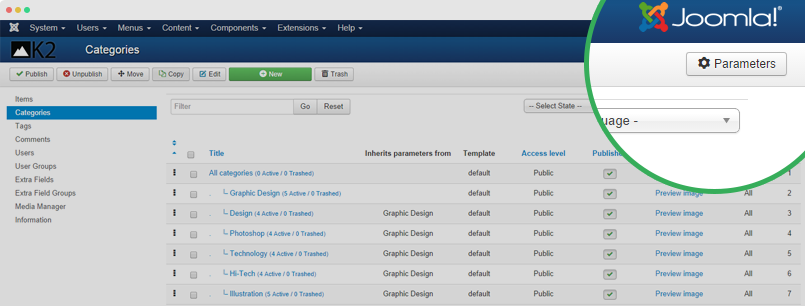
In JA Jason demo, we just change settings of images, other settings are default so we don't provide screen shots for those settings.
Hikashop pages configuration
In JA Jason, we support multiple Hikashop pages. You can build the pages as our demo site by following the detail instruction below:
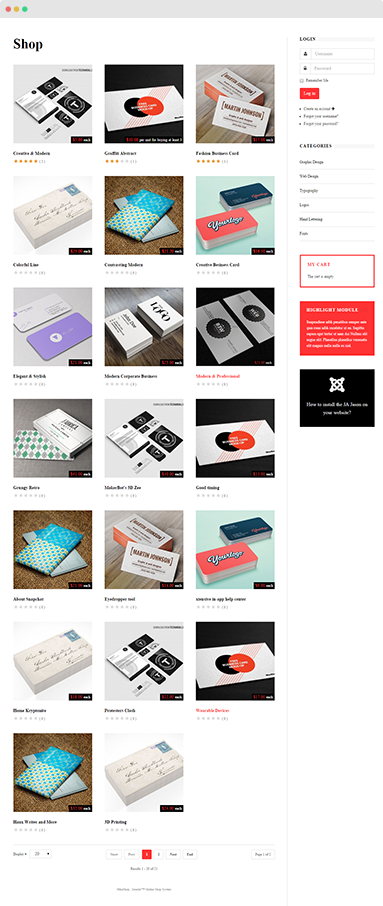
Shop page | Live demo →
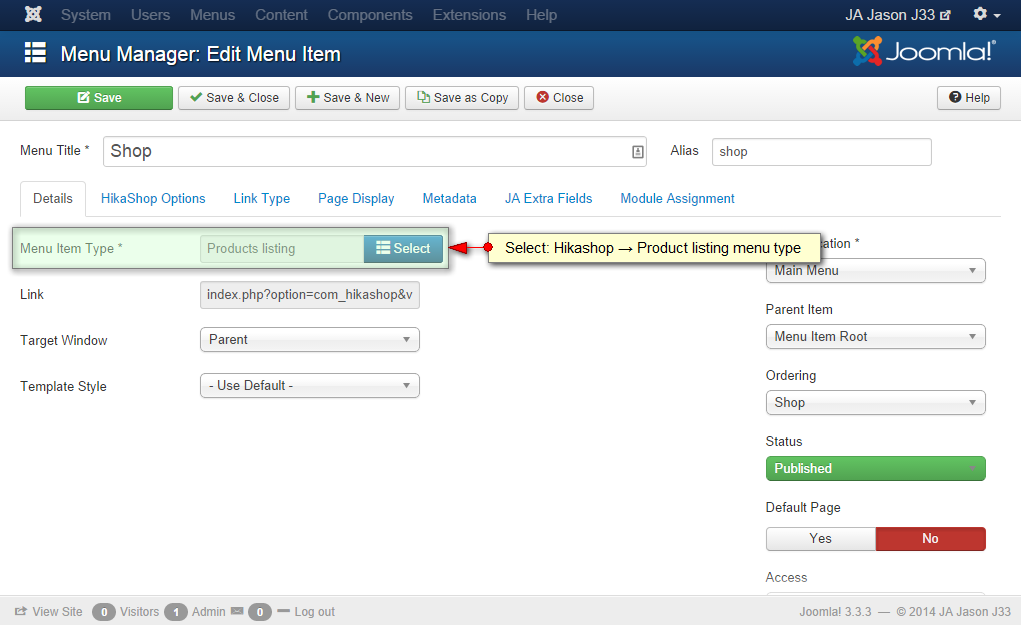
Step 1: create Shop menu item
- 1. Create Shop menu item in Main Menu, select Hikashop → Products listing menu type.
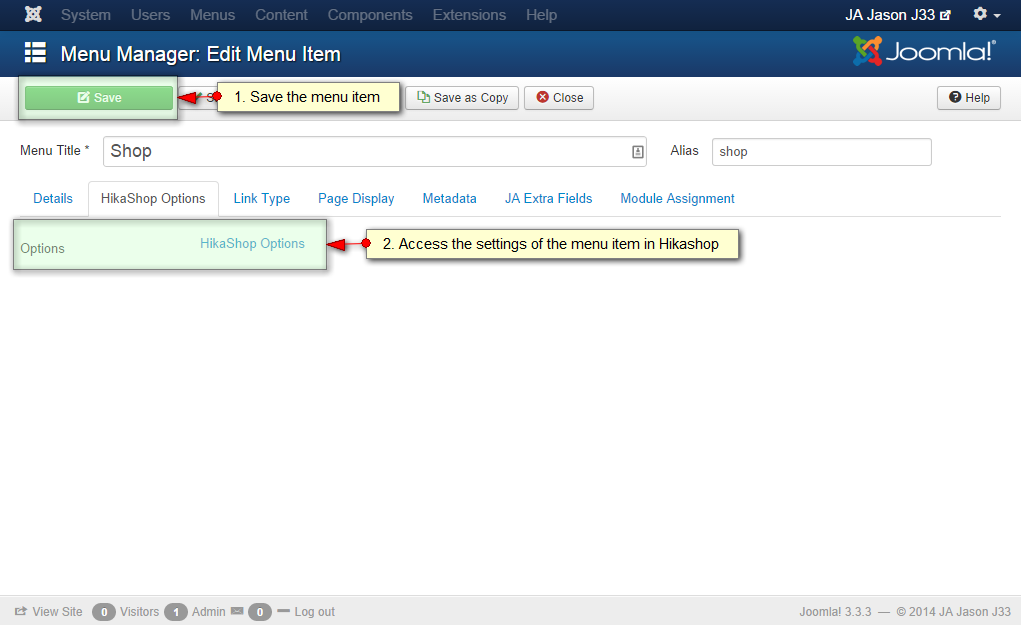
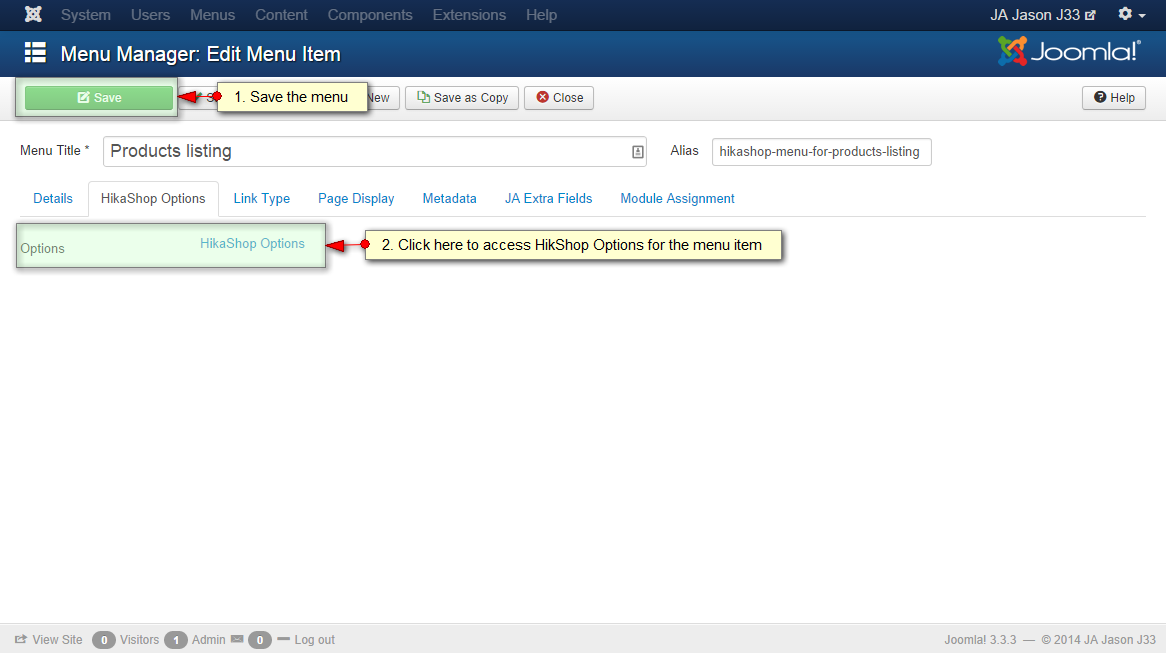
View Screenshot → - 2. Save the menu item in order access Hikashop settings as the Hikashop → Products listing menu type inherits settings from Hikashop menu.
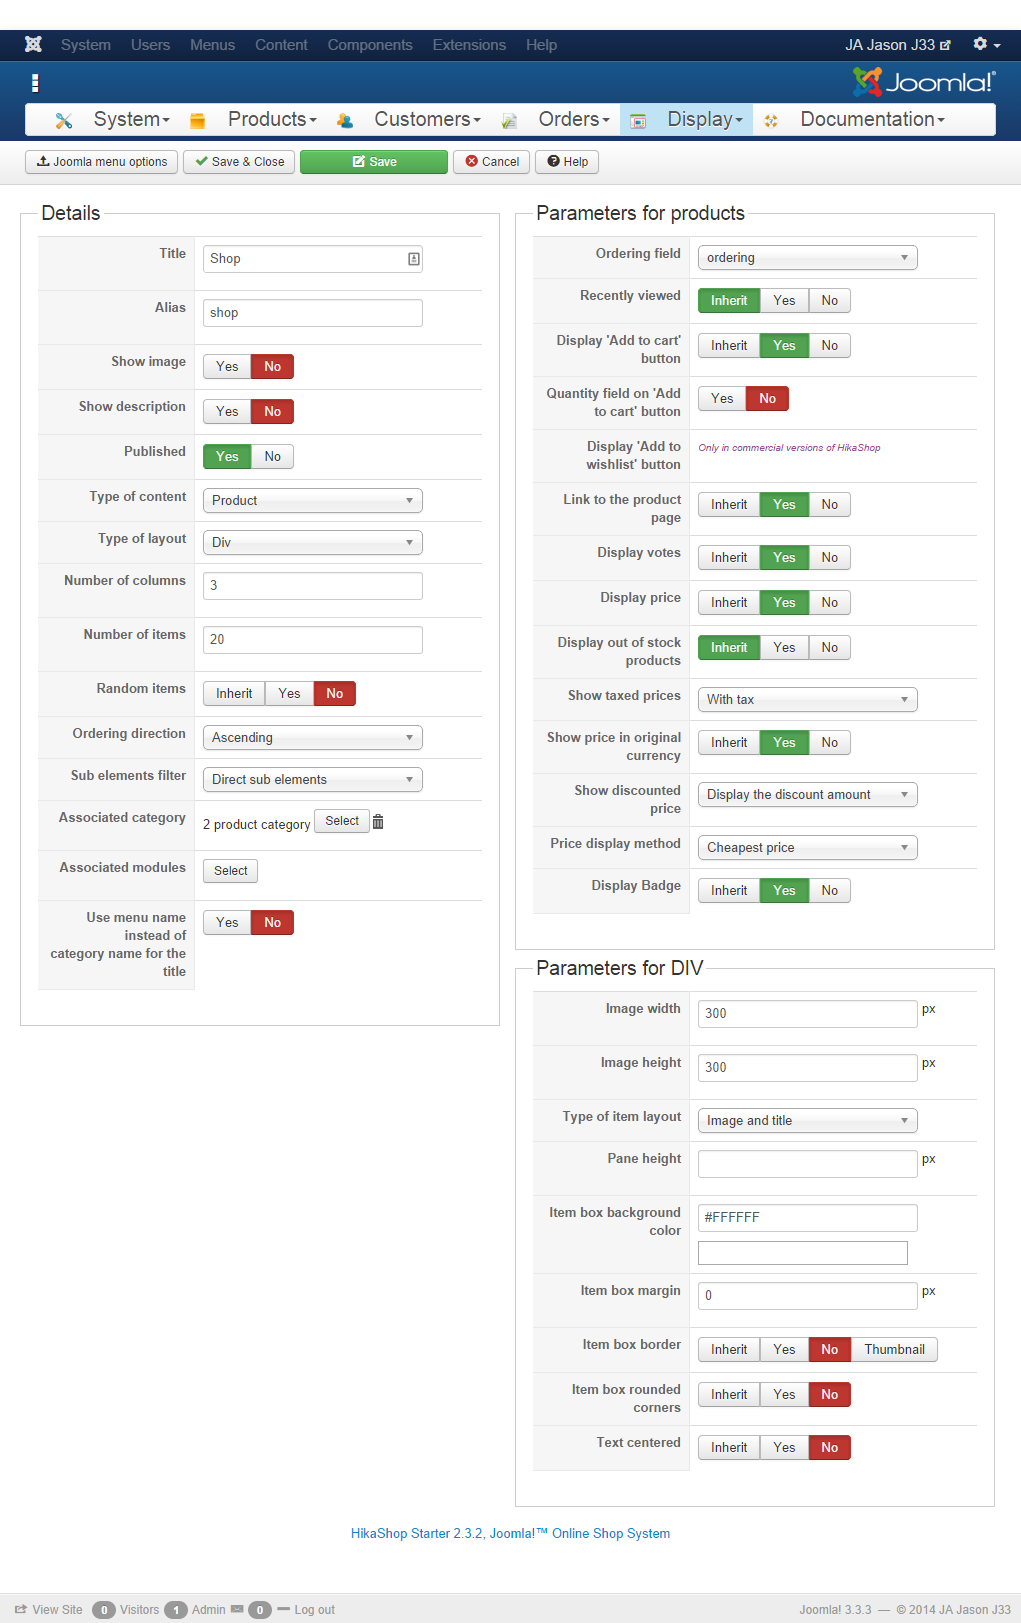
View Screenshot → - 3. HikaShop Options: after saving the Shop menu item, in the "HikaShop Option", hit the "HikaShop Option" link then you will be navigated to HikaShop settings panel for the menu.
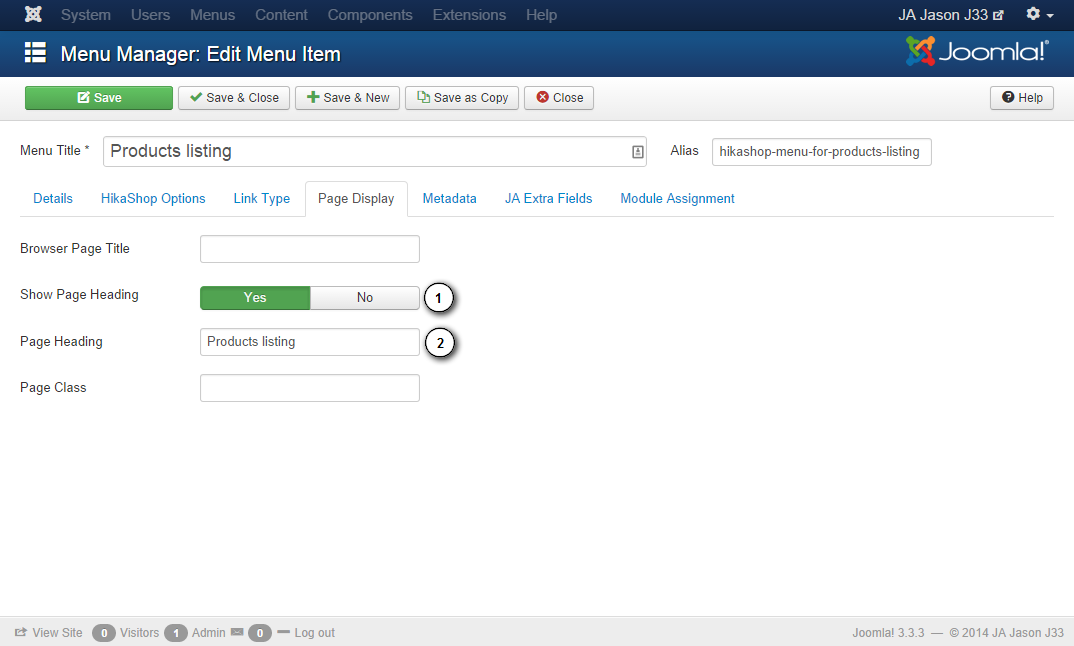
View Screenshot → - 4. Page heading and page class setting: open the Shop menu configuration panel again, in the "Page Display" tab, enable "Show Page Heading" option, add Page Heading and add page class
none-sidebar
View Screenshot → - 5. For settings in the Shop menu item that are not mentioned are default settings.
Step 2: create modules used in the page
You can see that, there are many modules in the right sidebar, create modules, assign them to position "sidebar-2" and assign to display in the "Shop" menu item. We used some Hikashop modules in the pages, you can check the settings of those modules in the Hikashop Module configuration section →
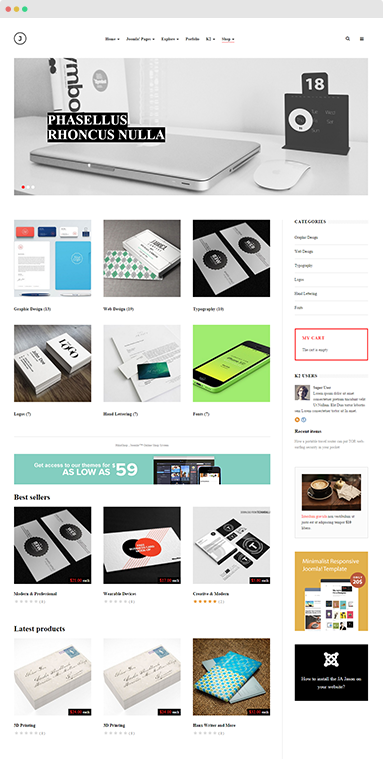
Categories listing | Live demo →
Step 1: create "Categories listing" menu item
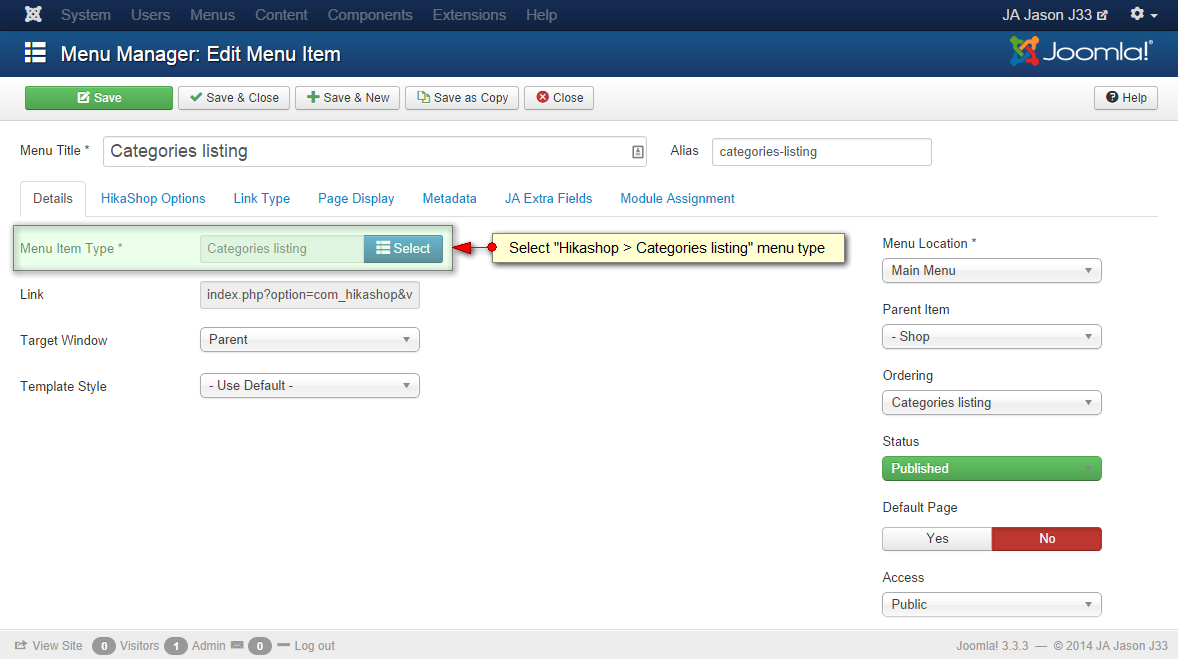
- 1. Create "Categories listing" menu item in Main Menu, select Hikashop → Categories listing menu type.
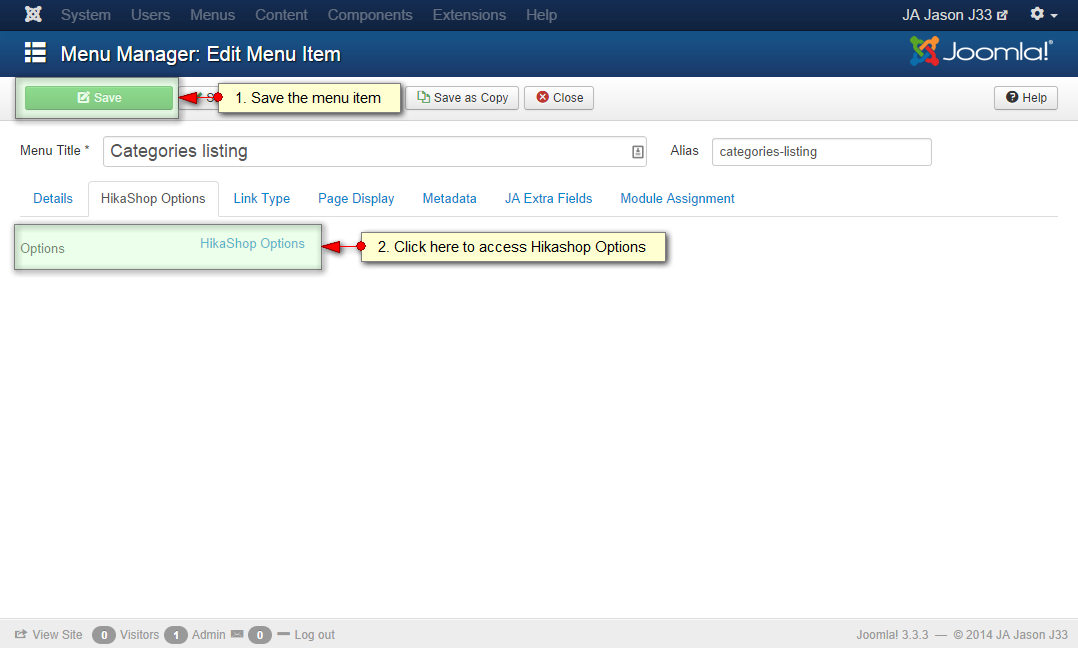
View Screenshot → - 2. Save the menu item in order access Hikashop settings as the Hikashop → Categories listing menu type inherits settings from Hikashop menu.
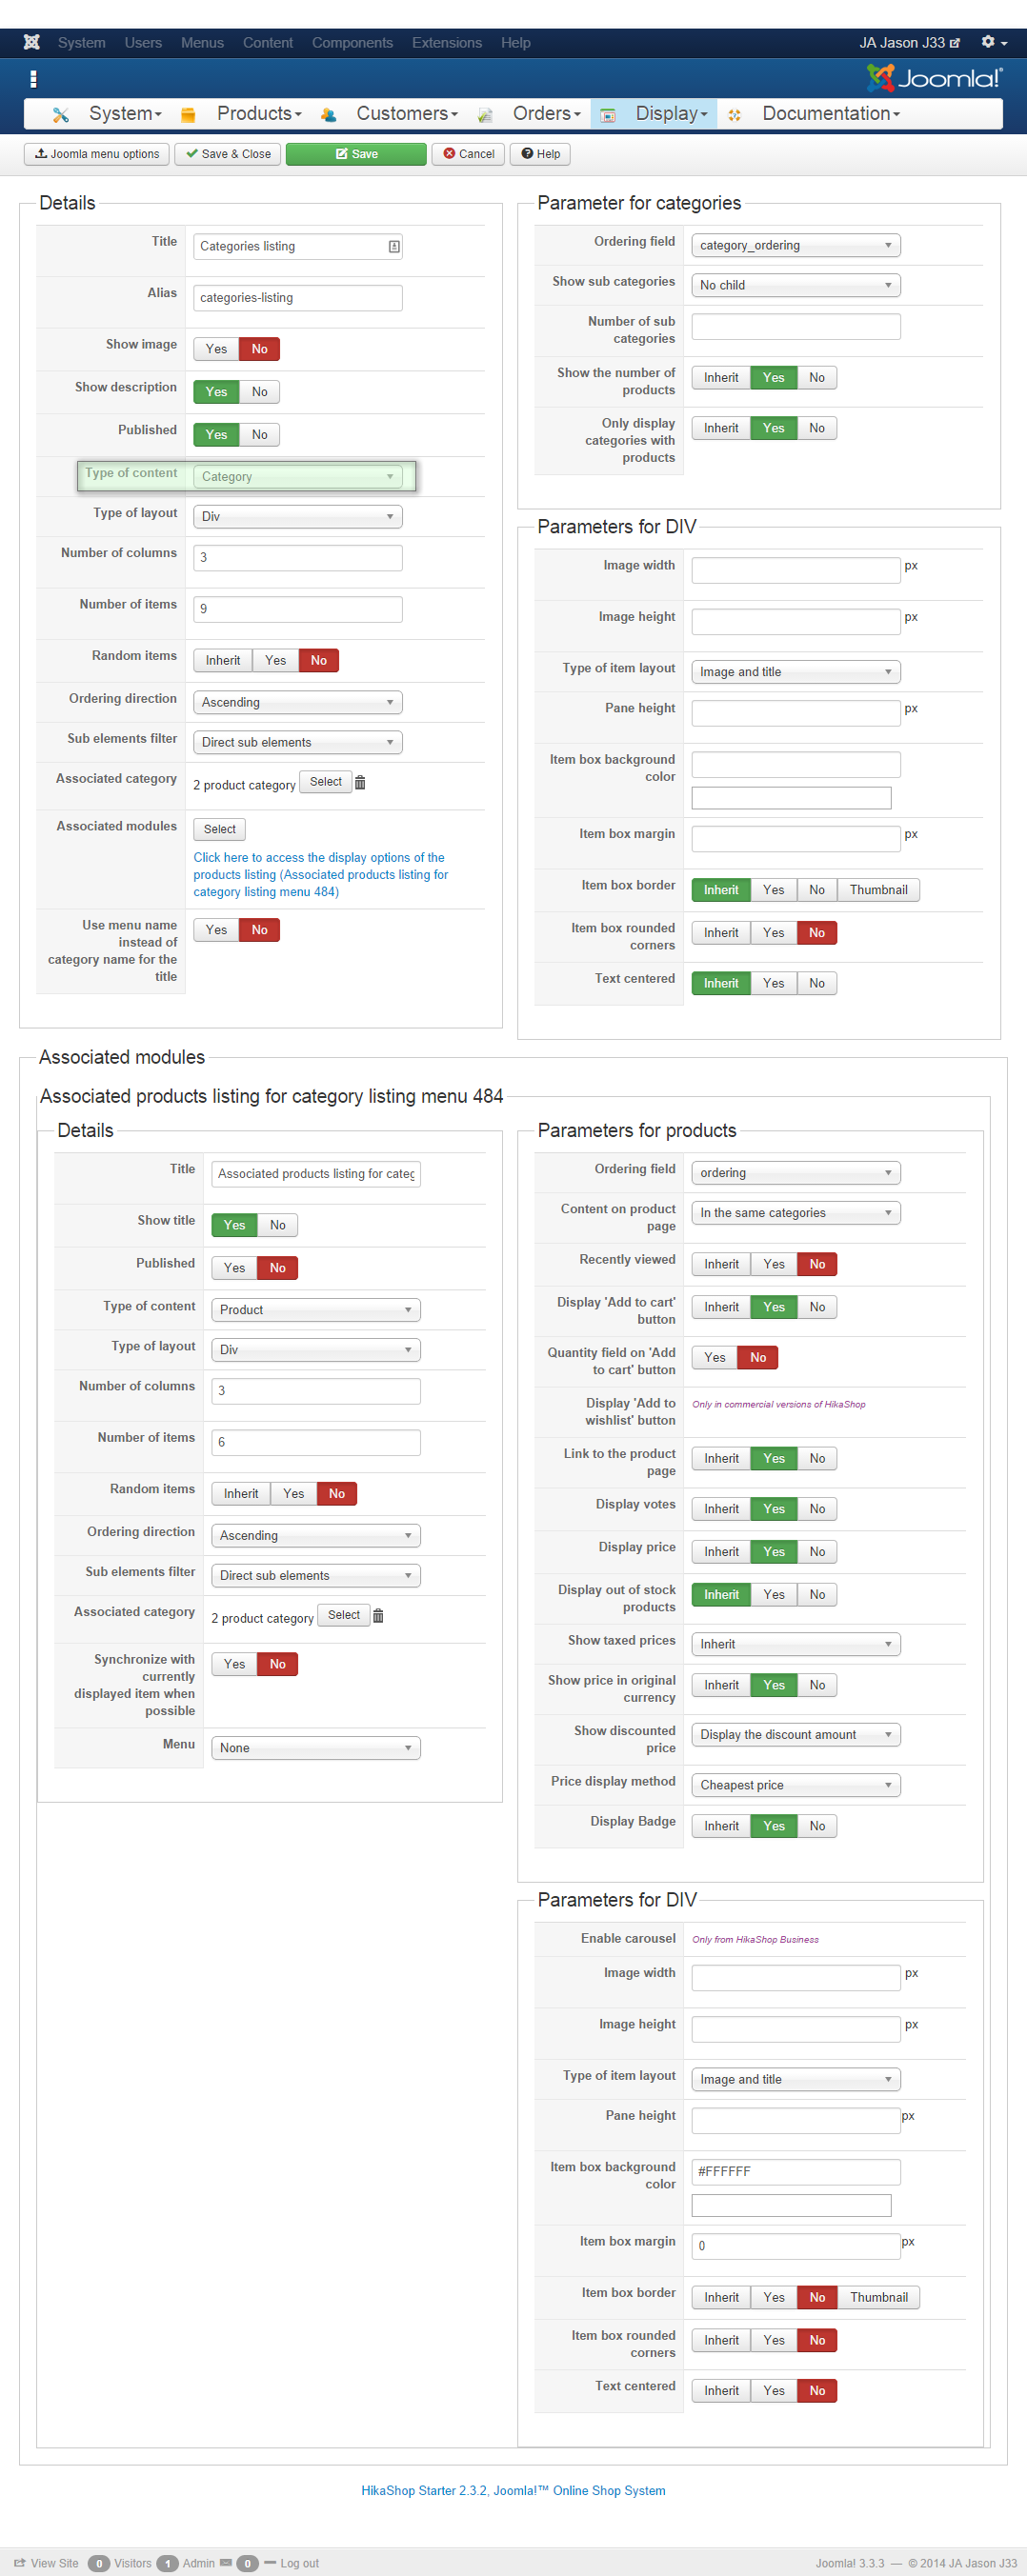
View Screenshot → - 3. HikaShop Options: after saving the "Categories listing" menu item, in the "HikaShop Option", hit the "HikaShop Option" link then you will be navigated to HikaShop settings panel for the menu.
View Screenshot → - 4. For settings in the "Categories listing" menu item that are not mentioned are default settings.
Step 2: create modules used in the menu
You can see that, there are many modules used in the page: on slideshow position, right sidebar, banners or content bottom.
- Slideshow module | Detail configuration →
- Banners module | Detail configuration →
- Latest Products module | Detail configuration →
- Best Seller module | Detail configuration →
- For modules in right sidebar, create modules, assign them to position "sidebar-2" and assign to display in the "Categories listing" menu item.
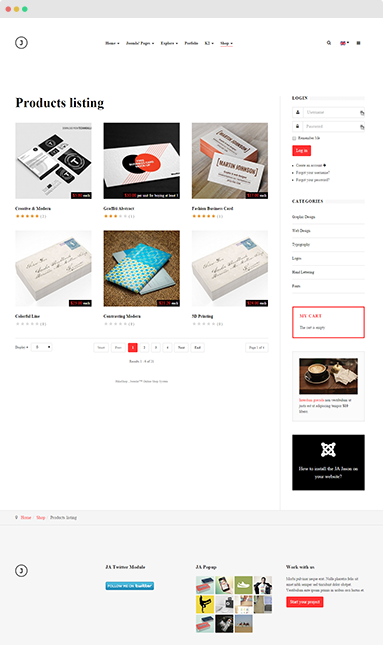
Product listing | Live demo →
Step 1: create "Products listing" menu item
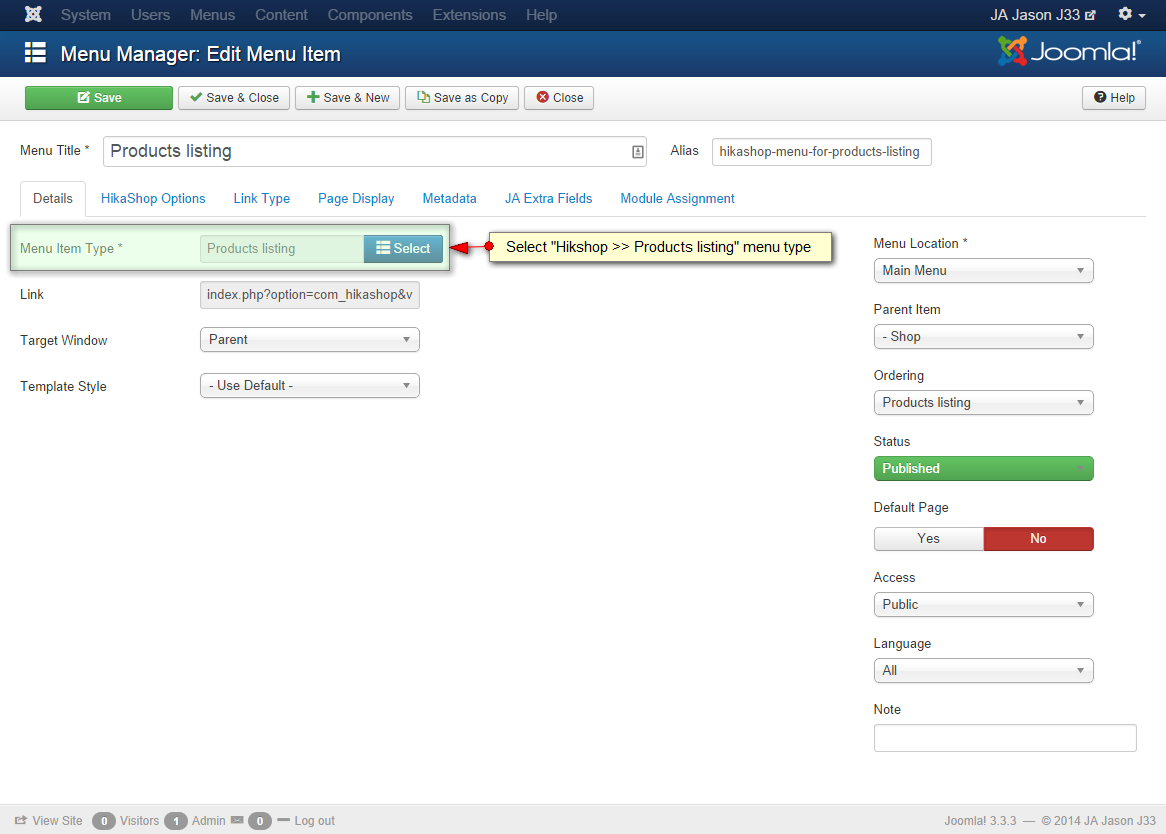
- 1. Create "Products listing" menu item in Main Menu, select Hikashop → Products listing menu type.
View Screenshot → - 2. Save the menu item in order access Hikashop settings as the Hikashop → Products listing menu type inherits settings from Hikashop menu.
View Screenshot → - 4. Page heading setting: open the Shop menu configuration panel again, in the "Page Display" tab, enable "Show Page Heading" option, add Page Heading
View Screenshot → - 5. For settings in the Shop menu item that are not mentioned are default settings.
Step 2: create modules used in the page
You can see that, there are many modules in the right sidebar, create modules, assign them to position "sidebar-2" and assign to display in the "Shop" menu item. We used some Hikashop modules in the pages, you can check the settings of those modules in the Hikashop Module configuration section →
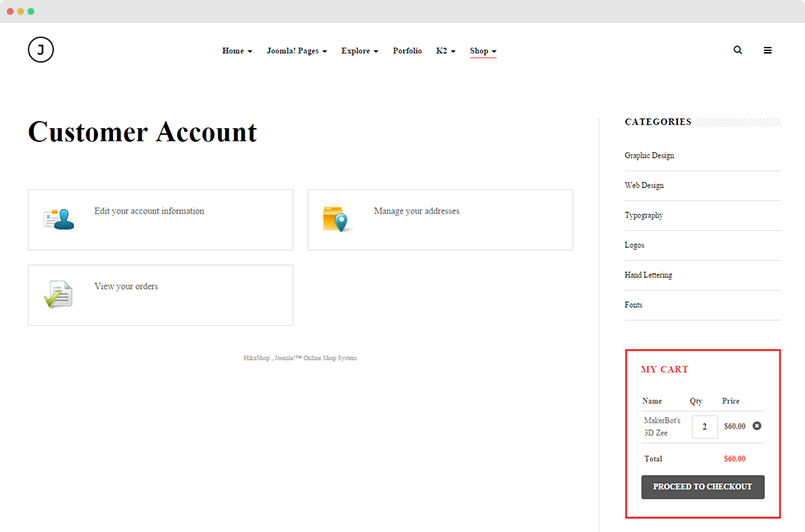
User Panel | Live demo →
The page is to display HikaShop user panel. You have to login to view those info, otherwise it displays a login form.
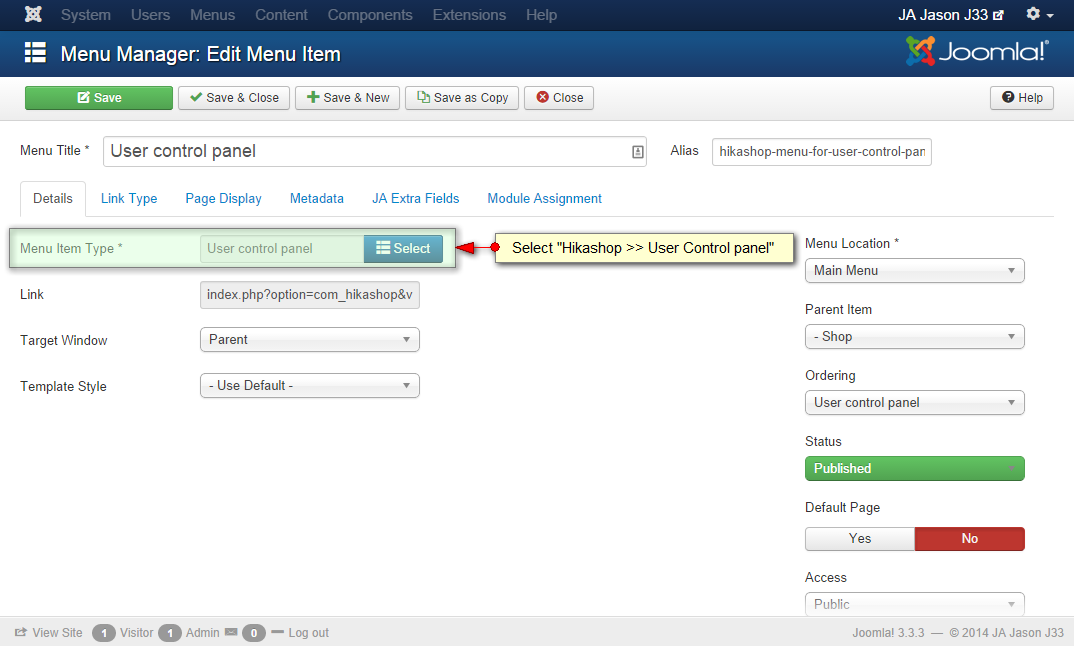
User Panel | Live demo →
The page is to display HikaShop user panel. You have to login to view those info, otherwise it displays a login form.
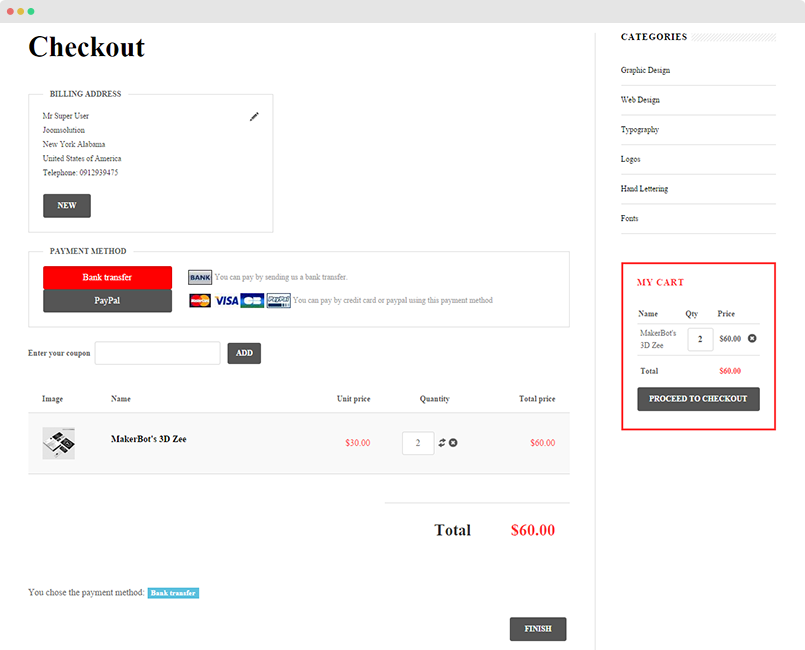
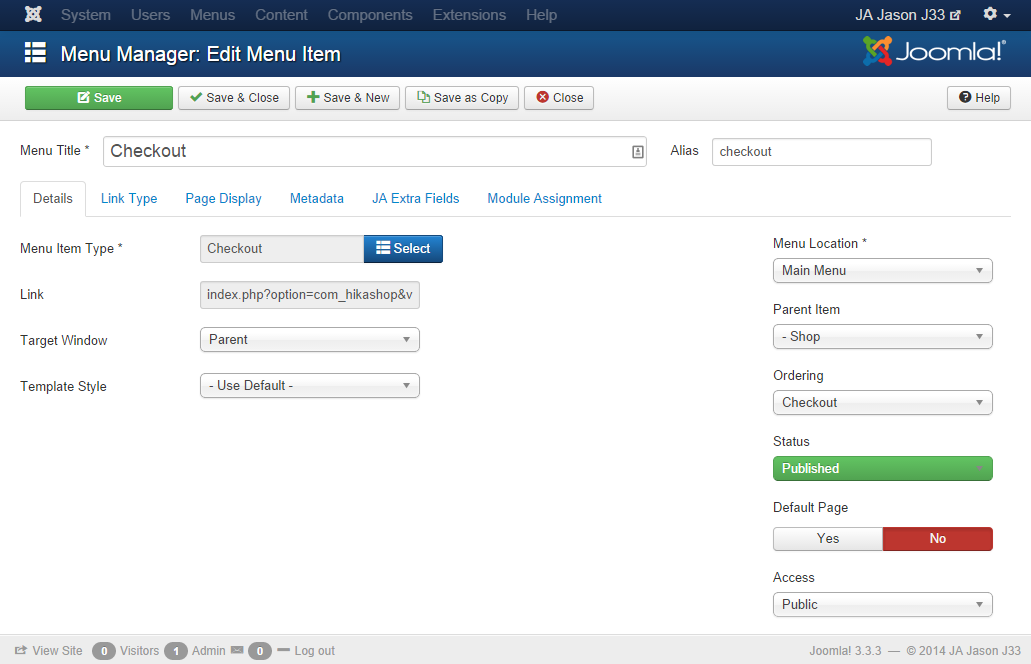
Checkout | Live demo →
The page is to display HikaShop checkout form. You have to register, login and add some products to cart to proceed with the checkout.
User Panel | Live demo →
The page is to display HikaShop registration form.
Menu back-end setting →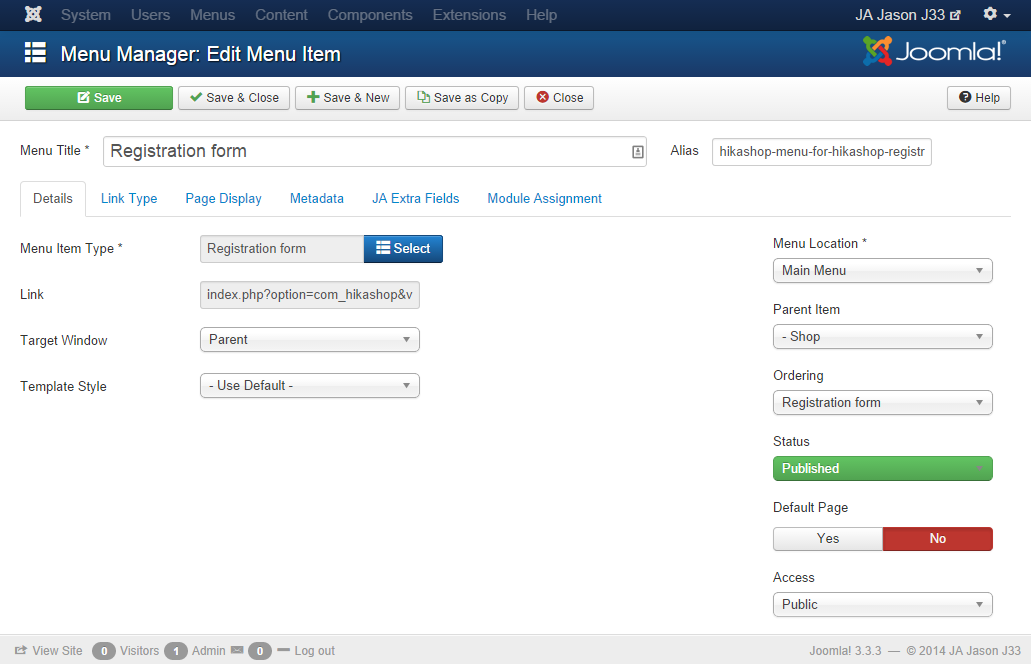
Hikashop Module configuration
Display a Hikashop module in your font-page
There are 2 steps to display a Hikashop module in front-page.
Creating new Hikashop module
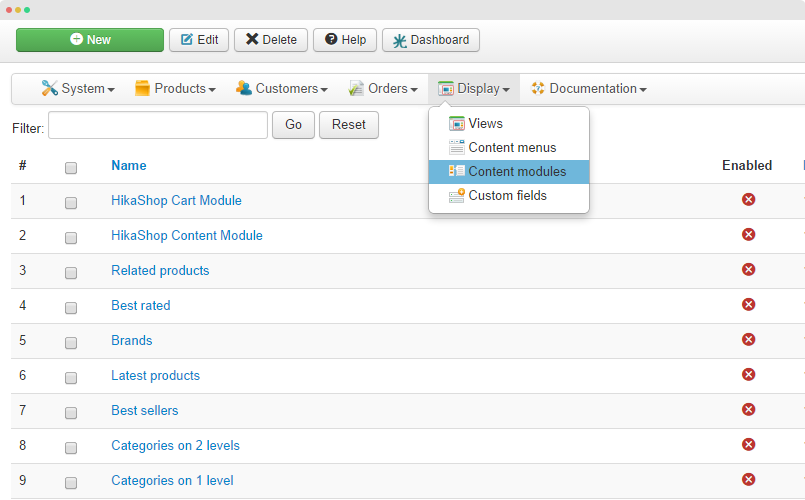
To create new Hikashop module, from the back-end setting of Hikashop, go to: Display → Content Modules. In the Content Modules panel, you will see a list of modules. By default, all the modules are disabled. If you want to use any module, open it, enable and configure.
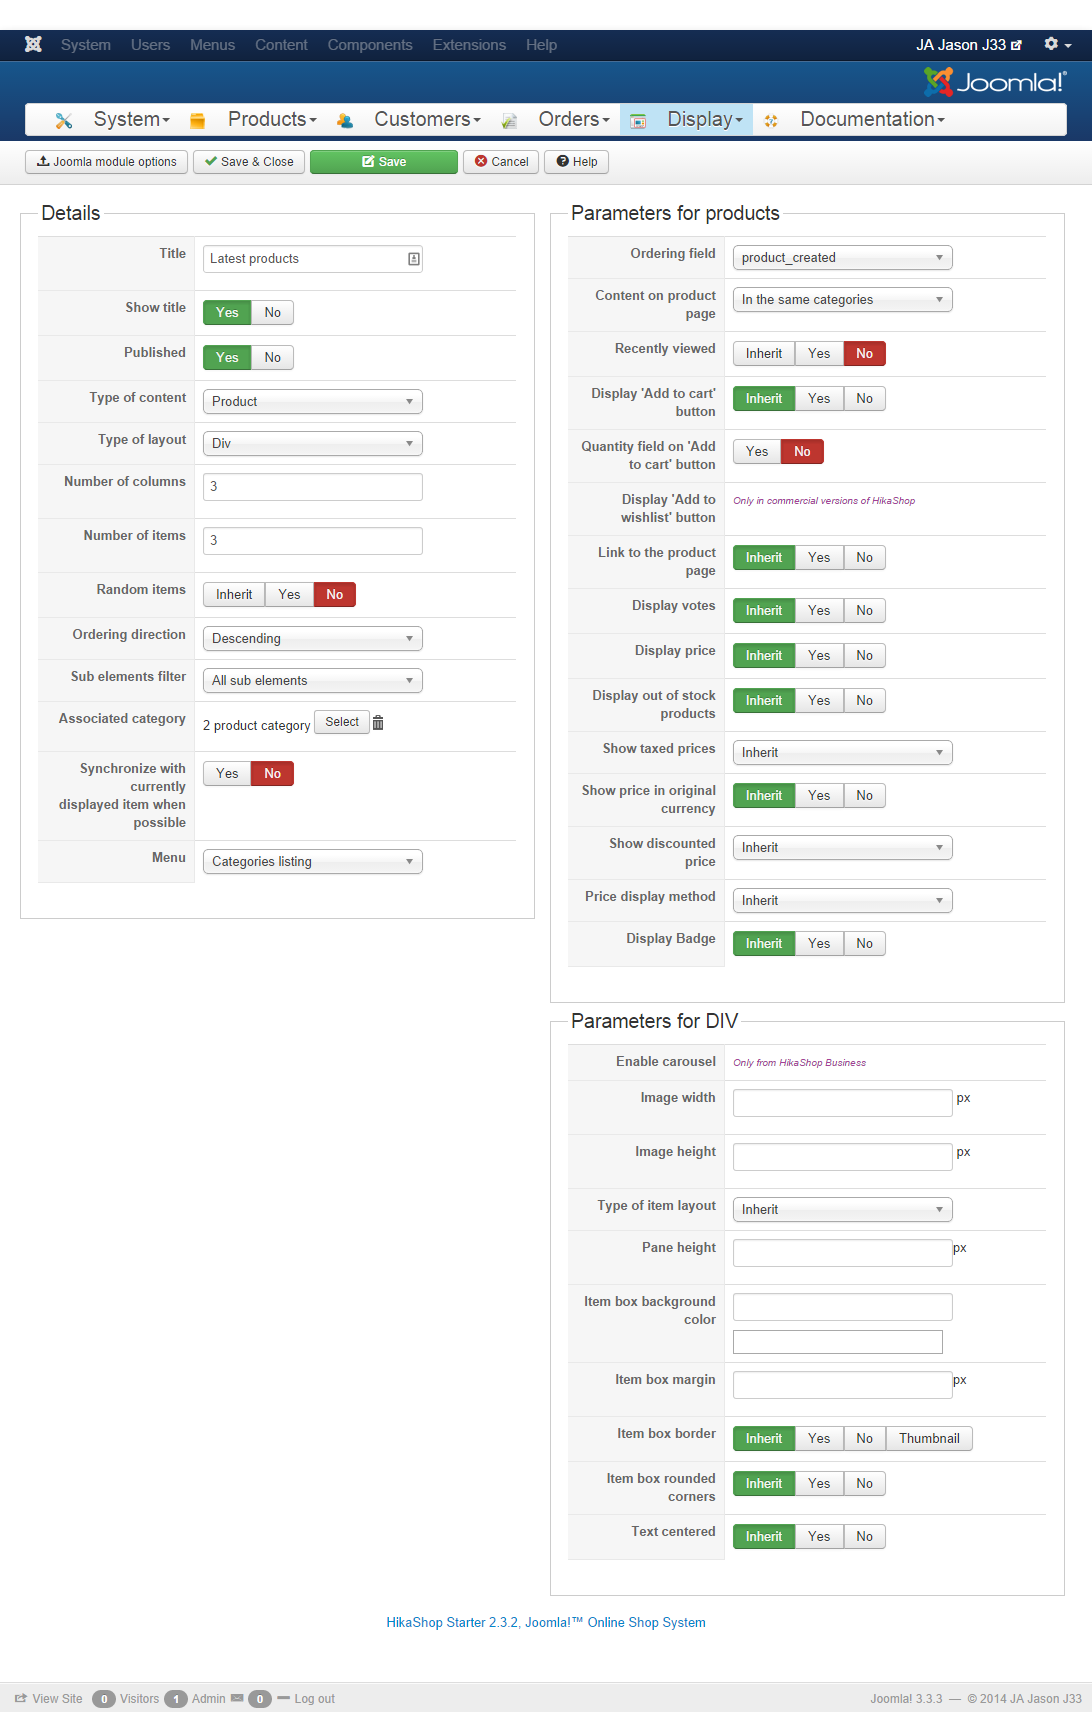
Hit the "New" button to create new module. In a module setting panel, you can select content type, layout type and configure number of columns and items.
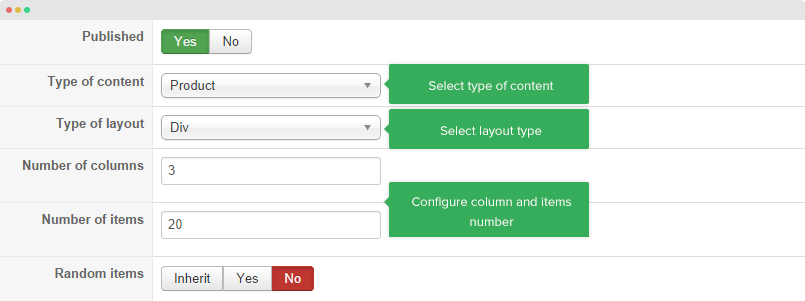
For each content type, there are different settings in the "Parameter for categories" panel.
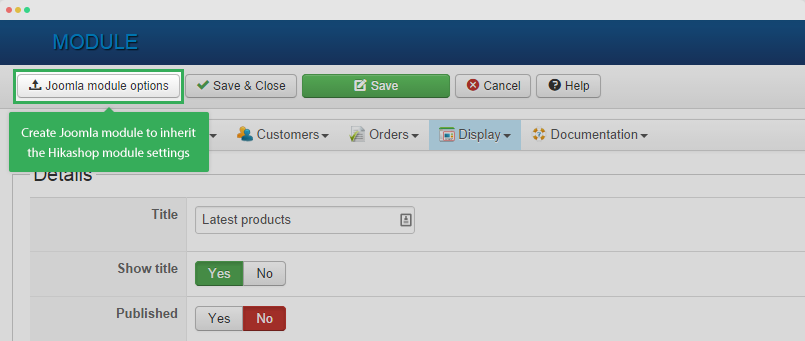
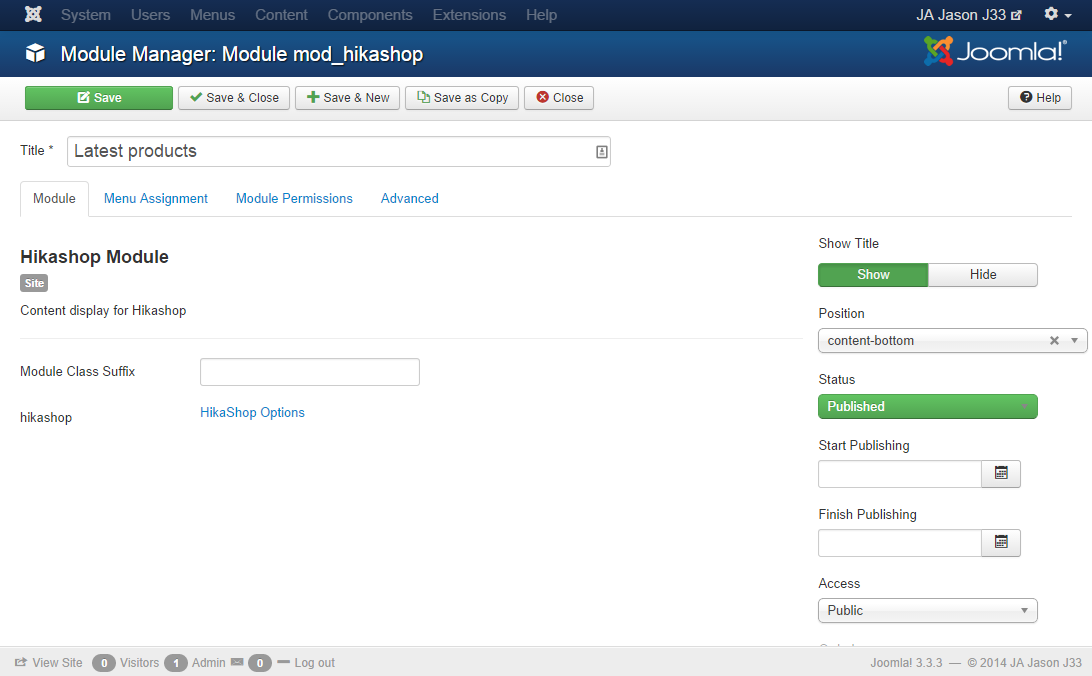
Create a Joomla module that inherit Hikashop module settings
The functionality of the Joomla module is to help you display a Hikashop module in the position and menu items you want.
In the setting panel of Hikashop module, hit the "Joomla module options".
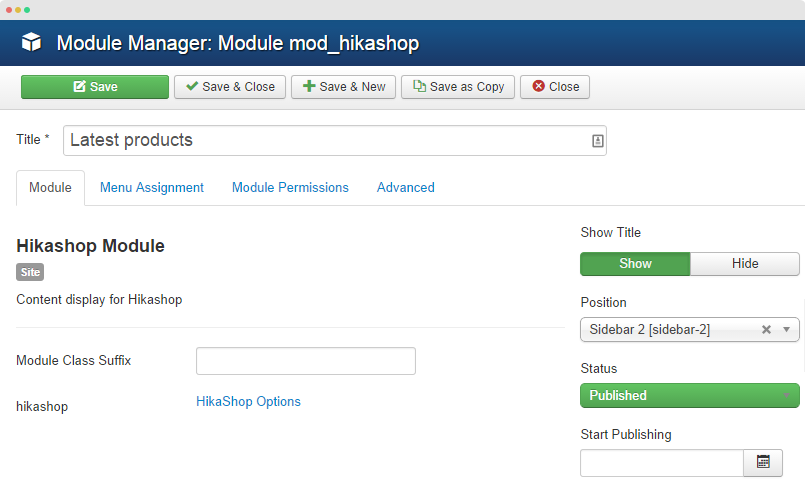
The action will bring you to the Joomla module setting panel where you can configure position, menu assignment.
Hikashop modules used in JA Jason demo configuration
There are 5 Hikashop modules used in JA Jason demo site.
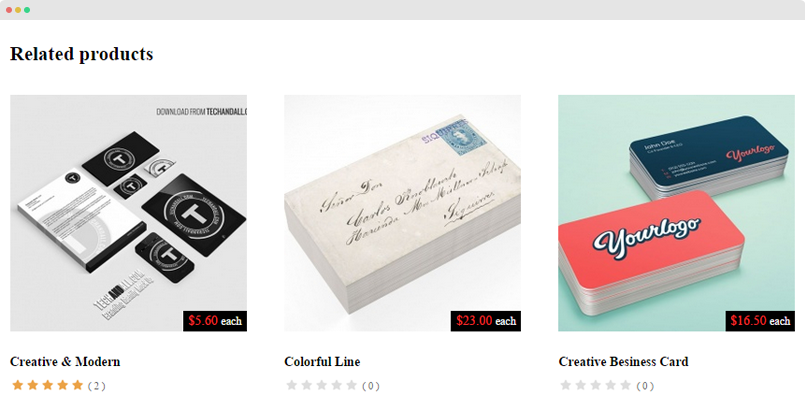
1. Related products
The module is displayed in Hikashop item detail page, after item content.
There is no Joomla module that inherit the Hikashop module settings as the displaying of the module in article detail page is defined in code.
2. Latest products
The module displays defined number of latest Hikashop items.

Back-end setting
3. Best Seller
The module displays defined number of best seller items.
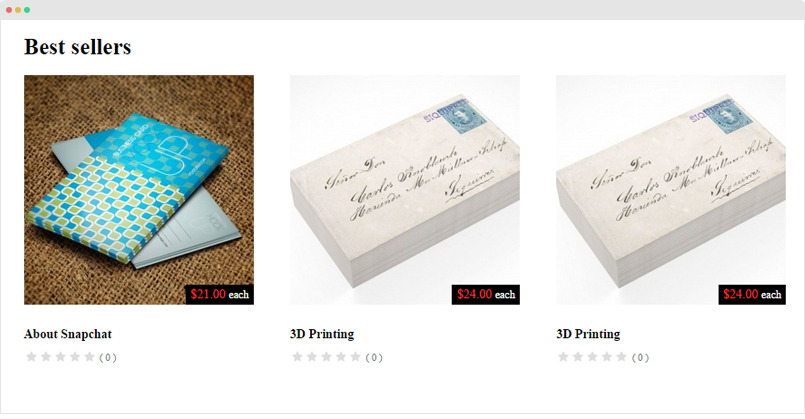
Back-end setting
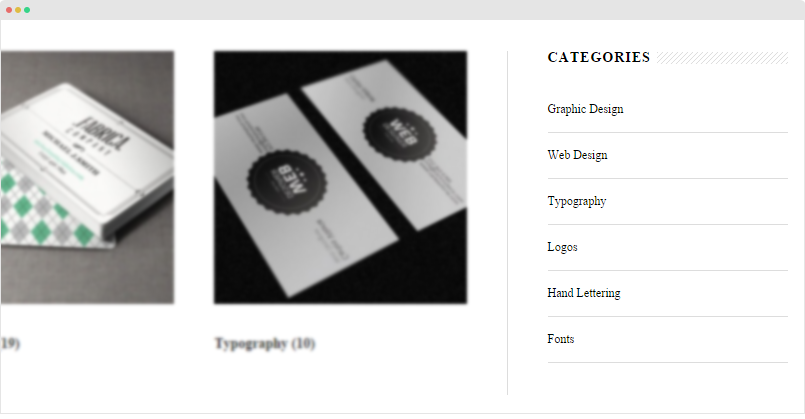
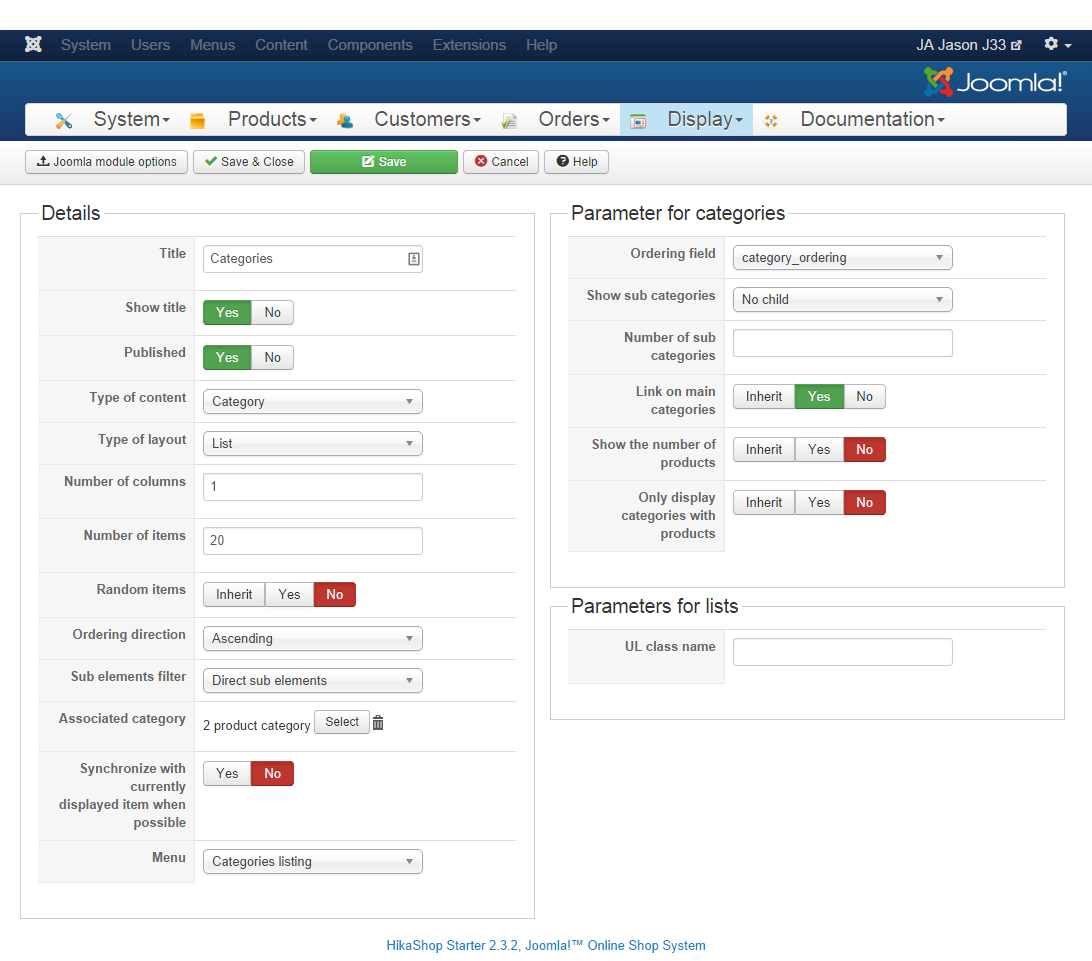
4. Categories
The module displays list of categories.
Back-end setting
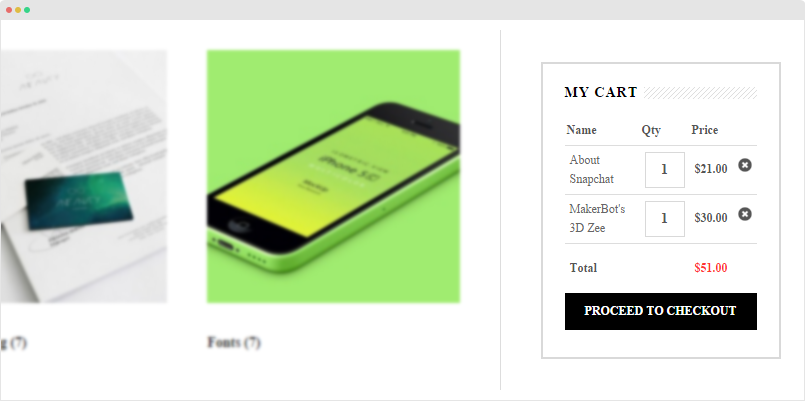
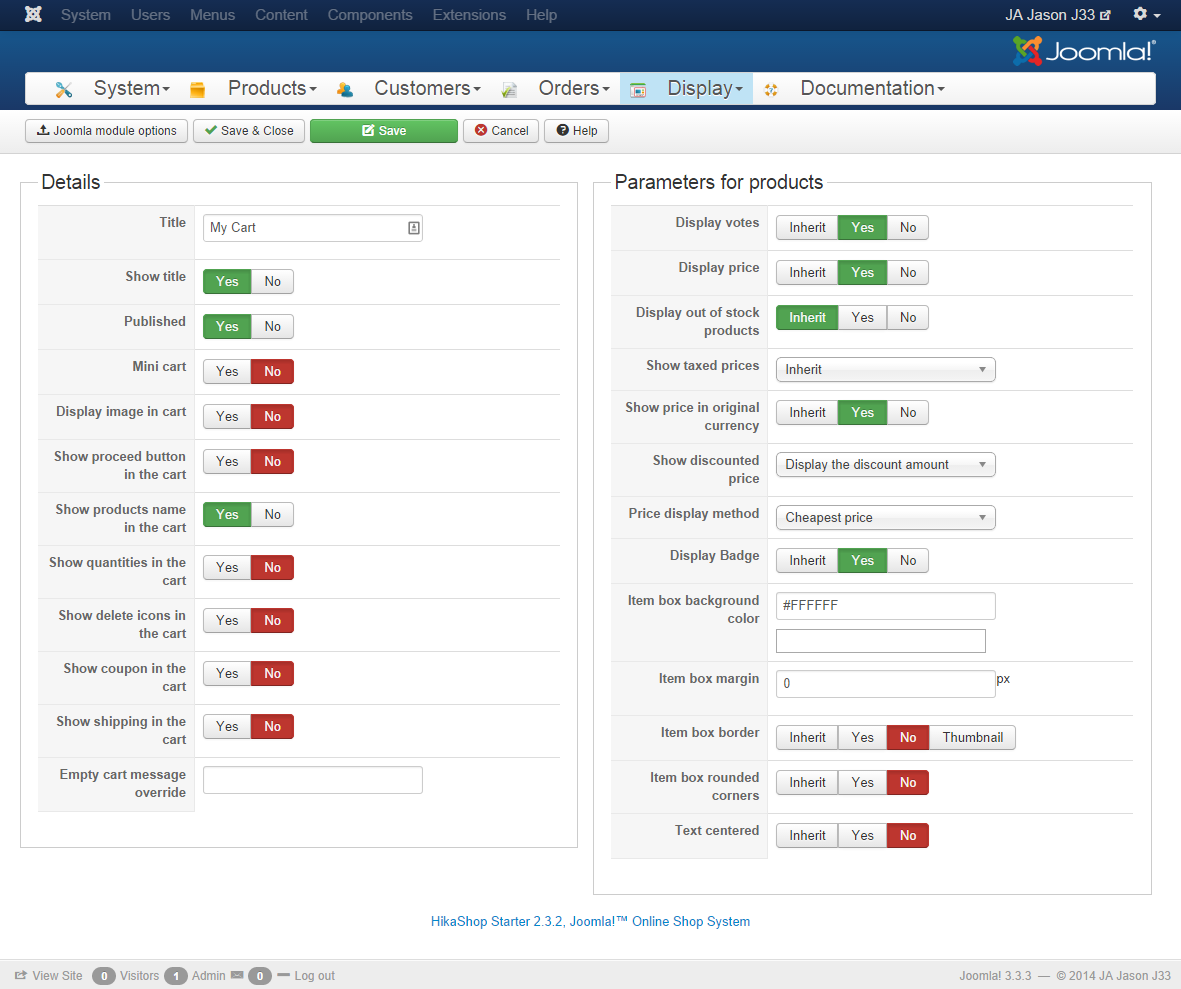
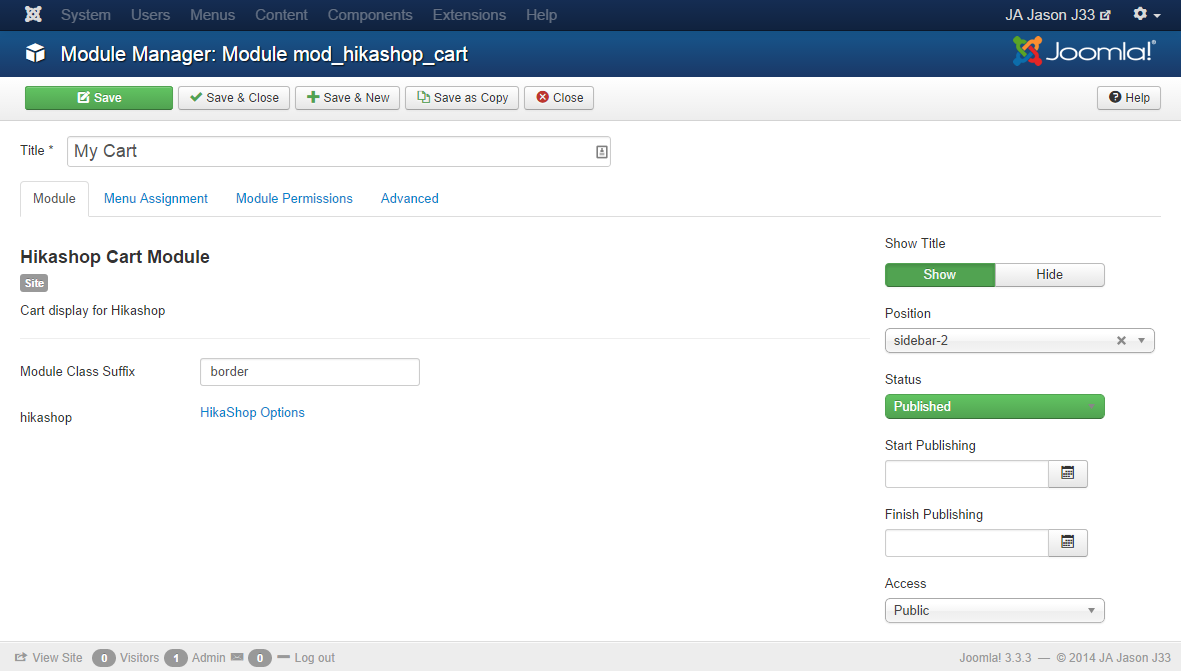
5. My Cart
Back-end setting
Customize Hikashop style
We put all customized style of Hikashop into templates/ja_jason/less/extras/com_hikashop.less file so that it's easy for you to find the customized style and change the customized style or add new customized styles. You can assign the customized style for specific Hikashop pages, to do that, open template style manager of JA Jason, in the "Add-ons" tab, you will see the "Template Extended styles", select the Hikashop pages that you want to apply the com_hikashop.less.
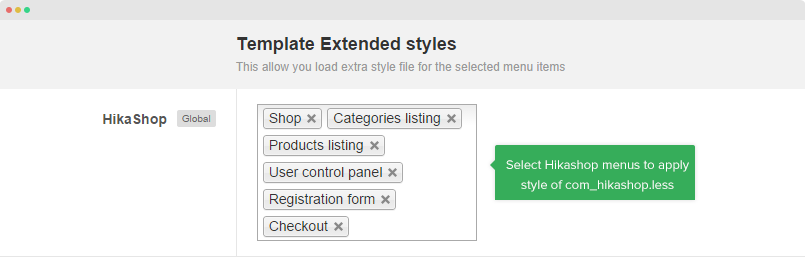
If you leave the field blank, the customized style is not applied for any page.
Override Hikashop default layouts
Hikashop style is customized and its default layouts are overridden. The overridden layouts are located in: templates/ja_jason/html/com_hikashop. You can customize Hikashop layouts using the overridden layouts.
Here is the structure of the com_hikashop folder.
templates/ja_jason/html/com_hikashop
+--category/
¦    +-- listing.php
+-- checkout/
¦    +-- login.php
¦    +-- step.php
+-- product/
¦    +-- listing_div.php
¦    +-- listing_img_title
¦    +-- show.php
¦    +-- show_default.php
¦    +-- show_tabular.php
+-- vote/
¦    +-- form.php
¦    +-- listing.php