System requirement
JA Orisite is compatible with Joomla 3 and Joomla 2.5. Please make sure your system meets the following requirements:
Joomla 3 System requirement
Software
- PHP (Magic Quotes GPC off): 5.3.1 + (5.4+ recommended)
Databases
- MySQL(InnoDB support required): 5.1+
- MSSQL 10.50.1600.1+
- PostgreSQL 8.3.18+
Web Severs
- Apache 2.x+
- Microsoft IIS 7
- Nginx 1.0 (1.1 recommended)
Joomla 2.5+ system requirement
Software
- PHP 5.2.4+ (5.4+ recommended)
- MySQL: 5.0.4+
Web Sever
- Apache: 2.x+
- Microsoft: IIS 7
- Nginx: 1.0 (1.1 recommended)
Browser requirement
The requirements are the same with both Joomla 2.5 and Joomla 3
- Firefox 4+
- IE (Internet Explorer) 8+
- Google Chrome 10+
- Opera 10+
- Safari 5+
Development Environment
The requirements are the same with both Joomla 2.5 and Joomla 3
During development process, Localhost is preferred. You can use the following servers on your PC to develop your site.
Windows
- WAMPSEVER
- XAMPP for Windows
Linux
- LAMP Bubdle
- XAMPP for Linux
Mac OS
- MAMP & MAMP Pro
- XAMPP for Mac OS
Download and Installation
1. Get to Know Your Template
- Everyone should read the Template's Overview Article! This is a quick and complete overview of the template, from the colors included, to all of the powerful Joomlart complimentary extensions that come with it. You'll also find links to the LIVE Demo Site, the Download area, as well as the Forum where you can ask questions.
- Need Help Getting Around Joomlart.com? We've created a QUICK ACCESS GUIDE for helping you to become a Joomlart Power User. This is a wonderful reference, full of tips on how to quickly find the template info, demo sites, module position guides and more. We don't want you to miss a thing!
2. Download Template and Extensions
Check download folder for the Quickstart, Template zip and other complimentary extensions zip files.
- Making a New Website? - If you are planning to make a new website, use our Quickstart package to clone the demo site and replace the demo content with yours. Check How to install Quickstart Package.
- Installing on your live website? - If you are planning to use this template on your already live website, readHow to make your site look like demo site guide first to learn about the steps involved. Then you can follow the userguide below.
The user guide covers the following aspects:
- Installing Template on your Joomla system
- Installing T3v2 Framework Plugin
- Installing complimentary / included extensions
- Custom HTML Modules
- Using Template Typography
- Third Party Configuration
- Mega Menu configs
4. Install the Template
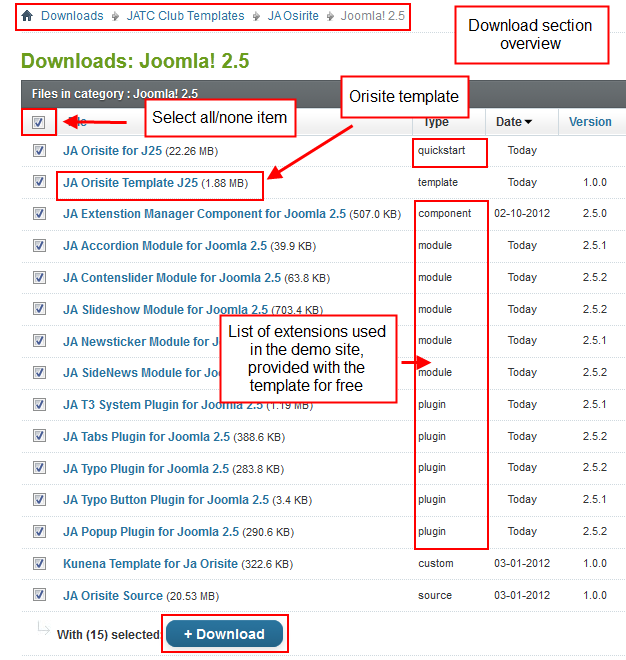
- Browse and Download: Go to the Download page of JA Orisite and download the Template zip file. Refer to this screenshot for the overview of the download folder.
- Install the Template: Now install the Template on your Joomla 2.5 system. Follow this guide if you are not familiar with the installation procedure.
Template Configuration
JA Orisite template will install with Settings used on the demo website, so you can postpone the configuration until you complete the setup (install other modules / plugins used in the demo website).
Once completed the setup, you can come back to the template back-end and check the various options for customizing your template. Refer to this Universal T3 V2 Back-end Config Guide for options on how to customize your installed template.
Please note: T3v2 template configurations are same in Joomla 1.5, 1.7 and 2.5, so the above guide link is valid for all.
Links to resources on T3v2 Framework templates and advanced configurations :
- Overview
- Developer Guides
- Customization FAQs
- Mega Menu - A missing menu system for Joomla
- Video Tutorials (valid for Joomla 1.5, 1.7 and 2.5)
Error? - I see “Missing T3” error on the website frontend?
T3v2 Frameworkbased templates need the T3 Framework Plugin to be installed and enabled.
5. Install T3v2 Framework Plugin
Download and install T3v2 Framework Plugin (aka T3 System plugin). Follow this guide if you are not familiar with the installation procedure. After the plugin is installed, enable it as described in the same guide.
6. Install complimentary
- Free Extensions: (aka complimentary / included extensions). We use many extensions on our demo site to provide greater flexibility and features. These are provided for free to our members.
- Custom HTML Module: To match the design of the template, we also style (CSS) for Custom HTML modules using different div classes. You will need to check the HTML codes and make sure to use the recommended HTML markup to get correct display. We provide the HTML code in this userguide.
- 3rd Party Extensions : This template uses JA Comment Component (with its plugins) that is also used for JA Nex Joomla J17. You will need to download JA Comment package, it is available to Developer members and JAEC members only.
Module Positions
- View Module Position Image (used positions only).
- Use Module Position Overlay in Template (used & empty module positions).
TIP: Read more about Checking and Finding Module Positions in T3 Templates.
Install and Configure Included Extensions
List of modules / plugins used in JA Orisite Template Demo
- JA Slideshow
- JA Contentslider
- JA Accordion
- JA Newsticker
- JA Sidenews
- JA Commentoff plugin (Available to JAEC and JA Developer members only)
- JA Commenton plugin (Available to JAEC and JA Developer members only)
- JA Comment plugin (Available to JAEC and JA Developer members only)
- JA Comment component (Available to JAEC and JA Developer members only)
- JA Latest Comment module (Available to JAEC and JA Developer members only)
- JA System Tabs plugin
- JA Popup plugin
- JA System Typo plugin
- JA Typo Button plugin
- JA Extensions Manager component
IMPORTANT: We provide the screenshot of the settings used on our demo website. Make sure you configure your modules / plugins in the same manner to achieve demo site alike style / functions.
Modules Configuration
1. JA Accordion Module
Code
Module Position : right
Module Suffix : no-padding
Back-end Settings for this module as in Demo
Front-end appearance

2. JA Content Slider Module
2.1 Must Read
Code
Module Position : user6
Module Suffix : NOT USED
Back-end Settings for this module as in Demo
Front-end appearance

2.2 Let Write
Code
Module Position : user7
Module Suffix : badge-hot
Back-end Settings for this module as in Demo
Front-end appearance

2.3 Think Different
Code
Module Position : user8
Module Suffix : NOT USED
Back-end Settings for this module as in Demo
Front-end appearance

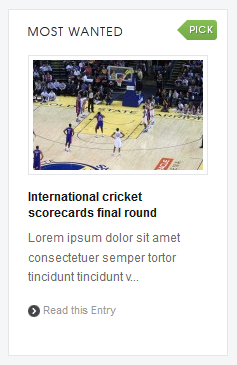
2.4 Most Wanted
Code
Module Position : user9
Module Suffix : badge-pick
Back-end Settings for this module as in Demo
Front-end appearance
2.5 In the Mix
Code
Module Position : content-mass-top
Module Suffix : no-border no-padding
Back-end Settings for this module as in Demo
Front-end appearance

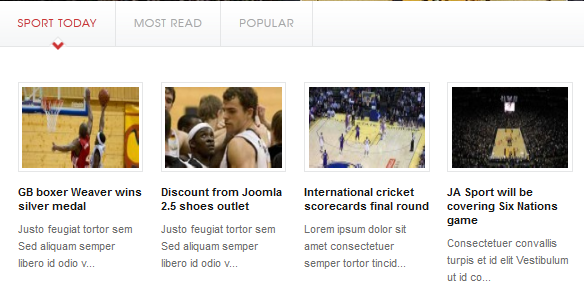
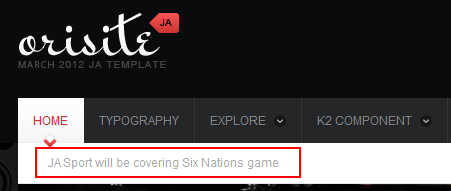
2.6 Sport Today
Code
Module Position : ja-tabs
Module Suffix : NOT USED
Back-end Settings for this module as in Demo
Front-end appearance
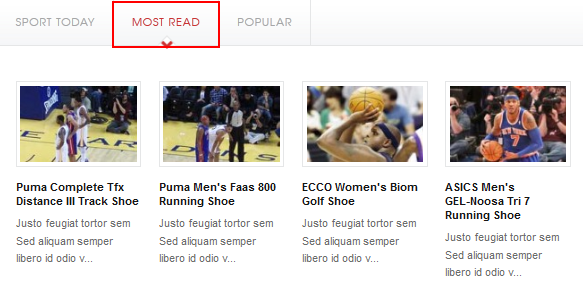
2.7 Most Read
Code
Module Position : ja-tabs
Module Suffix : NOT USED
Back-end Settings for this module as in Demo
Front-end appearance
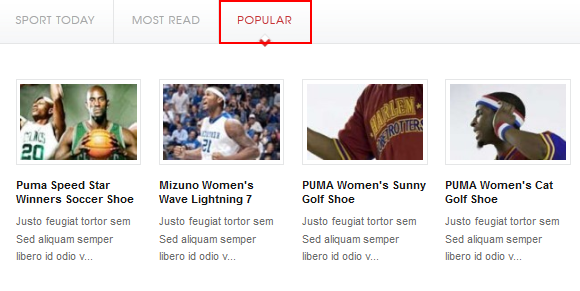
2.8 Popular
Code
Module Position : ja-tabs
Module Suffix : NOT USED
Back-end Settings for this module as in Demo
Front-end appearance
3. JA Newsticker Module
Code
Module Position : topbar
Module Suffix : NOT USED
Back-end Settings for this module as in Demo
Front-end appearance
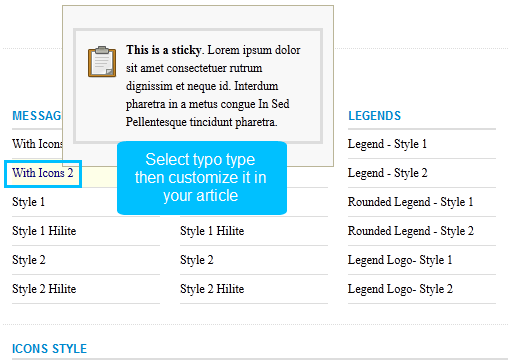
4. JA Typo Plugin
4.1 JA System Typo Plugin
This plugin is to embed typo styles to your system. Just install and enable the plugin, configuration is not required.
After installing and enabling the plugin, open the article you want to add typo. In the article edit form, select Typo button >> select typo type >> add it to your article >> customize it.
5. JA Comment Extensions
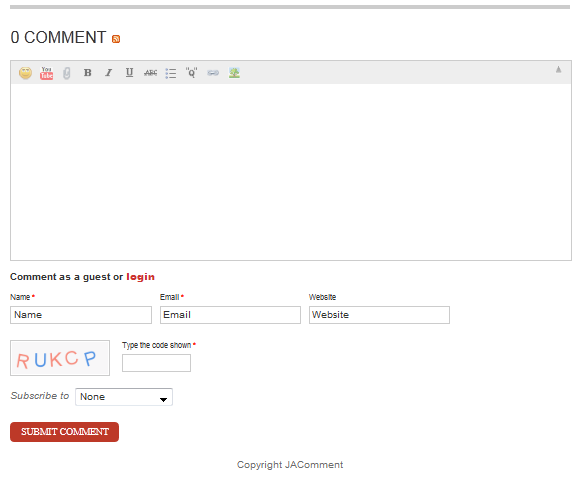
5.1 JA Comment Plugin
Back-end Settings for this module as in DemoFront-end appearance
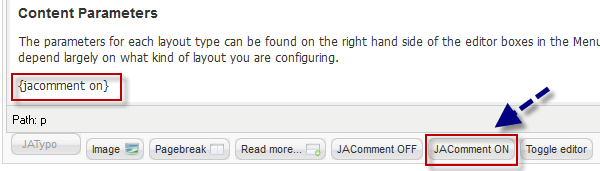
5.2 JA CommentOn plugin
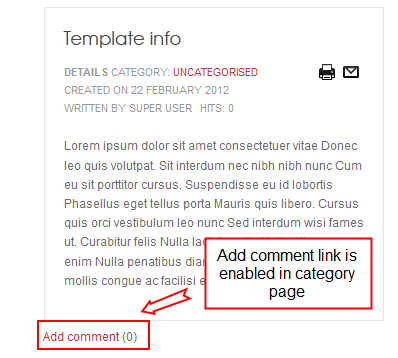
This plugin i to enable comment form on a specific article. Once enabled, open the article you want and put the tag: {comment on} in any place in the article content field or click on the JAComment ON button under the content field of the article.
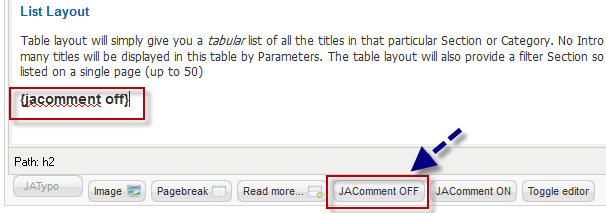
5.3 JA CommentOff plugin
This plugin is to disable comment form on a specific article. Once enabled, open the article you want and put the tag: {comment off} in any place in the article content field or click on the JAComment ON button under the content field of the article.
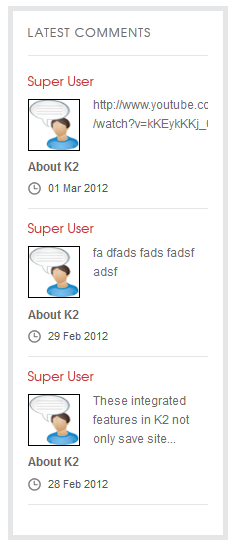
5.4 JA Latest Comment Module
Code:
Module Position : right
Module Suffix : NOT USED
Back-end Settings for this module as in Demo
Note: We have wiki for JA Comment component for more information and how to use JA Comment
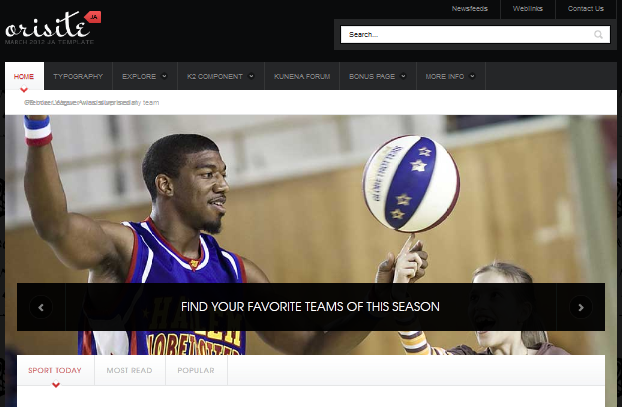
View Detail Documentation6. JA Slideshow Module
6.1 Slideshow in Home page
Code
Module Position : slideshow
Module Suffix : NOT USED
Back-end Settings for this module as in Demo
Front-end appearance
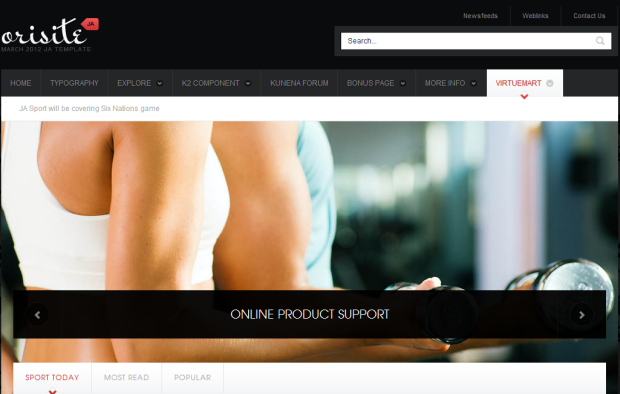
6.2 Slideshow in Virtual mart
Code
Module Position : slideshow
Module Suffix : NOT USED
Back-end Settings for this module as in Demo
Front-end appearance
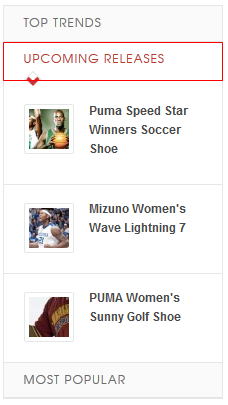
7. JA SideNews Module
7.1 Most Popular
Code
Module Position : accordion
Module Suffix : NOT USED
Back-end Settings for this module as in Demo
Front-end appearance

7.2 Upcoming releases
Code
Module Position : accordion
Module Suffix : NOT USED
Back-end Settings for this module as in Demo
Front-end appearance
7.3 Top Trends
Code
Module Position : accordion
Module Suffix : NOT USED
Back-end Settings for this module as in Demo
Front-end appearance

Custom HTML Modules
If you are not sure how to use Custom HTML Modules or accessing HTML Editor view. Read this Guide.
We will provide you with the HTML Code (markup) for reference below, you will need to replicate exactly and then change your content. Remember HTML code has special div classes, which are required for demo alike display.
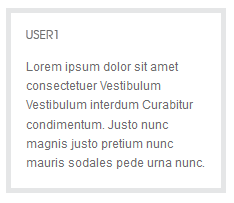
1. User1
Code:
Module Position : user1
Module Suffix : NOT USED
HTML Code
<p>Lorem ipsum dolor sit amet consectetuer Vestibulum Vestibulum interdum Curabitur condimentum. Justo nunc magnis justo pretium nunc mauris sodales pede urna nunc.</p>
Back-end Settings for this module as in Demo
Front-end appearance
2. User2
Code
Module Position : user2
Module Suffix : NOT USED
HTML Code
<p>Lorem ipsum dolor sit amet consectetuer Vestibulum Vestibulum interdum Curabitur condimentum. Justo nunc magnis justo pretium nunc mauris sodales pede urna nunc.</p>Back-end Settings for this module as in Demo
Front-end appearance
3. User3
CodeModule Position : user3 Module Suffix : NOT USEDHTML Code
<p>Lorem ipsum dolor sit amet consectetuer Vestibulum Vestibulum interdum Curabitur condimentum. Justo nunc magnis justo pretium nunc mauris sodales pede urna nunc.</p>Back-end Settings for this module as in Demo
Front-end appearance
4. User4
CodeModule Position : user4 Module Suffix : NOT USEDHTML Code
<p>Lorem ipsum dolor sit amet consectetuer Vestibulum Vestibulum interdum Curabitur condimentum. Justo nunc magnis justo pretium nunc mauris sodales pede urna nunc.</p>Back-end Settings for this module as in Demo
Front-end appearance
5. User6
CodeModule Position : user6 Module Suffix : NOT USEDHTML Code
<p>Lorem ipsum dolor sit amet consectetuer vitae Donec leo quis volutpat. Sit interdum nec nibh nibh nunc Cum eu sit porttitor cursus.</p>Back-end Settings for this module as in Demo
Front-end appearance
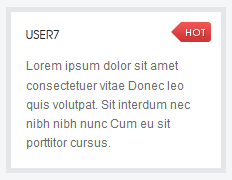
6. User7
CodeModule Position : user7 Module Suffix : badge-hotHTML Code
<p>Lorem ipsum dolor sit amet consectetuer vitae Donec leo quis volutpat. Sit interdum nec nibh nibh nunc Cum eu sit porttitor cursus.</p>Back-end Settings for this module as in Demo
Front-end appearance
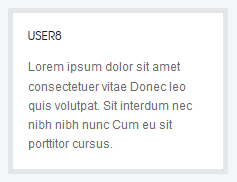
7. User8
CodeModule Position : user8 Module Suffix : NOT USEDHTML Code
<p>Lorem ipsum dolor sit amet consectetuer vitae Donec leo quis volutpat. Sit interdum nec nibh nibh nunc Cum eu sit porttitor cursus.</p>Back-end Settings for this module as in Demo
Front-end appearance
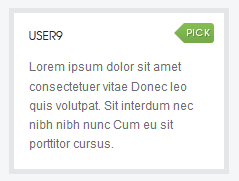
8. User9
CodeModule Position : user9 Module Suffix : badge-pickHTML Code
<p>Lorem ipsum dolor sit amet consectetuer vitae Donec leo quis volutpat. Sit interdum nec nibh nibh nunc Cum eu sit porttitor cursus.</p>Back-end Settings for this module as in Demo
Front-end appearance
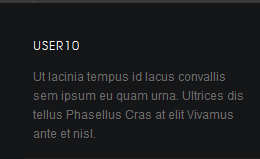
9. User10
CodeModule Position : user10 Module Suffix : NOT USEDHTML Code
<p>Lorem ipsum dolor sit amet consectetuer vitae Donec leo quis volutpat. Sit interdum nec nibh nibh nunc Cum eu sit porttitor cursus.</p>Back-end Settings for this module as in Demo
Front-end appearance
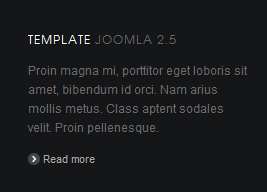
10. Template Joomla 2.5
CodeModule Position : user10 Module Suffix : NOT USEDHTML Code
<p>Proin magna mi, porttitor eget loboris sit amet, bibendum id orci. Nam arius mollis metus. Class aptent sodales velit. Proin pellenesque.</p>Back-end Settings for this module as in Demo
<p class="readmore"><a href="#">Read more</a></p>
Front-end appearance
11. Get in touch
CodeModule Position : user10 Module Suffix : NOT USEDHTML Code
<p>Give us a call at<strong class="extra">+1 801 111 6543</strong></p>Back-end Settings for this module as in Demo
<p>Email us at <strong class="extra">hello @orisite.com</strong></p>
Front-end appearance

12. User11
CodeModule Position : user11 Module Suffix : NOT USEDeHTML Code
<p>Ut lacinia tempus id lacus convallis sem ipsum eu quam urna. Ultrices dis tellus Phasellus Cras at elit Vivamus ante et nisl.</p>Back-end Settings for this module as in Demo
Front-end appearance

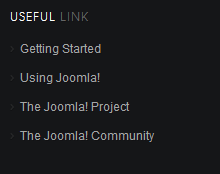
13. Useful Link
CodeModule Position : user11 Module Suffix : NOT USEDBack-end Settings for this module as in Demo F
Front-end appearance
14. Template Features
CodeModule Position : user11 Module Suffix : last-childBack-end Settings for this module as in Demo
Front-end appearance

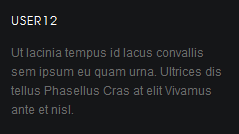
15. User12
CodeModule Position : user12 Module Suffix : last-childHTML Code
<p>Ut lacinia tempus id lacus convallis sem ipsum eu quam urna. Ultrices dis tellus Phasellus Cras at elit Vivamus ante et nisl.</p>Back-end Settings for this module as in Demo
Front-end appearance
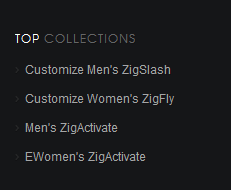
16. Top Collections
Code
Module Position : user12
Module Suffix : last-child
HTML Code
<ul>Back-end Settings for this module as in Demo
<li><a href="#">Customize Men's ZigSlash</a></li>
<li><a href="#">Customize Women's ZigFly</a></li>
<li><a href="#">Men's ZigActivate</a></li>
<li><a href="#">EWomen's ZigActivate</a></li>
</ul>
Front-end appearance
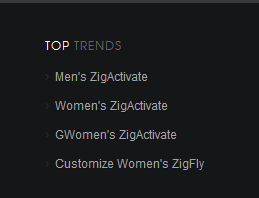
17. Top Trend
Code
Module Position : user12
Module Suffix : NOT USED
HTML Code
<ul>Back-end Settings for this module as in Demo
<li><a href="#">Men's ZigActivate</a></li>
<li><a href="#">Women's ZigActivate</a></li>
<li><a href="#">GWomen's ZigActivate</a></li>
<li><a href="#">Customize Women's ZigFly</a></li>
</ul>
Front-end appearance
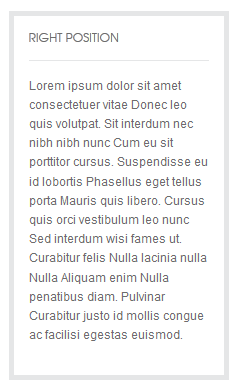
18. Right Position
Code
Module Position : right
Module Suffix : NOT USED
HTML Code
<p>Lorem ipsum dolor sit amet consectetuer vitae Donec leo quis volutpat. Sit interdum nec nibh nibh nunc Cum eu sit porttitor cursus. Suspendisse eu id lobortis Phasellus eget tellus porta Mauris quis libero. Cursus quis orci vestibulum leo nunc Sed interdum wisi fames ut. Curabitur felis Nulla lacinia nulla Nulla Aliquam enim Nulla penatibus diam. Pulvinar Curabitur justo id mollis congue ac facilisi egestas euismod.</p>Back-end Settings for this module as in Demo
Front-end appearance
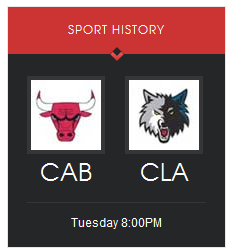
19. Sport History
Code
Module Position : inset2
Module Suffix : highlight-title
HTML Code
<div class="sport-history clearfix">Back-end Settings for this module as in Demo
<div class="sport-team">
<div class="sport-team-avatar"><img src="/images/demo/stories/avatar-cab.jpg" border="0" alt="" /></div>
<div class="sport-team-name">CAB</div>
</div>
<div class="sport-team">
<div class="sport-team-avatar"><img src="/images/demo/stories/avatar-cla.jpg" border="0" alt="" /></div>
<div class="sport-team-name">CLA</div>
</div>
</div>
<p class="mission-time">Tuesday 8:00PM</p>
Front-end appearance
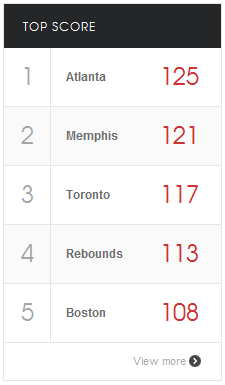
20. Top score
Code
Module Position : inset2
Module Suffix : dark-title no-padding
HTML Code
<table class="topscore-list">Back-end Settings for this module as in Demo
<tbody>
<tr class="first odd">
<td class="first">1</td>
<td>Atlanta</td>
<td class="last">125</td>
</tr>
<tr class="even">
<td class="first">2</td>
<td>Memphis</td>
<td class="last">121</td>
</tr>
<tr class="odd">
<td class="first">3</td>
<td>Toronto</td>
<td class="last">117</td>
</tr>
<tr class="even">
<td class="first">4</td>
<td>Rebounds</td>
<td class="last">113</td>
</tr>
<tr class="last odd">
<td class="first">5</td>
<td>Boston</td>
<td class="last">108</td>
</tr>
</tbody>
</table>
<p class="viewmore"><a href="#">View more</a></p>
Front-end appearance
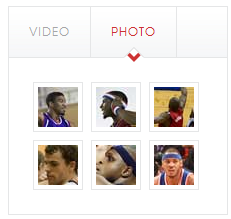
21. Photo
Code
Module Position : ja-tabs1
Module Suffix : NOT USED
HTML Code
<div class="img-photo clearfix"><span class="highslide-img"> {japopup type="image" title="Sample Images" content="images/demo/gallery/gl-1.jpg" width="594" height="386"} <img src="/images/demo/gallery/thumb-1.jpg" border="0" alt="Sample Image" /> {/japopup} </span> <span class="highslide-img"> {japopup type="image" title="Sample Images" content="images/demo/gallery/gl-2.jpg" width="594" height="386"} <img src="/images/demo/gallery/thumb-2.jpg" border="0" alt="Sample Images" /> {/japopup} </span> <span class="highslide-img"> {japopup type="image" title="Sample Images" content="images/demo/gallery/gl-3.jpg" width="594" height="386"} <img src="/images/demo/gallery/thumb-3.jpg" border="0" alt="Sample Images" /> {/japopup} </span> <span class="highslide-img"> {japopup type="image" title="Sample Images" content="images/demo/gallery/gl-4.jpg" width="594" height="386"} <img src="/images/demo/gallery/thumb-4.jpg" border="0" alt="Sample Images" /> {/japopup} </span> <span class="highslide-img"> {japopup type="image" title="Sample Images" content="images/demo/gallery/gl-5.jpg" width="594" height="386"} <img src="/images/demo/gallery/thumb-5.jpg" border="0" alt="Sample Images" /> {/japopup} </span> <span class="highslide-img"> {japopup type="image" title="Sample Images" content="images/demo/gallery/gl-6.jpg" width="594" height="386"} <img src="/images/demo/gallery/thumb-6.jpg" border="0" alt="Sample Images" /> {/japopup} </span></div>
Back-end Settings for this module as in Demo
Front-end appearance
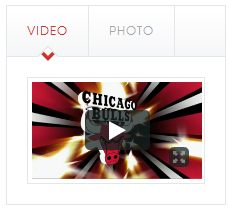
22. Video
Code
Module Position : ja-tabs1
Module Suffix : NOT USED
HTML Code
<div class="vimeo"> </div>Back-end Settings for this module as in Demo
Front-end appearance
23. Module Adv
Code
Module Position : content-mass-top
Module Suffix : no-border no-padding
HTML Code
<div class="adv"><img src="/images/demo/stories/banner.jpg" border="0" alt="Sample photo" title="Sample photo" align="middle" /></div>Back-end Settings for this module as in Demo
Front-end appearance

24. Content Mass Top
Code
Module Position : content-mass-top
Module Suffix : NOT USED
HTML Code
<p>Lorem ipsum dolor sit amet consectetuer vitae Donec leo quis volutpat. Sit interdum nec nibh nibh nunc Cum eu sit porttitor cursus.</p>Back-end Settings for this module as in Demo
Front-end appearance

25. Content Mass Bottom
Code
Module Position : content-mass-bottom
Module Suffix : no-border no-padding
HTML Code
<p>Ut lacinia tempus id lacus convallis sem ipsum eu quam urna. Ultrices dis tellus Phasellus Cras at elit Vivamus ante et nisl. Cursus augue malesuada molestie cursus dolor malesuada Quisque quis cursus ac. Tincidunt nibh pellentesque Vestibulum enim Cum ac interdum risus semper vitae. Volutpat hendrerit Mauris at porta sit urna cursus faucibus pede sit. Orci Vestibulum quis.</p>Back-end Settings for this module as in Demo
Front-end appearance
26. Inset 2 Positon
Code
Module Position : inset2
Module Suffix : NOT USED
HTML Code
<p>Lorem ipsum dolor sit amet consectetuer vitae Donec leo quis volutpat. Sit interdum nec nibh nibh nunc Cum eu sit porttitor cursus. Suspendisse eu id lobortis Phasellus eget tellus porta Mauris quis libero. Cursus quis orci vestibulum leo nunc Sed interdum wisi fames ut. Curabitur felis Nulla lacinia nulla Nulla Aliquam enim Nulla penatibus diam. Pulvinar Curabitur justo id mollis congue ac facilisi egestas euismod.</p>Back-end Settings for this module as in Demo
Front-end appearance
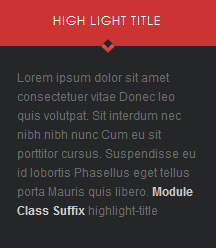
27. High Light Title
Code
Module Position : right
Module Suffix : highlight-title
HTML Code
<p>Lorem ipsum dolor sit amet consectetuer vitae Donec leo quis volutpat. Sit interdum nec nibh nibh nunc Cum eu sit porttitor cursus. Suspendisse eu id lobortis Phasellus eget tellus porta Mauris quis libero. <strong style="color: [URL=http://www.joomlart.com/forums/usertag.php?do=list&action=hash&hash=ccc]#ccc[/URL]">Module Class Suffix</strong> highlight-title</p>Back-end Settings for this module as in Demo
Front-end appearance
28. JA Tabs Module
Code
Module Position : right
Module Suffix : no-padding
HTML Code
<div>{jatabs type="modules" module="ja-tabs1" position="top" mouseType="click" animType="animFade"} {/jatabs}</div>
Back-end Settings for this module as in Demo
29. JA Tabs
Code
Module Position : tabs
Module Suffix : NOT USED
HTML Code
<div>{jatabs type="modules" module="ja-tabs" position="top" mouseType="click" animType="animFade"} {/jatabs}</div>
Back-end Settings for this module as in Demo
30. Top Menu Module
To display as Demo site, please follow step by step as below:
Step 1: Create all top menu items
Go to Administrator >> Menus >> Top >> Add New Menu Item Type
Back-end Settings: Top Menu Items

- Item 1 - Contact Us - Menu Back-end Settings
- Item 2 - Web link - Menu Back-end Settings
- Item 3 - NewsFeeds - Menu Back-end Settings
Step 2: Create new Menu module
Go to Administrator >> Module Manager >> Add new Menu Module
Code
Module Position : topmenu
Module Suffix : NOT USED
Back-end Settings for this module as in Demo
Front-end appearance

31. Search Top Module
Code
Module Position : searchtop
Module Suffix : NOT USED
Back-end Settings for this module as in Demo
Front-end appearance

32. Main Menu module
Code
Module Position : user14
Module Suffix : _menu
Back-end Settings for this module as in Demo
Front-end appearance

33. Footer Module
Code
Module Position : footer
Module Suffix : NOT USED
Back-end Settings for this module as in Demo
Front-end appearance

Extensions Configuration
I. K2 Component
1. Install
If you are new to this Joomla component, please read this guide.2. Configure K2 component
2.1 Global Configuration:
Click Parameter button on the right Back-end settings2.2 Category Configuration
As you can see on our Demo, each parent category uses different template: Orisite Blog uses Orisite_blog template while All Categories use Orisite style.
To build your website like our demo, navigate to Administrator >> Component >> K2 >> Categories
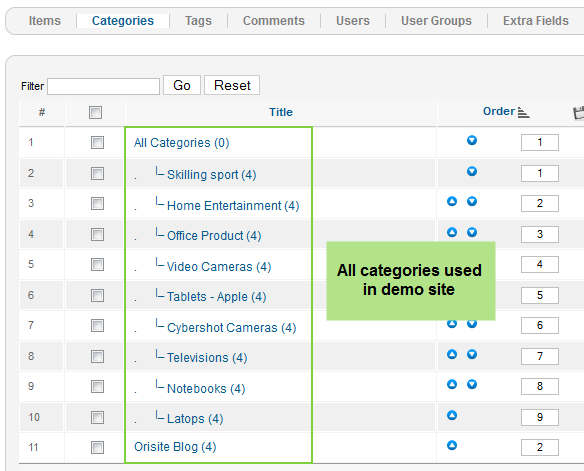
All Categories
3. Configurations for K2 Modules as on our Demo
This instruction is a reference for developers using manual installation, a guide on how to setup K2 Component like on the demo website and the quick-start package.
Please refer to the official documentation on how to install and setup K2.
There are 5 modules of K2 component being used in JA Orisite.
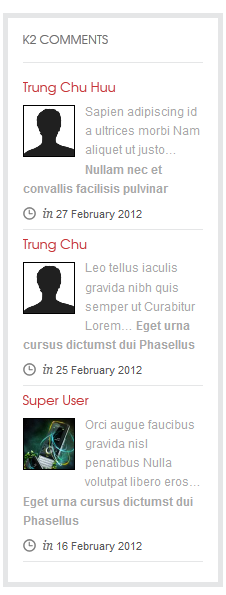
3.1 K2 Comment Module
Code:Module Position : right Module Suffix : NOT USEDBack-end Settings Front-end Appearance.
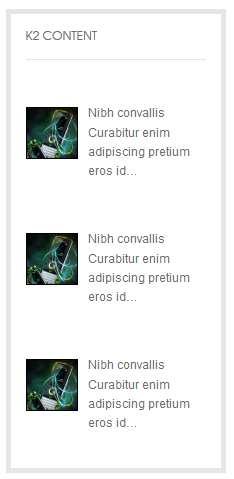
3.2 K2 Content Module
Code:Module Position : right Module Suffix : NOT USEDBack-end Settings Front-end Appearance.
3.3 K2 Tools Module
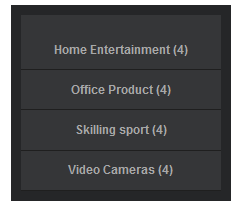
3.3.1 K2 Categories ( list )
Code:Module Position : right Module Suffix : _menuBack-end Settings Front-end Appearance.
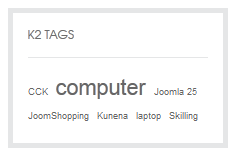
3.3.2 k2 Tags
Code:Module Position : right Module Suffix : NOT USEDBack-end Settings Front-end Appearance.
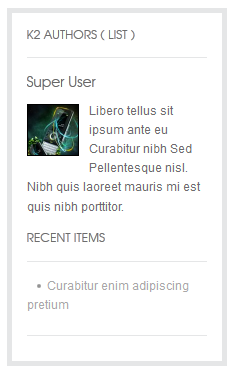
3.4 JA K2 Author (List) Module
Code:Module Position : right Module Suffix : NOT USEDDBack-end Settings Front-end Appearance.
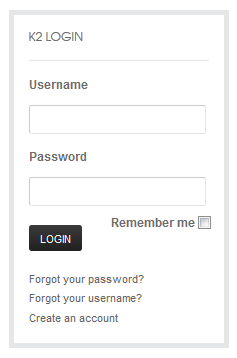
3.5 JA K2 Login Module
Code:Module Position : right Module Suffix : NOT USEDBack-end Settings Front-end Appearance.
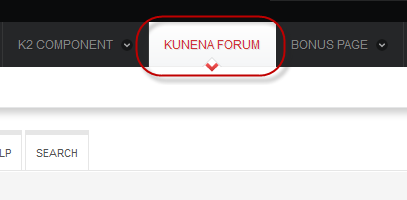
II. Kunena Forum
In the Demo site, Kunena Forum page uses JA_Orisite template as the default style.
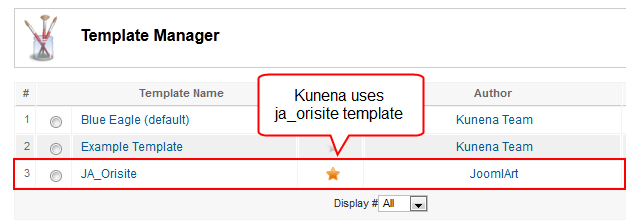
Kurena Forum page in Demo site
To set up for the forum as in Demo site, navigate to Administrator >> Component >> Kunena Forum >> Forum Configuration
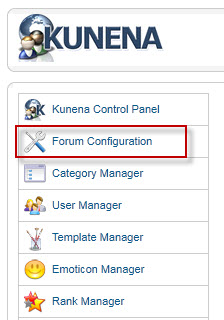
Then configure for all items as our screenshots shown below

- Back-end Settings for General
- Back-end Settings for Frontend
- Back-end Settings for Users
- Back-end Settings for Security
- Back-end Settings for Avatar
- Back-end Settings for Uploads
- Back-end Settings for RSS
- Back-end Settings for Plug-ins
- Back-end Settings for Ranking
- Back-end Settings for BBCode
- Back-end Settings for Integration
III. Virtual Mart
1. Install
2. ConfigureVirtuemart component
2.1 Global Configuration:
To open Configuration page.
Please navigate to Administrator >> Component >> Virtuemart>>Configuration
Back-end setting :
Note : we still keep default config with anothor tabs
2.2 Category & Product Configuration
To build your website like our demo, navigate to Administrator >> Component >> Virtuemart>> Product Category and create Category and Product normally.
Category Configuration
Product Configuration
3. Configurations for Virtuemart Modules as on our Demo
3.1 . VirtueMart Category Module
Code:
Module Position : right
Module Suffix : NOT USED
Back-end Settings for this module as in Demo
Front-end Appearance
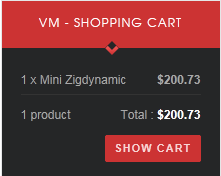
3.2 . VirtueMart Shopping Cart Module
Code:
Module Position : right
Module Suffix : highlight-title mycart
Back-end Settings for this module as in Demo
Front-end Appearance
Typography Styles - Supported in JA Orisite
JA Orisite comes with multiple typography styles for headings, content, tables, buttons, quotes, lists and so on...
You can view the Typography Pages in the Demo site.
And here is HTML code: Typography_Page_HTML_Code.txt
You can use the above HTML code for making similar page in your site and refer to the codes for using Typography.
IMPORTANT : These typography styles are specific to JA Orisite template and if you use them in your content and later decide to change the template, the styles will be broken, as these styles depend upon the template based css files (typo.css). We recommend using minimum typography, if you plan to change your template in future.
Menu Configurations
JA Orisite site uses Mega Menu. Follow the guide below to create menu:
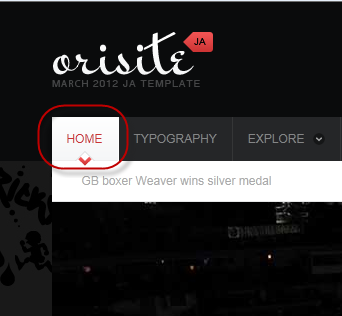
1. Home Menu
Back-end SettingsFront-end Appearance
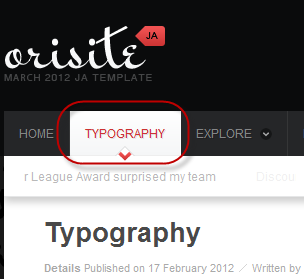
2. Typography Menu
Back-end SettingsFront-end Appearance
3. Explore Menu
Front-end Appearance
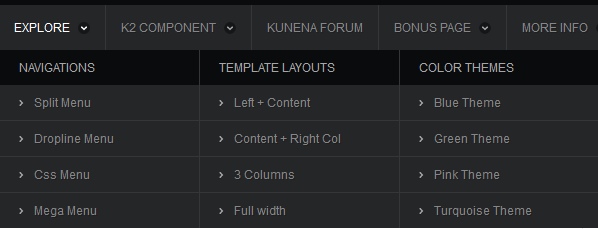
Back-end Settings
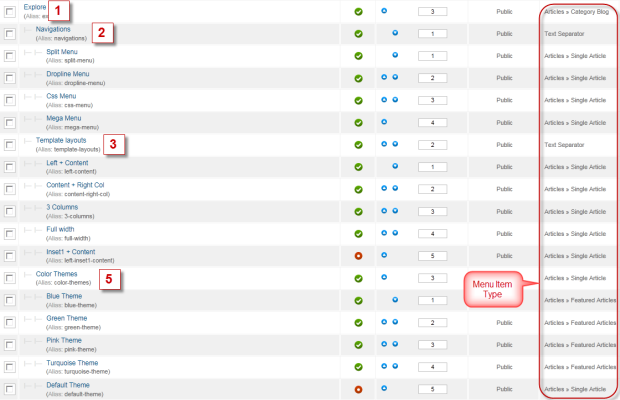
- Item 1 - Explore-Menu Back-end Settings
- Item 2 - Navigations - Menu Back-end Settings
- Item 3 - Template Layouts - Menu Back-end Settings
- Item 4 - Color Themes - Menu Back-end Settings
4. K2 Component Menu
Front-end Appearance
Back-end Settings : Main Menu Items (parent & child)
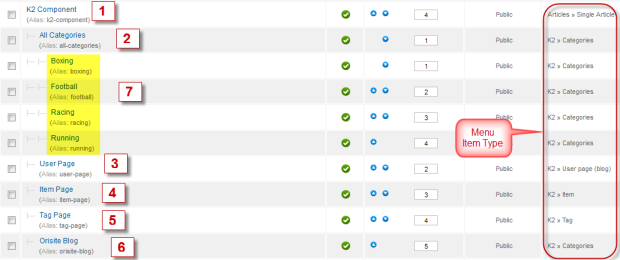
- Item 1 - K2 Component - Menu Back-end Settings
- Item 2 - All Categories - Menu Back-end Settings
- Item 3 - User Page - Menu Back-end Settings
- Item 4 - Items Page -Menu Back-end Settings
- Item 5 - Tag Page -Menu Back-end Settings
- Item 6 - Orisite Blog - Menu Back-end Settings
- Item 7 - Boxing Category -Menu Back-end Settings
Note: Other sub-menus in All Categories are also configured similar to Boxing Category menu
5. Kunena Forum Menu
Front-end Appearance
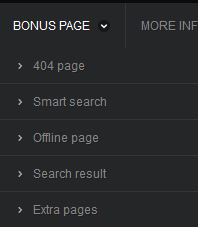
6. Bonus page Menu
Front-end Appearance
Back-end Settings : Main Menu Items (parent & child)
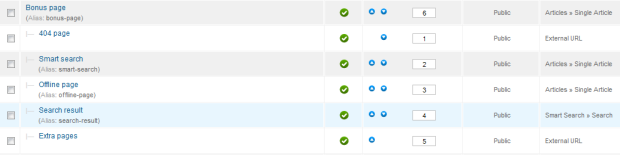
- Item 1 - Bonus Page - Menu Back-end Settings
- Item 2 - 404 Page - Menu Back-end Settings
- Item 3 - Smart Search - Menu Back-end Settings
- Item 4 - Offline page -Menu Back-end Settings
- Item 5 - Search Result - Menu Back-end Settings
- Item 6 - Extra Pages - Menu Back-end Settings
7. More Info Menu
Front-end Appearance
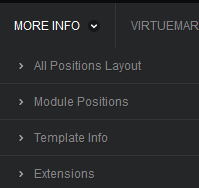
Back-end Settings : Main Menu Items (parent & child)
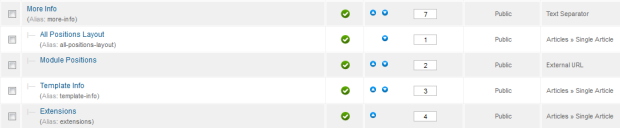
- Item 1 - More Info - Menu Back-end Settings
- Item 2 - All Positions Layout - Menu Back-end Settings
- Item 3 - Module Positions - Menu Back-end Settings
- Item 4 - Template Info - Menu Back-end Settings
- Item 5 - Extensions - Menu Back-end Settings
Note: To display Module Positions page like demo, you must go to Extensions >> Template Manager >> Click Options button >> Set Preview Module Positions as Enabled >> Save to enable preview module positions for your page.
8. Virtue Mart Menu
Front-end Appearance
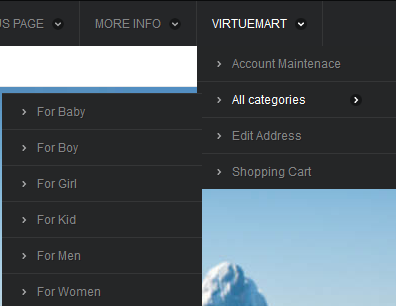
Back-end Settings : Main Menu Items (parent & child)
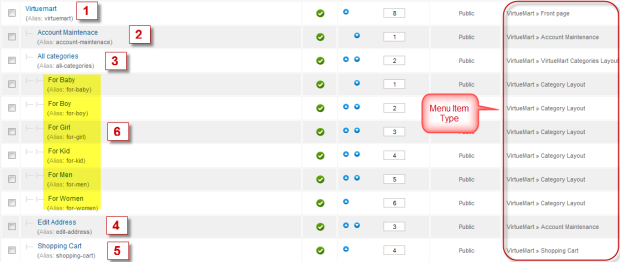
- Item 1 - Virtue Mart -Menu Back-end Settings
- Item 2 - Account Maintenace - Menu Back-end Settings
- Item 3 - All Categories - Menu Back-end Settings
- Item 4 - Edit Address - Menu Back-end Settings
- Item 5 - Shopping Cart - Menu Back-end Settings
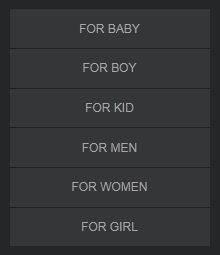
- Item 6 - For Baby -Menu Back-end Settings
Note: Others sub-menu in All Categories are also configured similar to For Baby menu.
The above user-guide should help one in replicating the Demo site settings for the template and extension on their website.
Recommended
If you are new or confused, we recommend installing Quickstart on your localhost and use it as reference for configuration. This is the best way to work with any template.
Links to all the resources are provided above, you should carefully read them to take the maximum advantage of our products.
Support :
Please raise your support queries in the support forum. We spend more time in getting the information from user in case the support guidelines are not followed.
If you have any questions regarding this userguide, please post a question in the forum. This thread is locked.