Template Installation
The section will help you with steps to install JA Admin template for your Joomla 3 site.
System requirement
JA Admin template is native with Joomla 3. Please make sure your system meets the following requirements:
Software
- Software: PHP (Magic Quotes GPC off): 5.3.1 + (5.4+ recommended)
Databases
- MySQL(InnoDB support required): 5.1+
- MSSQL 10.50.1600.1+
- PostgreSQL 8.3.18+
Web Severs
- Apache 2.x+
- Microsoft IIS 7
- Nginx 1.0 (1.1 recommended)
Browser requirement
- Firefox 4+
- IE (Internet Explorer) 8+
- Google Chrome 10+
- Opera 10+
- Safari 5+
Development Environment
During development process, Localhost is preferred. You can use the following servers on your PC to develop your site.
Windows
- WAMPSEVER
- XAMPP for Windows
Linux
- LAMP Bubdle
- XAMPP for Linux
Mac OS
- MAMP & MAMP Pro
- XAMPP for Mac OS
Installation
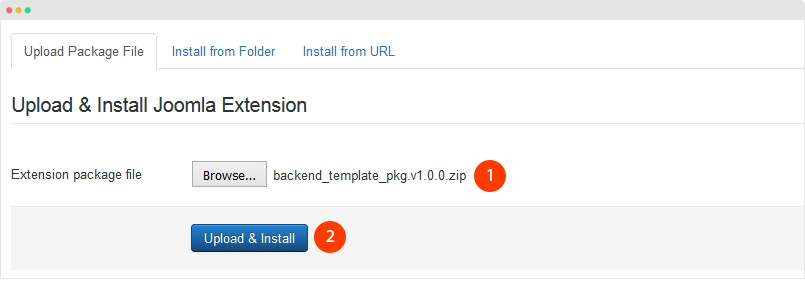
Step 1 - download the template.
Step 2 - install the package to your Joomla site: From your back-end setting panel, go to: "Extensions → Extension Manager", browse JA Admin template installation package then hit the "Upload and Install"
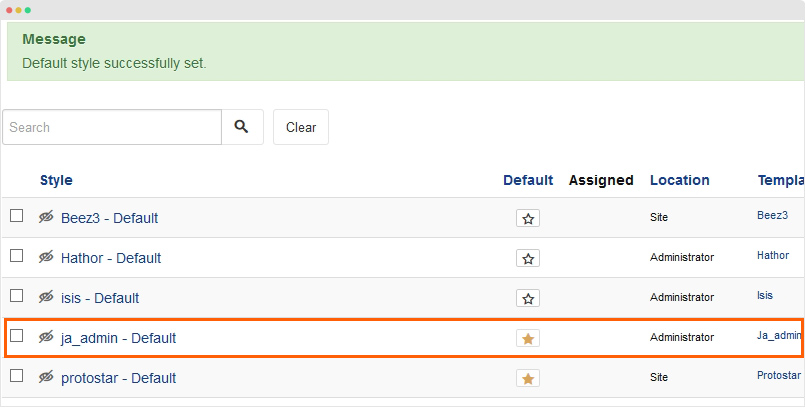
Step 3 - set default template style
Go to: "Extensions → Template Manager", set JA Admin template style as your default template style.
Configuration
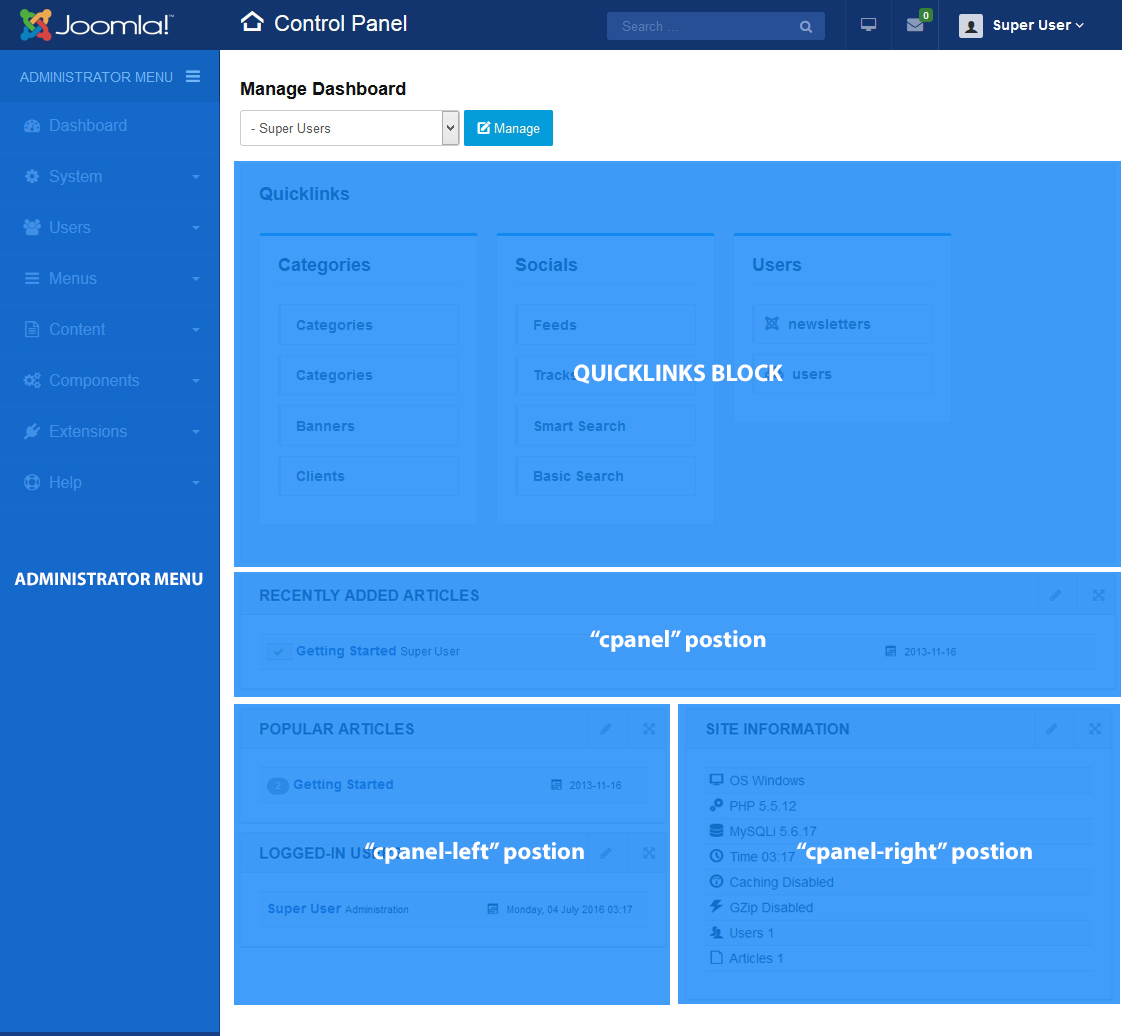
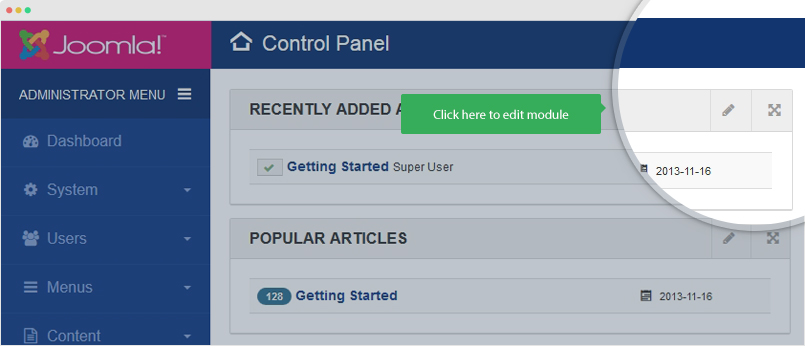
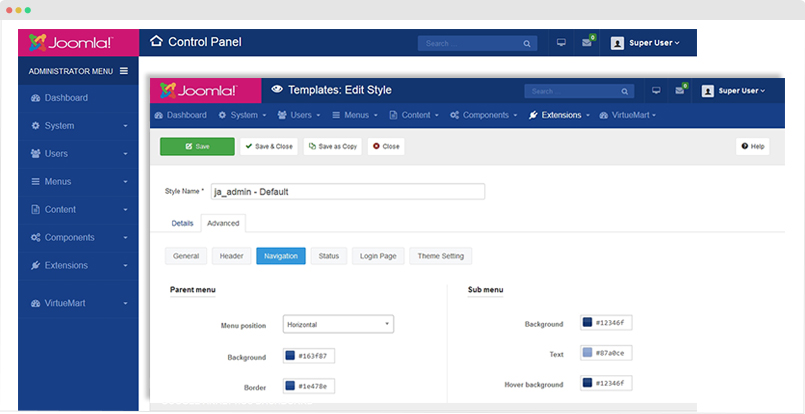
Once done, your site admin panel will look like this:
Dashboard Configuration
Only Administrator has permission to configure dashboard.
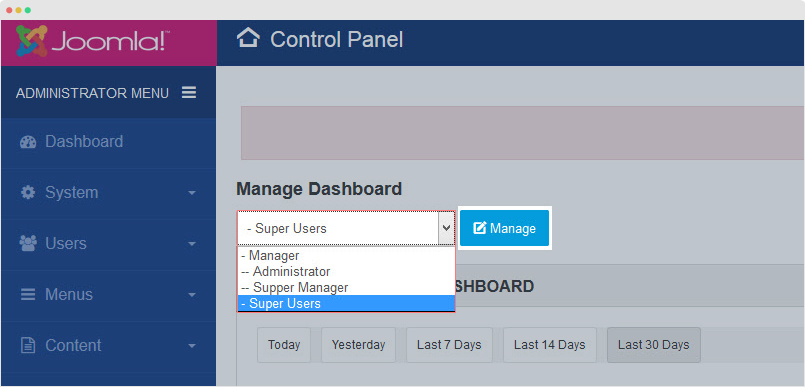
Access to your site admin panel and go to "Dashboard" page. Check out the structure of the dashboard page.
1. Build dashboard
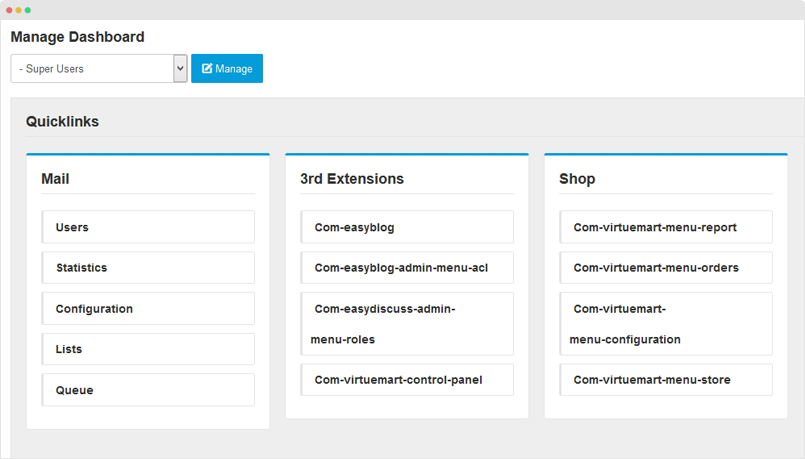
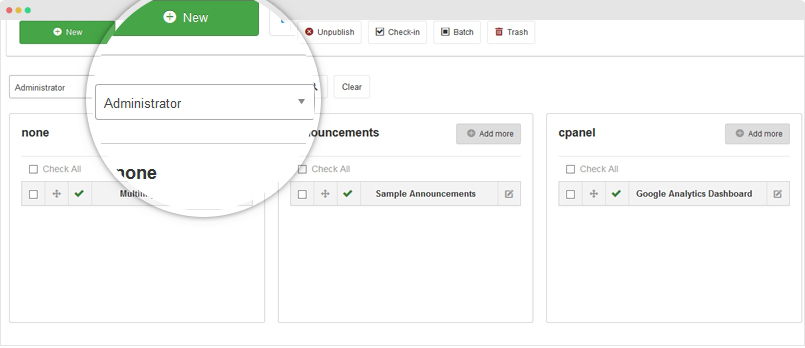
You can build multiple dashboard profiles, each usergroup is considerred as a profile and for each profile, it can have different dasboard with different enabled modules and quick links.
All dashboard profile is listed in the Manage Dashboard dropdown, select profile and hit button: "Manage".
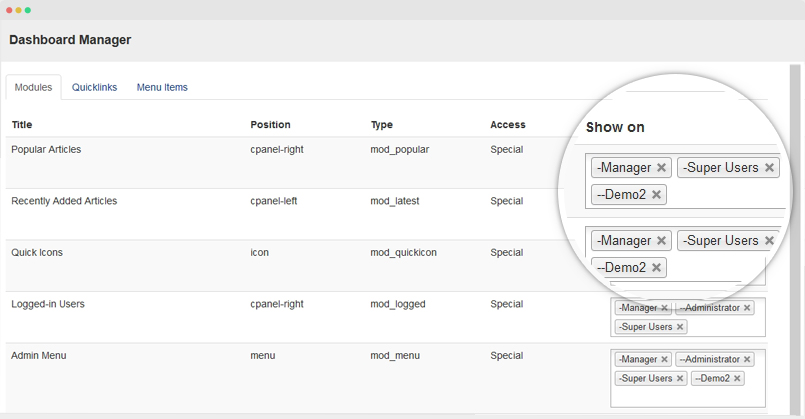
1.1 Back-end Modules
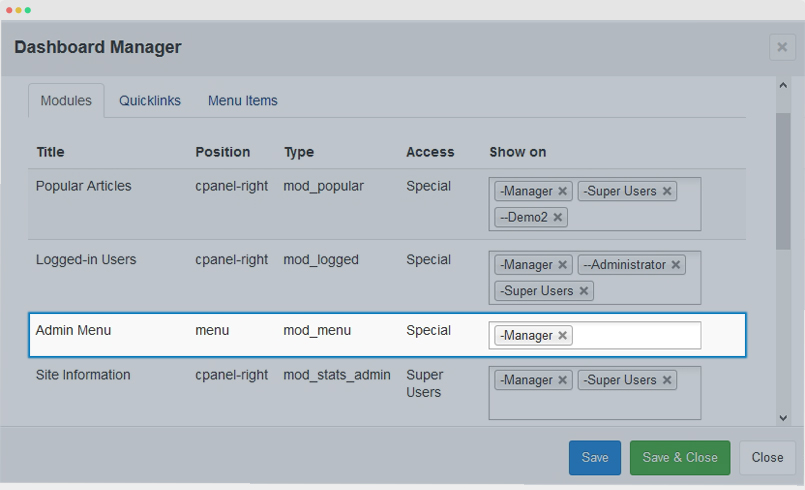
In the "Modules" configuration, you can select to show back-end modules on the dashboard of specific user group.
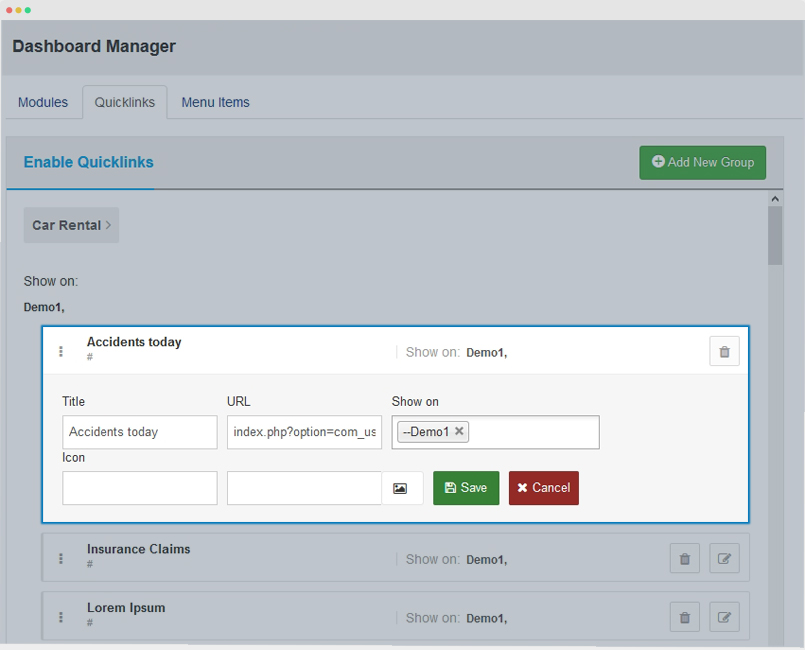
1.2 Quicklinks configuration
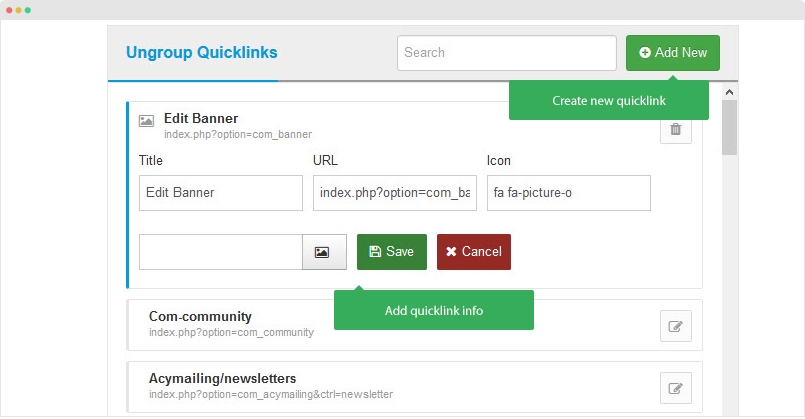
Next, open the Quicklinks tab, in the panel, you can create groups and add drag & drop to select quick links for each group.
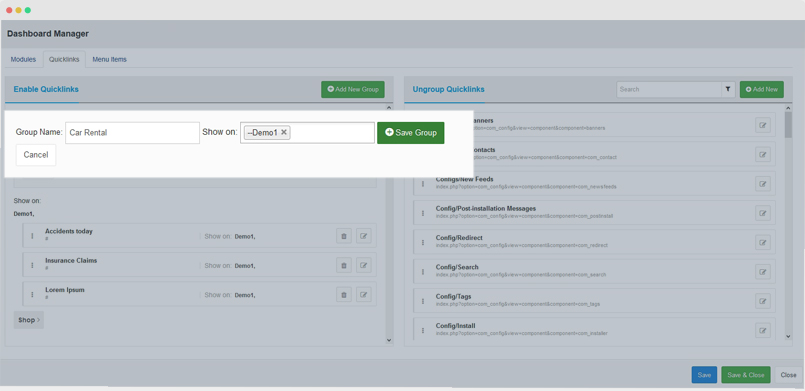
You can edit any quicklink, add icon (font awesome or image), change title and link.
By default, the system auto generate quicklinks, when you install new components, the quicklinks of the new extensions will be generated. You can also create custom quicklink. Hit the "Add New" and add info for the quicklink.
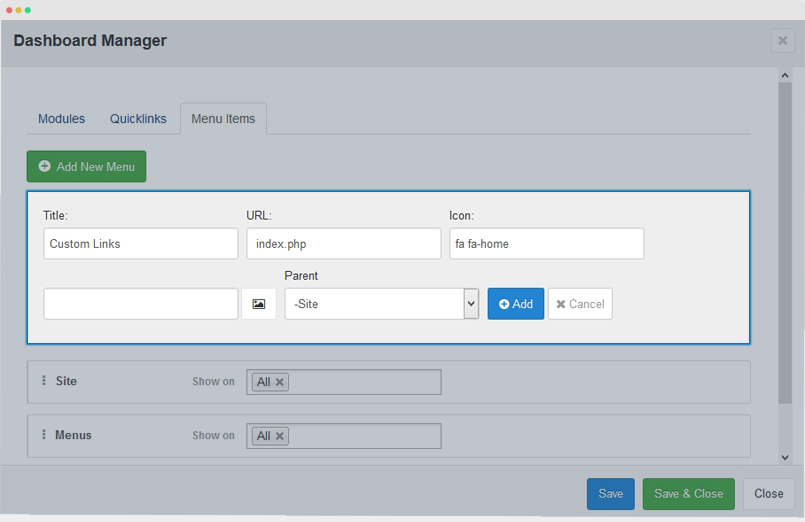
1.3 Menu items configuration
Open the Menu Items configuration panel, you can configure to show any menu item on dashboard of specific user group.
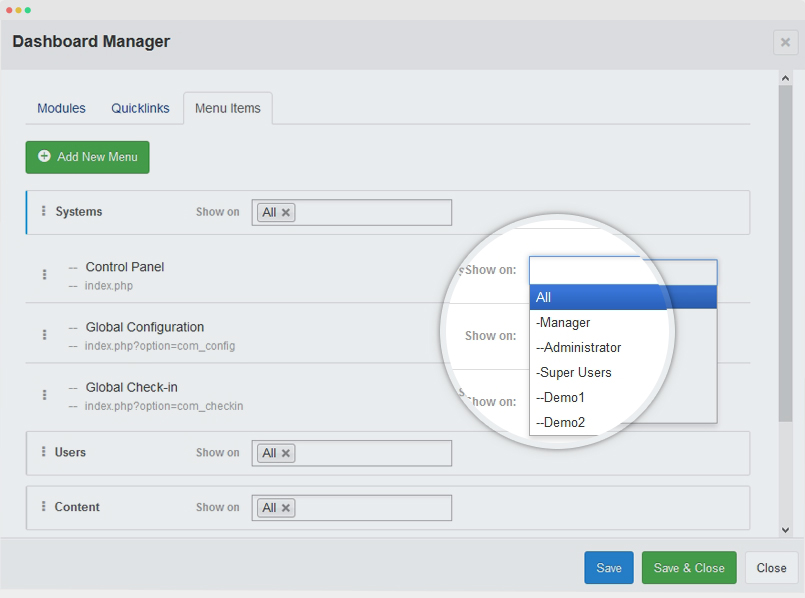
Administrator can create custom menu item, each menu item includes title, link, icon (font awesome icon or image icon) and parent menu item.
Once done, save and close the configuration panel, in the dashboard page panel, you will have a dashboard for selected profile with list of enabled modules and assigned quicklinks in groups.
2. Edit back-end modules
For the modules enabled in the dasboard profile, you can edit. Once it is enabled, the module is auto assigned to cpanel.
As mentioned, the layout includes multiple multiple positions: cpanel, cpanel-left, cpanel-right.
To view all modules in back-end, please go to: Extensions > Modules and select the "Administrator" type. In the panel, it show all modules group by module position, you can enable more modules or disable module if you want.
3. Disable Administrator Menu
In case want to disable the Administrator for a dashboard profile so when the user login, their dashboard only have enabled modules and assigned quicklinks. To do that, open profile configuration panel, find the module "Administrator Menu" and delete the user group that you don't want to show the admin menu on.
Do the same way to create dashboard for other profiles.
Theme configuration
JA Admin template includes lots of built-in functionalities to help you configure the template easier. From the back-end, go to: Extensions > Template > JA Admin > Advanced. In the pannel, you can see multiple configuration pannels.
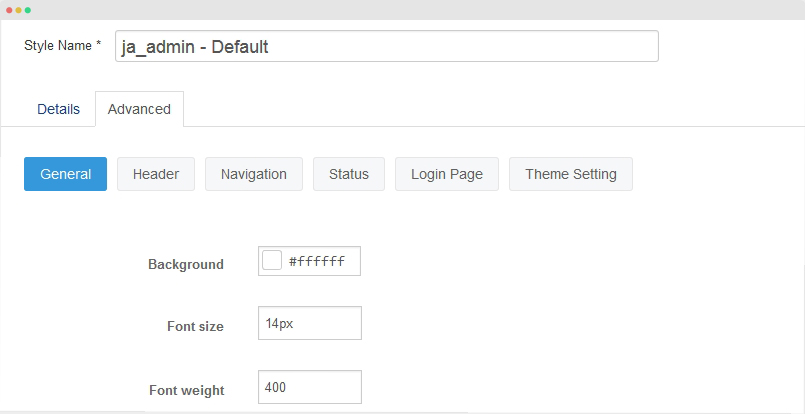
You can customize the style of the template using the predefined parameters.
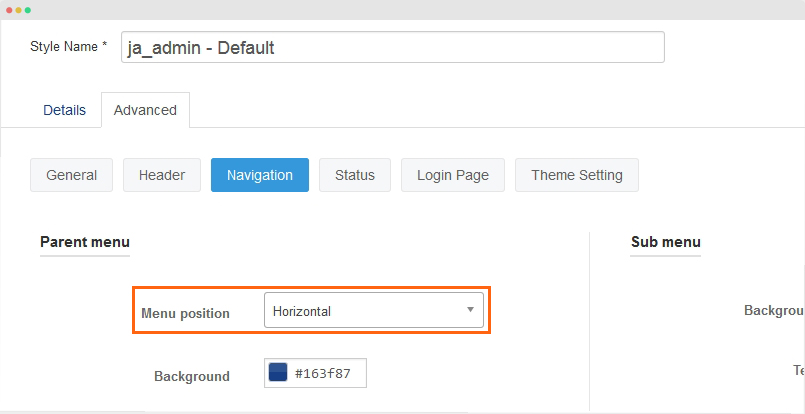
1. Configure navigation: Horizontal and Vertical
The template support 2 navigation types: Vertical and horizontal.
To configure navigation, open the "Navigation", select vertical or horizontal menu then save the changes.
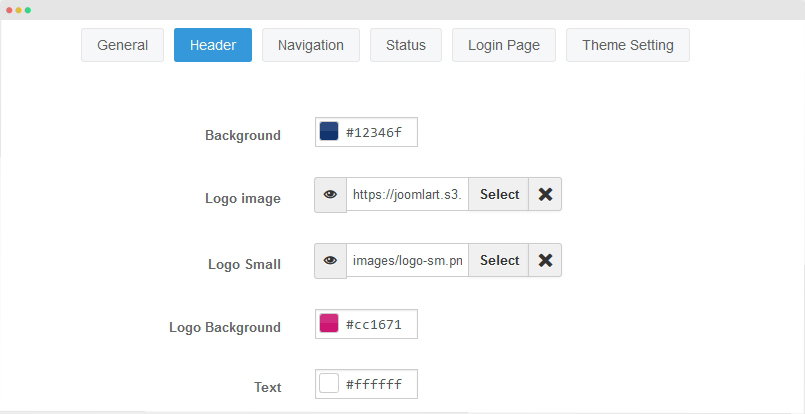
2. Header logo setting
Open the Header tab and you can browse image to display as header logo. The field "Logo Small" is for logo image in small screens: tablet and mobile.
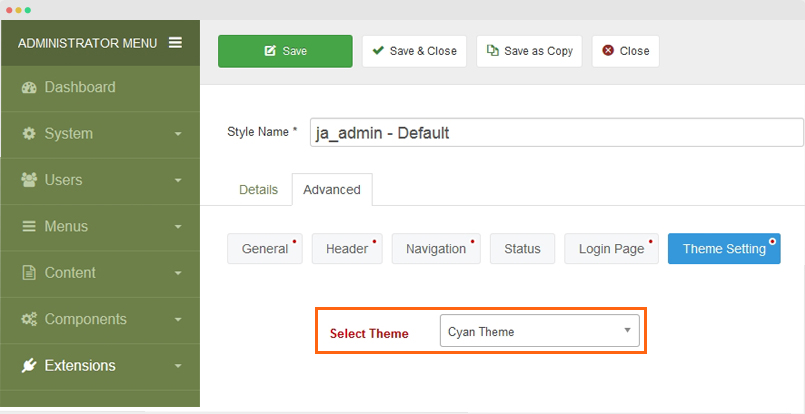
3. Theme Settings
The template support multiple theme colors, open the "Theme" configuration panel and select the theme you want then save the setting.
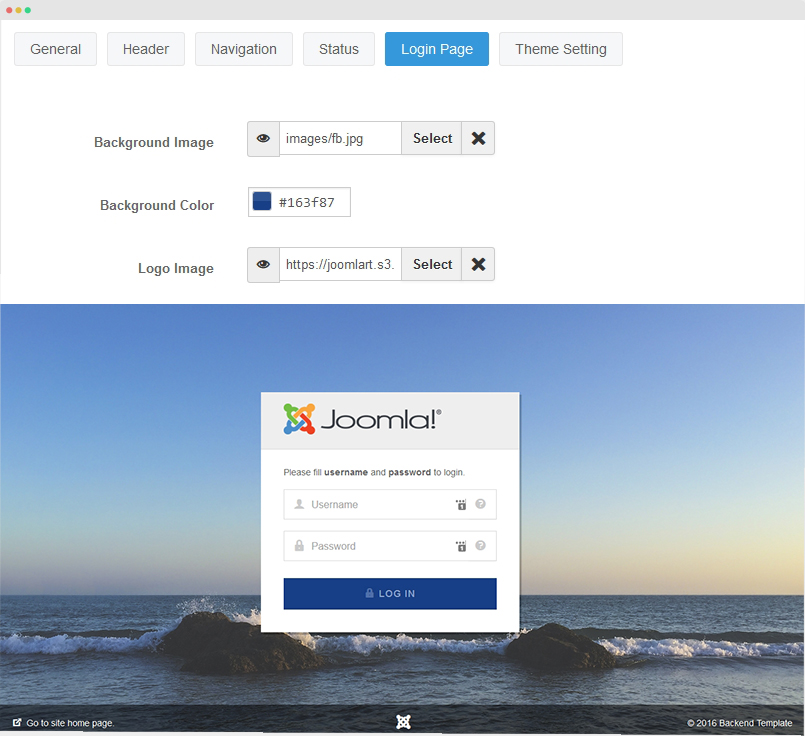
4. Login page configuration
You can change the login page background with image or color, change logo, etc. Open the "Login Page" configuration panel and do changes.
Upgrade Instruction
Take a full backup
Please always make a back-up before proceeding to any of the upgrade process. In case there is any problem, you can always restore from the back-up files.
- View the comparison between versions at JoomlArt Version Updates and replace the affected files, if you have not customized the affected files.
- Backup the file:
administrator/templates/ja_admin/admin/assets/links/quicklinks.json(this file store the quicklinks configuration you did for the admin template) - Download latest version and install to your site. The new version will override old version in your site. The configurarion you did will not be lost.
- Once the installation done, in the dashboard page, hit the "Manage" button and save so the icons on the left menu will be updated.
- Copy back the backup file:
administrator/templates/ja_admin/admin/assets/links/quicklinks.json
Documentation is a WIP. If you have any specific request or feedback as well as suggestions, feel free to drop us a line in JA Admin template forum. We'll try to cover them all.