Component Installation
Download the latest version of JA Multilingual component
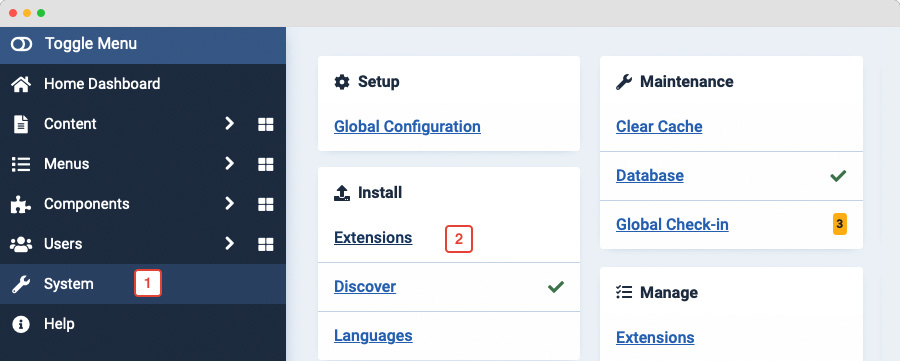
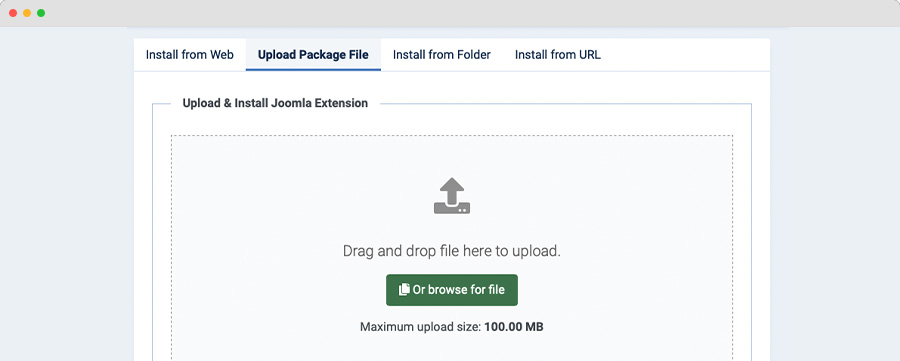
From your back-end setting panel, go to: "Extensions > Extension Manager", browse the extension installation files then hit the "Upload and Install"
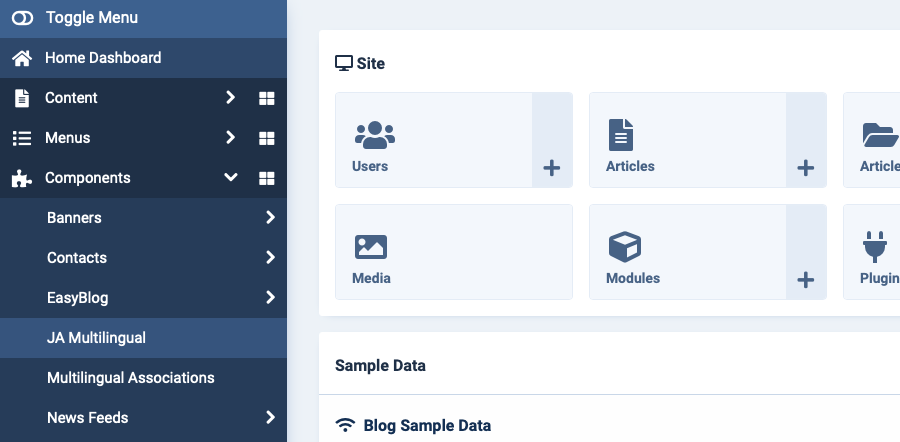
After installing the component successfully, access the configuration of the component. Login to your Joomla site (administrator), select Components > JA Multilingual.
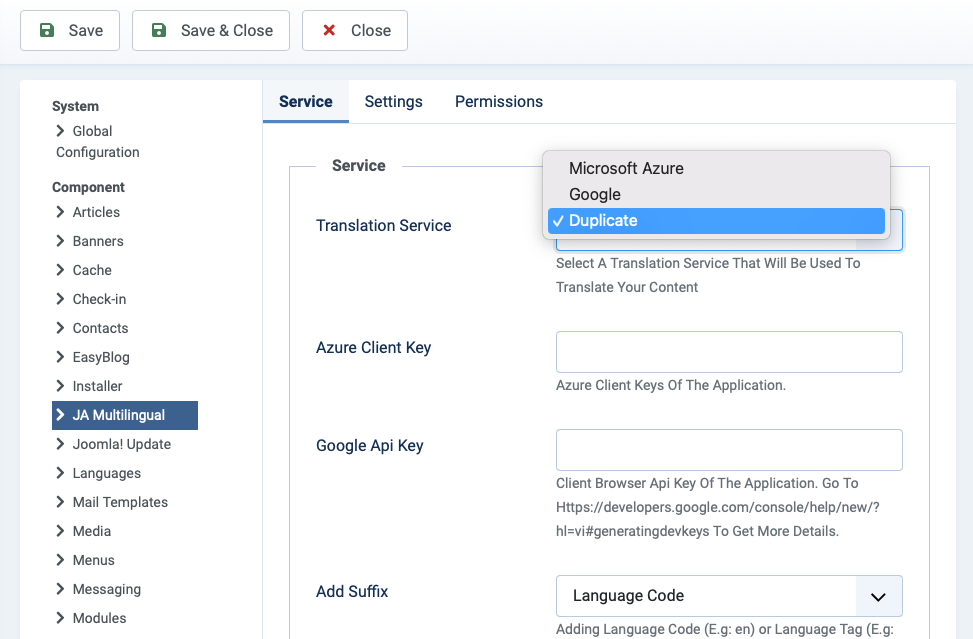
Select translation services
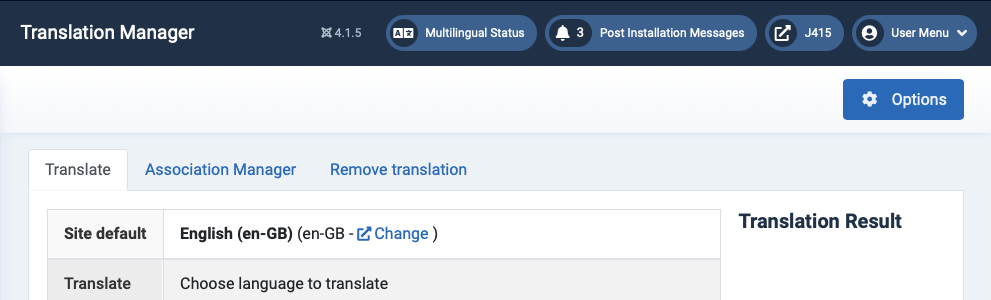
In the admin panel of the component, click on the Option button
JA Multilingual component supports 3 of the popular translation services: Microsoft Azure and Google.
When select a translation service, you need to add key for that service. We will show you steps to get the key in the 2 sections below.
Supported 3rd Extensions
The component supports the following third party extensions.
- K2 Component
- VirtueMart Component
- Mijishop Component
- Easyblog Component
Component Settings
From your site back-end, go to Components > JA Multilingual and hit the button Options.
Service settings
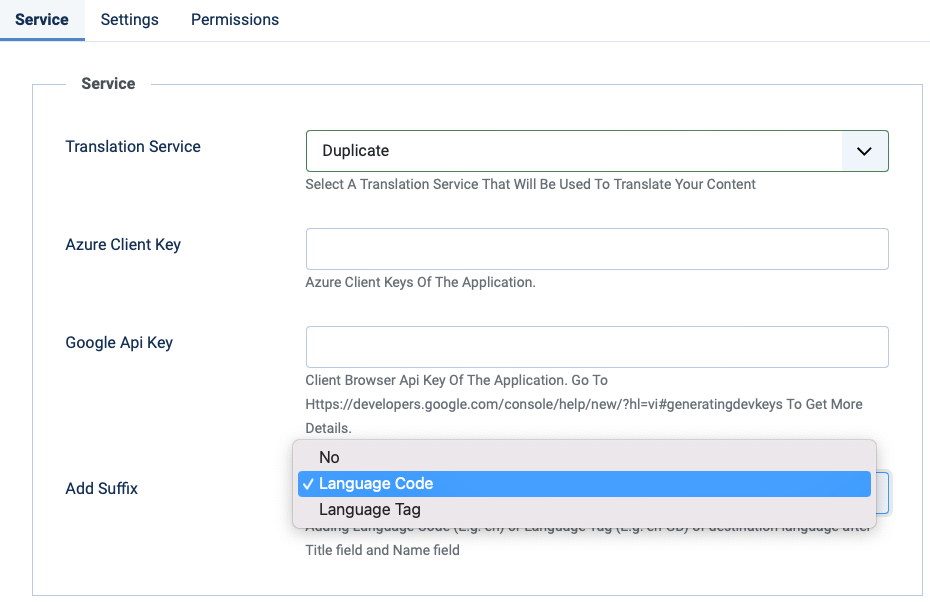
The Service setting panel allows you to configure translation service. The component supports 3 service methods:
- Duplicate - duplicate all site content and set up multilingual.
- Google - using Google translation service to translate your site content, to use this service, you will need register Google Api Key, check out the detail instruction.
- Microsft Aruze - using Translator service to translate your site content. You will get BING API, check out the detail instruction.
In case you select Duplicate translation service, you can configure to add Suffix for duplicated content, there are 3 modes available:
- No: no suffix is added.
- Add Language code: add language code for duplicated content: Ex - English(UK)
- Add Langue Tag: ex: Add en-GB for English(UK)
Settings
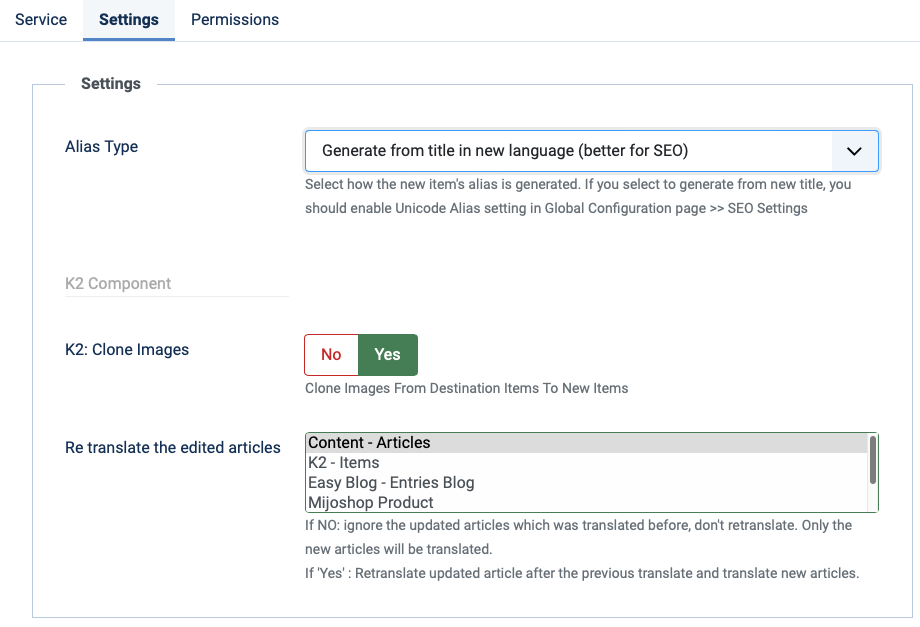
The panel includes settings for alias type, clone images and re-translate edited content. Article has recently updated will be re-translate to other language in your site.
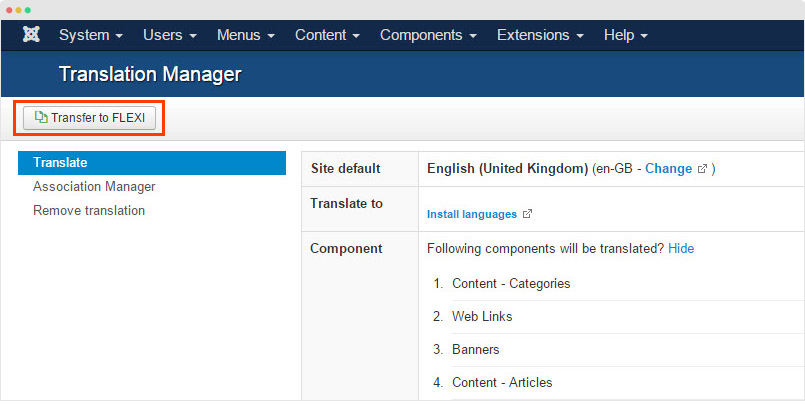
FLEXIcontent compatibility
FLEXIcontent is a popular CCK for Joomla with advanced content management system developed to replace the native article manager of Joomla! (com_content). JA Multilingual is now compatible with the extension.
The configuration is simple, after the translation is done, go to "Component > JA Multilingual" then click on the "Transfer to FLEXI".
Get Microsoft Azure Translator API
To get started, please follow these 4 steps to begin using the Microsoft Translator API
1. Sign into Azure
- Don't have an account? Sign-up for a Microsoft Azure account
- Already have an account? Sign-in
2. Subscribe to Microsoft Translator
- After you sign into Azure, go to the Cognitive Services section
- Under "API Type" select the Text or Speech API
- You can only add one Translator API subscription at a time
- In the Pricing Tier section, select the pricing tier that best fits your needs
- Each subscription has a free tier. The free tier has the same features and functionalities as the paid plans and does not have an expiration date
- Fill out the rest of the form, and select the Create button
- All subscriptions go into effect immediately
3. Authentication Key
- Retrieve your authentication key by going to the menu All Resources > click on your subscription
- The Key value is used for authentication, keep the Key value confidential. You will need this when you develop your app
4. Learn, Test and Get Support
Get Google API
Step 1: Create a new project
Create a new project in Google Cloud Console
Login with your google account, follow this link https://cloud.google.com/console#/project, to create new project.

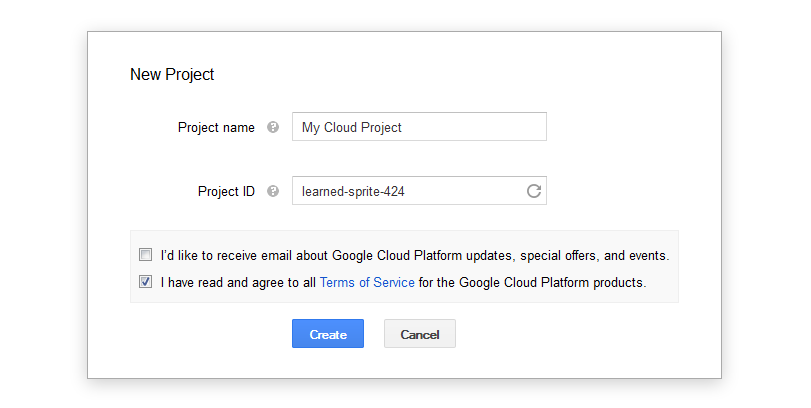
Then you have to verify by phone. Once done, new project is created.
Step 2: Enable Translate API
Go to project, on the left column APIs & auth > APIs > Translate API then enable it.
Step 3: Register App and new API key
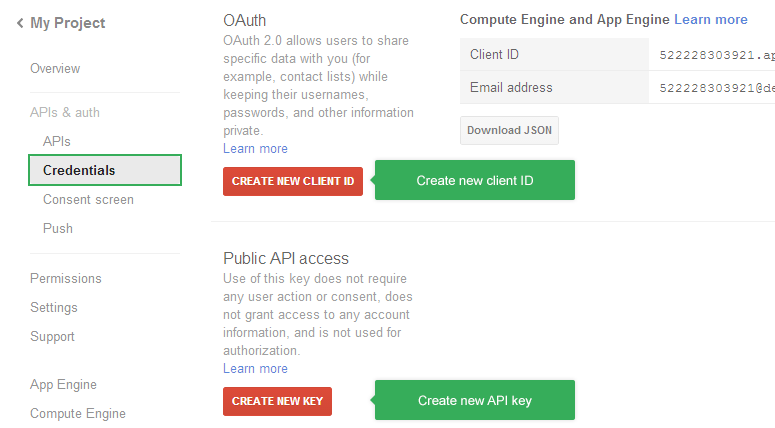
Go to project, on the left column APIs & auth >> Credentials
Create new Client ID
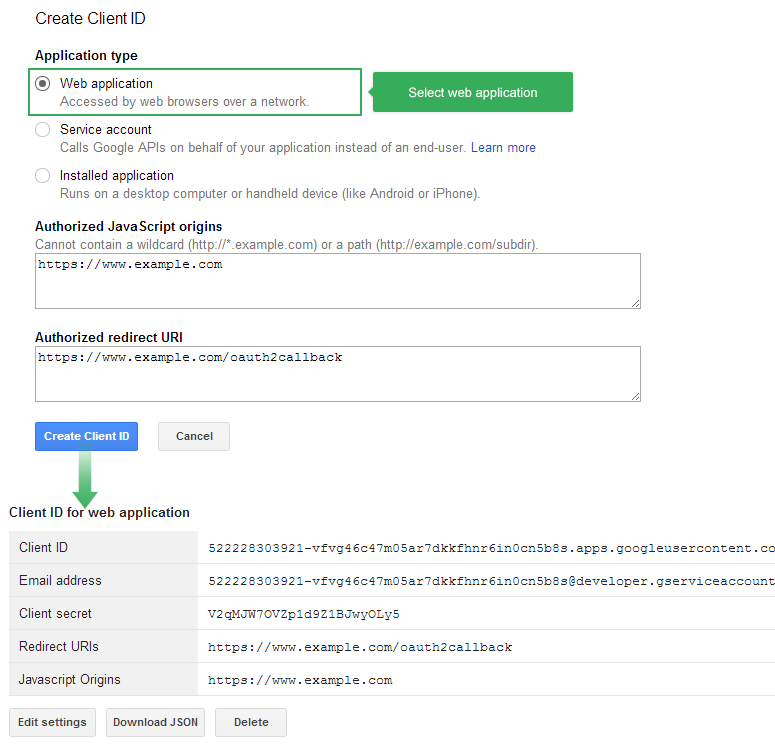
Click New client ID to create new client ID, select Web Application flatform
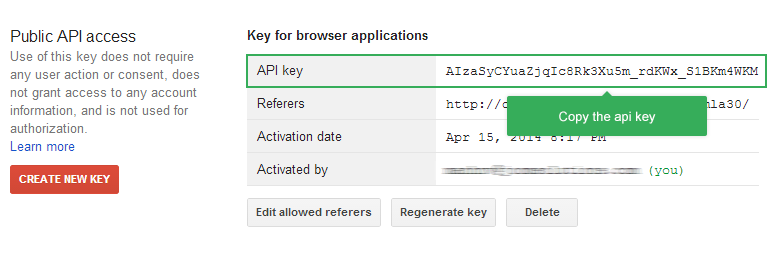
Create new API key
After register App, go ahead to create new API key, click on Create new key button.
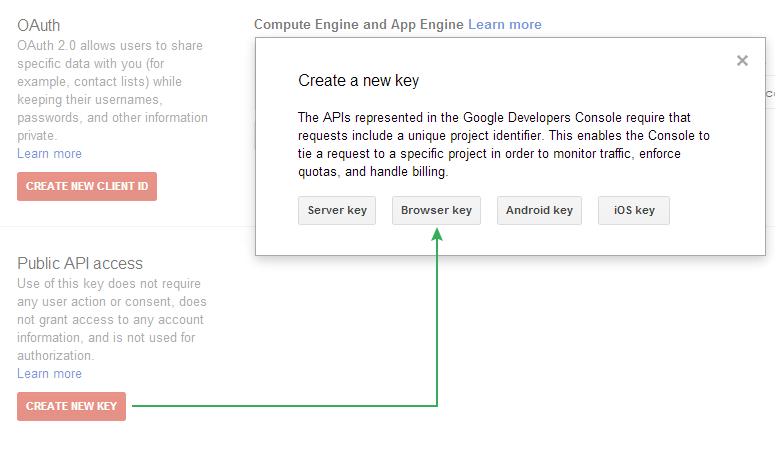
Add url then click on Create.
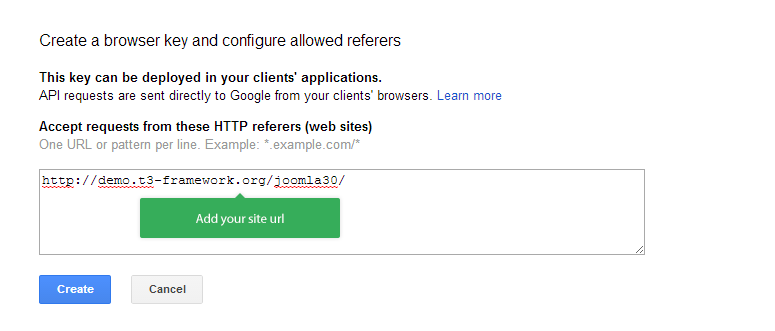
Now copy the created API key.
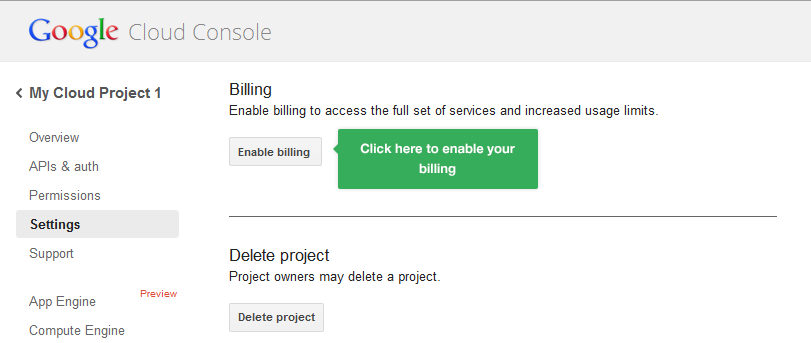
Step 4: Billing
Important
Google Translate API v2 requires billing information for all accounts before you can start using the service. See instructions below to enable billing.
1. Usage Fees:
- Translation: $20 per 1 M characters of text, where the charges are adjusted in proportion to the number of characters actually provided. For example, if you were to translate 500K characters, you would be billed $10.
- Language Detection: $20 per 1 M characters of text, where the charges are adjusted in proportion to the number of characters actually provided.
2. Usage limits:
- Google Translate API has a default limit of 2 M chars/day. You can increase this limit up to 50 M chars/day in the Cloud Console by following the instructions below.
- If you need to translate more than 50 M chars/day, please request at Google Translate API v2 Feedback
To enable billing for your project, go to project, on the left column Settings >> Enable Billing >> Fill the info and complete your transaction.
Step 5: View/change user limits
To view or change usage limits for your project, or to request an increase to your total limit, on Google Cloud Console, select a project >> APIs & auth >> Translate API.
On the API's info page, select the Quota link near the API name.
Translate languages
These are how-to steps to translate a language.
1. Install languages to be translated to
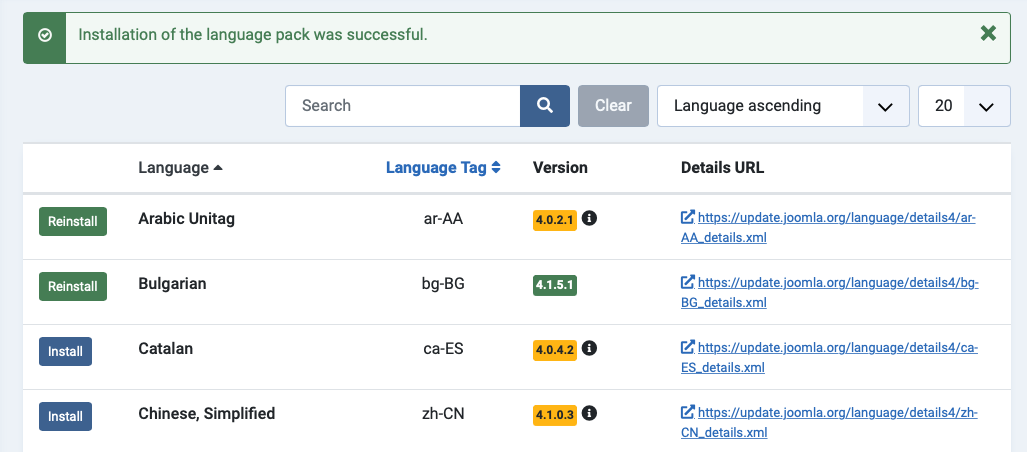
If the language you want to translate to is already installed in your site then you can skip the installation, and go ahead with the translating.
In case the language is not installed in your site, you can select to install from the JA Multilingual component admin panel by clicking on the Install languages
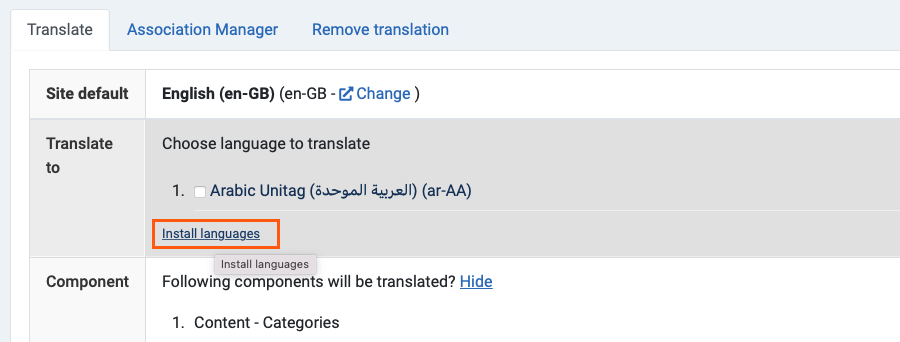
Now, install the languages you want.
2. Change default language (if necessary)
The language to translate from is your site default language. Please make sure you have the correct default language before you translate. You will have to undo all translation if you plan to change the default language later on. You can also change the language to translate from by changing your site default language.
Click on the Change button.
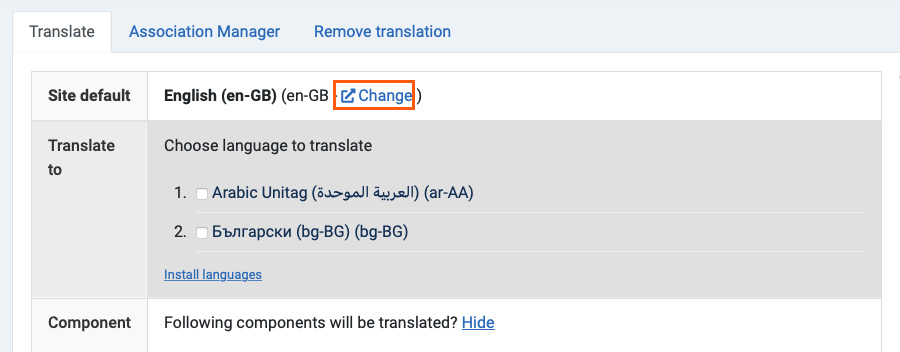
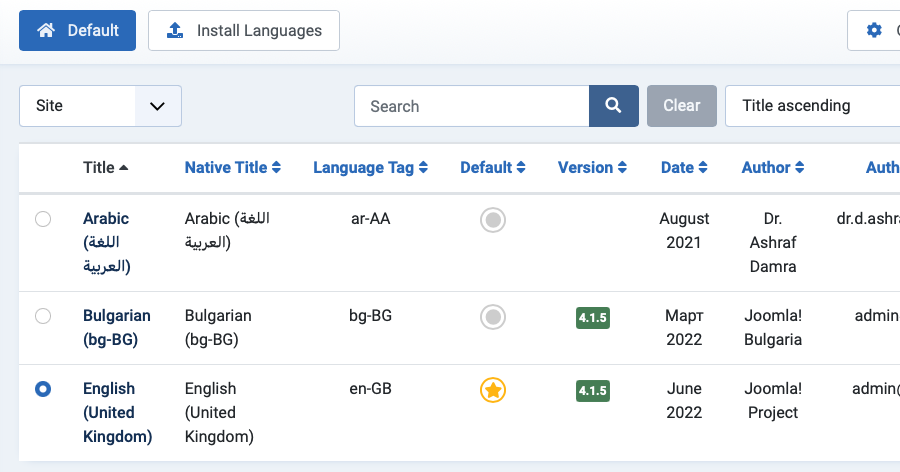
Now set the new default language for your site.
3. Translate languages
So now we already get all the initial set-up done, let's start translating the languages. Click on the Translate All button and let the magic works.
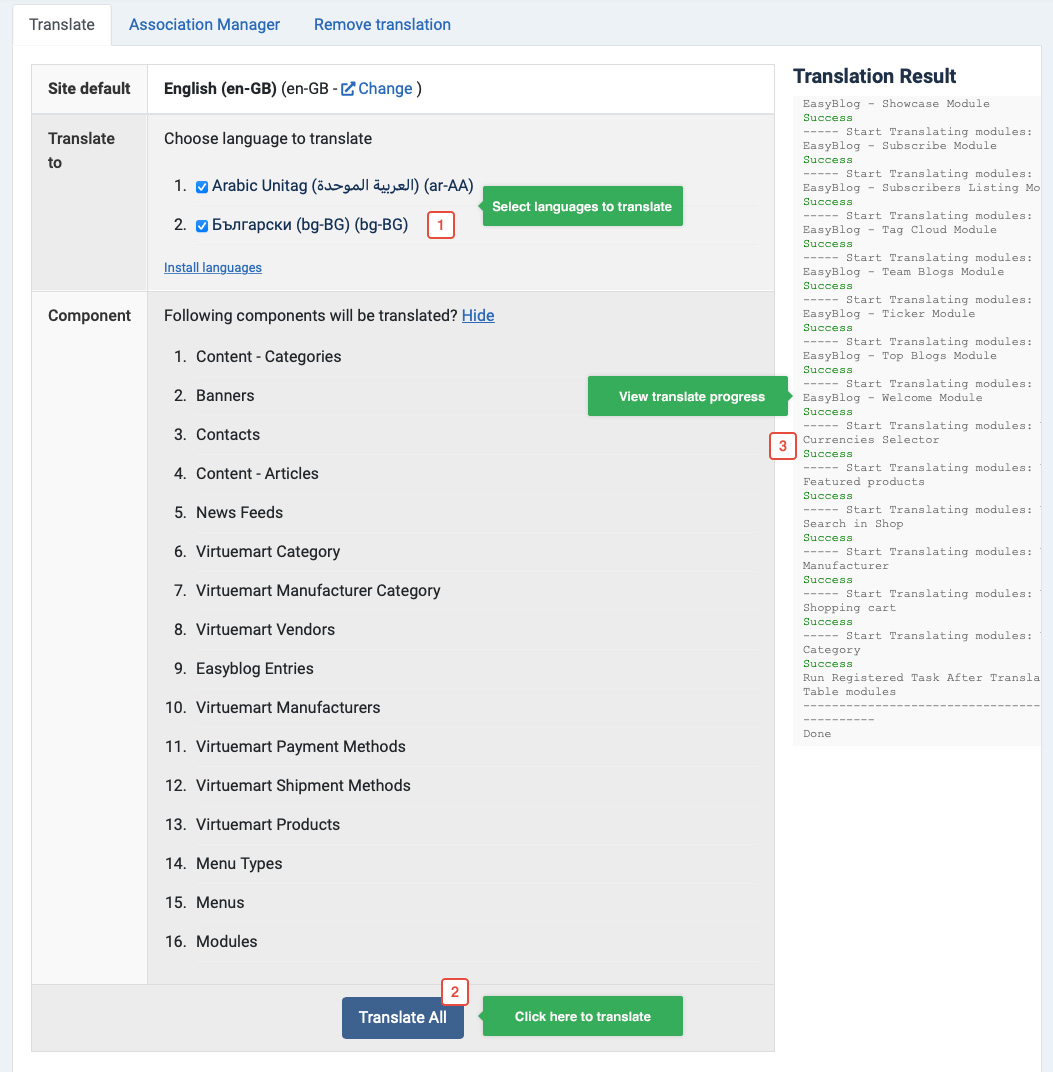
You can see the progress of the translation in the translation progress window, you can also keep track of whether or not the translation is successful.
If there are some elements in your site which somehow cannot be translated. You would see the failed message and that is pretty normal. Don't worry about it!

Note:
If an error occurs with a request, the API returns an HTTP status code and reason in the response based on the type of error.
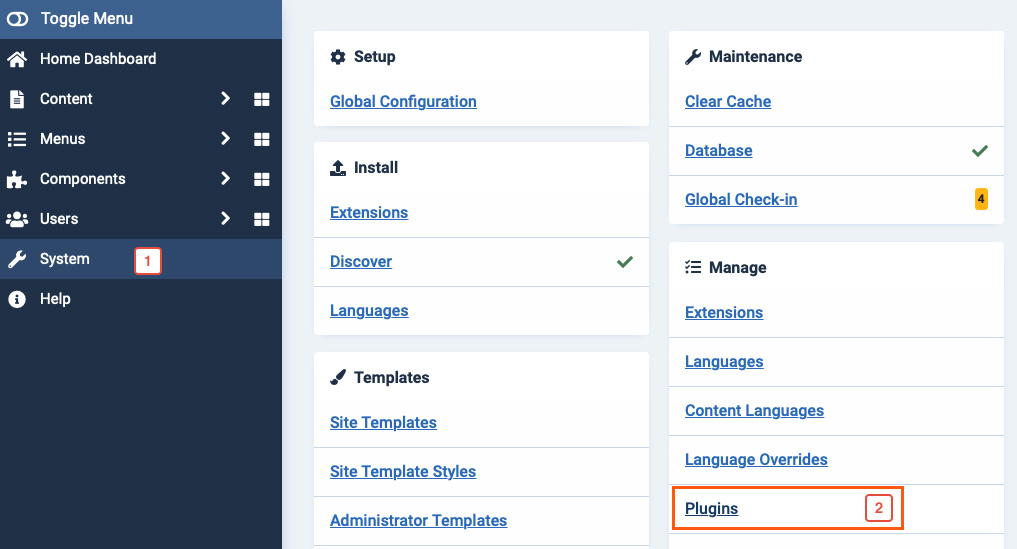
Enable "language switcher" module
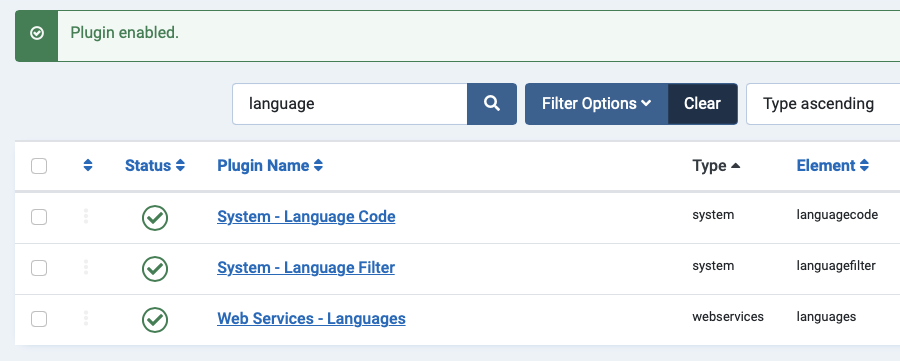
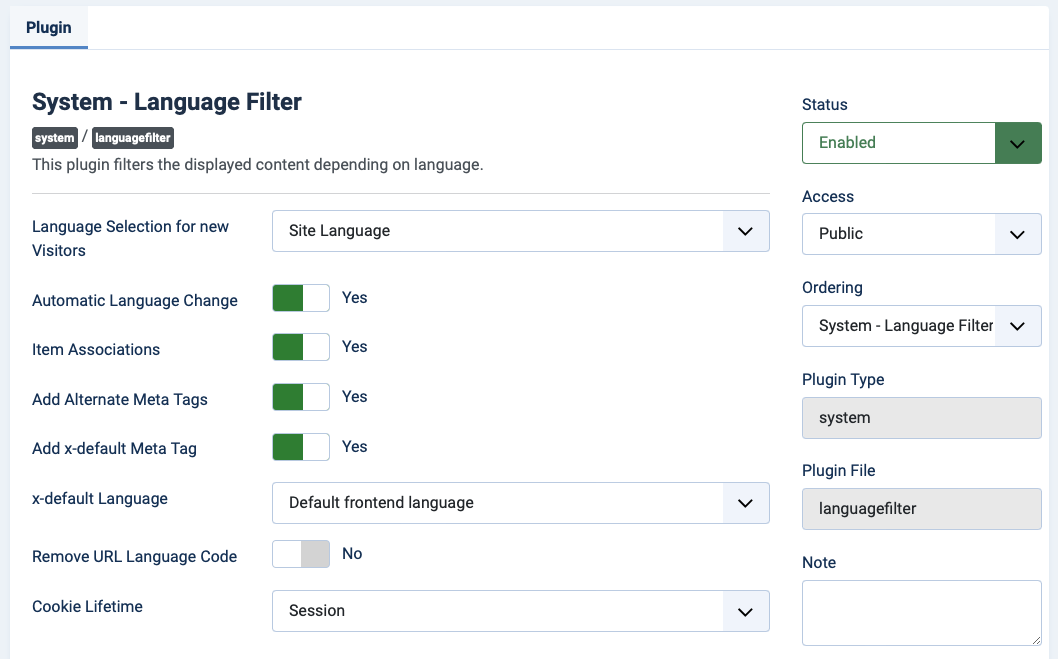
1. Enable Plugin: System - Language Filter
Navigate to: System > Manage > Plugins then find plugin named: System - Language Filter
Then configure the plugin as our suggestion in the screenshot below.
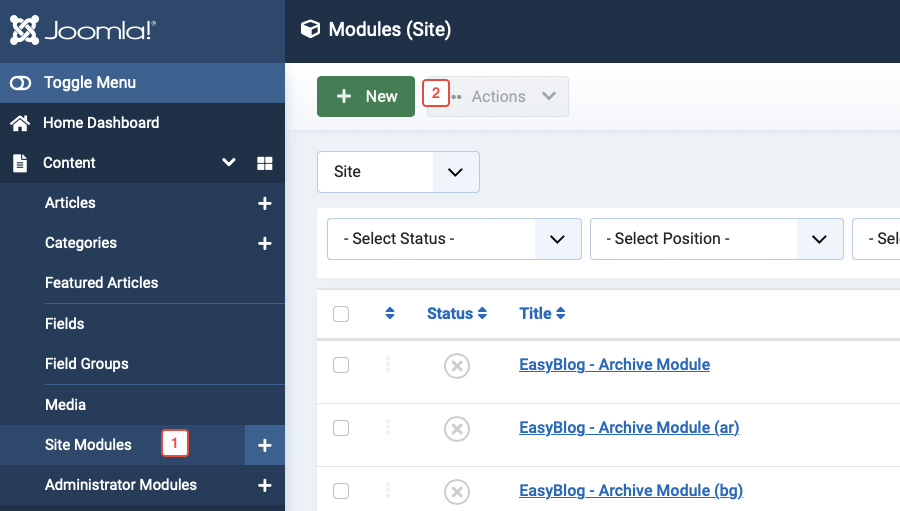
2. Add module: Language Switcher
Navigate to: Extensions > Module Manager then click on New button to create new module. In the appeared popup, select module: Language Switcher
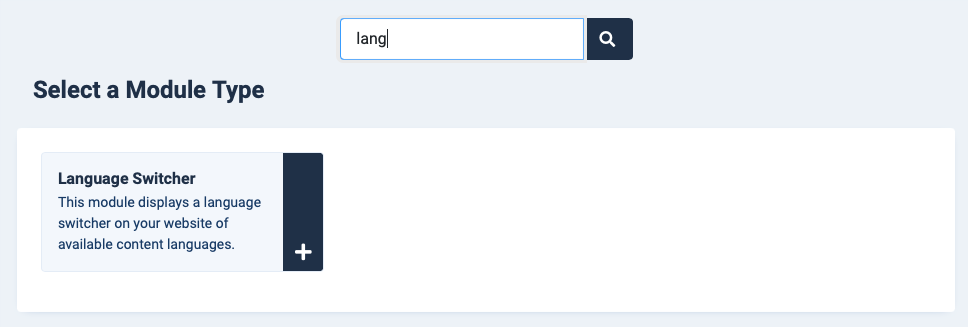
Set the position for the module
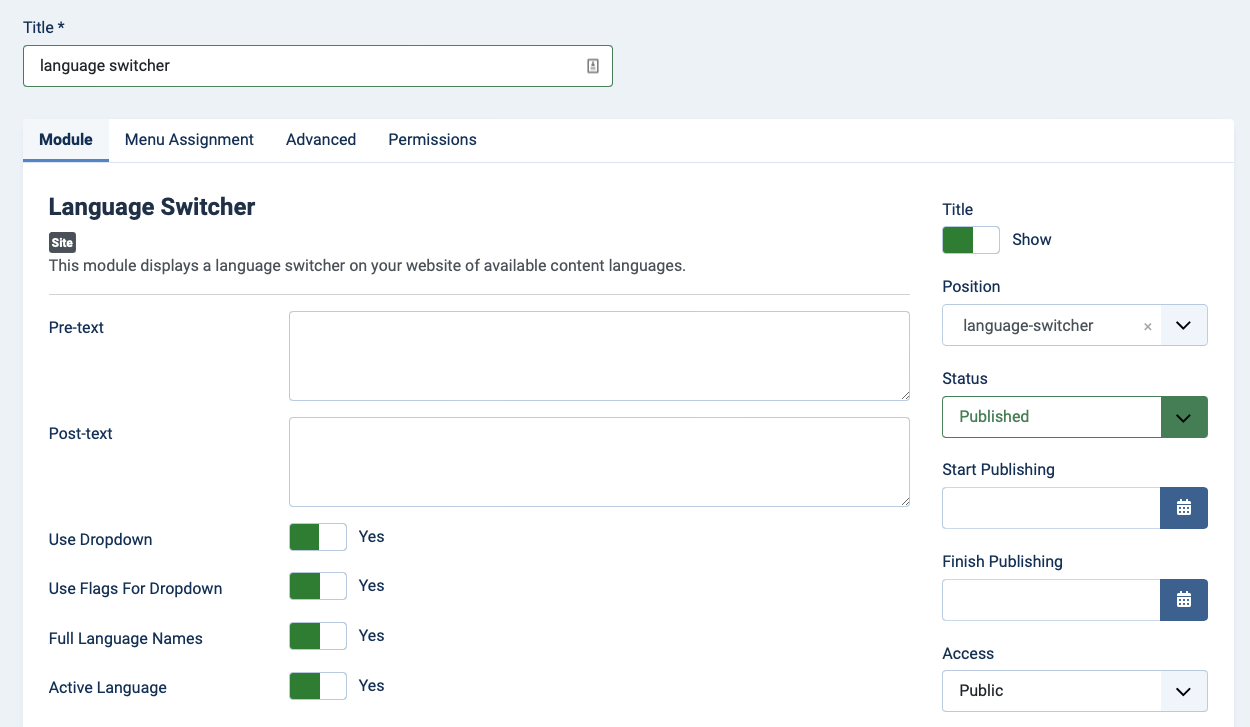
We keep the default settings for other fields, you can configure as you wish but for default settings, the module works fine.
Please assign the module to All languages so that when you switch to any language, the module is enabled.
Manage Content (Manual translation)
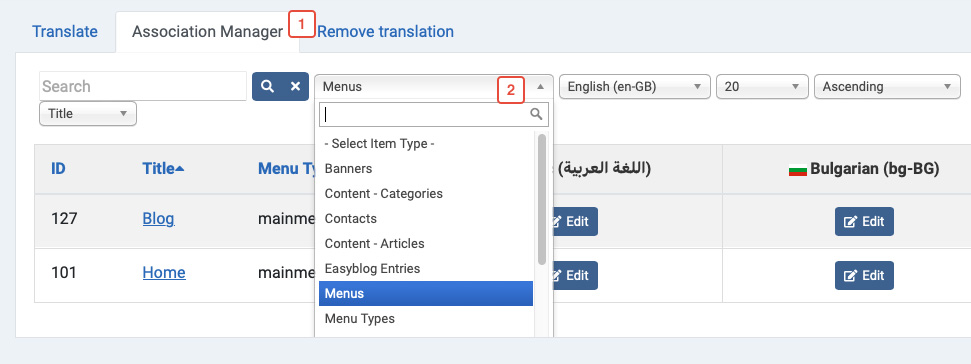
Step 1: Open Association Manager
After auto translation, you may want to update translation manually, we have made it pretty easy in this extension, from the back-end of the JA Multilingual Component, select Association Manager then select content type.
Step 2: Edit associated content
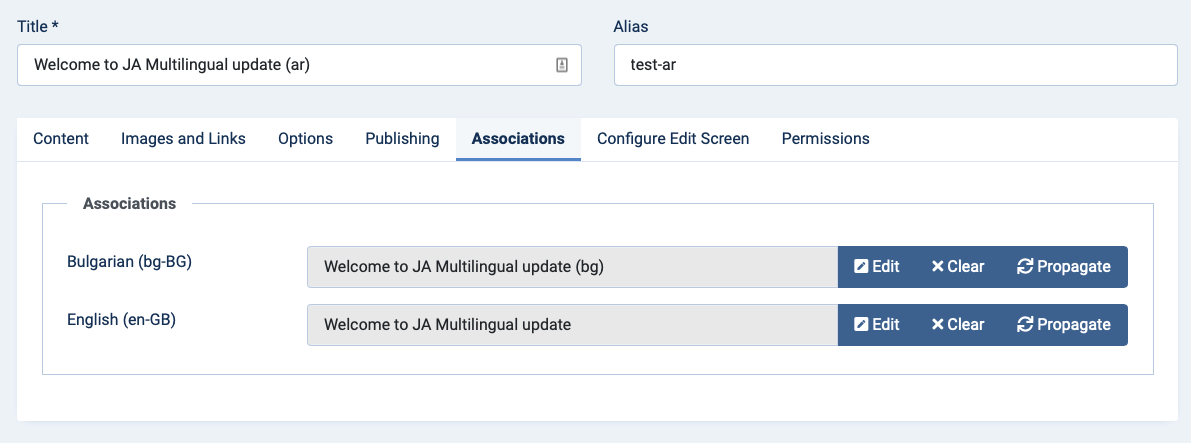
Now check the content box that include the title and its associated items of translated languages, click on Edit to fix the content in the language.
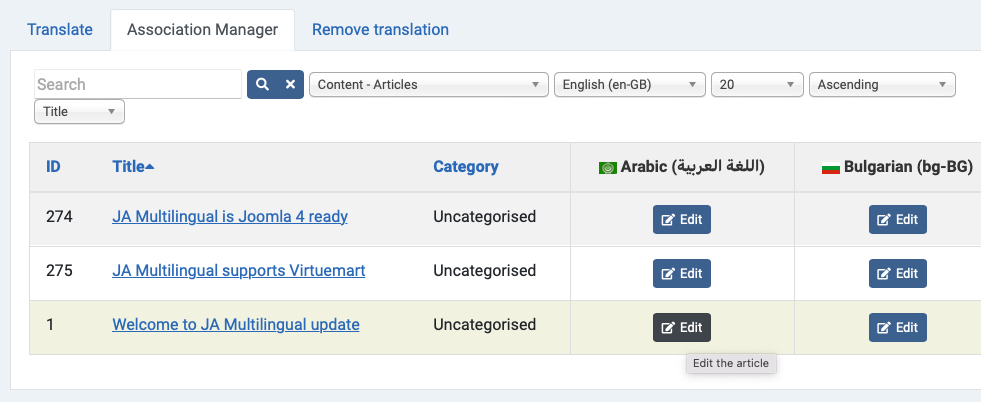
Now open the item to customize its content.
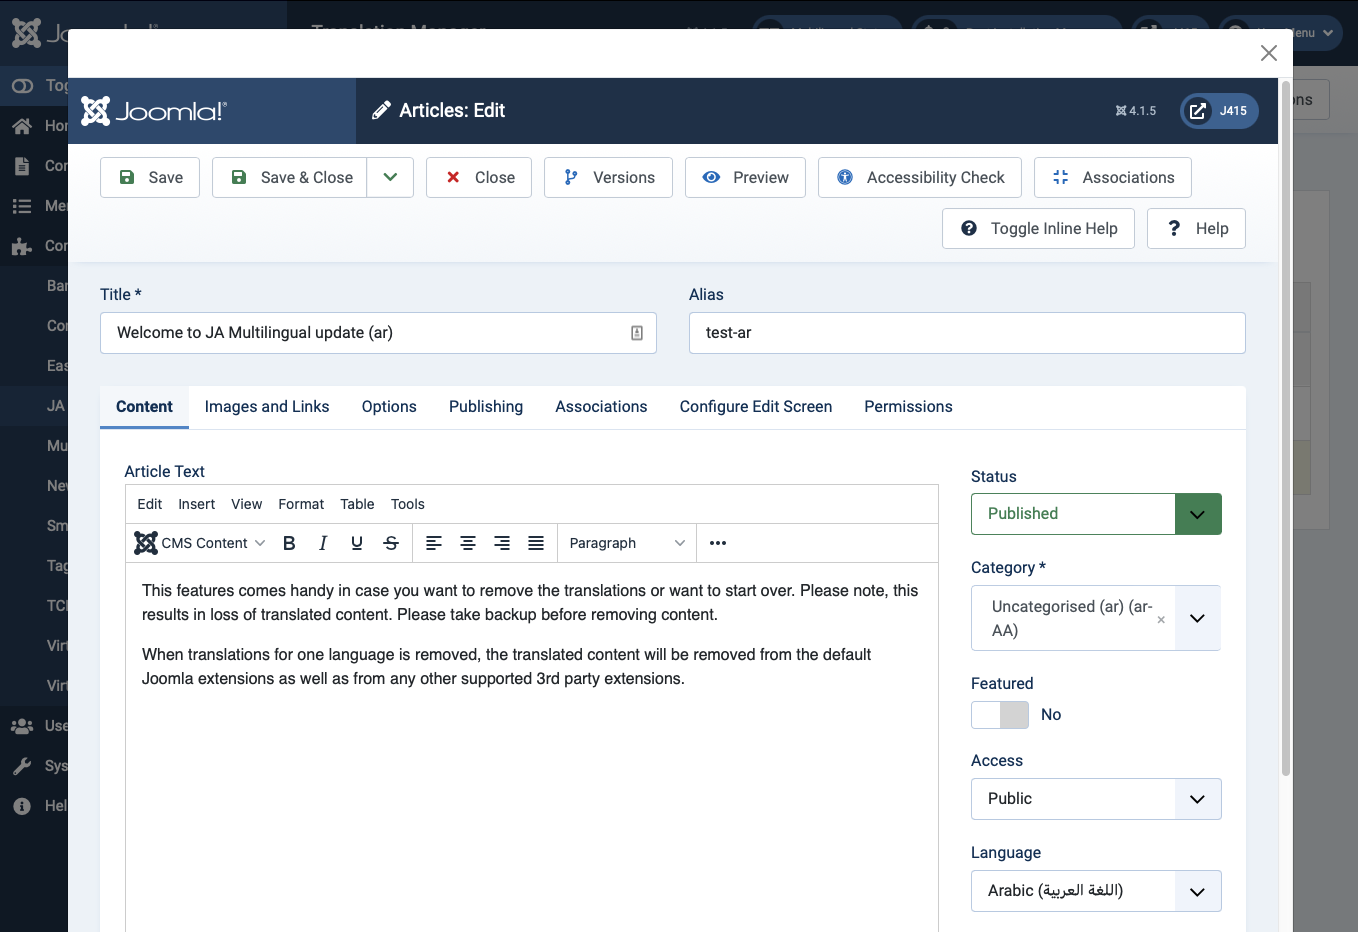
If you want to change association of the item, open the Association of the item the change
Remove translations
This features comes handy in case you want to remove the translations or want to start over. Please note, this results in loss of translated content. Please take backup before removing content.
When translations for one language is removed, the translated content will be removed from the default Joomla extensions as well as from any other supported 3rd party extensions.
- Content - Categories
- Web Links
- Banners
- Content - Articles
- News Feeds
- Contacts
- Menu Types
- Menus
- Modules
Steps to remove translation of one language. We will remove translation of Arabic as a live sample. It's the same for any other language.

Step 1: take backup
Once you remove translation, content will be gone forever so it requires you to take backup before you remove translation.
Step 2: remove translation
Now hit the Remmove button of language you want to remove its translation.
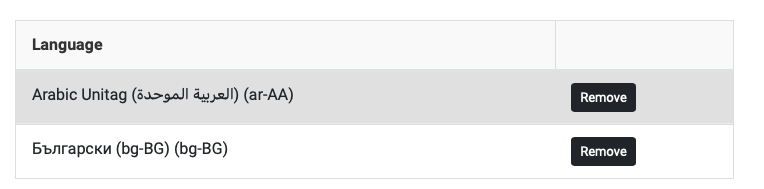
Translation of Arabic language has been removed successfully.
Step 3: uninstall language
This step is to uninstall language. If you don't want to uninstall language, just remove translation, you can ignore the step.
To uninstall a language, we need to delete content language and uninstall language package. In the Remove translation panel, you will see a note, it includes links to the Language Manager: Content languages and Extension Manager: Manage panel.
Remove language content
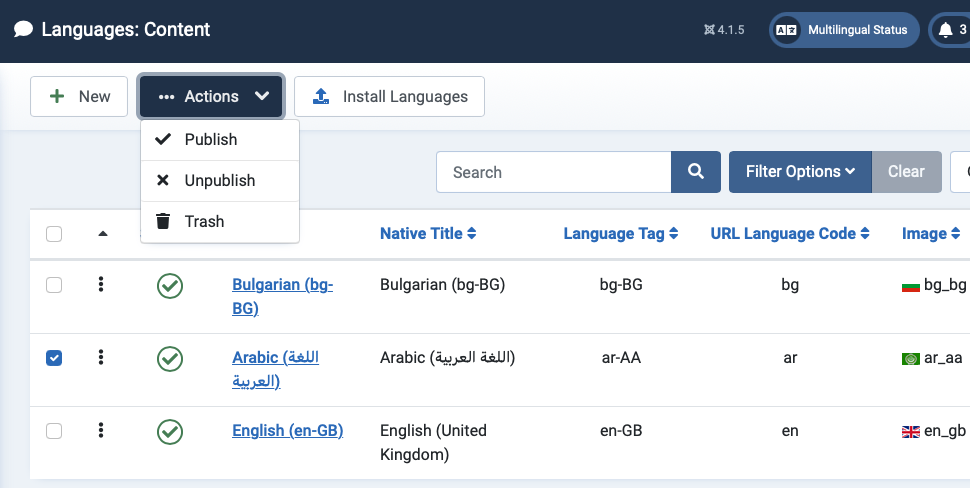
Access Language Manager: Content Languages panel by go to System > Manage > Language Content, and filter language.
Remove language package
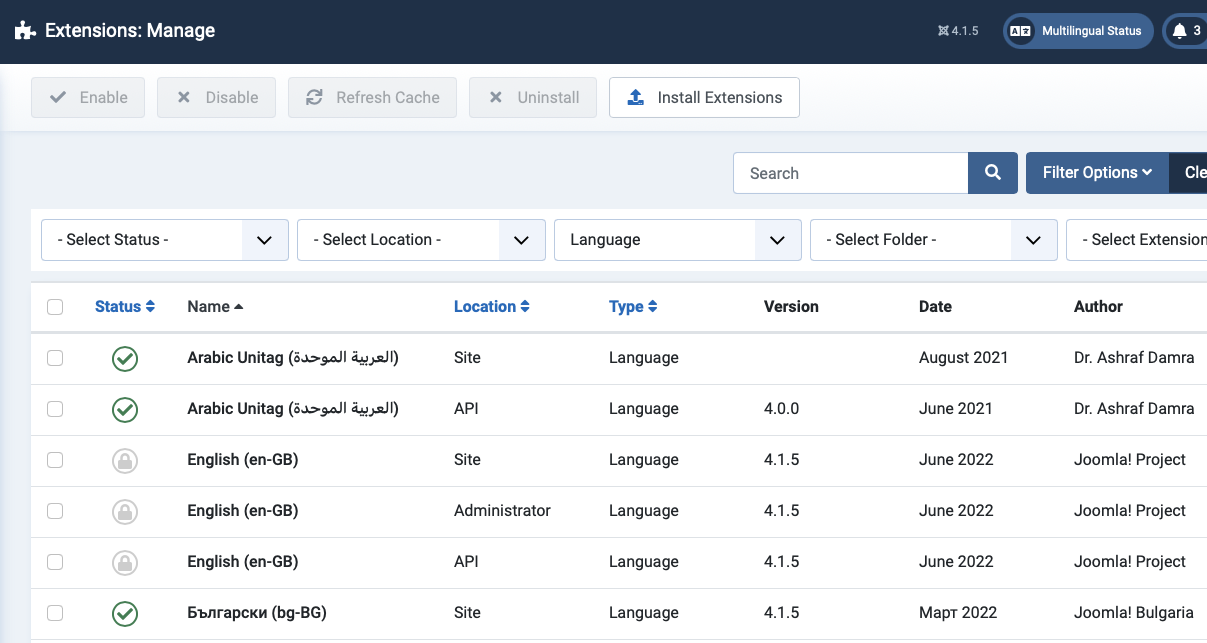
To access "Extension Manager: Manage" panel, go to System > Manage > Extensions. Search for language package then uninstall.
Video Tutorial
This is how-to video tutorial that shows you all steps to install, configure the component and translate.
If you still have trouble, feel free to ask us in discussion forum.