Introduction
JA Nex is one addition to them Joomla News site template, and now it is running on the robust T3 Framework. It includes support for K2 and Kunena components, is fully responsive and also supports RTL language layout.
JA Nex features sticky Mega Menu, Kunena, K2, Filter Tag Cloud (applied for Joomla 3 only).
Note:
- JA Nex RTL language layout is ready.
- Support both Joomla 2.5 & Joomla 3.
- Fully responsive.
1. Main Features
- Filter Tag Cloud (applied for Joomla 3 only)
- Developed with T3 Framework & Bootstrap
- Supports Joomla 2.5 and Joomla 3.0
- Fully responsive
- Supports Mega Menu
- Supports multiple layouts
- Supports multiple themes
- Supports RTL language
- Supports K2
- Supports Kunena
2. JA Extensions Supported
- JA Newsfeatured module
- JA Newspro module
- JA Sidenews module
- JA Contentslider module
- JA Accordion module
- JA Bulletin module
- JA Newsticker module
- JA Tabs plugin
- JA Popup plugin
- JA Thumbnail plugin
- T3 Framework plugin
- JA Extensions Manager Component
3. Third Party Extensions Supported
- K2 Component
- Kunena Component
4. Layout and Module Positions
Please check the image below to know the structure, layout, module positions of JA Nex.

System requirement
JA Nex is compatible with Joomla 3 and Joomla 2.5. Please make sure your system meets the following requirements:
Joomla 3 System requirement
Software
- PHP (Magic Quotes GPC off): 5.3.1 + (5.4+ recommended)
Databases
- MySQL(InnoDB support required): 5.1+
- MSSQL 10.50.1600.1+
- PostgreSQL 8.3.18+
Web Severs
- Apache 2.x+
- Microsoft IIS 7
- Nginx 1.0 (1.1 recommended)
Joomla 2.5+ system requirement
Software
- PHP 5.2.4+ (5.4+ recommended)
- MySQL: 5.0.4+
Web Sever
- Apache: 2.x+
- Microsoft: IIS 7
- Nginx: 1.0 (1.1 recommended)
Browser requirement
The requirements are the same with both Joomla 2.5 and Joomla 3
- Firefox 4+
- IE (Internet Explorer) 8+
- Google Chrome 10+
- Opera 10+
- Safari 5+
Development Environment
The requirements are the same with both Joomla 2.5 and Joomla 3
During development process, Localhost is preferred. You can use the following servers on your PC to develop your site.
Windows
- WAMPSEVER
- XAMPP for Windows
Linux
- LAMP Bubdle
- XAMPP for Linux
Mac OS
- MAMP & MAMP Pro
- XAMPP for Mac OS
Download & Installation
1. Plan your site Development
- Making a New Site ? - If you are planning to make a new site, use our Quickstart package to clone the demo site and replace the demo content with yours. Check How to install Quickstart Package.
- Installing on your live site ? - If you are planning to use this template on your already live site, read How to make your site look like demo site guide first to know about the steps involved. Then you can follow the userguide below.
2. Download Template and Extensions
Browse and Download: Go to the Download page of JA Nex and download the template zip file.
3. Install Template
Install the template: Now install the template on your Joomla 2.5 & Joomla 3.0 system. Follow This Guide if you are not familiar with the installation procedure.
If you are new to Joomla installation procedure, please check the following documentation.
Detail documentation4. Install Extensions
We'll be installing JA Nex template with the settings as is used on the demo website, other customization should be postponed until you complete the initial setup (including modules & plugins as is on the demo).
If you are new to Joomla installation procedure, please check the following documentation.
Detail documentationNote:
Custom HTML Module: to match the design of the template, we also style (CSS) for Custom HTML modules using different div classes. You will need to check the HTML codes and make sure to use the recommended HTML markup to get correct display. We provide the HTML code in this user-guide.
Extensions Configuration
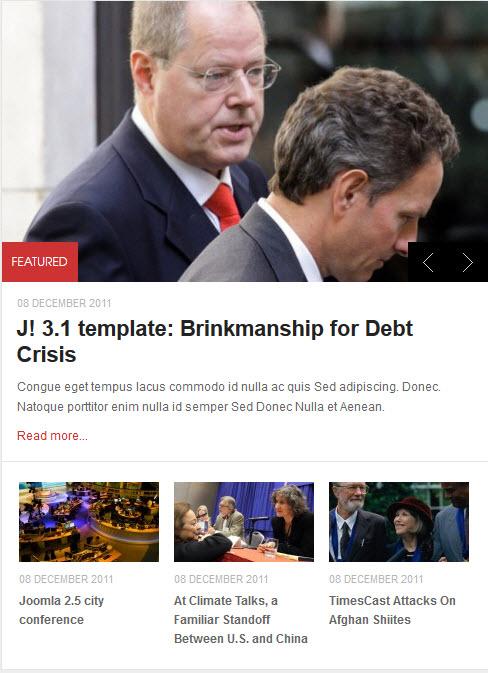
1. JA Newsfeatured Module
Module position: top-home1
Module Suffix:  featured-module
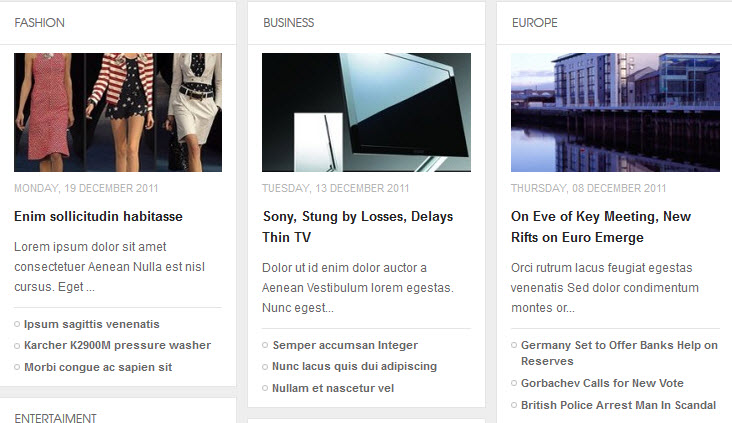
2. JA Newspro Modules
2.1 Music News
Module position : top-home2
Module Suffix :  news_home_module

2.2 JA News Pro! Module
Module position : masscol-1
Module Suffix :  ja-masscol-news
3. JA Sidenews module
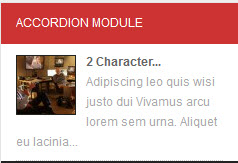
3.1 Accordion Module
Module position : accordion
Module Suffix : Not Used
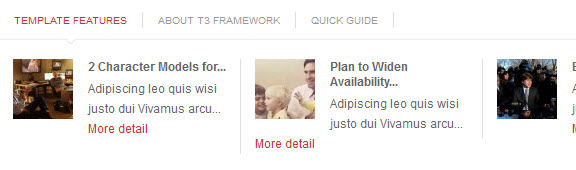
3.2 Template Features
Module position : ja-tabs
Module Suffix : Not Used
4. JA Contentslider module
Module position : position-1
Module Suffix : box titbla_module

5. JA Bulletin module
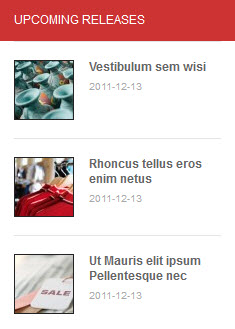
5.1 Upcoming Releases
Module position : accordion
Module Suffix : Not Used
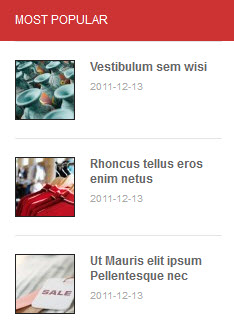
5.2 Most Popular
Module position : accordion
Module Suffix : Not Used
6. JA Newsticker module
Module position : top-ticker
Module Suffix : Not Used

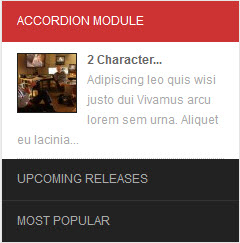
7. JA Accordion module
Module position : sidebar-2
Module Suffix : accordion
8. JA Tabs Plugin
9. JA Popup Plugin
10. JA Thumbnail Plugin
11. Banner module
There are 3 Banner Modules used in the template:11.1 Banners1
Module Position : top-home3
Module Suffix :  adv1
To display as Demo site, please follow step by step as below:
Step 1: Create New Category
Go to Administrator >> Components >> Banners >> Categories >> New.
Back-end SettingsStep 2: Create New Banner
Go to Administrator >> Components >> Banners >> Banners >> New.
Back-end SettingsStep 3: Create New Banner module
Back-end SettingsFront-end Appearance

11.2 Banners2
Module Position : sidebar-2
Module Suffix :  adv2
To display as the Demo site, please follow step by step as below:
Step 1: Create New Category
Go to Administrator >> Components >> Banners >> Categories >> New.
Back-end SettingsStep 2: Create New Banner
Go to Administrator >> Components >> Banners >> Banners >> New.
Back-end SettingsStep 3: Create New Banner module
Back-end SettingsFront-end Appearance

11.3 Banners3
Module Position : masscol-2
Module Suffix :  adv3
To display as the Demo site, please follow step by step as below:
Step 1: Create New Category
Go to Administrator >> Components >> Banners >> Categories >> New.
Back-end SettingsStep 2: Create New Banner
Go to Administrator >> Components >> Banners >> Banners >> New.
Back-end SettingsStep 3: Create New Banner module
Back-end SettingsFront-end Appearance

12. Acymailing module
This module is Joomla default module, that means when you install a fresh Joomla core, this module is ready to use.
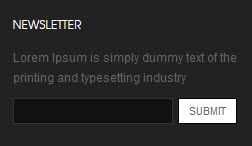
12.1 Newsletter
Module position : footer-5
Module Suffix :  Not Used
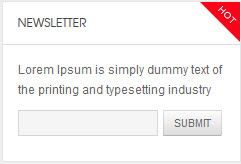
12.2 Newsletter
Module position : top-home3
Module Suffix :  ja-letter badge-red
13. Breadcrumbs module
This module is Joomla default module, that means when you install a fresh Joomla core, this module is ready to use.
Module position : navhelper
Module Suffix :  Not Used

14. Footer module
This module is Joomla default module, that means when you install a fresh Joomla core, this module is ready to use.
Module position : footer
Module Suffix :  Not Used

15. Language Switcher module
This module is Joomla default module, that means when you install a fresh Joomla core, this module is ready to use.
Module position : languageswitcherload
Module Suffix :  Not Used

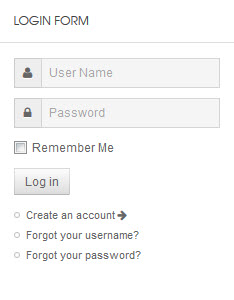
16. Login Form module
This module is Joomla default module, that means when you install a fresh Joomla core, this module is ready to use.
Module position : sidebar-2
Module Suffix :  Not Used
17. Menu module
17.1 Footer Menu module
To display as Demo site, please follow step by step as below:
Step 1: Create "Footer" menu
Go to: Administrator >> Menus >> Menu Manager >> Add New Menu: Footer Menu. Then go to Administrator >> Menus >> Footer menu >> Add New Menu Items for the Menu.
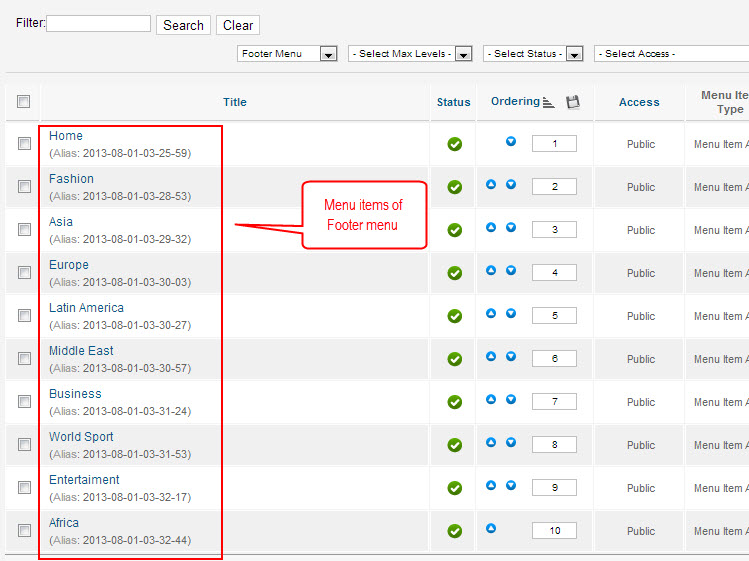
Back-end setting for the menu items
Step 2: Create new "Footer menu" module
This module is Joomla default module, that means when you instal a fresh Joomla core, this module is ready to use.
Go to Administrator >> Module Manager >> Add new Menu Module.
Module position : menu-footer
Module Suffix :  Not Used

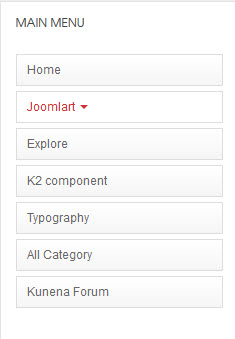
17.2 Main Menu module
Step 1: Create "Main menu" menu and create menu items under the menu
Step 2: Create new "Main menu" module
Module position : sidebar-2
Module Suffix :  Not Used
17.3 About Joomla Menu module
Step 1: Create "About Joomla" menu and create menu items under the menu.
Step 2: Create new "About Joomla" module
Module position : sidebar-2
Module Suffix :  Not Used
18. Search module
18.1 Search
This module is Joomla default module, that means when you install a fresh Joomla core, this module is ready to use.
Module position : head-search
Module Suffix :  Not Used

18.2 Search
This module is Joomla default module, that means when you install a fresh Joomla core, this module is ready to use.
Module position : search-footer
Module Suffix :  Not Used

19. Who's Online module
This module is Joomla default module, that means when you instal a fresh Joomla core, this module is ready to use.
Module position : sidebar-2
Module Suffix :  badge-red

20. Similar Tags module
This module is Joomla default module 3.x, that means when you install a fresh Joomla core, this module is ready to use.
Module position : sidebar-2
Module Suffix : NOT USED

21. Popular Tags module
This module is Joomla default module 3.x, that means when you install a fresh Joomla core, this module is ready to use.
Module position : sidebar-2
Module Suffix : NOT USED
IV. Custom HTML Modules
1. Image Temp
Module position : footer-1
Module Suffix :  imgtemp
<div><img src="/images/stories/demo/img-footer.gif" border="0" alt="left" title="Sample photo" width="122" />Lorem ipsum dolor sit amet, <a href="#" title="sample link">consectetur</a> adipisicing elit, sed do eiusmod tempor incididunt ut <a href="#" title="sample link">labore et</a> dolore.</div>
- Back-end Settings
- Front-end Appearance
2. Hubs
Module position : footer-2
Module Suffix : Not Used
Custom Output
<ul>

<li><a href="#">News</a></li>
<li><a href="#">Business</a></li>
<li><a href="#">Culture</a></li>
<li><a href="#">Design</a></li>
<li><a href="#">Lifestyle</a></li>
<li><a href="#">Technology</a></li>
</ul>

4. Features
Module position : footer-3
Module Suffix :  grid1x1 grid-pos-3 blue
Custom Output
<ul>

<li><a href="#">Infographics</a></li>
<li><a href="#">Videos</a></li>
<li><a href="#">Slideshow</a></li>
<li><a href="#">Project</a></li>
<li><a href="#">Current issue</a></li>
<li><a href="#">Online Store</a></li>
</ul>
5. Company
Module position : footer-4
Module Suffix : NOT USED
Custom Output
<ul>

<li><a href="#">About</a></li>
<li><a href="#">Contact</a></li>
<li><a href="#">Support</a></li>
<li><a href="#">Jobs</a></li>
<li><a href="#">Privacy</a></li>
<li><a href="#">Terms</a></li>
</ul>
6. Connect
Module position : footer-5
Module Suffix :  connect
Custom Output
<div class="social"><a class="ico-social ico-facebooks" href="#" title="Facebook"><span>Facebook</span></a><a class="ico-social ico-twitters" href="#" title="Twitter"><span>Twitter</span></a><a class="ico-social ico-rss" href="#" title="RSS"><span>RSS</span></a><a class="ico-social ico-flick" href="#" title="Flick"><span>Flick</span></a></div>
7. Follow me
Module position : head-social
Module Suffix : NOT USED
<div class="social"><a class="ico-social ico-facebooks" href="#" title="Facebook"><span>Facebook</span></a><a class="ico-social ico-twitters" href="#" title="Twitter"><span>Twitter</span></a><a class="ico-social ico-rss" href="#" title="RSS"><span>RSS</span></a></div>
- Back-end Settings
- Front-end Appearance

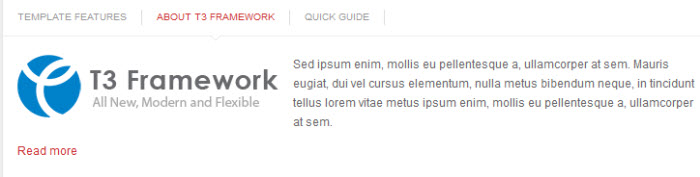
8. About T3 Framework
Module position : ja-tabs
Module Suffix : NOT USED
<p><img src="/images/stories/demo/logo.png" border="0" alt="Sample photo" title="Sample photo" align="left" />Sed ipsum enim, mollis eu pellentesque a, ullamcorper at sem. Mauris eugiat, dui vel cursus elementum, nulla metus bibendum neque, in tincidunt tellus lorem vitae metus ipsum enim, mollis eu pellentesque a, ullamcorper at sem.</p>

<p><a class="readmore" href="#">Read more</a></p>
- Back-end Settings
- Front-end Appearance
9. Quick guide
Module position : ja-tabs
Module Suffix : NOT USED
<p><img src="/images/stories/demo/demo-1.jpg" border="0" alt="Sample photo" title="Sample photo" align="left" />Sed ipsum enim, mollis eu pellentesque a, ullamcorper at sem. Mauris eugiat, dui vel cursus elementum, nulla metus bibendum neque, in tincidunt tellus lorem vitae metus in tincidunt tellus lorem vitae metus.</p>

<p><a class="readmore" href="#">Read more</a></p>
- Back-end Settings
- Front-end Appearance
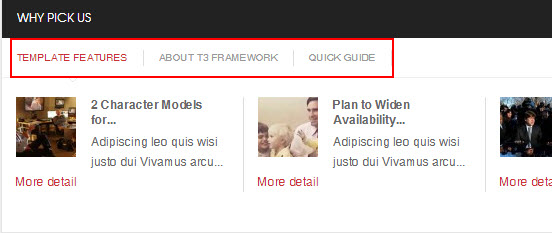
10. Why Pick Us
Module position : masscol-2
Module Suffix :  ja-tabs titbla_module
<p>{jatabs type="modules" module="ja-tabs" position="top" mouseType="click" animType="animMoveHor" } {/jatabs}</p>

<p> </p>
- Back-end Settings
- Front-end Appearance

11. Photo Images
Module position : sidebar-2
Module Suffix : Not Used
<div class="img-photo clearfix"><span class="highslide-img">{japopup type="image" title="Sample Images" content="images/stories/highslide/slide1.jpg" width="594" height="386"} <img src="/images/stories/highslide/thumb-1.jpg" border="0" alt="Sample Image" /> {/japopup} </span> <span class="highslide-img">{japopup type="image" title="Sample Images" content="images/stories/highslide/slide2.jpg" width="594" height="386"} <img src="/images/stories/highslide/thumb-2.jpg" border="0" alt="Sample Images" /> {/japopup} </span> <span class="highslide-img">{japopup type="image" title="Sample Images" content="images/stories/highslide/slide3.jpg" width="594" height="386"} <img src="/images/stories/highslide/thumb-3.jpg" border="0" alt="Sample Images" /> {/japopup} </span> <span class="highslide-img">{japopup type="image" title="Sample Images" content="images/stories/highslide/slide4.jpg" width="594" height="386"} <img src="/images/stories/highslide/thumb-4.jpg" border="0" alt="Sample Images" /> {/japopup} </span> <span class="highslide-img">{japopup type="image" title="Sample Images" content="images/stories/highslide/slide5.jpg" width="594" height="386"} <img src="/images/stories/highslide/thumb-5.jpg" border="0" alt="Sample Images" /> {/japopup} </span> <span class="highslide-img">{japopup type="image" title="Sample Images" content="images/stories/highslide/slide6.jpg" width="594" height="386"} <img src="/images/stories/highslide/thumb-6.jpg" border="0" alt="Sample Images" /> {/japopup} </span></div>
- Back-end Settings
- Front-end Appearance
12. Today video
Module position : sidebar-2
Module Suffix :  blackbg video1
<p><object data="http://vimeo.com/moogaloop.swf?clip_id=7421222&server=vimeo.com&color=333333&fullscreen=1" type="application/x-shockwave-flash" width="210" height="120"><param name="quality" value="high" /><param name="src" value="http://vimeo.com/moogaloop.swf?clip_id=7421222&server=vimeo.com&color=333333&fullscreen=1" /><param name="pluginspage" value="http://vimeo.com/moogaloop.swf?clip_id=7421222&server=vimeo.com&color=33bbbb&fullscreen=1" /><param name="scale" value="noborder" /><param name="wmode" value="transparent" /></object></p>
- Back-end Settings
- Front-end Appearance
13. Template Features
Module position : sidebar-2
Module Suffix : box badge-vote badge-red
<div class="list-useful">
<p class="blocknumber blocknumber-1"><span class="bignumber">01</span> <span class="title-bignumber">Fluid Grid</span> Lorem ipsum dolor sit amet consectetuer rutrum dignissim et neque id.</p>
<p class="blocknumber blocknumber-1"><span class="bignumber">02</span> <span class="title-bignumber">Simple and Clean Design</span> Interdum pharetra in a metus congue In Sed Pellente gravida pellentesque.</p>
<p class="blocknumber blocknumber-1 last"><span class="bignumber">03</span> <span class="title-bignumber">Mega Menu</span> In Sed Pellentesque tincidunt pharetra a metus congue tincidunt pharetra.</p>
</div>
- Back-end Settings
- Front-end Appearance

14. Color Module
Module position : sidebar-2
Module Suffix :  badge-black titleredbox
<p>Nunc rutrum scelerisque ipsum ut aliquet. Duis et augue nunc, gravida fermentum mi.</p>
- Back-end Settings
- Front-end Appearance
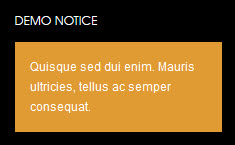
15. Demo notice
Module position : sidebar-2
Module Suffix :  blackbg bgcolor
<div>Quisque sed dui enim. Mauris ultricies, tellus ac semper consequat.</div>
- Back-end Settings
- Front-end Appearance
Third Party Extensions Configuration
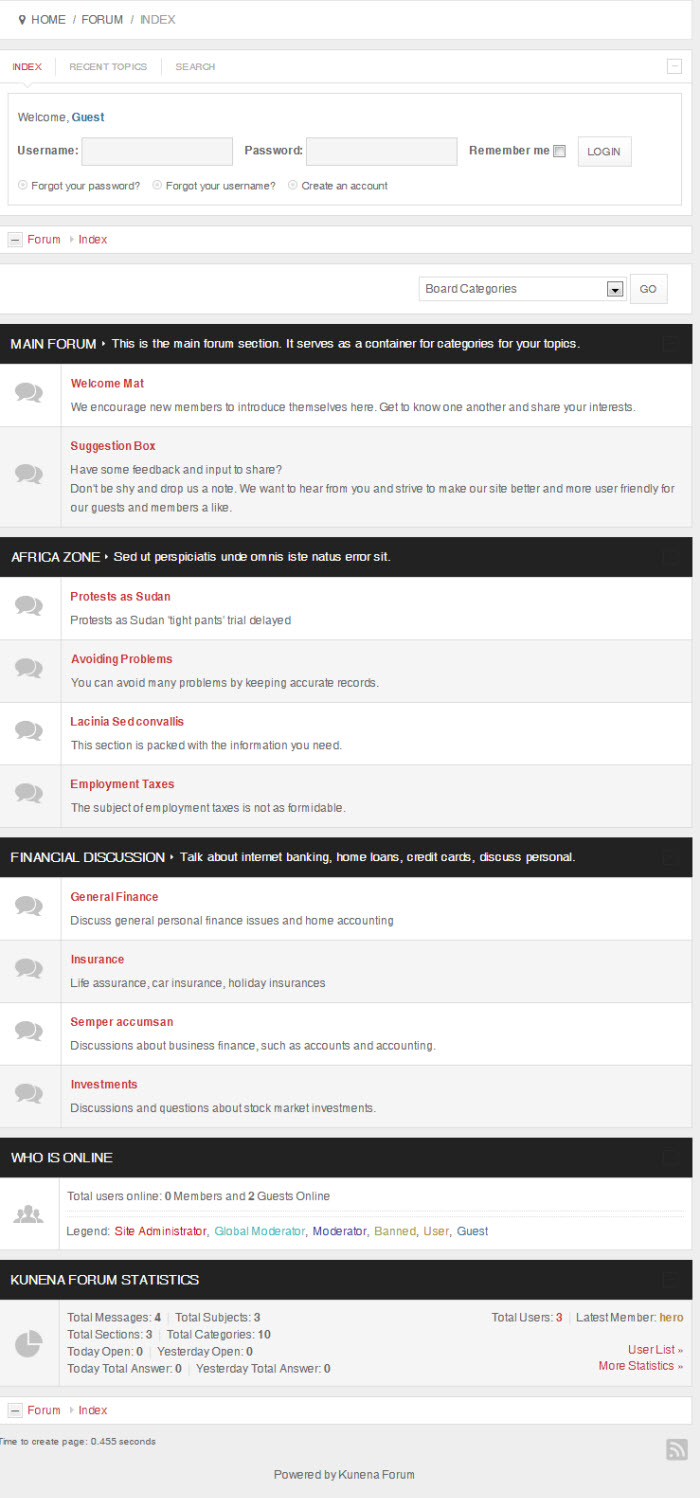
1. Kunena Component
1.1 Install Kunena Forum component
If you are new to this Joomla component, please read this guide to install this component into Joomla.
1.2 Configure Kunena Forum component
Step1: To do like demo site, you must download and extract Kunena theme for JA Nex. Then go to the extracted folder: kunena_theme_nex_t3.v1.0.0/components/com_kunena/template and copy ja_nex folder into components/com_kunena/template folder on your site.
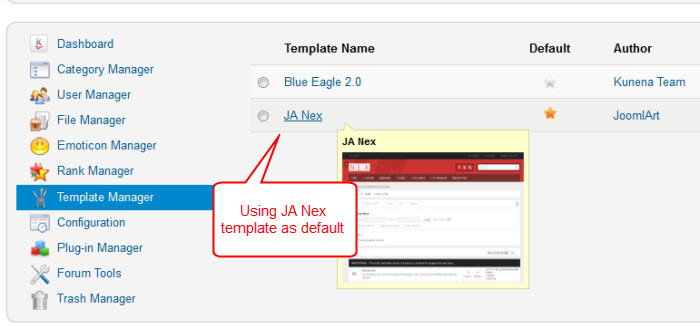
Step 2: Go to Administrator >> Component >> Kunena Forum >> Template Manager, set ja_nex template as the default style.
Step 3: To set up for the forum as in Demo site, navigate to Administrator >> Component >> Kunena Forum >> Forum Configuration.
- Back-end Settings for General
- Back-end Settings for Front-end
- Back-end Settings for Users
- Back-end Settings for Security
- Back-end Settings for Avatar
- Back-end Settings for Uploads
- Back-end Settings for Ranking
- Back-end Settings for BBCode
- Back-end Settings for RSS
- Back-end Settings for Extra
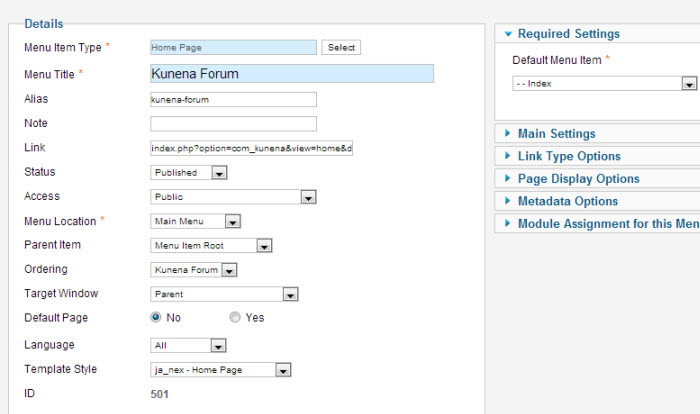
Step 4: Go to Menu >> Main Menu >> Add New Menu Item: Kunena Forum as our screenshots shown below.
Front-end Appearance
2. K2 Component
2.1 Install and Configure K2
2.1.1 Install K2
If you are new to this Joomla component, please read this guide.
2.1.2 Configure K2 component
2.1.2.1 Global Configuration: Click Parameter button on the right
Back-end settings
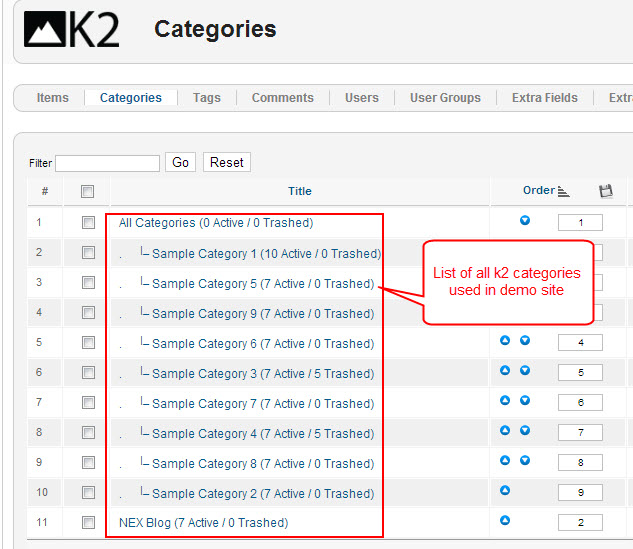
2.1.2.2 Category Configuration
As you can see on our Demo, there are different styles for each page: Nex Blog uses nex_blog style while All Categories use nex style.
To build your website like our demo, navigate to Administrator >> Component >> K2 >> Categories.
- Back-end Settings
- Front-end Appearance
Note: To set the column displaying on All Categories page, you should have enough child categories under All Categories category.
- Back-end Settings
- Front-end Appearance
Note: Settings for others child categories under All Categories category as the same as Sample Category 1 settings.
2.2 Configurations for K2 Modules as on our Demo
This instruction is a reference for developers using manual installation, a guide on how to setup K2 Component like on the demo website and the Quickstart package.
Please refer to the official documentation on how to install and setup K2.
There are 5 modules of K2 component being used in JA Nex.
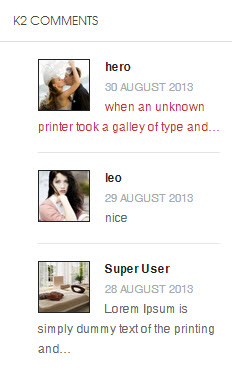
2.2.1 JA K2 Comment Module
Module Position : sidebar-2
Module suffix : NOT USED
Back-end Settings for this module as in Demo
Demo site
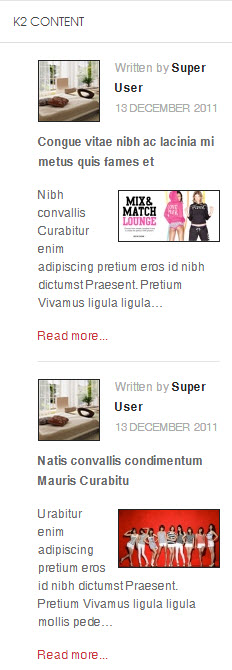
2.2.2 JA K2 Content Module
Code:Module Position : sidebar-2 Module suffix : NOT USEDBack-end Settings for this module as in Demo
Demo site
2.2.3 JA K2 Tools Module
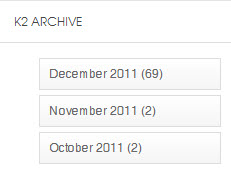
2.2.3.1 K2 Archive
Code:Module Position : sidebar-2 Module suffix : Not UsedBack-end Settings for this module as in Demo
Demo site
2.2.3.2 K2 Categories
Code:Module Position : sidebar-2 Module suffix : Not UsedBack-end Settings for this module as in Demo
Demo site

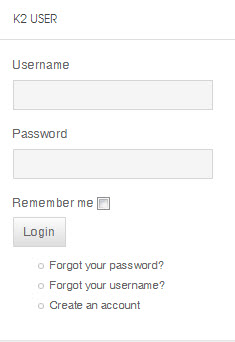
2.2.4 K2 User
Code:Module Position : sidebar-2 Module suffix : NOT USEDBack-end Settings for this module as in Demo
Demo site
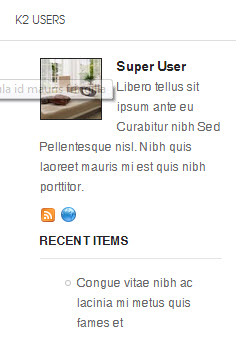
2.2.5 K2 Users
Code:Module Position : sidebar-2 Module suffix : NOT USEDBack-end Settings for this module as in Demo
Demo site
Template Customization
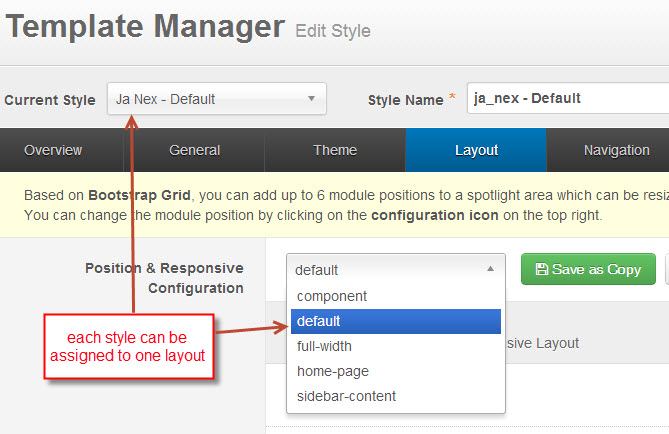
1. Template Override
In summary, to override template, you clone a style then edit as you wish. After all, assign the cloned style to specific menus. The assigned menus will override the same menus in the default style.
Each style can be configured to use one theme and one layout so in one website, you can have menus with different themes and layouts.
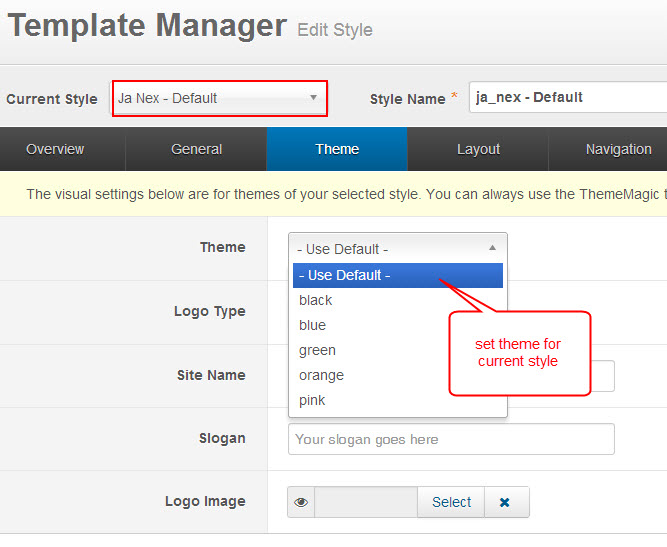
2. Themes Settings
JA Nex supports up to 5 themes, the themes are available when you install the JA Nex template.
3. Layout Settings
JA Nex supports 5 layouts:
The following video tutorials will show you how to work with Layouts: Configure and Customize.
Layout Configuration
T3 comes with ease of layout customization. The visual layout configuration is easier than ever before.
Layout Customization
The video tutorial guides you on how to customize the layouts, add new layout, and customize blocks in a layout.
4. ThemeMagic Settings
JA Nex is developed with T3 so you can customize themes with ThemeMagic.
To customize themes with the feature, firstly, you have to enable the option.
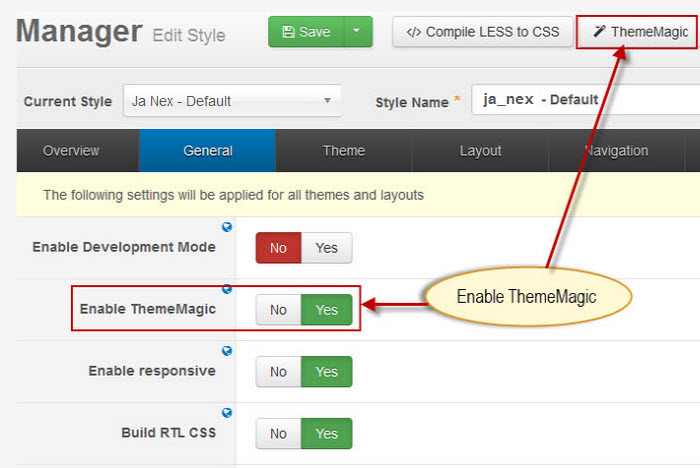
In the setting panel, you can customize all the themes. The left panel is the setting area while the right panel is your site front-end. Each time you change settings, click on "Preview" button to view the change in front-end on the right panel.
The following video tutorials will show you how to customize themes and customize ThemeMagic.
ThemeMagic Customization
After watching the tutorial, you can be able to customize your theme quickly using ThemeMagic as well as know how to add new group and parameters to ThemeMagic.
Mega Menu Configuration
1. Menu items Back-end Settings
- Home Menu
- Joomlart Menu
- Explore Menu
- K2 component Menu
- Typography Menu
- All Categories Menu
- Kunena Menu
2. Megamenu Configuration
To configure Mega Menu, go to: Extensions >> Template manager >> open JA Next template, in the Navigation setting, you can configure Mega Menu.
Step 1: Enable Mega Menu
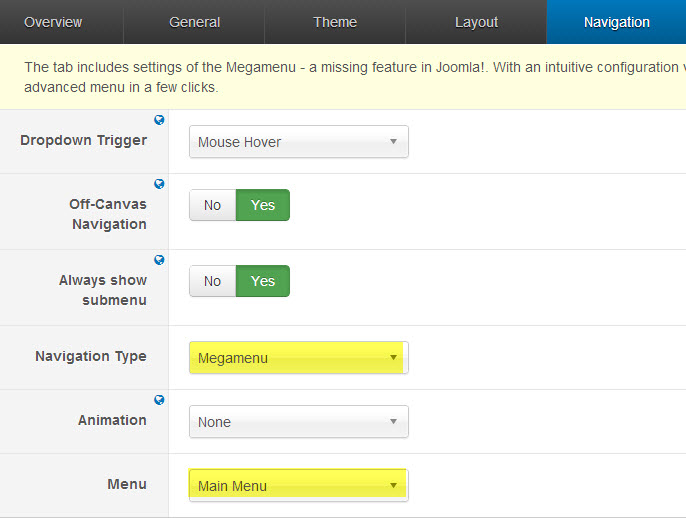
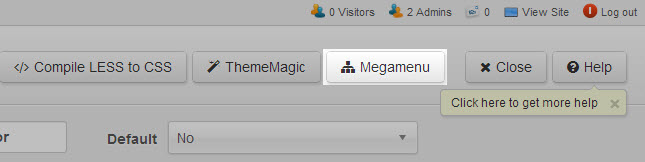
Step 2: Open Mega Menu page
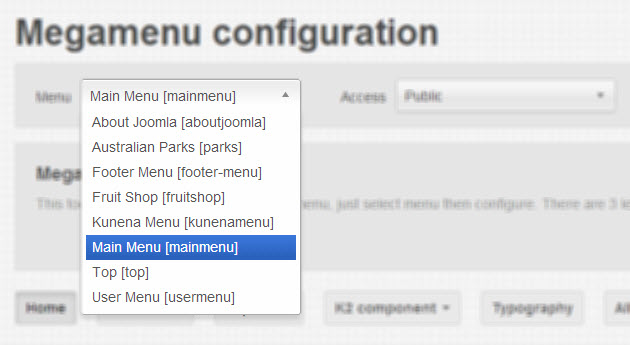
Step 3: Select Menu to configure Mega Menu
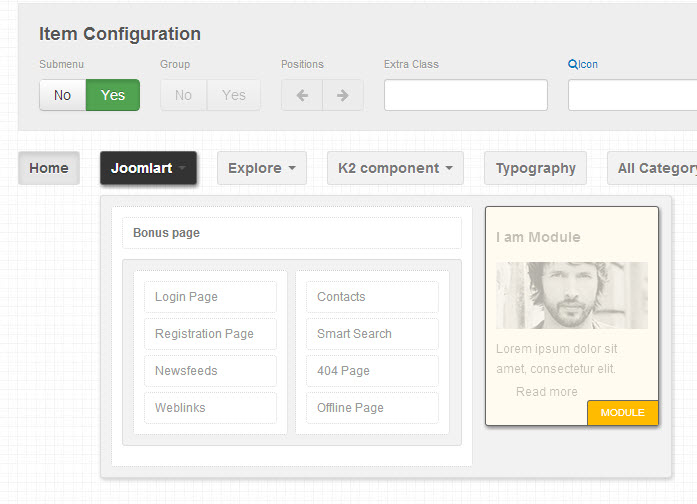
Step 4: Configure Mega Menu
Mega Menu Configuration
This is the video tutorial for Mega Menu configuration, you will learn how to build up a Mega Menu, how to use Mega Menu settings effectively, how to add icons, how to style menu items with our T3 Framework.
Recommendation
The above userguide should help one in replicating the Demo site settings for the template and extension on their site.
Recommended :
If you are new or are confused, we recommend installing Quickstart on your localhost and use it as reference for configs. This is the best way to work with any template. Links to all the resources are provided above, you should carefully read them to take the maximum advantage of our products.
Support :
Please raise your support queries in the forum and make sure you follow the support guidelines. We spend more time in getting the information from user in case the support guidelines are not followed.