

-
AuthorPosts
-
Hung Dinh Friend
Hung Dinh
- Join date:
- September 2014
- Posts:
- 4408
- Downloads:
- 11
- Uploads:
- 189
- Thanks:
- 309
- Thanked:
- 3310 times in 3 posts
October 25, 2010 at 4:20 am #155382JA Community Plus Template Installation and Configuration
I. Template Installation:
From the JA Communit Plus download package, you select and upload template package into your site Administrator to install as normal. This is your first time installation? Check out How to install manual Joomla! template guide.
Tips: If you wish to have JA Community Plus exactly as per our demo, we recommend you use quick-start package. This will create a new Joomla site with JA Community Plus, all built-in extensions and sample content. Check How to install Quickstart.
II. Template Configuration
Note: The JA Community Plus bases on JoomlArt’s stable T3 Framework 2.0, you have to install the JA T3 System plugin for Joomla 1.5. How to install Joomla! Plugin
Log in your site Admin panel, select Extensions >> Template Manager, click on JA_COMMUNITY_PLUS.You can change all parameters as you wish.
1. Global Setting:
Click on Global tab to see the Global panel configuration: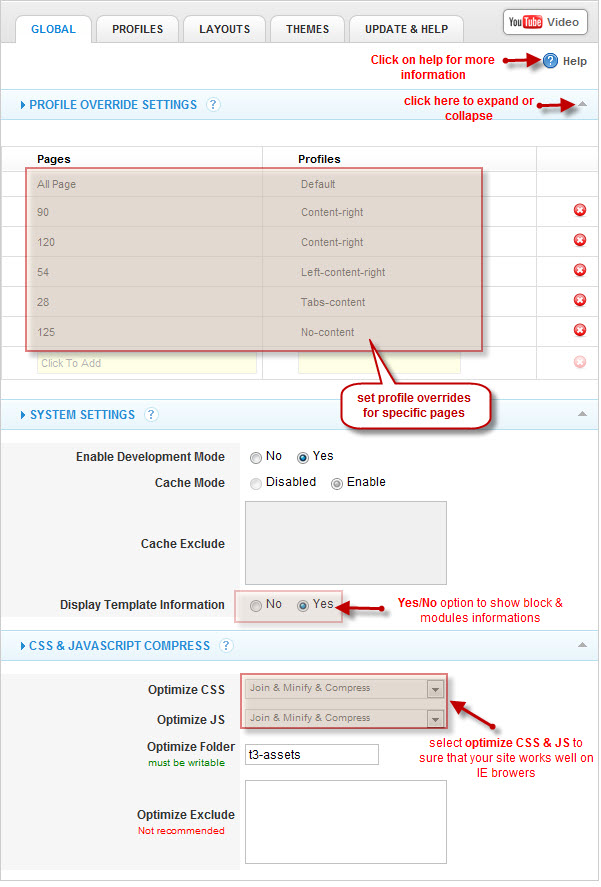
2. Profile settings in JA Community Plus:
You can customize the default profile to use your favorite settings, but each other profile can override any of these settings. The profile settings control the template logo, font-size, layout, menu system and generally all template features. Click on Profile tab to see the Profile Panel configuration as following image:
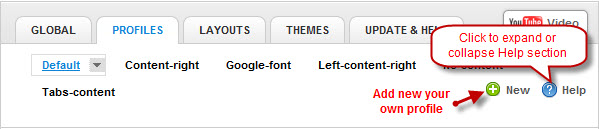
Click on Default to go to Default profile settings:
2.1 Logo settings:
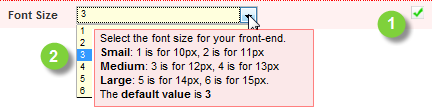
2.2 Setup the Font-size:
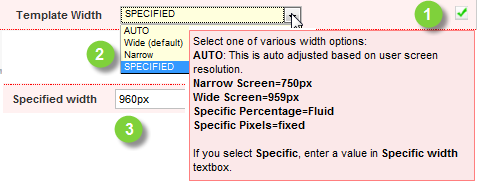
2.3 Adjust template width:
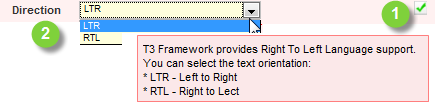
2.4 Right To Left language support.
2.5 T3 Logo Settings:

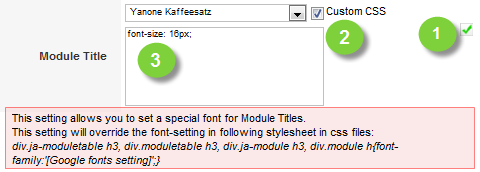
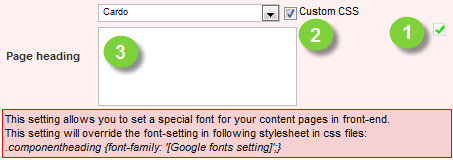
2.6 Google font Settings:


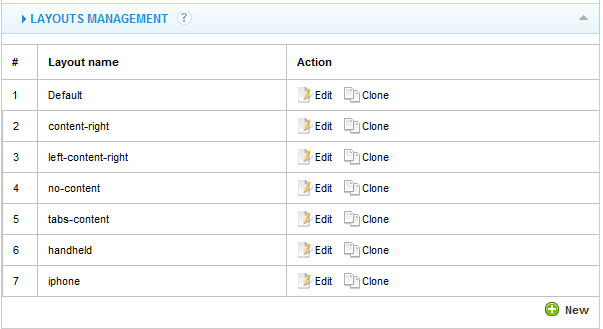
3. Layouts for JA Community Plus:
In this administration panel you can manage layouts used by the template. Using internal editors this panel will allow you to easily manage layouts (clone, edit any parameters to fit your need) on the fly.
4. Themes:
You can create your custom themes, pack them and upload them to the template themes folder right in the back-end, just like installing a template extension.
You also can upload new themes using an internal upload system, similar to Joomla! Install/Uninstall page. The themes you upload must be packed in a zip or gz archive format.
III. Modules Position:
You can see Modules Position via: Here
March 5, 2011 at 12:44 pm #379826Hi
While installing Community Plus template in version 1.6, I am getting the following error:
Strict Standards: Declaration of JButtonPopup::fetchId() should be compatible with that of JButton::fetchId() in……..
Is this a common issue? can you help?
 Ninja Lead
Moderator
Ninja Lead
Moderator
Ninja Lead
- Join date:
- November 2014
- Posts:
- 16064
- Downloads:
- 310
- Uploads:
- 2864
- Thanks:
- 341
- Thanked:
- 3854 times in 3563 posts
March 8, 2011 at 4:26 am #380205hi, open your php.ini, change error reporting option to:
error_reporting = E_ALL & ~E_NOTICE
that should help.1 user says Thank You to Ninja Lead for this useful post
-
AuthorPosts
This topic contains 3 replies, has 3 voices, and was last updated by ![]() Ninja Lead 13 years, 11 months ago.
Ninja Lead 13 years, 11 months ago.
We moved to new unified forum. Please post all new support queries in our New Forum