
Having an eCommerce Magento site and longing for more graphics, messages or charts? Wondering if you can do it manually? Sure! You can get it done with ease by creating a static block of your desired content and call it onto your front-end. Let me show you how.
Magento tutorial : How to create Static Blocks
What is a static block?
A static block allows you to showcase your promotion banners, sale graphics, return policies, size charts, etc. A good placement of static blocks is much of help to liven up your site with promotional graphics and messages to grab visitors' attention.
By default, our responsive Magento themes ship with the most rational arrangement of static blocks. Even if you want the static blocks as per our demo sites, basic knowledge about how to create static blocks could be really helpful for you. Not to mention that you may love to create static blocks for a different impression or just to show off some more messages.
Creative use of static blocks
1. Promotional/Discount banner

You can add more promotion banners into your site with static blocks
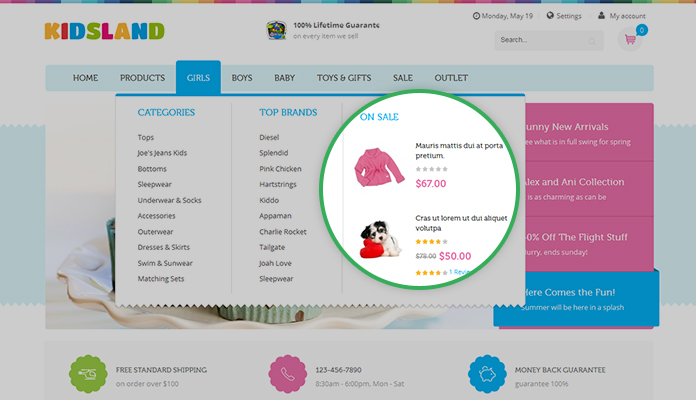
2. Size chart
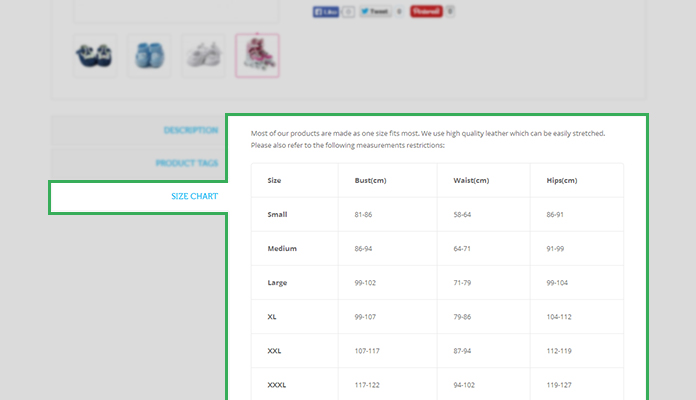
In case you need more size chart, create a static block and put the size chart into it
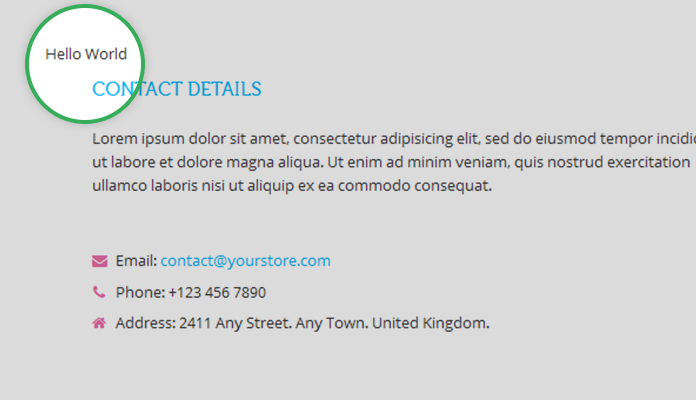
3. Contact info
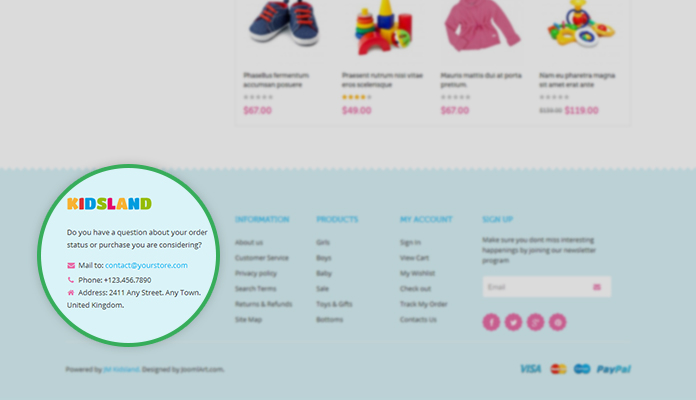
Static block for contact info
4. Contact Map
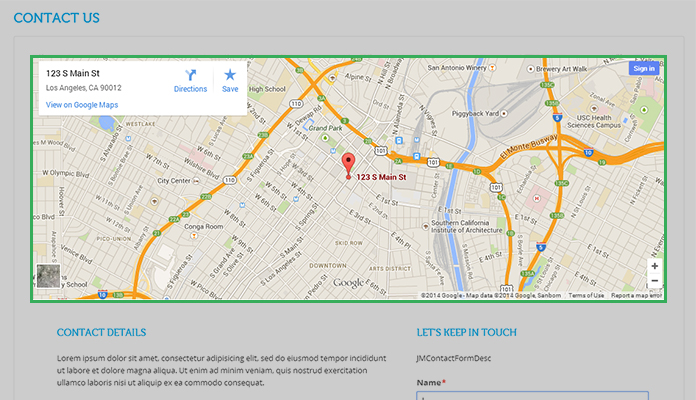
This map is common for Contact Us page
5. Product image
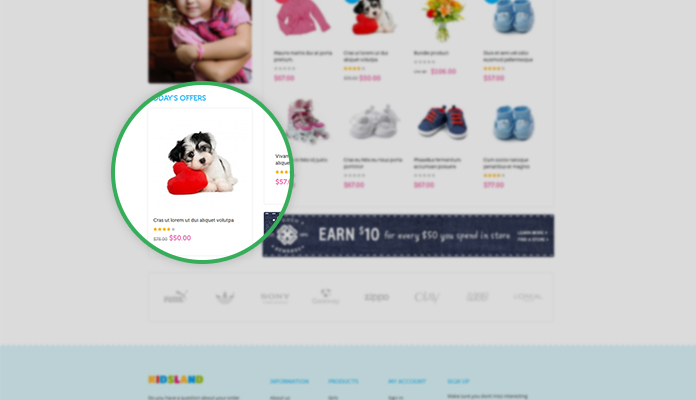
You can use static blocks to show off more product images as well.
6. Content in Mega Menu
You can add static blocks for graphic, clips or item detail directly into your Mega Menu
How to create a static block
It's actually quite simple. Say I want to create a {My Block} block with content "Hello World" and add it into our latest responsive Magento theme - JM Kidsland, let's see.
Step 1. Define position for the Static Block
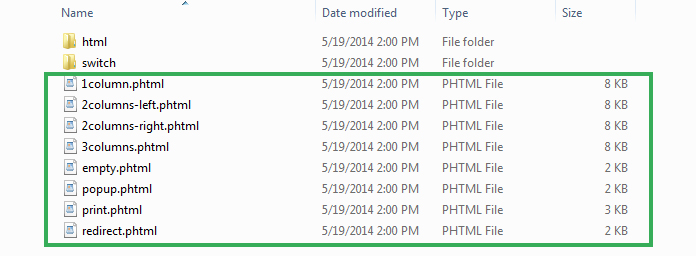
All the block positions within your eCommerce site are managed at app\design\frontend\default\{jm_themename}\layout\page.xml. Open this file and create a new position following the syntax :

XML file structure
<block type="core/text_list" name="tops1" as="tops1" translate="label">

                <label>Content Top 1</label>

            </block>
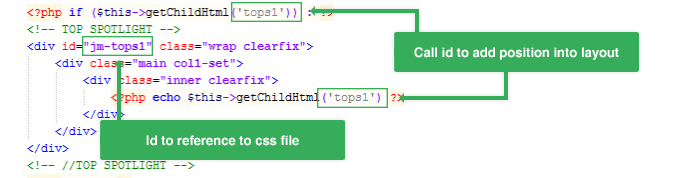
To change any block position, open \app\design\frontend\default\{jm_themename}\template\page and select the layout that the block belongs to.
Choose the layout you want to edit in page folder
Replace the position names in the below code with your desired ones. Then, copy and paste it into the layout code file.
XML file structure
<?php if ($this->getChildHtml('tops1')) : ?>

<!-- TOP SPOTLIGHT -->

<div id="jm-tops1" class="wrap clearfix">

<div class="main col1-set">

<div class="inner clearfix">

<?php echo $this->getChildHtml('tops1') ?>

</div>

</div>

</div>
Magento will recognize the block automatically and display it on the front-end as you have defined.
Step 2. Create the static block
1. In the Admin Panel, navigate to CMS >> Static Blocks.
2. In Static Blocks page, click the [Add New Block] button to create a new Static Block. Input name {My Block} with identifier = [myblock]. You can find more details about the Back-end Settings.
3. Click the [Save Block] button to complete.
Samples with various pages
Determine which page you wish to put the actual static block first. Each page will need different customization as below.
1. Homepage
With the static blocks displayed on the Homepage, you can configure them right in the back-end of the theme.
1. In the Admin Panel, navigate through CMS >> Page >> Home.
2. In {Design} tab, copy and paste the following code to display the block on Homepage. Parameter explanations for Back-end Settings.
<reference name="tops1">

<block type="cms/block" name="myblock">

<action method="setBlockId"><block_id>myblock</block_id></action>

</block>

</reference>
See what it is like in you front-end:
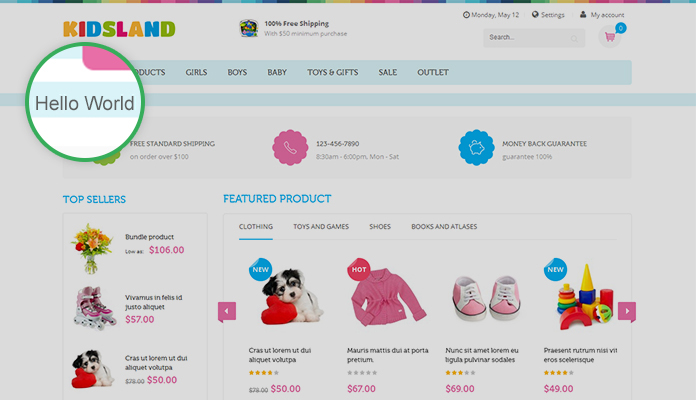
{My Block} is now on your homepage
2. Category and Product pages
If you want the block to appears in all category and product pages of your eCommerce Magento site (normally in the header or footer of your site), you will have to define it in the folder layout.
1. Enter app\design\frontend\default\{jm_themename}\layout\page.xml.
2. Copy the following code and paste it into the tag default translate="label" module="page".
XML file structure
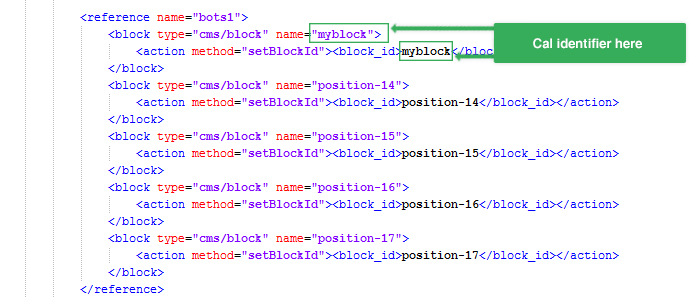
<reference name="bots1">

<block type="cms/block" name="myblock">

<action method="setBlockId"><block_id>myblock</block_id></action>

</block>


</reference>
Enjoy the footer with the new static block {myblock} :
{My Block} in the footer of your site
3. Contact Us
In case you wish to add any static block onto only one CMS page like Privacy page, Pricing page and so on, you can follow this example of contact page :
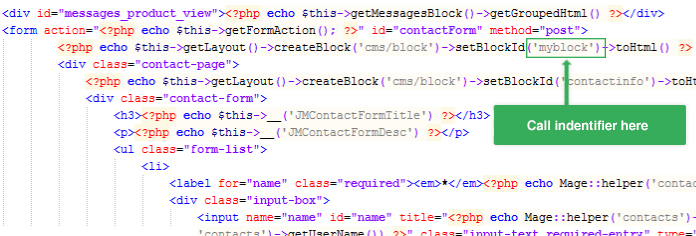
1. Enter app\design\frontend\default\{jm_themename}\template\contacts\form.phtml.
2. Copy the following code and paste it into the tag class="ct-contacts clearfix".
XML file structure
<form action="<?php echo $this->getFormAction(); ?>" id="contactForm" method="post">

<?php echo $this->getLayout()->createBlock('cms/block')->setBlockId('myblock')->toHtml() ?>

<div class="contact-page">

<?php echo $this->getLayout()->createBlock('cms/block')->setBlockId('contactinfo')->toHtml() ?>

<div class="contact-form">

<h3><?php echo $this->__('JMContactFormTitle') ?></h3>

<p><?php echo $this->__('JMContactFormDesc') ?></p>

<ul class="form-list">

<li>

<label for="name" class="required"><em>*</em><?php echo Mage::helper('contacts')->__('Name') ?></label>

<div class="input-box">

<input name="name" id="name" title="<?php echo Mage::helper('contacts')->__('Name') ?>" value="<?php echo $this->htmlEscape($this->helper('contacts')->getUserName()) ?>" class="input-text required-entry" type="text" />

</div>

</li>

<li>

<label for="email" class="required"><em>*</em><?php echo Mage::helper('contacts')->__('Email') ?></label>

<div class="input-box">

<input name="email" id="email" title="<?php echo Mage::helper('contacts')->__('Email') ?>" value="<?php echo $this->htmlEscape($this->helper('contacts')->getUserEmail()) ?>" class="input-text required-entry validate-email" type="text" />

</div>

</li>

<li>

<label for="telephone"><?php echo Mage::helper('contacts')->__('Telephone') ?></label>

<div class="input-box">

<input name="telephone" id="telephone" title="<?php echo Mage::helper('contacts')->__('Telephone') ?>" value="" class="input-text" type="text" />

</div>

</li>

<li>

<label for="comment" class="required"><em>*</em><?php echo Mage::helper('contacts')->__('Comment') ?></label>

<div class="input-box">

<textarea name="comment" id="comment" title="<?php echo Mage::helper('contacts')->__('Comment') ?>" class="required-entry input-text" cols="5" rows="3"></textarea>

</div>

</li>

</ul>

<div class="buttons-set">

<button type="submit" title="<?php echo Mage::helper('contacts')->__('Submit') ?>" class="button"><span><span><?php echo Mage::helper('contacts')->__('Submit') ?></span></span></button>

<p class="required"><?php echo Mage::helper('contacts')->__('* Required Fields') ?></p>

<input type="text" name="hideit" id="hideit" value="" style="display:none !important;" />

</div>

</div>

</div>

</form>
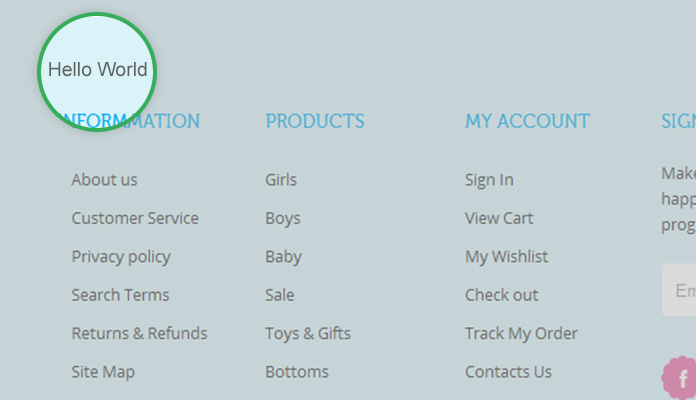
Now you can see the newly created block in the front-end :
{My Block} now appears in the Contact Us page
Now give it a try and add cool static blocks to your eCommerce Magento site.