Optimize CSS and JS
This is a new feature in T3 Framework (version 2.1.0), if you are running any template developed with T3 framework and you want to use this feature, you have to upgrade to version 2.1.x
How optimization works.
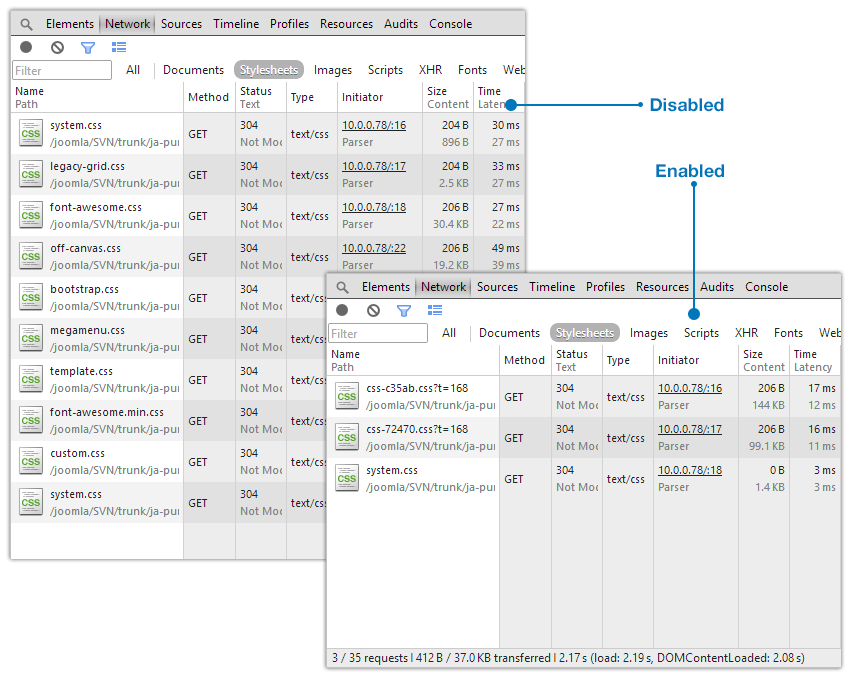
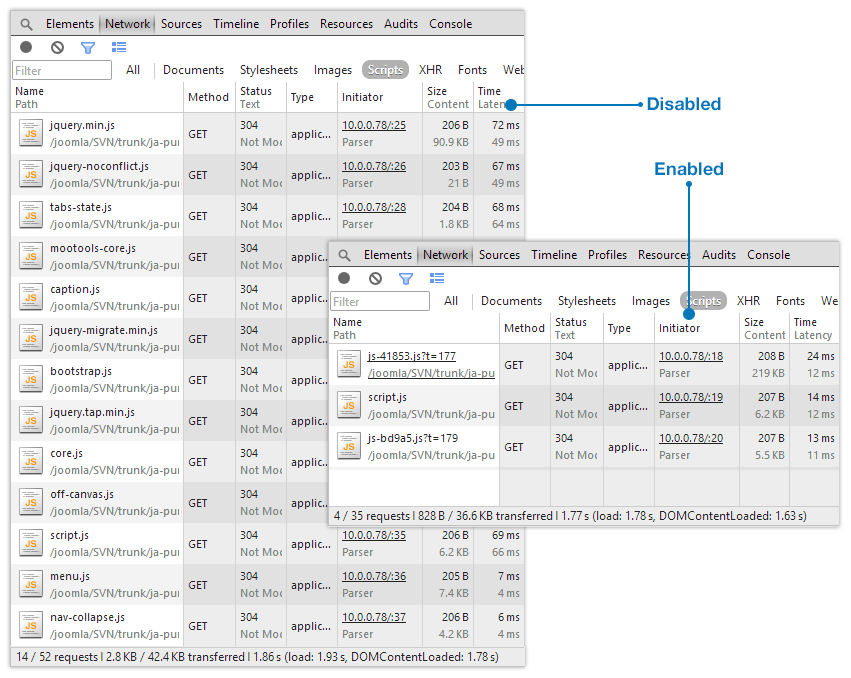
The optimization feature is to improve your site performance. The feature is applied for CSS and JS. When the option is enabled, it will join and compress CSS and JS files. When user view a page, instead of loading all CSS and JS files, it will load the optimized CSS and JS file only.
When enable optimization, it will:
- Decrease total file size to be loaded in one page
- Decrease number of requests when view a page
CSS optimization
JS optimization
How to enable optimization
To enable this feature, please turn off the development mode in General tab in any purity template style back-end setting.
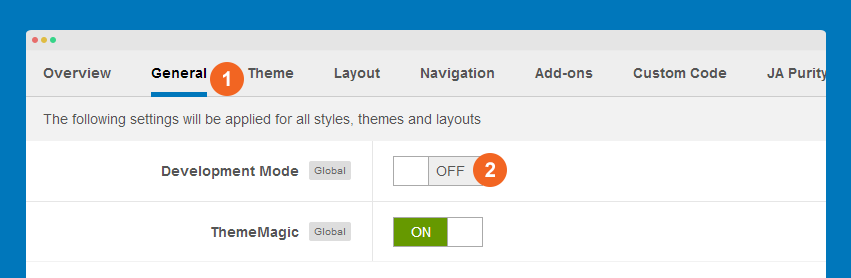
Now enable options: Optimize CSS and Optimize JS.
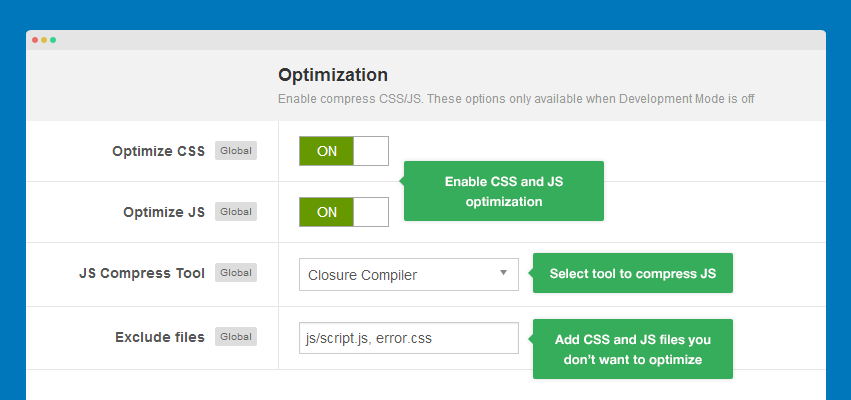
For JS optimization, we provide 2 tools to compress: Closure Compiler and JSMIN. The Closure compiler has better compress and more accurate but it limit the size of optimization group (under 200kb).
You can exclude CSS and JS files that you don't want to optimize, just add the file name, if you have many files, please saperate them with comma. If you have 2 same files, please add full path to the files to distinguish.
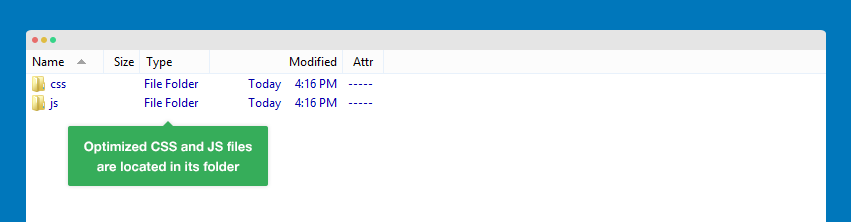
Where optimized files saved?
All the optimized CSS are located in templates/purity_iii/t3-assets/css folder and the optimized JS files are located in templates/purity_iii/t3-assets/js.
How optimized files are generated?
When the optimization option is enabled, the optimized CSS and JS files will be auto generated when a page is viewed in the first time. If there is any change in the CSS, JS loaded in a page, new optimized JS and CSS files will be auto gererated again. So to prevent from having a lot of optimized CSS and JS files, you should check before turn the Optimization option on.
Masthead configuration
In Purity III, there are 2 ways to create masthead for any menu item.
Using extra field
In menu setting panel, we add extra fields that allow you to add masthead for the menu item. Then extra fields are in Page Display tab.
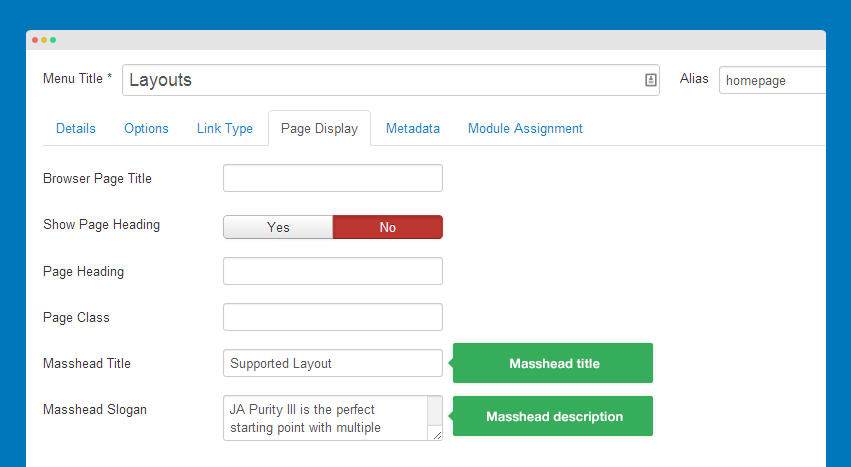
You can customize style of masthead, you can find the style of masthead in .less file in templates/purity_iii/less.
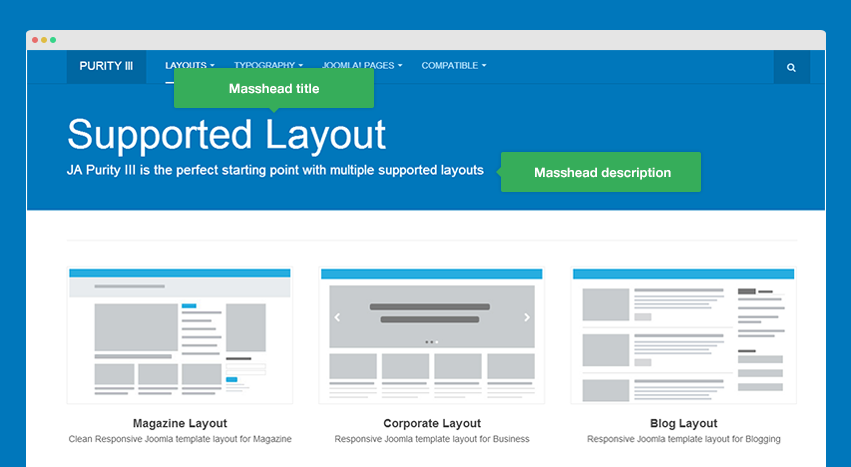
Front-end Appearance
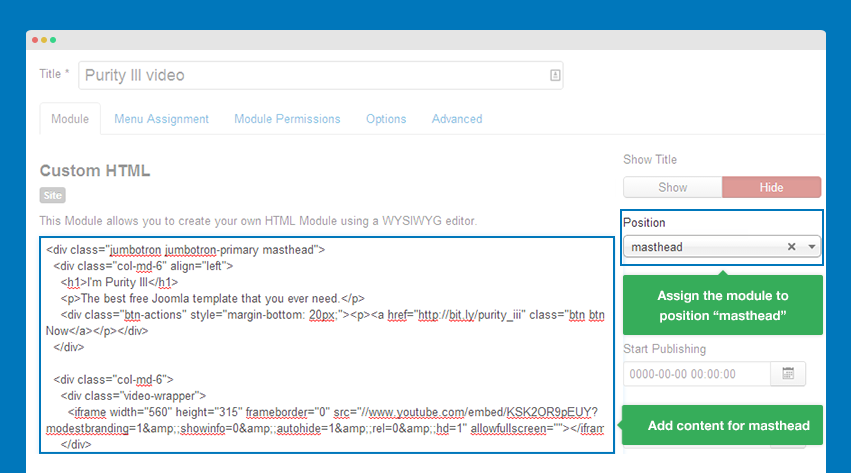
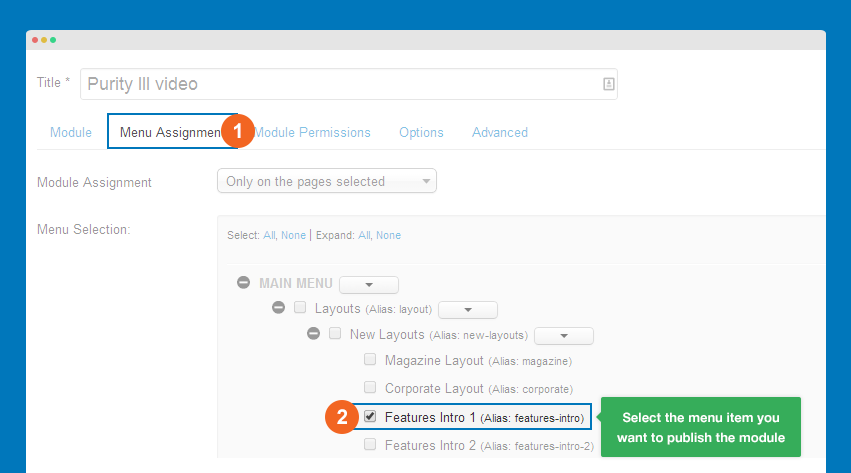
Using masthead position
By default, position masthead is enabled in all layouts.

If you want to display masthead in any specific page, create a module, add content to the module, assign to position masthead. Normally, we use Custom HTML module so that we can add content flexiblely.
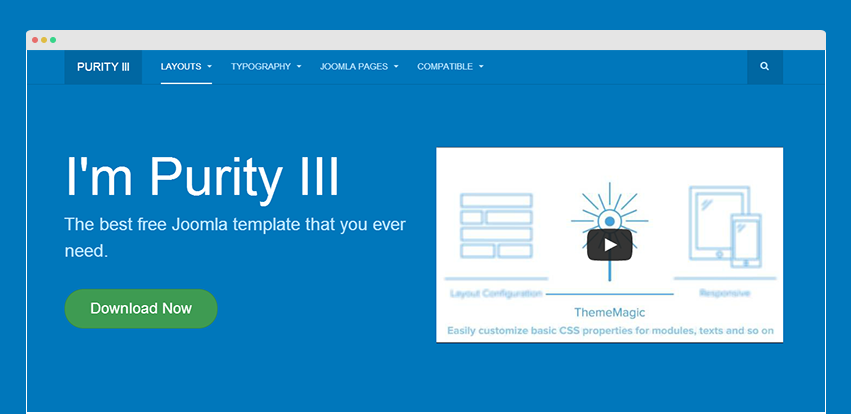
Example content used in Purity III demo
<div class="jumbotron jumbotron-primary masthead">
<div class="col-md-6" align="left">
<h1>I'm Purity III</h1>
<p>The best free Joomla template that you ever need.</p>
<div class="btn-actions" style="margin-bottom: 20px;"><p><a href="http://bit.ly/purity_iii" class="btn btn-success btn-lg">Download Now</a></p></div>
</div>
<div class="col-md-6">
<div class="video-wrapper">
<iframe width="560" height="315" frameborder="0" src="//www.youtube.com/embed/KSK2OR9pEUY?modestbranding=1&;showinfo=0&;autohide=1&;rel=0&;hd=1" allowfullscreen=""></iframe>
</div>
</div>
</div>
Assign the module to the page you want to display in.
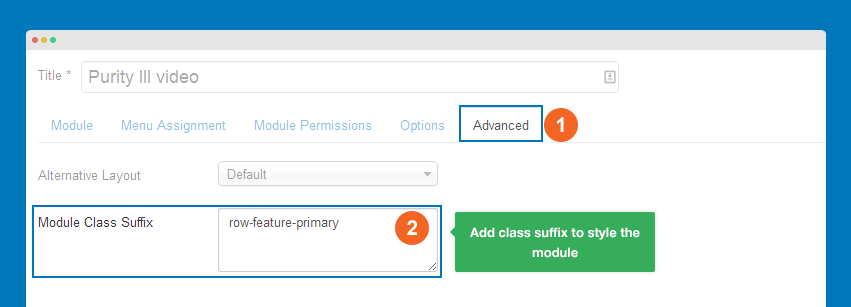
Add class to style for the module. In Purity demo, modules in masthead position use class row-feature-primary, the class is to set background color for masthead.
Front-end appearance
In conclusion, if you just want to use simple masthead with title and description, you should use extra fields in menu setting. If you want to have flexible content in masthead, you can select to use masthead position.
Install Google analytics
For every web master, Google analytics is a must-have tool. The installation of Google analytics now is so easy with the suppport of T3 framework.
Quick guide to get your Google analytics tracking code:
- Sign in to your Analytics account, and go to the admin page.
- Select an account from the dropdown in the Account column.
- Select a property from the dropdown in the Property column.
- Click Tracking Info.
When you have Google analytics tracking code, open any Purity III template style, go to Custom code tab then add your Google analytics tracking code to the field Before.

Note:
You can add the scripts to any template style, as this is global settings.
An other way to add Google analytics tracking code to your site is adding the code before closing
tag in the header.php file in templates/purity_iii/tpls/blocks.
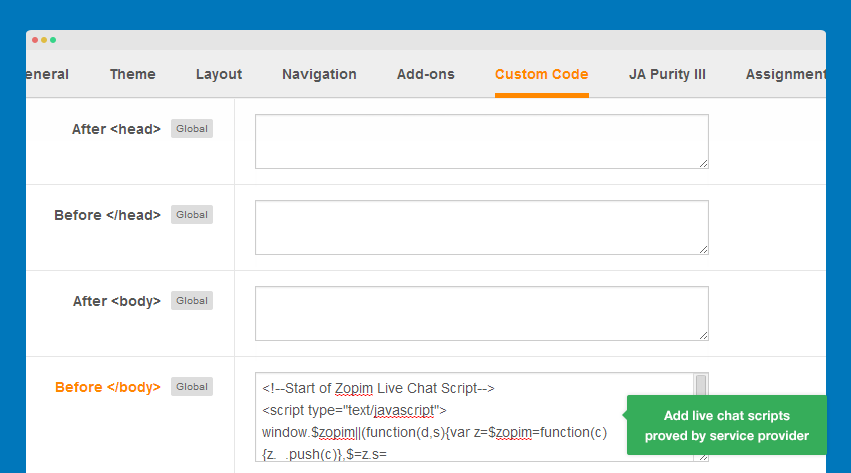
Install live chat scripts
Normally, when you use a Live chat service, the provider will give scripts to add to your site. Instead of adding the scripts to file, you now can paste the scripts to the Purity III template style back-end setting.
Open any Purity III template style, go to Custom code tab then add live chat to correct field.
Note:
You can add the scripts to any template style, as this is global settings.
Add new fonts
Purity III use font awesome 2 and font awesome 3 font. If you want to use other font, you can add.
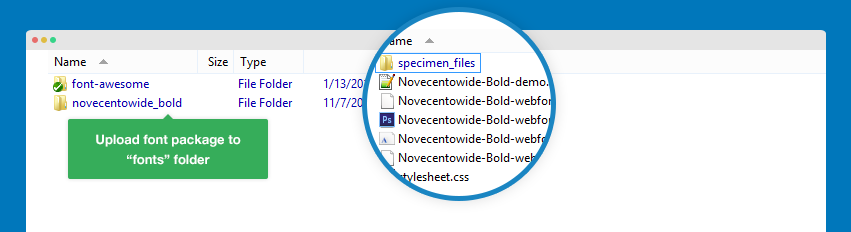
Add font package
There are 2 steps to add new font package to your template:
Step 1: add font package
Upload your font package to templates/purity_iii/fonts
Step 2: embed new font
Please open asset.xml in folder templates/purity_iii/etc
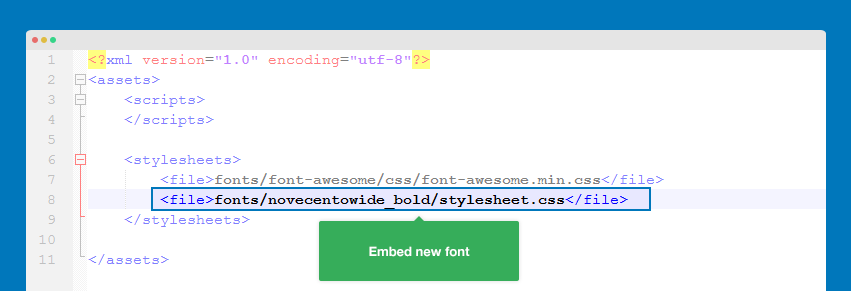
<stylesheets>
	<file>fonts/font-awesome/css/font-awesome.min.css</file>
	<file>fonts/novecentowide_bold/stylesheet.css</file>
</stylesheets>
Google fonts
If you want to use Google fonts, you just need to difine the google fonts you want to use in the asset.xml in templates/purity_iii/etc.
<stylesheets>
	<file>http://fonts.googleapis.com/css?family=Roboto+Slab:400,100,300</file>
</stylesheets>
Embed stylesheet and Javascript
If you want to add new stylesheet and Javascript to Purity III template, there are 2 ways to do this.
#1. use head.php file
Open head.php file in the templates/purity_iii/tpls/blocks folder, then declare the new stylesheet and Javascript files that you just added.
Format to add CSS stylesheet
<?php
// CUSTOM CSS
if(is_file(T3_TEMPLATE_PATH . '/css/custom.css')) {
$this->addStyleSheet(T3_TEMPLATE_URL.'/css/custom.css');
}
?>
Format to add Javascript
<?php
if(is_file(T3_TEMPLATE_PATH . '/templates/purity_iii/js/holder.js')) {
$this->addScript(T3_TEMPLATE_URL.'/templates/purity_iii/js/script.js');
}
?>
#2. use assets.xml file
An other way to add new the CSS, Javascript is embedding them to assets.xml in the templates/t3_bs3_blank/etc.
Format to embed CSS stylesheets
<stylesheets>
<file>fonts/novecentowide/stylesheet.css</file>
<file>http://fonts.googleapis.com/css?family=Roboto+Slab:400,100,300</file>
</stylesheets>
Format to embed CSS stylesheets
<scripts>
<file>js/jquery.mousewheel.js</file>
<file>js/iscroll.js</file>
<file>js/script.js</file>
</scripts>
Module configuration
The section includes configuration of modules used in Purity III demo: default Joomla modules and Custom HTML module.
1. Sample Banner 1
Module type: Custom HTML
Module Position: sidebar-2
Module Suffix: NOT USED
HTML code
<a href="#" title="Sample banner"><img class="img-responsive" src="/images/joomlart/banners/sb-1.jpg" alt="Sample banner" /></a>
2. Custom tabs
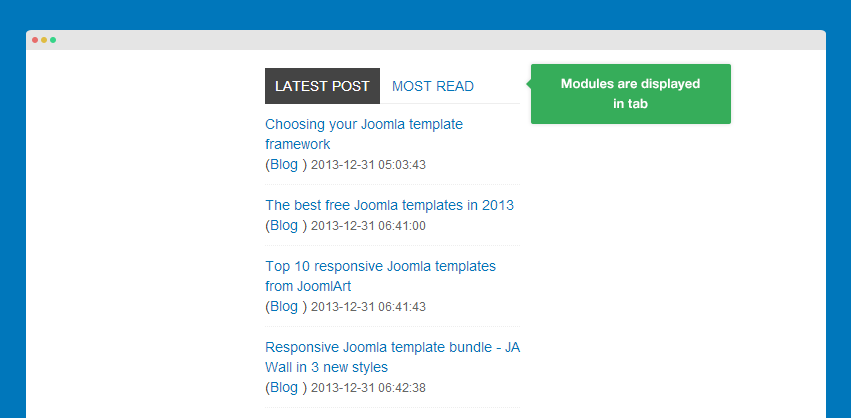
To have same tabs as in our demo, please follow the instructions.
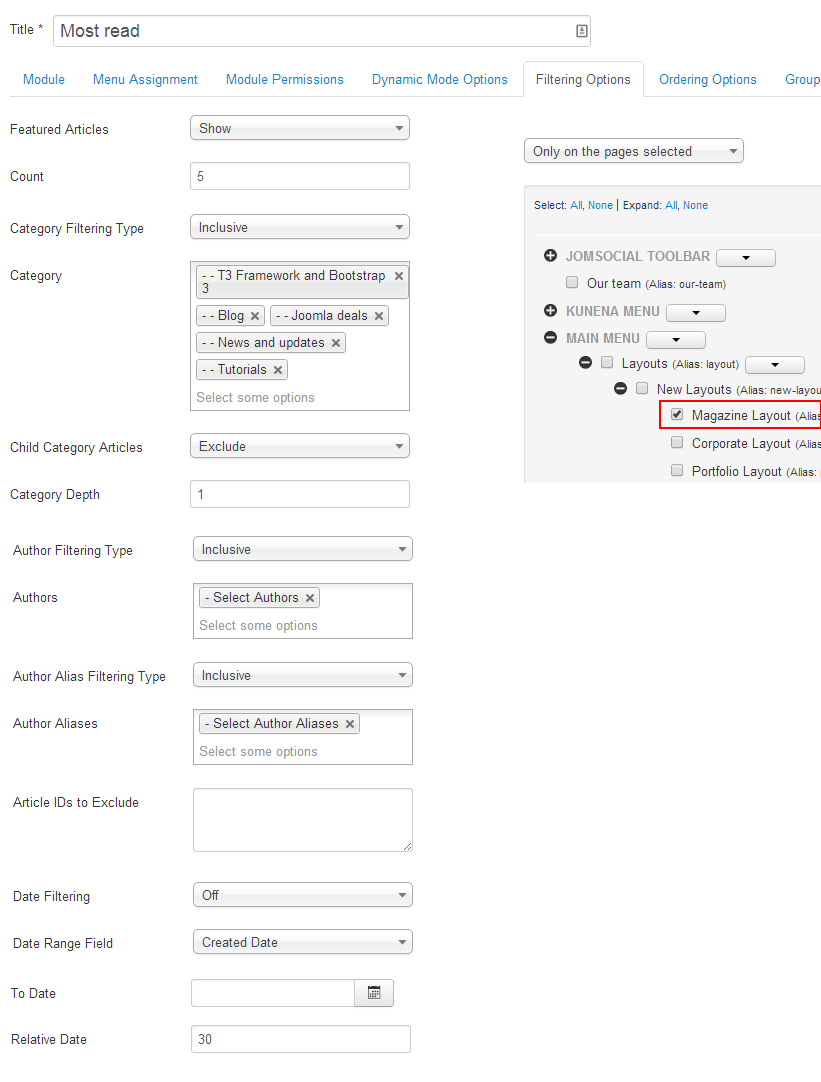
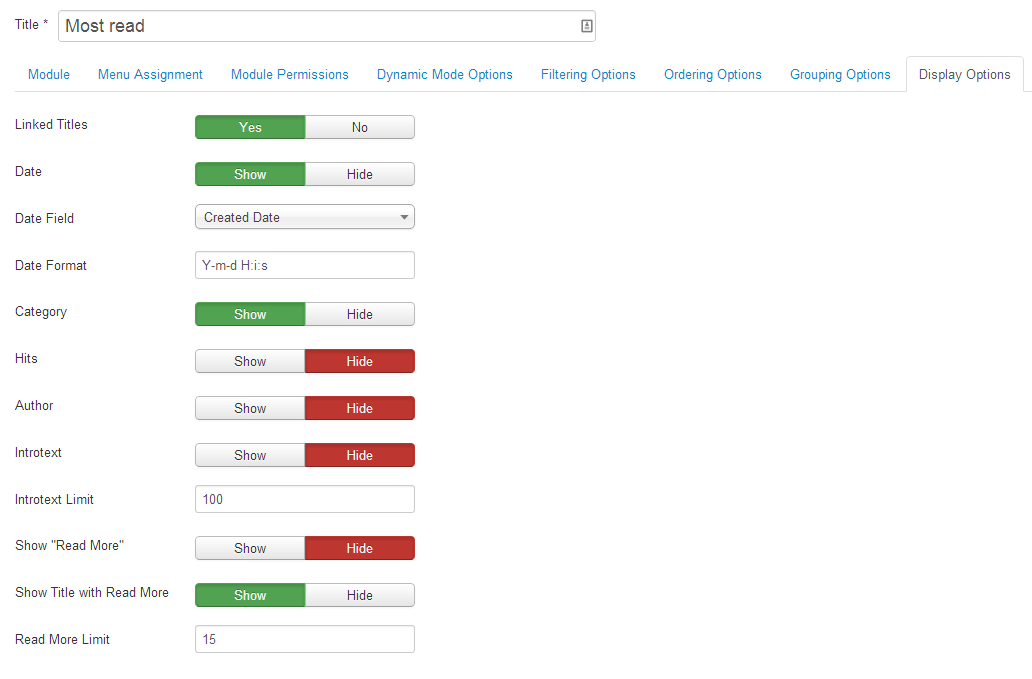
Step 1: create "Most Read" module
Module type: Articles Category
Module Position: tab-1
Module Suffix: NOT USED
Step 2: create "Popular post" module
Module type: Articles Category
Module Position: tab-2
Module Suffix: NOT USED
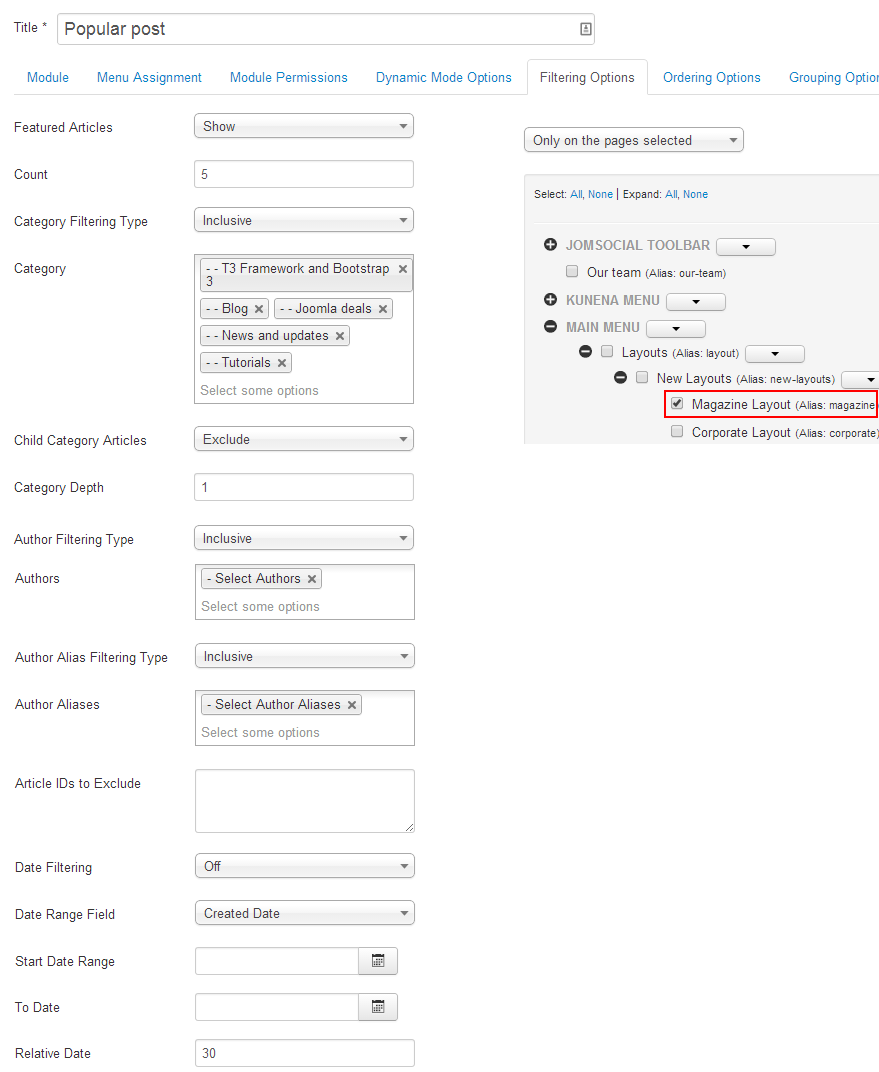
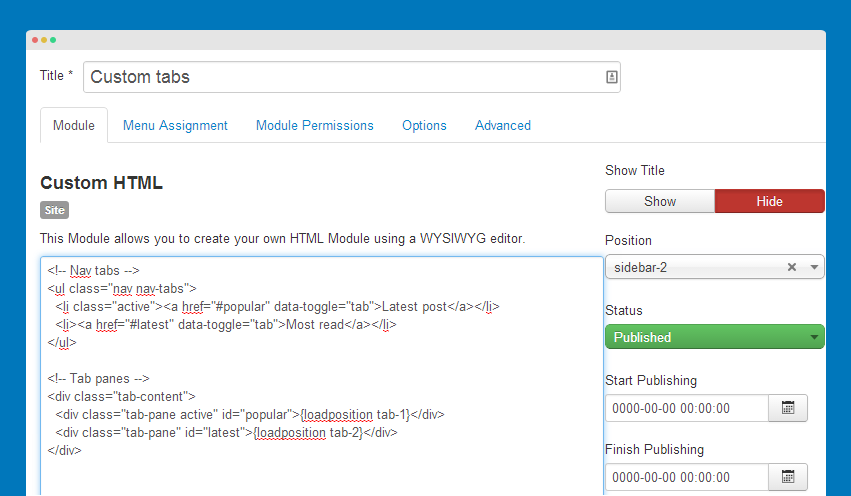
Step 3: create Custom HTML module to define "Most Read" and "Popular post" modules in tab.
Module type: Custom HTML
Module Position: sidebar-2
Module Suffix: NOT USED
<!-- Nav tabs -->
<ul class="nav nav-tabs">
  <li class="active"><a href="#popular" data-toggle="tab">Latest post</a></li>
  <li><a href="#latest" data-toggle="tab">Most read</a></li>
</ul>

<!-- Tab panes -->
<div class="tab-content">
  <div class="tab-pane active" id="popular"></div>
  <div class="tab-pane" id="latest"></div>
</div>
Custom HTML module setting
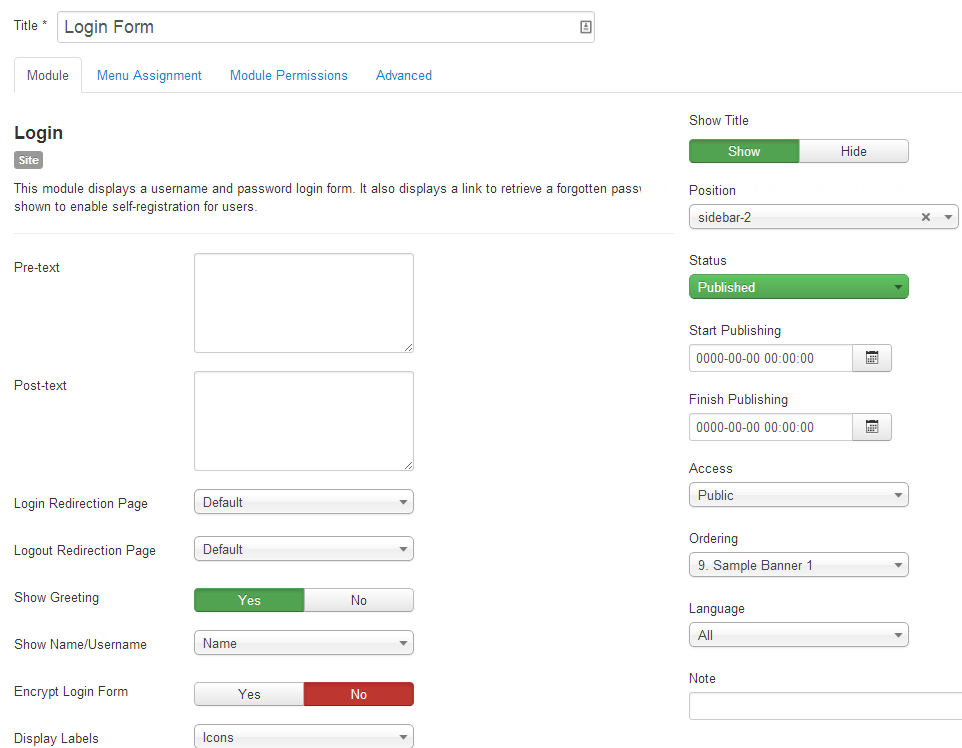
3. Login Module
Module type: login
Module Position: sidebar-2
Module Suffix: NOT USED
HTML code
4. Slideshow
Module type: Custom HTML
Module Position: slideshow
Module Suffix: NOT USED
HTML code
<div class="container">

<div id="carousel-example-generic" class="carousel slide" data-ride="carousel">
  <!-- Indicators -->
  <ol class="carousel-indicators">
    <li data-target="#carousel-example-generic" data-slide-to="0" class="active"></li>
    <li data-target="#carousel-example-generic" data-slide-to="1"></li>
    <li data-target="#carousel-example-generic" data-slide-to="2"></li>
  </ol>

  <!-- Wrapper for slides -->
  <div class="carousel-inner">

    <div class="item active">
     <img src="/images/joomlart/slideshow/sl-1.jpg" alt="Sample image" />
      <div class="carousel-caption">
      <h2>Your perfect starting template, Purity III</h2>
      <p>Either it's your first time with Joomla or you are a developer already, Purity III won't let you down.</p>
     </div>
    </div>

    <div class="item">
      <img src="/images/joomlart/slideshow/sl-2.jpg" alt="Sample image" />
      <div class="carousel-caption">
      <h2>This is the best FREE Joomla 3 template!</h2>
      <p>We have drunken too much of the best… but this repsonsive Joomla template truly is, and IT'S FREE!</p>
     </div>
    </div>
    <div class="item">
      <img src="/images/joomlart/slideshow/sl-3.jpg" alt="Sample image" />
      <div class="carousel-caption">
      <h2>The next generation of Purity series</h2>
      <p>Sophisticated in Design, Brilliant in Features. That's how we define Purity Series.</p>
     </div>
    </div>
  </div>

  <!-- Controls -->
  <a class="left carousel-control" href="#carousel-example-generic" data-slide="prev">
    <span class="glyphicon glyphicon-chevron-left"></span>
  </a>
  <a class="right carousel-control" href="#carousel-example-generic" data-slide="next">
    <span class="glyphicon glyphicon-chevron-right"></span>
  </a>
</div>

</div>
4. Team members
Module type: Custom HTML
Module Position: sidebar-2
Module Suffix: NOT USED
HTML code
<div class="media">
  <a href="#" class="pull-left"><img src="/images/joomlart/corporate/staff-1.jpg" alt="Sample image" style="width: 60px;" class="img-thumbnail" /></a>
  <div class="media-body">
  <h4 class="media-heading">Scott Singleton</h4>
    <strong><small>CEO Director</small></strong><br />
    <small><a href="mailto:ceo@your-domain.com">ceo@your-domain.com</a></small>
  </div>
</div>

<div class="media">
  <a href="#" class="pull-left"><img src="/images/joomlart/corporate/staff-2.jpg" alt="Sample image" style="width: 60px;" class="img-thumbnail" /></a>
  <div class="media-body">
  <h4 class="media-heading">Marie Hall</h4>
    <strong><small>Managing Director</small></strong><br />
    <small><a href="mailto:sale@your-domain.com">sale@your-domain.com</a></small>
  </div>
</div>

<div class="media">
  <a href="#" class="pull-left"><img src="/images/joomlart/corporate/staff-3.jpg" alt="Sample image" style="width: 60px;" class="img-thumbnail" /></a>
  <div class="media-body">
  <h4 class="media-heading">Mamie Ray</h4>
    <strong><small>Sales manager</small></strong><br />
    <small><a href="mailto:ceo@your-domain.com">sales@your-domain.com</a></small>
  </div>
</div>

<div class="media">
  <a href="#" class="pull-left"><img src="/images/joomlart/corporate/staff-4.jpg" alt="Sample image" style="width: 60px;" class="img-thumbnail" /></a>
  <div class="media-body">
  <h4 class="media-heading">Johnny Payne</h4>
    <strong><small>Creative director</small></strong><br />
    <small><a href="mailto:ceo@your-domain.com">design@your-domain.com</a></small>
  </div>
</div>
5. Our partners
Module type: Custom HTML
Module Position: sidebar-2
Module Suffix: NOT USED
HTML code
<img src="/images/joomlart/corporate/partners.gif" alt="Sample image" class="image-reponsive" />
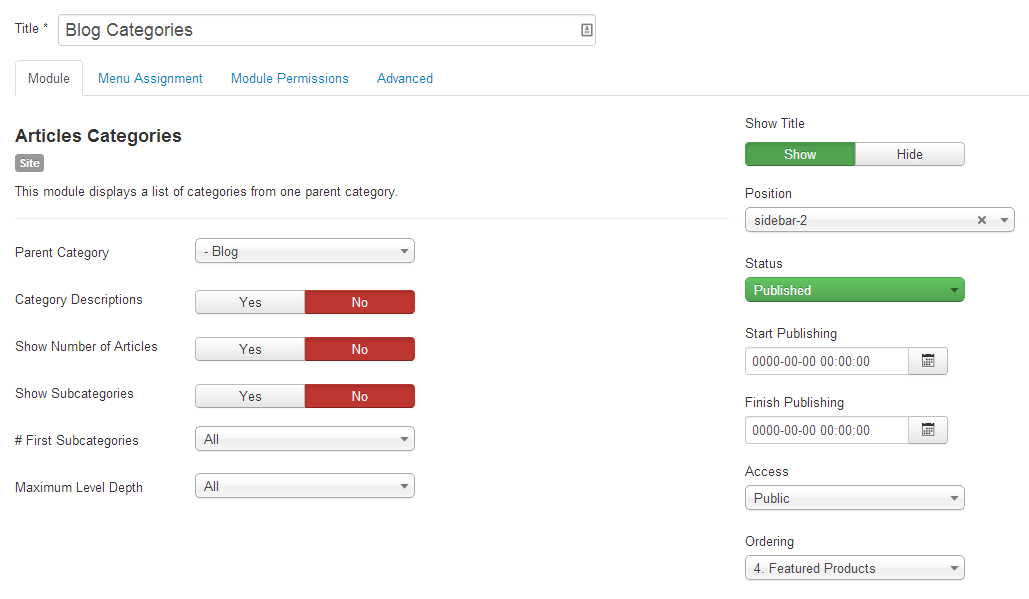
6. Blog Categories
Menu type: Articles Categories
Module Position: sidebar-2
Module Suffix: NOT USED
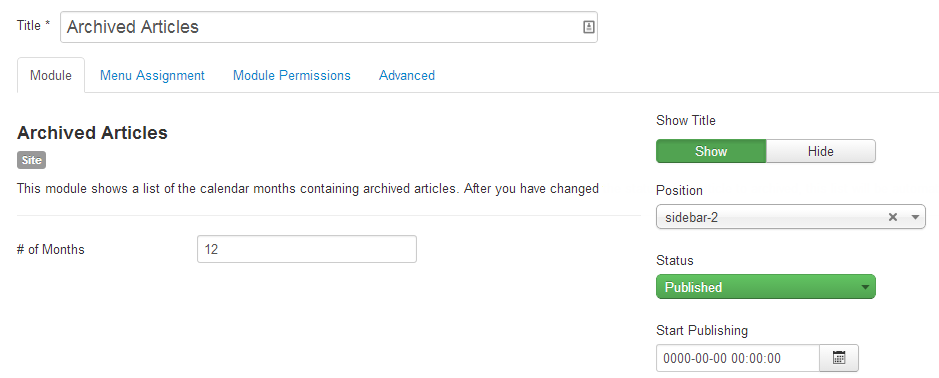
7. Archived Articles
Menu type: Archived Articles
Module Position: sidebar-2
Module Suffix: NOT USED
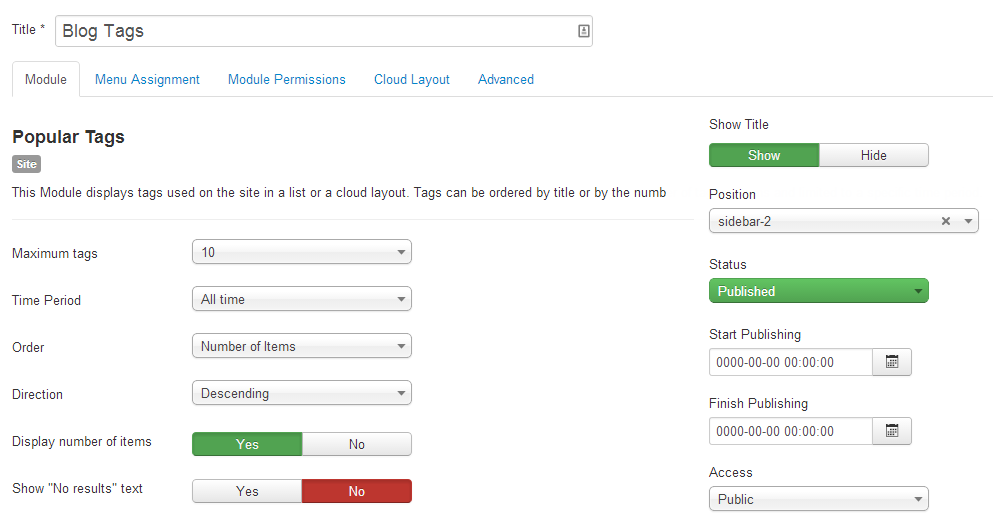
8. Blog Tags
Menu type: Popular tags
Module Position: sidebar-2
Module Suffix: NOT USED
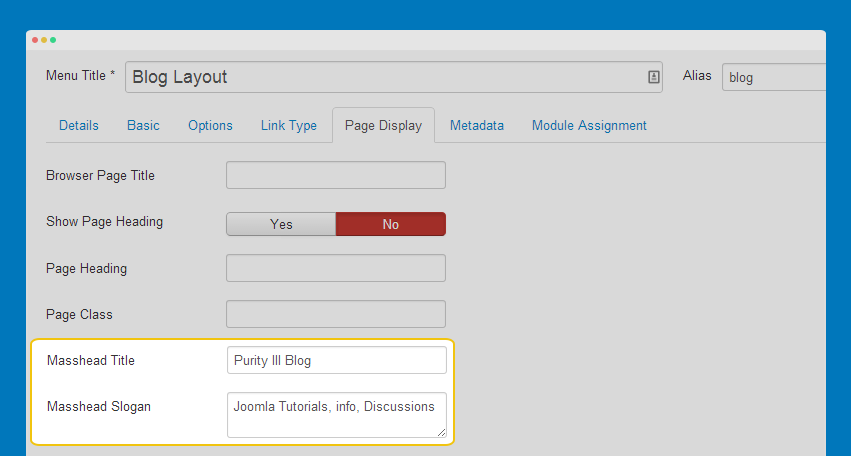
9. Masthead
You can enable masthead for any menu. In the menu setting, go to Page Display tab to add Masthead title and Masthead Slogan.
Looking for Custom HTML module on Features Intro layout 2? Check it out now.
Multilingual site setup
If you want to build a multilingual site with Purity III template, just follow the instruction below:
There are 2 steps included in the process
- Set up multilingual
- Style module "Language switcher"
- Configure menu that use override layouts
- Multilingual for Megamenu (for manual setup only)
#1: Set up multilingual
The setup process can be varied depending on your site's development status.
Fresh installation with the Quickstart package
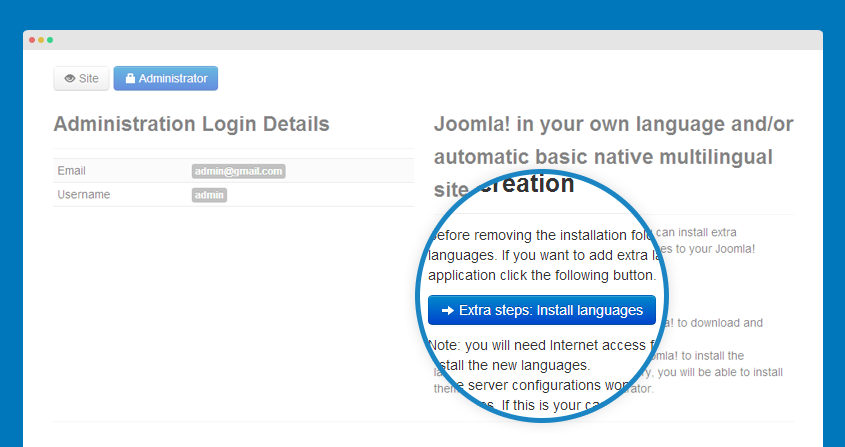
In this case, Joomla core itself provides auto multilingual setup. You only need to enable this option during the installation process. Right after the database installation step, you will be able to go through the multilingual setup. It has 3 steps:
1: Enable "Extra step: Install language"
2: Install languages

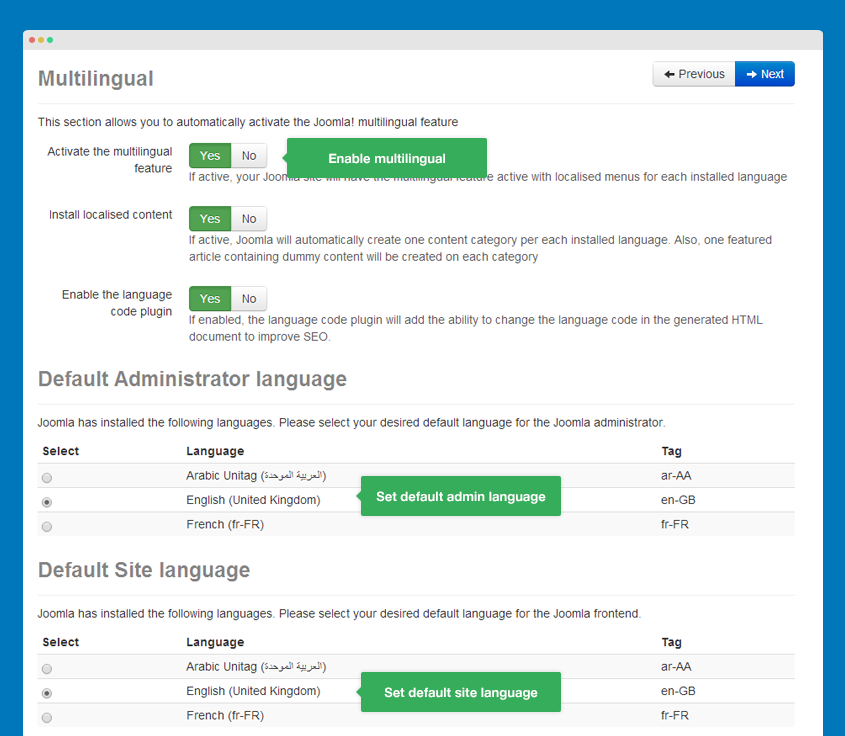
3: Enable "Multilingual" feature and select default admin/site language
Your site is now multilingual, the next step is creating "Language switcher" module.
Setup for an existing Joomla 2.5 and Joomla 3 site
From version 2.5, it's now easier to build a multilingual site without seeking help from third party extension. There are 2 possible ways to build up a multilingual site: manual setup or auto setup with JA Multilingual Component. It's up to you to go either way.
In this tutorial, we will show you step-by-step to build a multilingual site with JA Multilingual component, the free Joomla extension not only helps setting up a multilingual site for you, it also translates all content in your site: articles, menus, modules, third party extensions, event metadata, saving you A LOT of time!
Step 1: Install the component
If you are new to Joomla, you can check out our detail guide on extension installation
How to install extensionsStep 2: Configure translation service
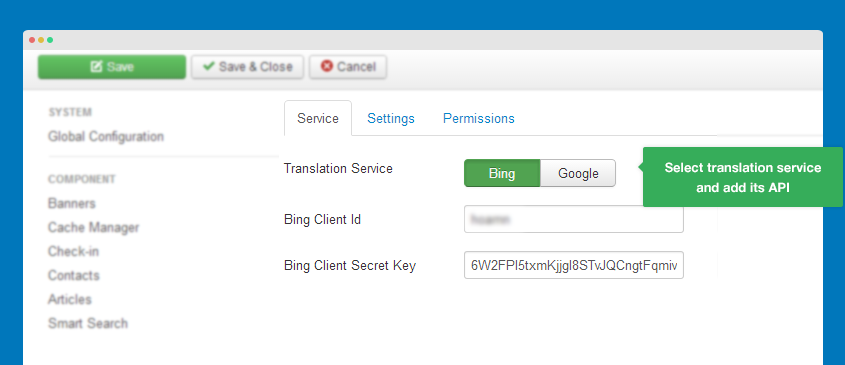
The component currently supports 2 translation services: BING and Google. What you need is registering BING API or Google API, add the info to the configuration of the component.
Get BING API for Free Get Google API
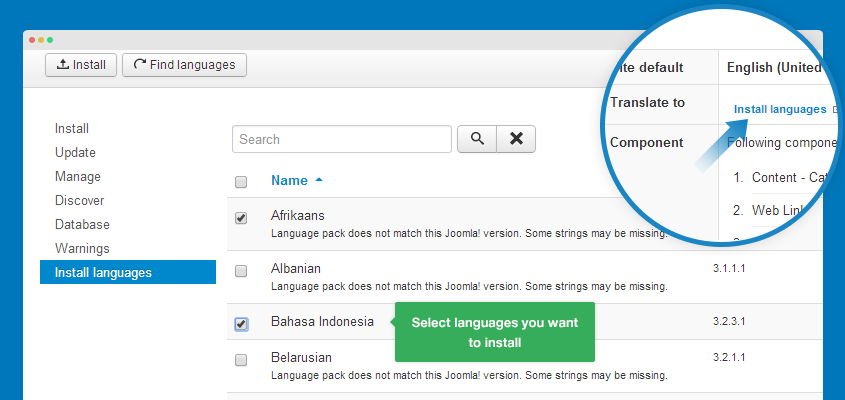
Step 3: Install languages
Click on "Install language" then select languages you would like to install.
Step 4: Translate languages
Click on "Translate All" to translate all installed languages. You can check the translation process on the right pannel.
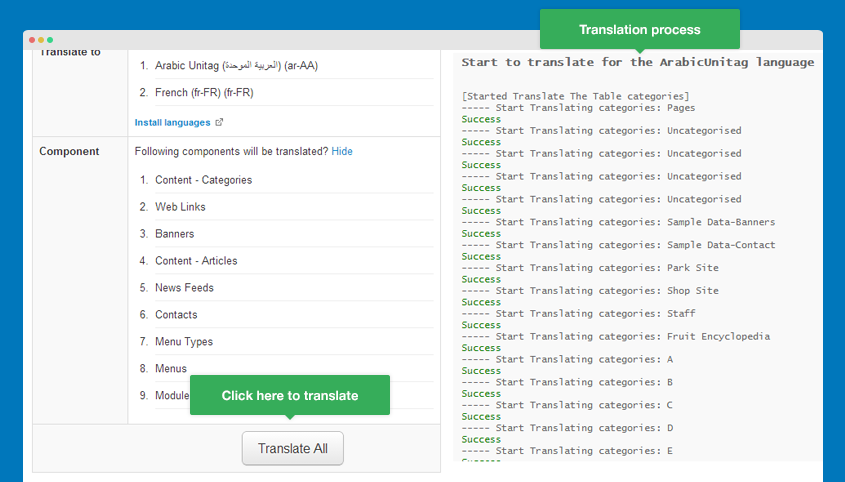
The translation content includes:
- Banners
- Content - Categories
- Contacts
- Content - Articles
- Menus
- Menu types
- Modules
- News Feeds
- Web Links
After the installation is done, your site is now multilingual.
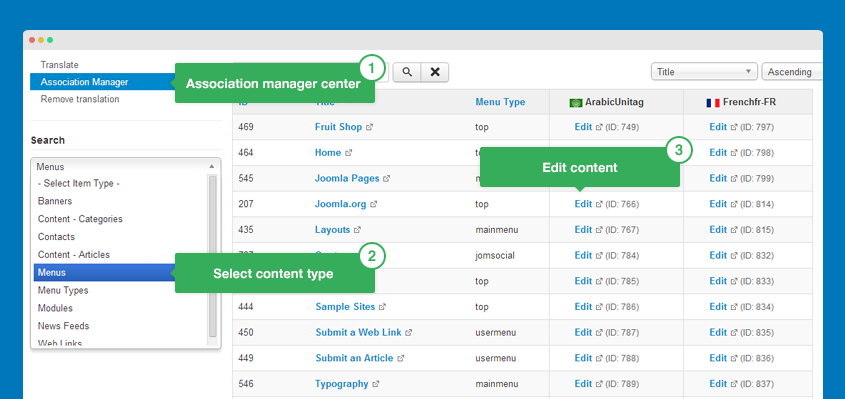
To manage association or to edit content, the best place to do that is the "Association Manager" panel.
You can also use manual setup as Joomla default supports.
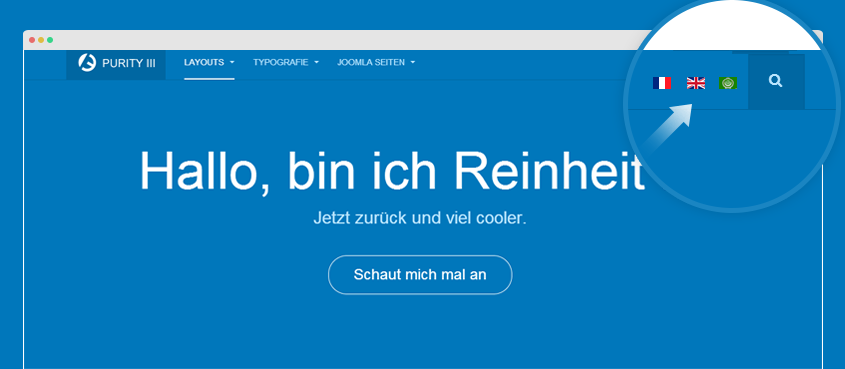
#2: Publish "Language switcher" module
The module allow users to switch languages in your site.
Module setting
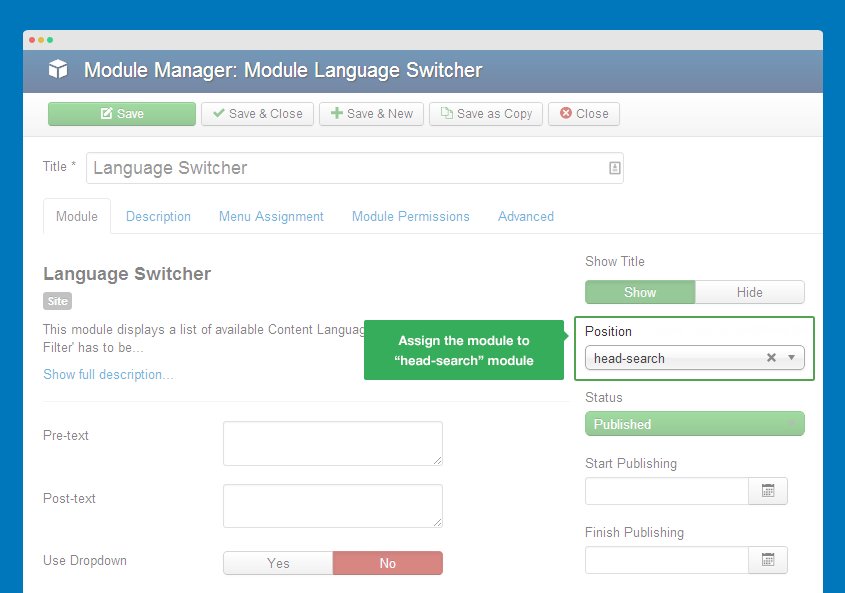
Please assign the module to position "head-sear" and to all menu items. You can leave other setting as default.
Custom style
By default, when you publish the module in the "head-search", it does not look as nice as you might like, so you might need to custom its style a bit.
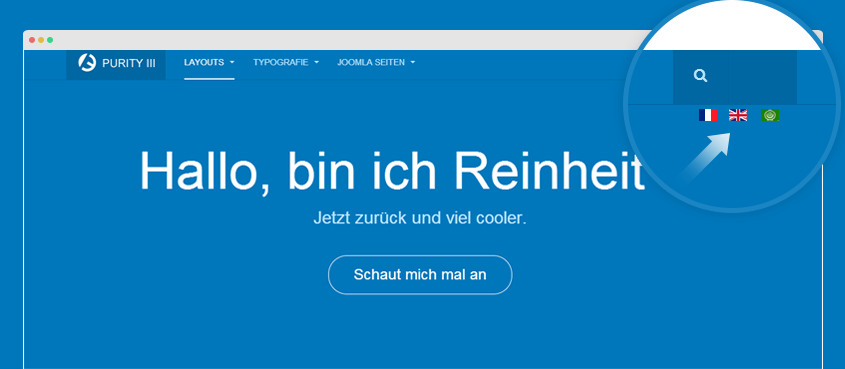
To custom style, add style to any .less file in your template LESS folder (templates/purity_iii/less).
Add the following style to the file: templates/purity_iii/less/style.less
// language switcher module
// ---------
.mod-languages {
	position: absolute;
	left: -100px;
	top: 20px;
	// more style comes here
}
#3: Configure menu that use override layout
For default Joomla layouts, it works fine but for override layouts (Magazine, xBlog, Portfolio, Feature Intro 1, Feature intro 2, Corporate, Glossary), we need to configure its menu.
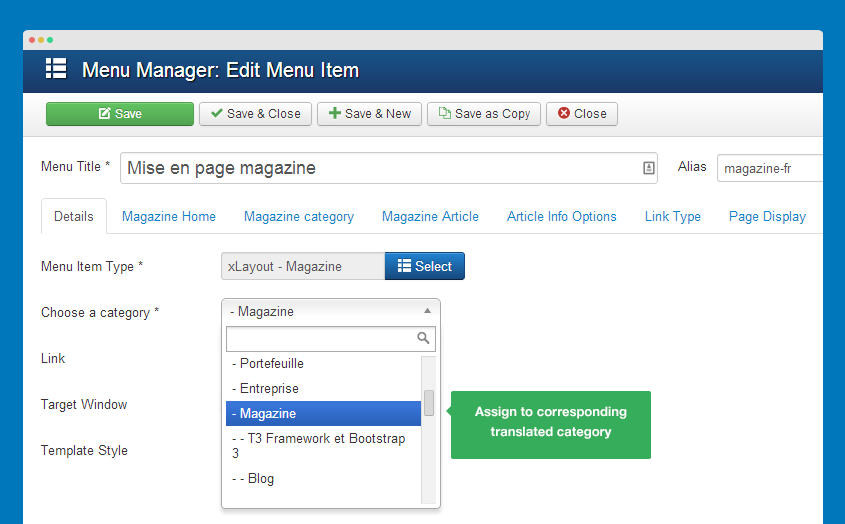
All override layouts in Purity III get content from a category. What we have to do is assign correct category for translated menu items that use override layouts.
Go to: Components >> JA Multilingual >> Association manager, then select Menu content type.
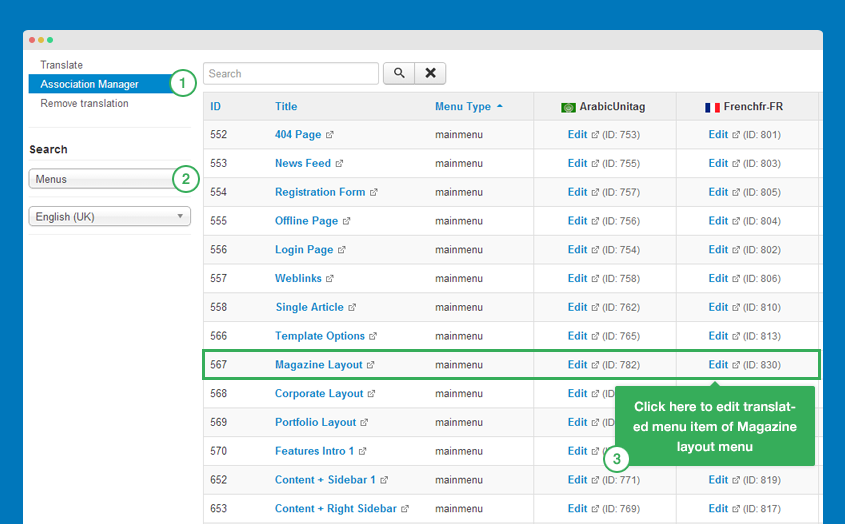
Assign to corresponding translated category for the menu item.
Do the same for other menu items that use override layouts.
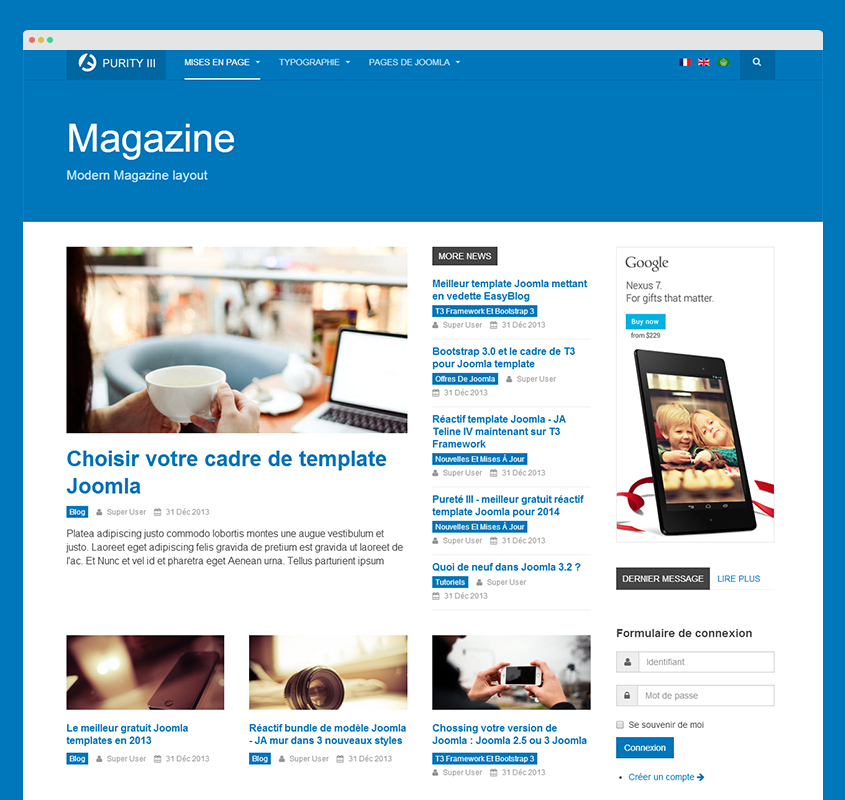
We're done, let's see the front-page.
Megamenu will work fine with your multilingual site without any configuration/customization.

#4: Multilingual megamenu
If you select to build your multilingual site manually, you need to follow the instruction to make your megamenu work in multilingual site. In this tutorial, we enable megamenu for French langauge.
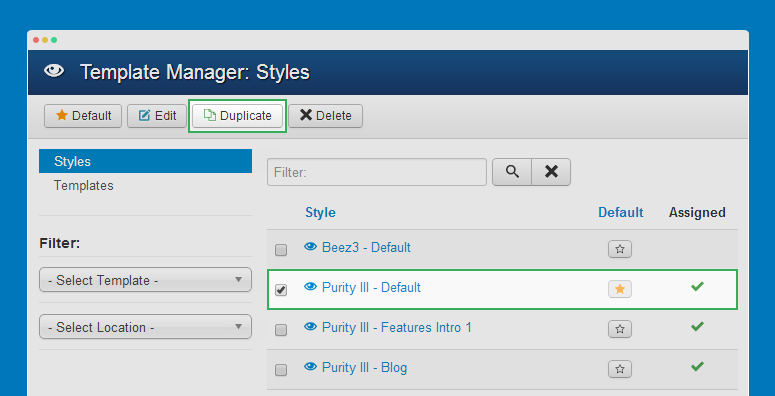
Step 1: duplicate default style
Select Purity III default template style then hit "Duplicate" button.
Step 2: configure duplicated template style
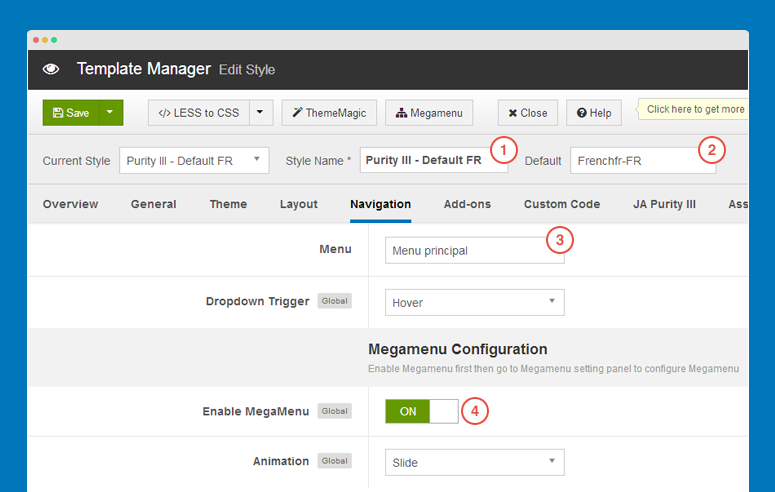
Open the duplicated template style to configure
- Rename the duplicated template style, you should add language code. The template style name should be: Purity III - Default FR
- Set default language for the template style - French
- Assign translated menu (the menu that will be displayed as main menu for the French language).
- Enable Megamenu
Step 3: configure megamenu
Open Megamenu configuration pannel by clicking on the "Megamenu" button on the top options bar.
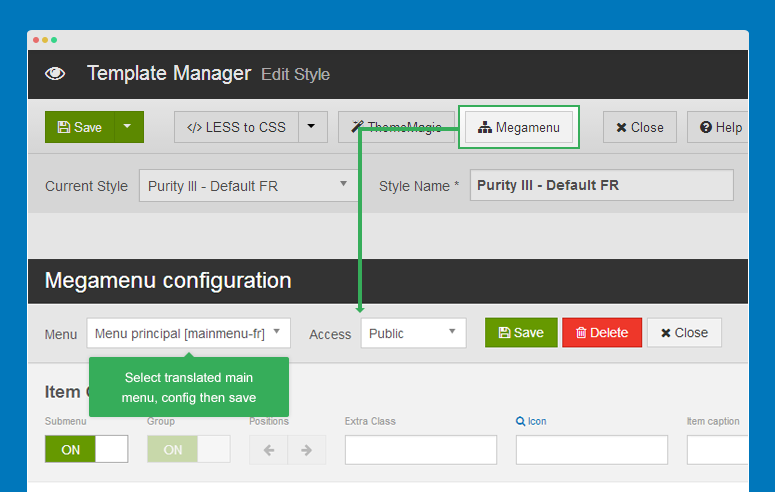
By default, it will load the selected menu that you assigned. After configure megamenu, please keep in mind to save its settings.
You should save megamenu settings even you don't change anything, this will help to render and make megamenu work in French language.