Introduction
JA Mitius sports the hot Mega Menu (the T3v3 one) and tons of bonus styles for varrious Joomla default layouts. Also released is the countdown module to show a timer to site visitors for any event or for site launch. It comes in 4 color styles, which you can see in live action on the demo site Make sure you check all the pages in the live demo.
- JA Mitius now supports RTL language, but this feature will come soon.
- Fully compatible with Joomla 2.5 & Joomla 3
1. Main Features
- Developed with T3 Framework
- Responsive Template
- Native with Joomla 2.5 and Joomla 3.0
- Developed with Bootstrap
- Multiple styles supported by default
- Multiple layouts supported by default
2. JA Extensions Supported
- JA Slideshow lite module
- JA Content Slider
- JA Login Module
- JA Side News Module
- JA Content Pop-up Module
- JA Facebook Activity Module
- JA Accordion Module
- JA Newsticker Module
- JA Countdown Module
- JA Extensions Manager Component
- JA Tabs plugin
- JA Pop-up plugin
- T3 framework
3. Thirdparty Extensions Supported
- Kunena Component
- K2 Component
- Acymailing Component
4. Layout and Module Positions
Each JA Templates usually support multiple layouts. Each layout are built up from one or many blocks. Blocks are defined to fit each template's requirement. The more detail guide of how to customize layout, block ... will be shown in section: V. Customization. Let's name them:
- home-1: the layout of onepage page
- default
- default-content-right
- default-content-left
System requirement
JA Mitius is compatible with Joomla 3 and Joomla 2.5. Please make sure your system meets the following requirements:
Joomla 3 System requirement
Software
- Software: PHP (Magic Quotes GPC off): 5.3.1 + (5.4+ recommended)
Databases
- MySQL(InnoDB support required): 5.1+
- MSSQL 10.50.1600.1+
- PostgreSQL 8.3.18+
Web Severs
- Apache 2.x+
- Microsoft IIS 7
- Nginx 1.0 (1.1 recommended)
Joomla 2.5+ system requirement
Software
- Software: PHP 5.2.4+ (5.4+ recommended)
- MySQL: 5.0.4+
Web Sever
- Apache: 2.x+
- Microsoft: IIS 7
- Nginx: 1.0 (1.1 recommended)
Browser requirement
The requirements are the same with both Joomla 2.5 and Joomla 3
- Firefox 4+
- IE (Internet Explorer) 8+
- Google Chrome 10+
- Opera 10+
- Safari 5+
Development Environment
The requirements are the same with both Joomla 2.5 and Joomla 3
During development process, Localhost is preferred. You can use the following servers on your PC to develop your site.
Windows
- WAMPSEVER
- XAMPP for Windows
Linux
- LAMP Bubdle
- XAMPP for Linux
Mac OS
- MAMP & MAMP Pro
- XAMPP for Mac OS
II. Download & Installation
1. Plan your site Development
- Making a New Site ? - If you are planning to make a new site, then use our Quickstart package to clone the demo site and replace the demo content with yours. Check How to install Quickstart Package.
- Installing on your live site ? - If you are planning to use this template on your already live site. Then you should follow How to make your site look like demo site guide first to know about the steps involved.
2. Download Template and Extensions
Browse and Download: Go to the Download page of JA Mitius and download the Template zip file.
3. Install Template and Extensions
- Install the template that you download in your Joomla 2.5 system.
- JA Mititus template will install with Settings used on the demo website, so you can postpone the configuration until you complete the setup (install other modules / plugins used in the demo website).
Custom HTML Module: To match the design of the template, we also style (CSS) for Custom HTML modules using different div classes. You will need to check the HTML codes and make sure to use the recommended HTML markup to get correct display. We provide the HTML code in this user-guide.
Extensions Configuration
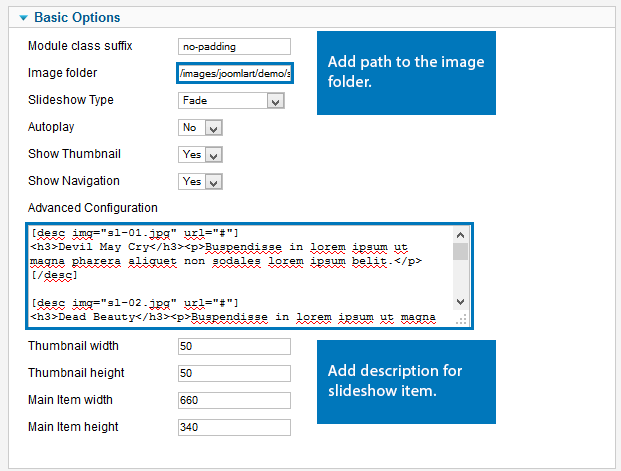
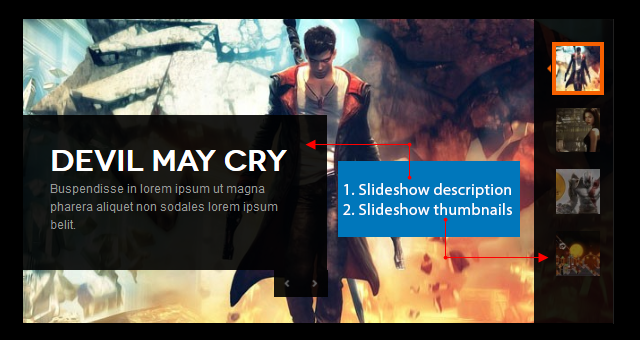
1. JA Slidesow Lite Module
Module Position: slideshow
Module Suffix: no-padding
Slideshow's description: Add description for each slideshow item, the following is the sample code for description used in demo site.
[desc img="sl-01.jpg" url="#"]
<h3>Devil May Cry</h3><p>Buspendisse in lorem ipsum ut magna pharera aliquet non sodales lorem ipsum belit.</p>
[/desc]
[desc img="sl-02.jpg" url="#"]
<h3>Dead Beauty</h3><p>Buspendisse in lorem ipsum ut magna pharera aliquet non sodales lorem ipsum belit.</p>
[/desc]
[desc img="sl-03.jpg" url="#"]
<h3>God of War</h3><p>Buspendisse in lorem ipsum ut magna pharera aliquet non sodales lorem ipsum belit.</p>
[/desc]
[desc img="sl-04.jpg" url="#"]
<h3>Angry Birds</h3><p>Buspendisse in lorem ipsum ut magna pharera aliquet non sodales lorem ipsum belit.</p>
[/desc]
Main Configuration panel
- Full Back-end Settings
- Front-end Appearance
For more detail, please check the documentation of the module.
Detail Documentation2. JA Content Slider module
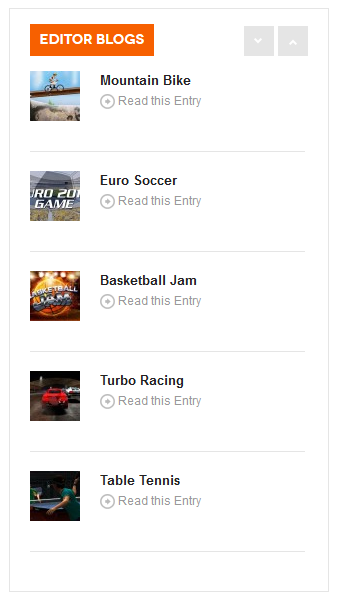
2.1 Editor Blogs
Module Position: position-2
Module Suffix: title-yellow
- Back-end Settings
- Front-end Appearance
2.2 Latest Games
Module Position: position-3
Module Suffix:  title-yellow
- Back-end Settings
- Front-end Appearance

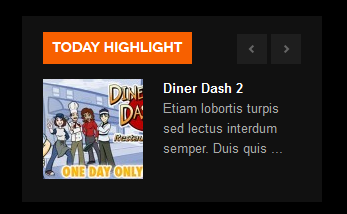
2.3 Today Highlight
Module Position: sidenews
Module Suffix: gray title-yellow
- Back-end Settings
- Front-end Appearance
For more detail, please check the documentation of the module.
Detail Documentation3. JA Content Popup Module
Module Position: position-1
Module Suffix: NOT USED
- Back-end Settings
- Front-end Appearance

For more detail, please check the documentation of the module.
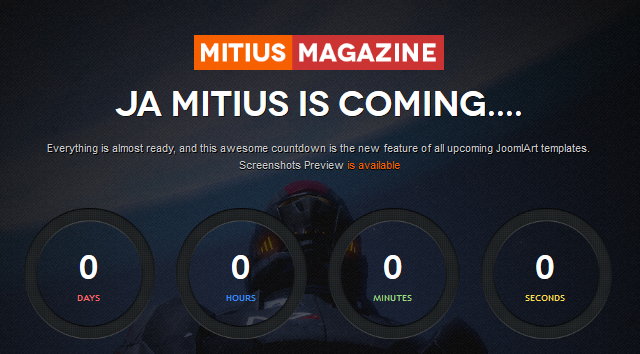
Detail Documentation4. JA CountDown Module
Module Position: countdown
Module Suffix: NOT USED
Main Configuration panel
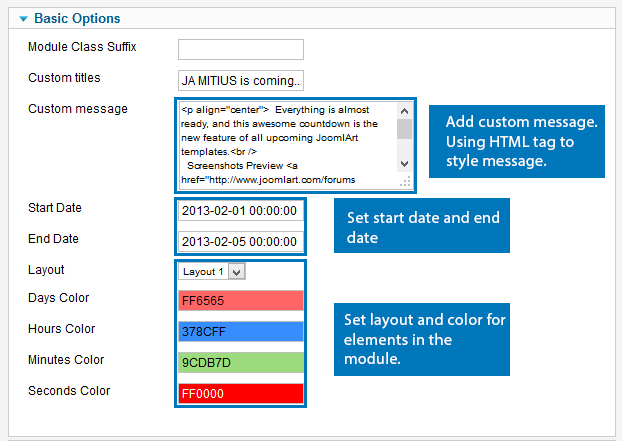
- Full Back-end Settings
- Front-end Appearance
For more detail, please check the documentation of the module.
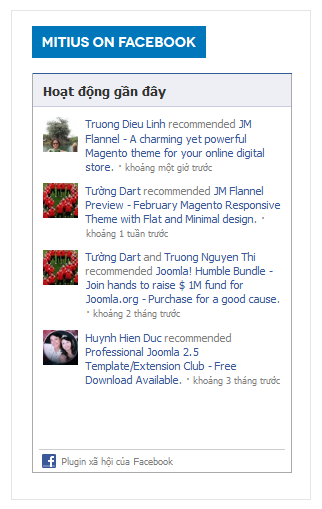
Detail Documentation5. JA Facebook Activity Module
Module Position: position-5
Module Suffix:  title-blue
- Back-end Settings
- Front-end Appearance
For more detail, please check the documentation of the module.
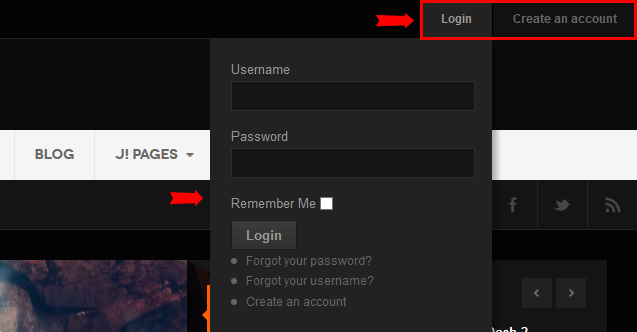
Detail Documentation6. JA Login Module
Module Position: top-login
Module Suffix: NOT USED
- Back-end Settings
- Front-end Appearance
7. JA Accordion Module
Module Position: position-5
Module Suffix:  accordion
- Back-end Settings
- Front-end Appearance
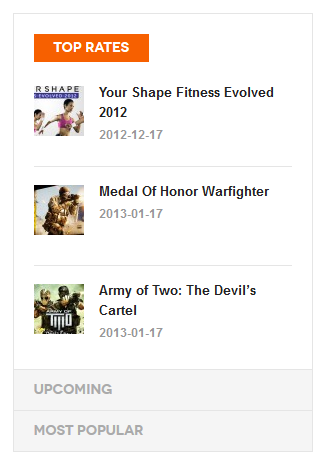
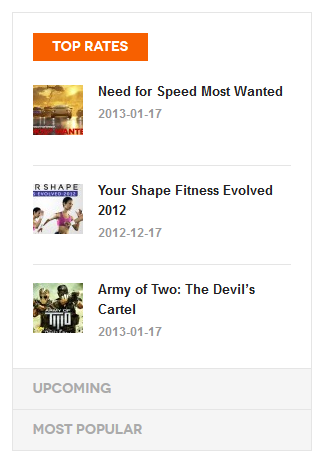
8. JA Sidenews Module
8.1 Top Rates
Module Position: accordion
Module Suffix:  NOT USED
- Back-end Settings
- Front-end Appearance
8.2 Upcoming
Module Position: accordion
Module Suffix:  NOT USED
- Back-end Settings
- Front-end Appearance

8.3 Most Popular
Module Position: accordion
Module Suffix:  NOT USED
- Back-end Settings
- Front-end Appearance

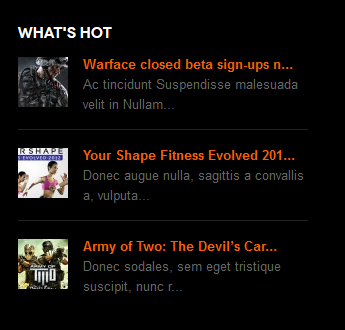
8.4 What's hot
Module Position: footer-4
Module Suffix:  NOT USED
- Full Back-end Settings
- Front-end Appearance
8.5 What's new
Module Position: mega-1
Module Suffix:  NOT USED
- Back-end Settings
- Front-end Appearance

8.6 Interview
Module Position: position-5
Module Suffix: black
- Back-end Settings
- Front-end Appearance

For more detail, please check the documentation of the module.
Detail Documentation9. JA Newsticker Module
Module Position: top-newsticker
Module Suffix:  NOT USED
- Back-end Settings
- Front-end Appearance

For more detail, please check the documentation of the module.
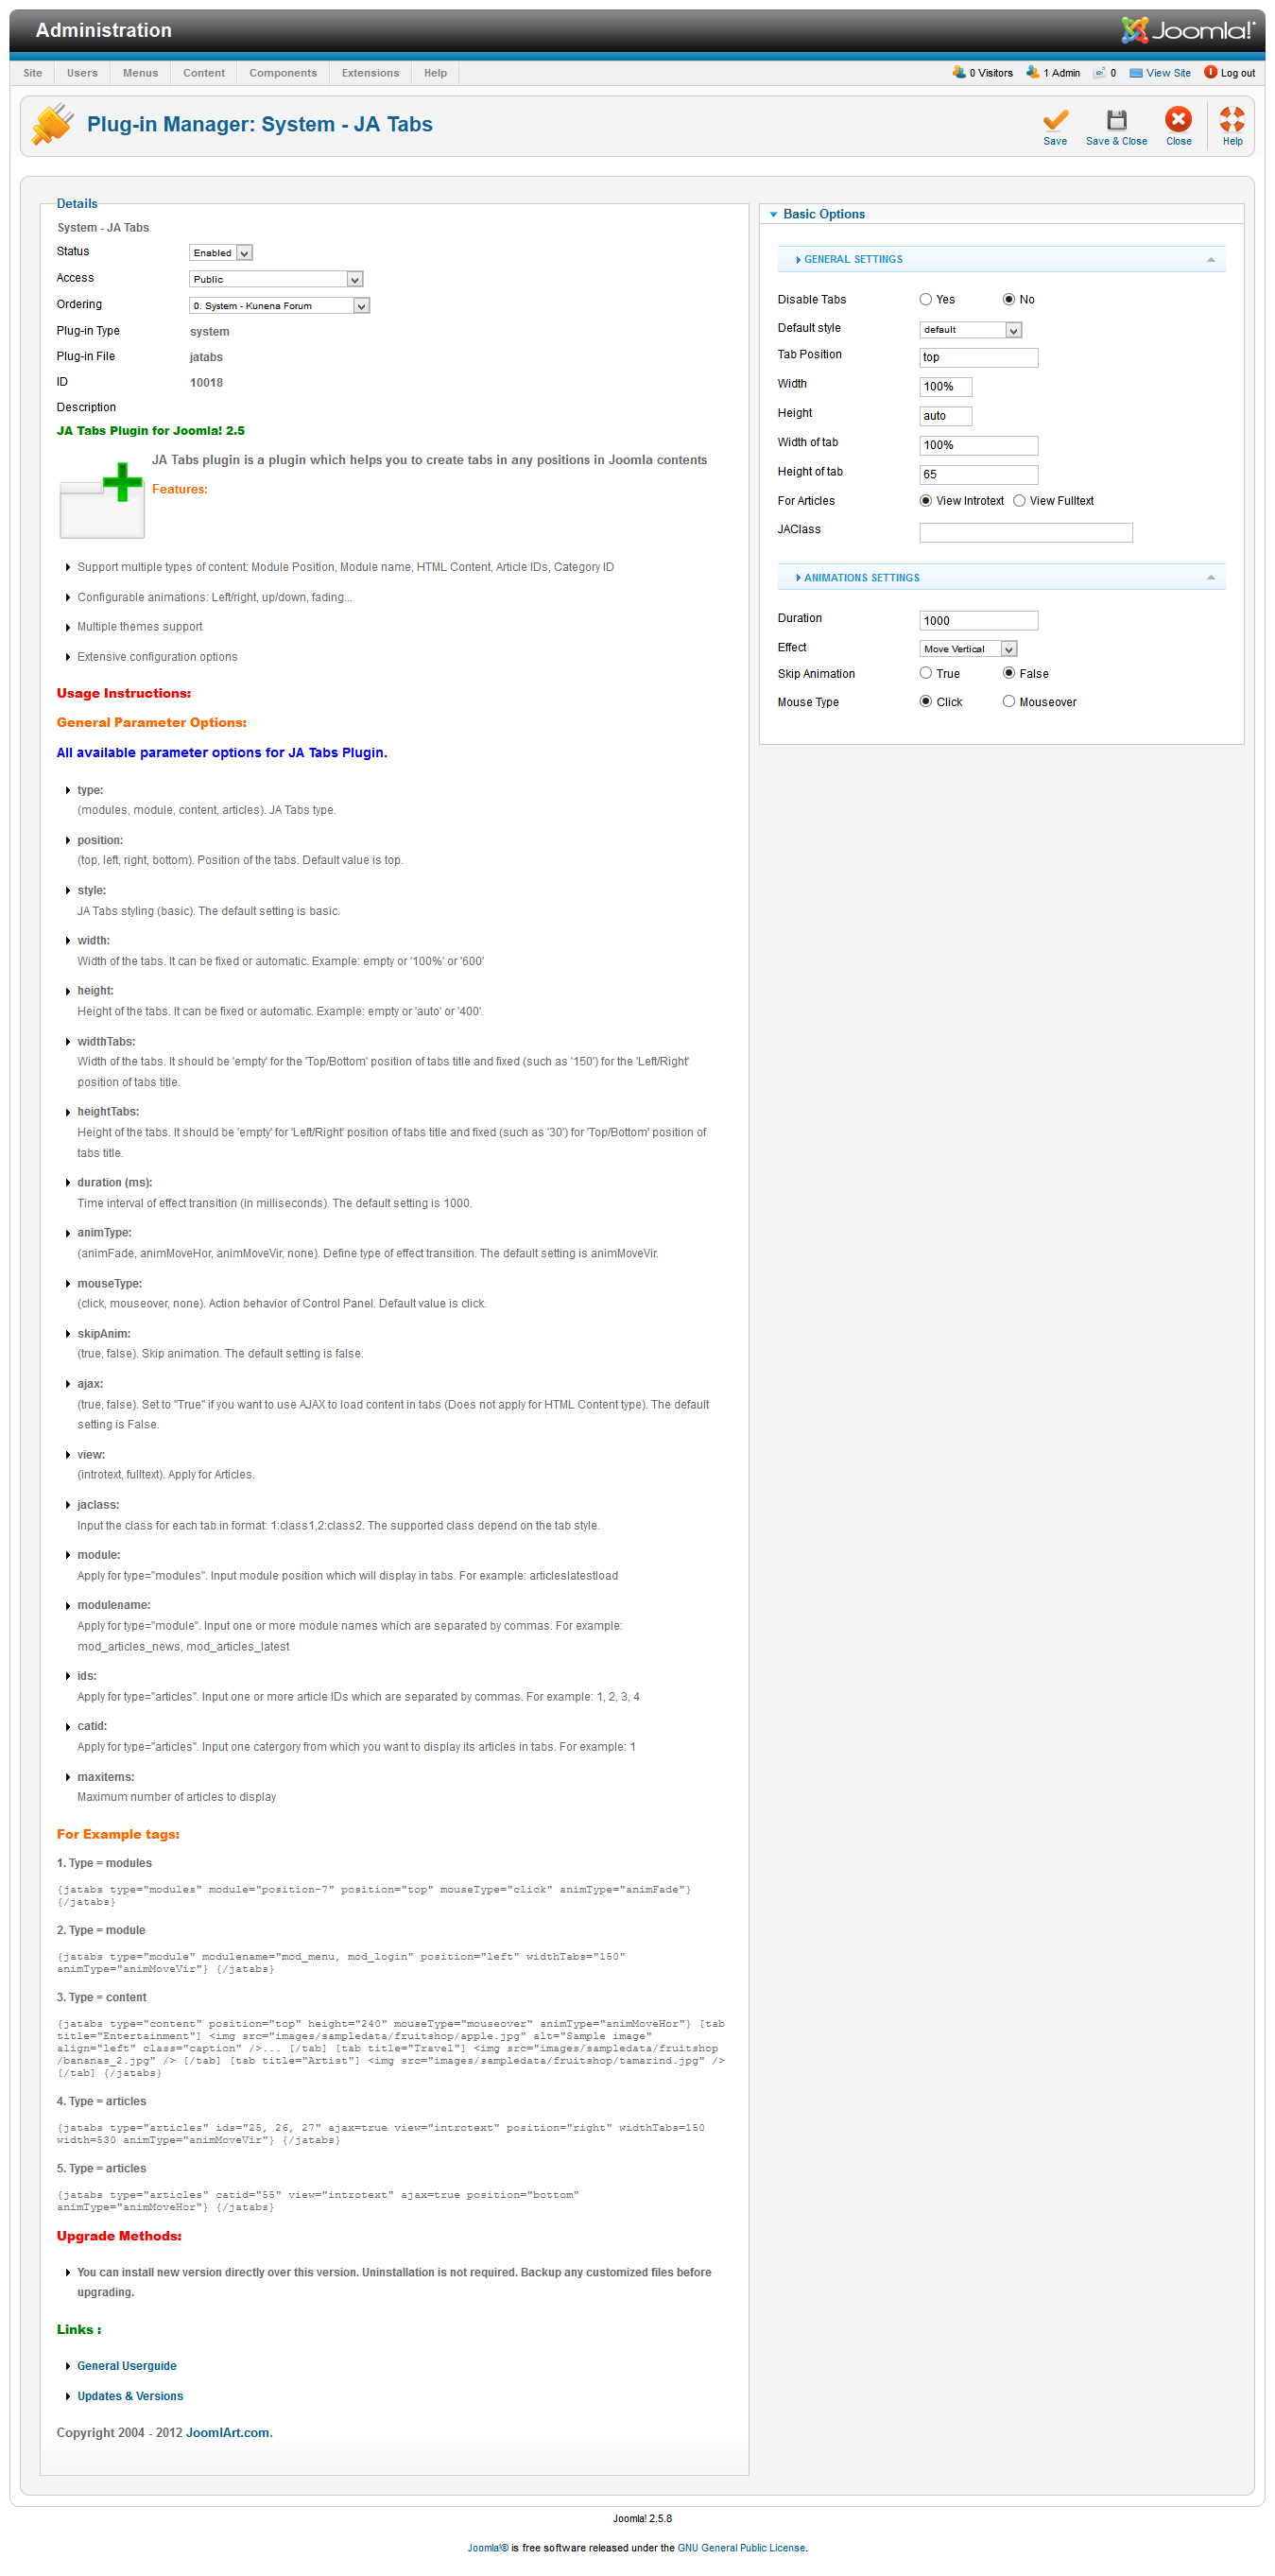
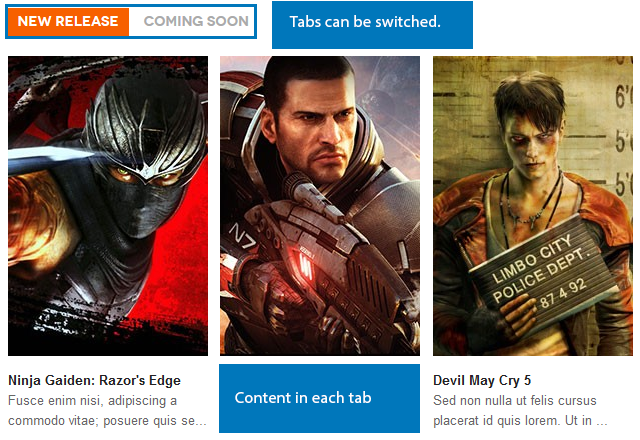
Detail Documentation10. JA Tabs Plugin
To add tab, there some steps that you should follow:
- Step 1: install and enable plugin: ja tab then configure it as you expect it to be - Full Backend Settings
- Step 2: Assign content to tab
- Step 3: Create Custom Module that define which modules will be displayed in tab (this settings can also include the animation, ... of tab, the settings will have higher priority than they are in JA Plugin setting panel)
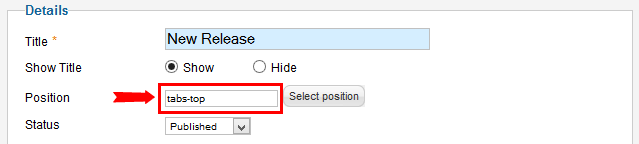
For modules you want to display in JA Tabs, the content can be configured as you wish, just one thing you should keep in mind that, the modules in one tab must be assigned to same position. Example: tabs-top
Example Code:
{jatabs type="modules" module="tabs-top" position="top" mouseType="click" animType="animFade"} {/jatabs}
In the tag above, the module loads modules in position: "tabs-top" to display in tab.
10.1 Tab 1
Module Configuration:
New Release (JA Sidenews Module)
Module Position: tabs-top
Module Suffix: NOT USED
Back-end Settings
Coming Soon (JA Sidenews Module)
Module Position: tabs-top
Module Suffix:  NOT USED
Back-end Settings
Custom module to define the 2 above modules to display in tab
Module Position: mas-col
Module Suffix: no-padding
Back-end Settings
Code to calls JA Plugin
{jatabs type="modules" module="tabs-top" position="top" mouseType="click" animType="animFade"} {/jatabs}
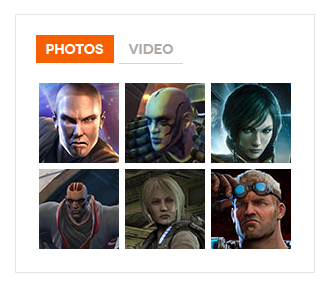
10.2 Tab 2
Module Configuration:
Video
Module Position: ja-tabs
Module Suffix:  NOT USED
<p><a class="video" href="http://www.youtube.com/watch?v=aBvyc5P7Fsg" title="JA Elastica - Web Responsive Design Template for Joomla "><img src="/images/joomlart/demo/vimeo1.jpg" border="0" alt="Sample Image" title="Sample video" /></a><span>Quis eros Aliquam et diam ac a dolor nec nunc accumsannunc dolor turpis.</span></p>Back-end Settings
Photos
Module Position: ja-tabs
Module Suffix:  NOT USED
<div class="img-photo clearfix"><span class="highslide-img"> {japopup type="image" title="Sample Images" content="images/joomlart/demo/gallery/gl-1.jpg" width="660" height="300"} <img src="/images/joomlart/demo/gallery/thumb-1.jpg" border="0" alt="Sample Image" /> {/japopup} </span> <span class="highslide-img"> {japopup type="image" title="Sample Images" content="images/joomlart/demo/gallery/gl-2.jpg" width="660" height="300"} <img src="/images/joomlart/demo/gallery/thumb-2.jpg" border="0" alt="Sample Images" /> {/japopup} </span> <span class="highslide-img"> {japopup type="image" title="Sample Images" content="images/joomlart/demo/gallery/gl-3.jpg" width="660" height="300"} <img src="/images/joomlart/demo/gallery/thumb-3.jpg" border="0" alt="Sample Images" /> {/japopup} </span> <span class="highslide-img"> {japopup type="image" title="Sample Images" content="images/joomlart/demo/gallery/gl-4.jpg" width="660" height="300"} <img src="/images/joomlart/demo/gallery/thumb-4.jpg" border="0" alt="Sample Images" /> {/japopup} </span> <span class="highslide-img"> {japopup type="image" title="Sample Images" content="images/joomlart/demo/gallery/gl-5.jpg" width="660" height="300"} <img src="/images/joomlart/demo/gallery/thumb-5.jpg" border="0" alt="Sample Images" /> {/japopup} </span> <span class="highslide-img"> {japopup type="image" title="Sample Images" content="images/joomlart/demo/gallery/gl-6.jpg" width="660" height="300"} <img src="/images/joomlart/demo/gallery/thumb-6.jpg" border="0" alt="Sample Images" /> {/japopup} </span></div>
Custom module to define the 2 above modules to display in tab
Module Position: position-5
Module Suffix: tabs
Back-end Settings
Code to calls JA Plugin
{jatabs type="modules" module="ja-tabs" position="top" mouseType="click" animType="animFade"} {/jatabs}
For more detail, please check the documentation of the plugin.
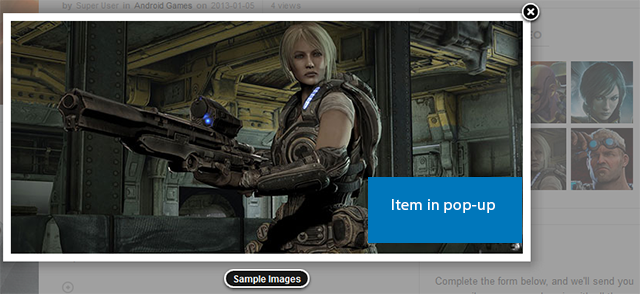
Detail Documentation11. JA Pop-up plugin
Step 1: Intall and enable the plugin
Back-end SettingsStep 2: Create custom module then add pop-up item
<div class="img-photo clearfix"><span class="highslide-img"> {japopup type="image" title="Sample Images" content="images/joomlart/demo/gallery/gl-1.jpg" width="660" height="300"} <img src="/images/joomlart/demo/gallery/thumb-1.jpg" border="0" alt="Sample Image" /> {/japopup} </span> <span class="highslide-img"> {japopup type="image" title="Sample Images" content="images/joomlart/demo/gallery/gl-2.jpg" width="660" height="300"} <img src="/images/joomlart/demo/gallery/thumb-2.jpg" border="0" alt="Sample Images" /> {/japopup} </span> <span class="highslide-img"> {japopup type="image" title="Sample Images" content="images/joomlart/demo/gallery/gl-3.jpg" width="660" height="300"} <img src="/images/joomlart/demo/gallery/thumb-3.jpg" border="0" alt="Sample Images" /> {/japopup} </span> <span class="highslide-img"> {japopup type="image" title="Sample Images" content="images/joomlart/demo/gallery/gl-4.jpg" width="660" height="300"} <img src="/images/joomlart/demo/gallery/thumb-4.jpg" border="0" alt="Sample Images" /> {/japopup} </span> <span class="highslide-img"> {japopup type="image" title="Sample Images" content="images/joomlart/demo/gallery/gl-5.jpg" width="660" height="300"} <img src="/images/joomlart/demo/gallery/thumb-5.jpg" border="0" alt="Sample Images" /> {/japopup} </span> <span class="highslide-img"> {japopup type="image" title="Sample Images" content="images/joomlart/demo/gallery/gl-6.jpg" width="660" height="300"} <img src="/images/joomlart/demo/gallery/thumb-6.jpg" border="0" alt="Sample Images" /> {/japopup} </span></div>
Front-end Appearance
In JA Mitius, we provide different Alternative layouts to display item list page. User can easily switch layouts with one click.
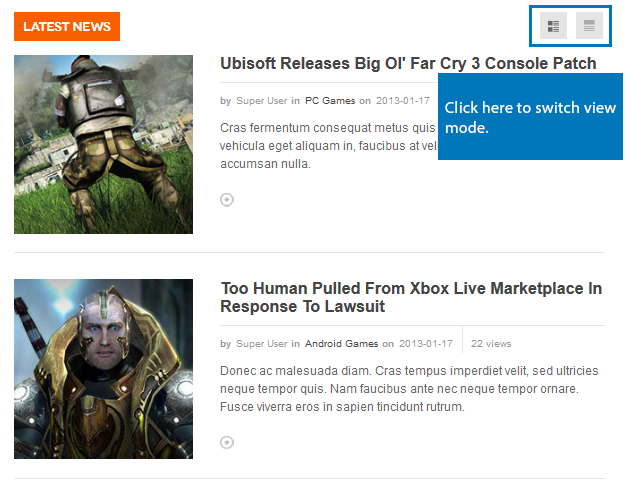
The same page but in different layout

Instruction
We use Articles Category module to display content in the pages. This is the default Joomla module. But we add new layouts so that the module can be configured.
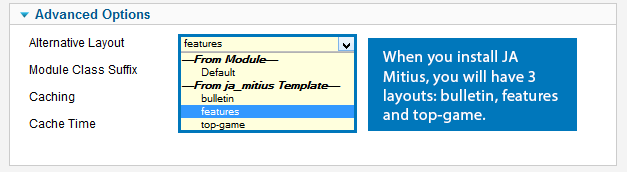
Supported Layouts can be used in the module:
- bulletin
- features
- top-games
In the setting of the module, navigate the Advanced setting tab where you can find Alternative Layout. Select one layout with the 3 layouts. Each layout gives you a different outlook in front-end.
Module Configuration
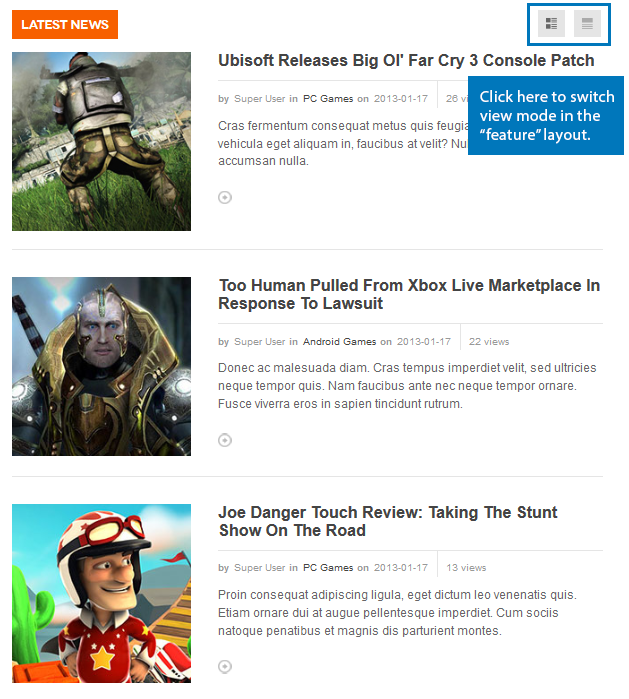
1. Latest News (features layout)
Module Position: mast-col
Module Suffix:  no-padding mod-views  title-yellow
- Back-end Settings
- Front-end Appearance
2. Top 10 games (bulletin layout)
Module Position: mast-col
Module Suffix: topgame
- Back-end Settings
- Front-end Appearance

You can view details here : http://docs.joomla.org/Help25:Conten...anager_Options
Custom HTML Modules
If you are not sure how to use Custom HTML Modules or how to access the HTML Editor please Read this Guide.
We will provide you with the HTML Code (markup) for reference below, you will need to replicate it exactly and then change your content. Remember, HTML code has special div classes, which are required for demo alike display.
1. Module Adv2
Module Position: mast-col
Module Suffix:  no-padding
<p><img src="/images/joomlart/demo/adv2.jpg" border="0" alt="Sample photo" title="Sample photo" align="middle" /></p>
- Back-end Settings
- Front-end Appearance

2. Custom Logo
Module Position: countdown
Module Suffix: mod-hilite1 no-padding
<div style="text-align: center; margin-bottom: 30px;"><a href="http://demo.joomlart.com" title="JA Mitius"><img src="/images/joomlart/demo/simcity-logo1.png" border="0" alt="JA Mitius" /></a></div>
- Back-end Settings
- Front-end Appearance
3. Module Adv3
Module Position: position-5
Module Suffix:  no-padding
<p><img src="/images/joomlart/demo/adv3.jpg" border="0" alt="Sample photo" title="Sample photo" align="middle" /></p>
- Back-end Settings
- Front-end Appearance

4. Module Adv1
Module Position: slidenews
Module Suffix: no-padding
<p><img src="/images/joomlart/demo/adv1.jpg" border="0" alt="Sample photo" title="Sample photo" align="middle" /></p>
- Back-end Settings
- Front-end Appearance

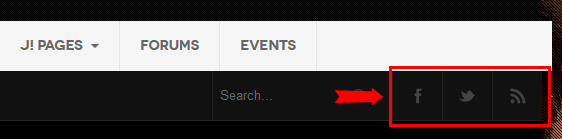
5. Social
Module Position: social
Module Suffix:  NOT USED
<ul class="social-list">
<li class="facebook first"><a href="#" title="Facebook">Facebook</a></li>
<li class="twitter"><a href="#" title="Twitter">Twitter</a></li>
<li class="feed "><a href="#" title="Feed">Feed</a></li>
</ul></p>
- Back-end Settings
- Front-end Appearance
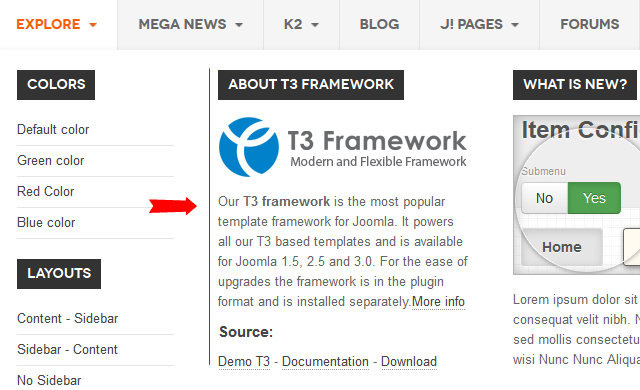
6. About T3 Framework
Module position: mega-1
Module Suffix: NOT USED
<p><img src="/images/joomlart/demo/t3-logo.png" border="0" alt="T3 Logo" style="margin-bottom: 15px;" /> Our <strong>T3 framework</strong> is the most popular template framework for Joomla. It powers all our T3 based templates and is available for Joomla 1.5, 2.5 and 3.0. For the ease of upgrades the framework is in the plugin format and is installed separately.<a class="custom-link" href="#" title="More info">More info</a></p>
<h4>Source:</h4>
<p><a class="custom-link" href="#" title="Demo">Demo T3</a> - <a class="custom-link" href="#" title="Demo">Documentation</a> - <a class="custom-link" href="#" title="Demo">Download</a></p>
- Back-end Settings
- Front-end Appearance
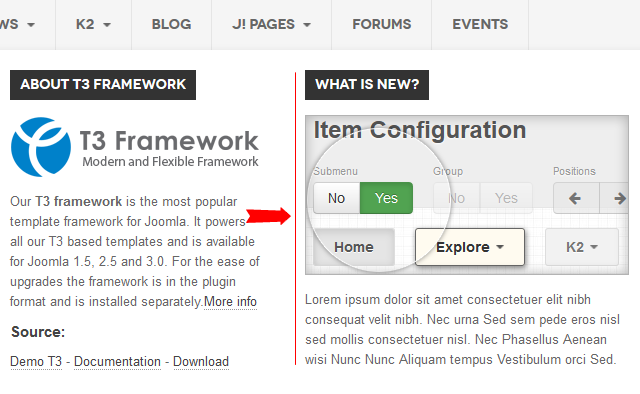
7. What is new?
Module position: Module Position: mega-1
Module Suffix:  NOT USED
<p><img src="/images/joomlart/demo/mega-menu.png" border="0" alt="" style="margin-bottom: 15px;" /> Lorem ipsum dolor sit amet consectetuer elit nibh consequat velit nibh. Nec urna Sed sem pede eros nisl sed mollis consectetuer nisl. Nec Phasellus Aenean wisi Nunc Nunc Aliquam tempus Vestibulum orci Sed.</p>
- Back-end Settings
- Front-end Appearance
K2 & Kunena Configuration
K2 Configuration
1. Installation
If you are new to K2 Component, please follow THIS GUIDE to know more the component, how to install, how to use.
2. Configuring K2 component
We provide 2 templates for K2: ja_mitius and ja_mitius_blog. The template ja_mitius_blog is for blog page and ja_mitius is for the rest.
2.1 Global Configuration: (click Parameter button on the top right side).
Backend Setting
- Layout & View Settings
- Content Settings
- Images Settings
- Social Settings
- Comments Settings
- Frontend & Editing Settings
- Advanced Settings
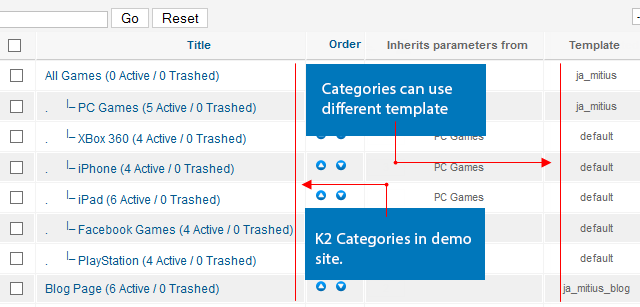
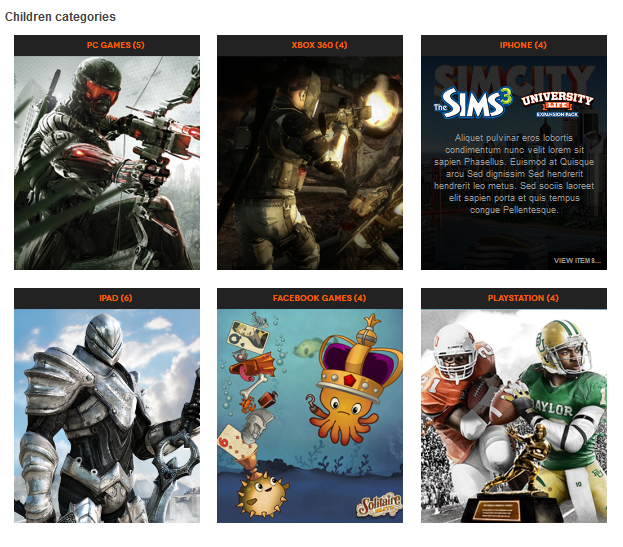
2.2 Category Configuration:
To build your website like our demo, navigate to: Administrator >> Components >> K2 >> Categories
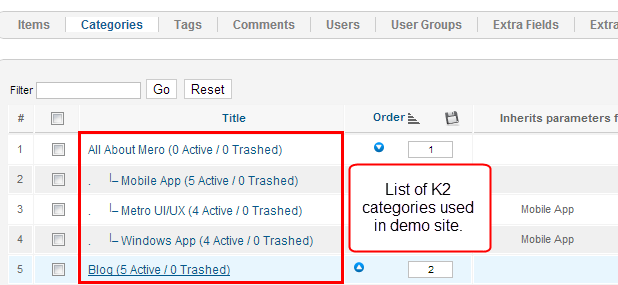
Back-end settings for each category
Front-end appearance
- ja_mitius template
- ja_mitius_blog template
Note:Other categories are inherited from category PC Games settings
3. Configurations for K2 Modules
These modules are all available for you to use when you install K2 in your site.
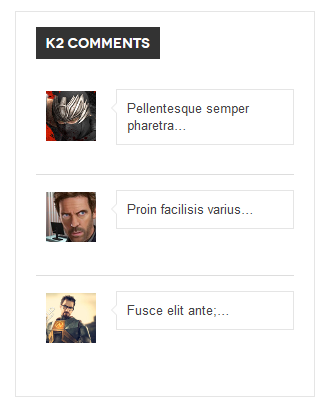
3.1 K2 Comments
Module position: position-5
Module Suffix : NOT USED
- Back-end Settings
- Front-end Appearance
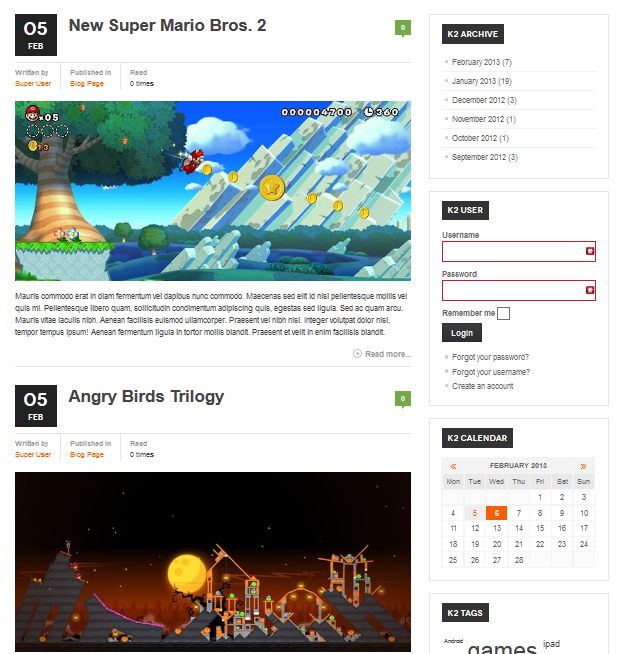
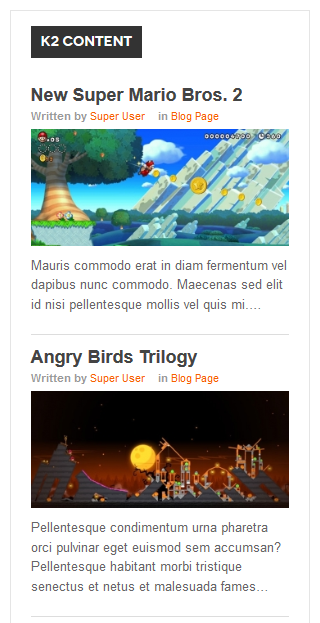
3.2 K2 Content
Module position: position-5
Module Suffix : NOT USED
- Back-end Settings
- Front-end Appearance
3.3 K2 Tools
3.3.1 K2 Archive
Module position: position-5
Module Suffix : NOT USED
- Back-end Settings
- Front-end Appearance
3.3.2 K2 Tags
Module position: position-5
Module Suffix : NOT USED
- Back-end Settings
- Front-end Appearance
3.3.2 K2 Calendar
Module position: position-5
Module Suffix : NOT USED
- Back-end Settings
- Front-end Appearance
3.4 K2 User
Module position: position-5
Module Suffix : NOT USED
- Back-end Settings
- Front-end Appearance
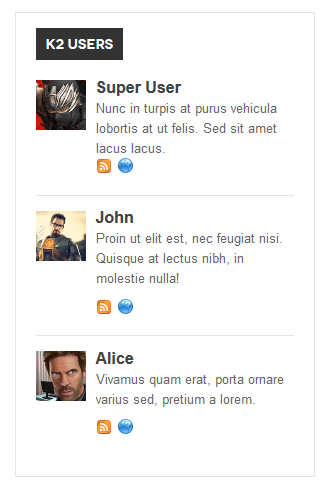
3.5 K2 Users
Module position: position-5
Module Suffix : NOT USED
- Back-end Settings
- Front-end Appearance
Kunena Configuration
In the Demo site, Kunena Forum page uses ja_mitius template as the default style
Kurena Forum page in Demo site
To set up for the forum as in Demo site, navigate to Administrator >> Component >> Kunena Forum >> Forum Configuration
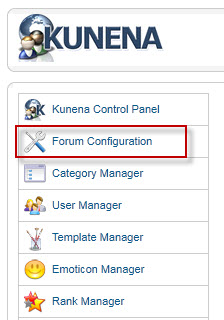
Then configure for all elements as our screenshots shown below

- Blog category
- All Games category
- PC Games category
- PC Games category
- PC Games category
- PC Games category
- PC Games category
- PC Games category
- PC Games category
- PC Games category
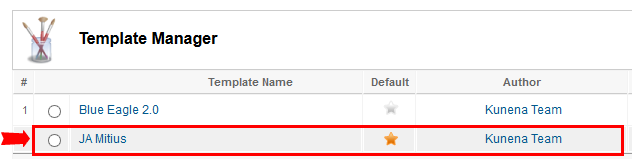
The next step is to set JA Mitius template as default Kunena template. The template is specific designed for JA mitius template, so you should use it only when your site uses JA Mitius template.
Template Customization
1. Template Override
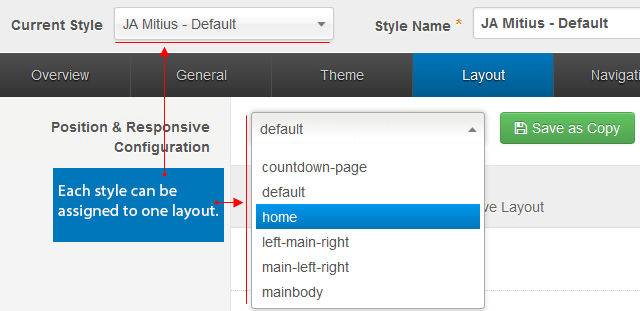
In summary, to override template, you clone a style then edit as you wish. After all, assign the cloned style to specific menus. The assigned menus will override the same menus in the default style.
Each style can be configured to use a theme, layout so in one website, you can have menus with different themes, layous.
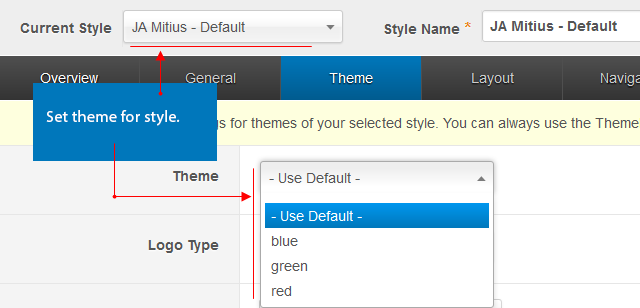
2. Themes Setting
JA Mitius supports 4 themes.
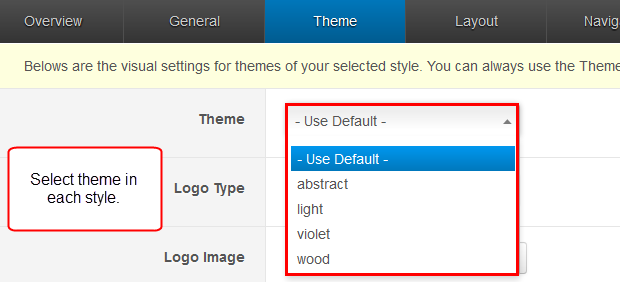
Let's check how front-end looks like.
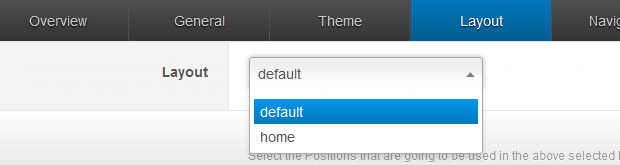
3. Layout Setting
The supported Layouts in the JA Mitius:
In each layout, you can customize to satisfy your website's need.
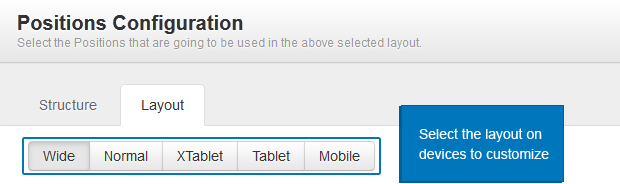
3.1 Configure layout structure
In the setting panel, you can customize the structure of a layout, you can change any module position, set number of module positions in a spotlight block.
3.2 Configure Responsive Layouts
In the setting panel, customize layout in any supported responsive layouts. Select a responsive layout, then enable, disable any module position in the layout, you can also resize module positions in spotlight block.
The following video tutorials will show you how to work with Layouts: Configure and Customize
Layout Configuration
T3 comes with ease of layout customization. The visual layout configuration is easier than ever before.
Layout Customization
The video tutorial guides you on how to customize the layouts, add new layout, and customize blocks in a layout.
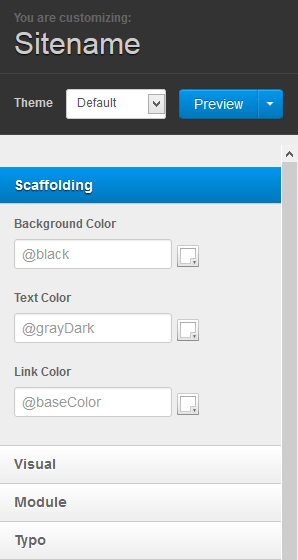
4. ThemeMagic Setting
JA Mitius is developed with T3 so you can customize themes with ThemeMagic
To customize theme with the feature, firstly, you have to enable the option.

In the setting panel, you can customize all the themes. The left panel is the setting area while the right panel is your site front-end. Each time you change setting, click on "Preview" button to view the change in front-end on the right panel.
The following video tutorials will show you how to customize theme and customize ThemeMagic
ThemeMagic Customization
After watching the tutorial, you can be able to customize your theme quickly using ThemeMagic as well as know how to add new group and parameters to ThemeMagic.
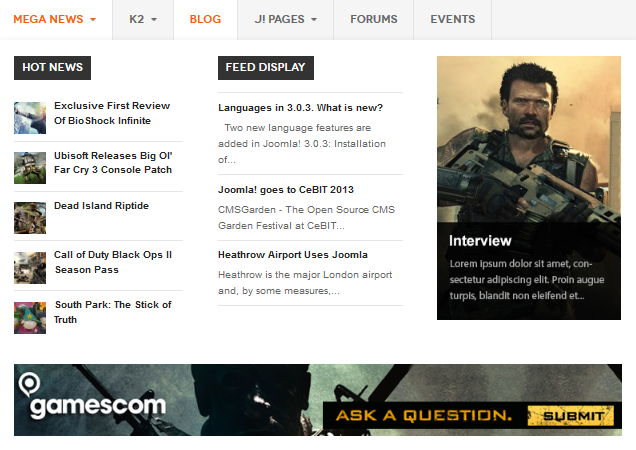
Mega Menu Configuration
Front-end Appearance
To configure Mega Menu, go to: Extensions --> Template manager --> open JA Fubix template, in the Navigation setting, you can configure Mega Menu.
Step 1: Enable Mega Menu
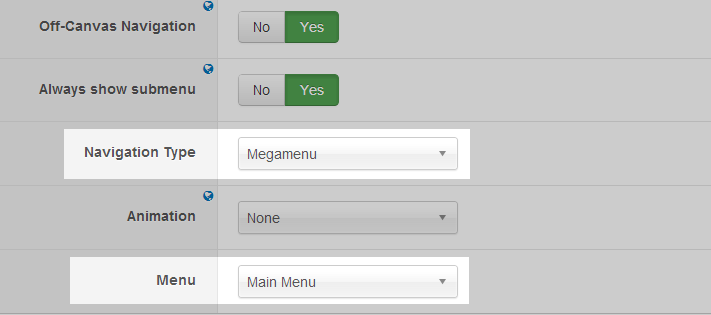
Step 2: Open Mega Menu page

Step 3: Select Menu to configure Mega Menu and set the access level to the selected menu
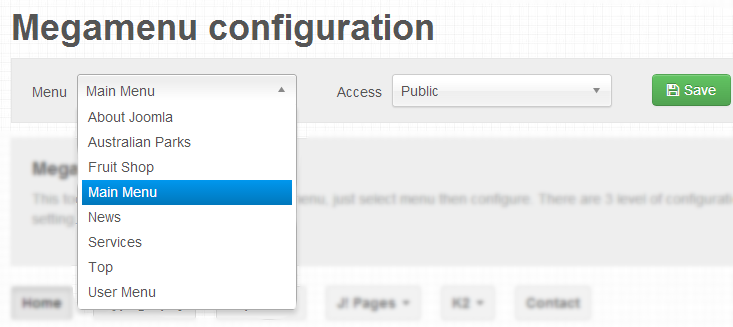
Step 4: Configure Mega Menu

Mega Menu Configuration
This is the video tutorial for Mega Menu configuration, you will learn how to build up a Mega Menu, how to use Mega Menu settings effectively, how to add icons, how to style menu items with our T3 Framework.
Recommendation
The above userguide should help one in replicating the Demo site settings for the template and extension on their site.
Recommended :
If you are new or are confused. We recommend installing Quickstart on your localhost and use it as reference for configs. This is the best way to work with any template. Links to all the resources are provided above, you should carefully read them to take the maximum advantage of our products.
Support :
Please raise your support queries in the forum and make sure you follow the support guidelines. We spend more time in getting the information from user incase the support guidelines are not followed.