Introduction
JA Hawkstore is a responsive Joomla ecommerce template for Joomla 2.5 featuring Virtuemart shopping cart component. It runs on our brand new T3v3 Framework with tons of backend customization config options.
- JA Hawkstore supports RTL language.
- Version for Joomla 3 will be released when Virtuemart component is available for Joomla 3
1. Main Features
- T3 Framework latest version
- Integrated Bootstrap
- Fully responsive
- K2 and Virtuemart Component Support
- Support Mega Menu
- Off-Canvas navigation for your mobile and tablet
- JA VM Product Module (new module developed for this template)
- Will support at least 6 colors (including the default one)
2. JA Extensions Supported
- JA Slideshow Lite module
- JA Masshead module
- JA VM Products module
- JA Tabs plugin
- T3 Framework plugin
- JA Extensions Manager Component
3. Third Party Extensions Supported
- K2 Component
- Virtuemart Component
- Acymailing Component
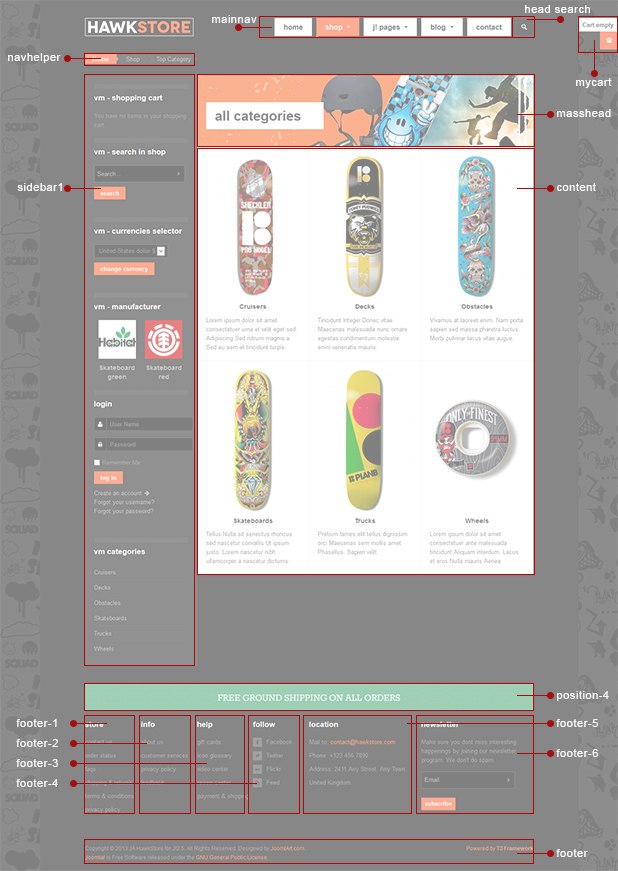
4. Layout and Module Positions
Please check the image below to know the structure, layout, module positions of JA Smashboard.
System requirement
JA Hawkstore is compatible with Joomla 2.5. Please make sure your system meets the following requirements:
Joomla 2.5+ system requirement
Software
- Software: PHP 5.2.4+ (5.4+ recommended)
- MySQL: 5.0.4+
Web Sever
- Apache: 2.x+
- Microsoft: IIS 7
- Nginx: 1.0 (1.1 recommended)
Browser requirement
The requirements are the same with both Joomla 2.5 and Joomla 3
- Firefox 4+
- IE (Internet Explorer) 8+
- Google Chrome 10+
- Opera 10+
- Safari 5+
Development Environment
The requirements are the same with both Joomla 2.5 and Joomla 3
During development process, Localhost is preferred. You can use the following servers on your PC to develop your site.
Windows
- WAMPSEVER
- XAMPP for Windows
Linux
- LAMP Bubdle
- XAMPP for Linux
Mac OS
- MAMP & MAMP Pro
- XAMPP for Mac OS
Download & Installation
1. Plan your site Development
- Making a New Site ? - If you are planning to make a new site, then use our Quickstart package to clone the demo site and replace the demo content with yours. Check How to install Quickstart Package.
- Installing on your live site ? - If you are planning to use this template on your already live site. Then you should follow How to make your site look like demo site guide first to know about the steps involved.
2. Download Template and Extensions
Browse and Download: Go to the Download page of JA Hawkstore and download the Template zip file.
3. Install Template and Extensions
- Install the template that you download in your Joomla 2.5 system.
- JA Hawkstore template will install with Settings used on the demo website, so you can postpone the configuration until you complete the setup (install other modules / plugins used in the demo website).
Custom HTML Module: To match the design of the template, we also style (CSS) for Custom HTML modules using different div classes. You will need to check the HTML codes and make sure to use the recommended HTML markup to get correct display. We provide the HTML code in this userguide.
Extensions Configuration
1. JA Slideshow Lite Module
Module position : slideshow
Module Suffix : NOT USED
- Back-end Settings
- Front-end Appearance

For more detail, please check the documentation of the module.
Detail Documentation2. Banners Modules
In demo site, we use multiple.
2.1 Adv1
Position : position-1
Module Suffix : NOT USED
To display as Demo site, please follow step by step as below:
Step 1: Create New Category
Go to Administrator >> Components >> Banners >> Categories >> New
Back-end SettingsStep 2: Create New Banner
Go to Administrator >> Components >> Banners >> Banners >> New
Back-end SettingsStep 3: Create New Banner module
Back-end SettingsFront-end Appearance

2.2 Adv2
Module title : Adv3
Module position : position-2
Module Suffix : NOT USED
Front-end Appearance

2.3 Adv3
Module position : position-3
Module Suffix : NOT USED
Front-end Appearance

2.4 Adv4
Module position : position-4
Module type : Banners
Module Suffix : NOT USED
Front-end Appearance

3. JA Tabs
Front-end Appearance
To have tabs as Demo, please follow the instructions below.
Step 1: Install, enable and configure the JA Tab plugin
Back-end SettingsStep 2: Create modules and assign them all to one position
In the demo site, we display 3 JA JM product modules in tabs.
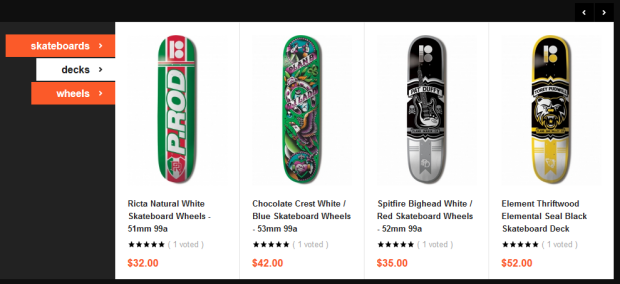
3.1 Skateboards
Module position : tabs
Module Suffix : NOT USED
- Back-end Settings
- Front-end Appearance
3.2 Decks
Module position : tabs
Module Suffix : NOT USED
- Back-end Settings
- Front-end Appearance
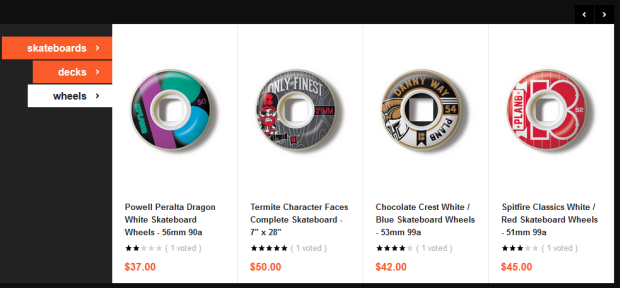
3.3 Wheels
Module position : tabs
Module Suffix : NOT USED
- Back-end Settings
- Front-end Appearance
Step 3: Create a Custom HTML module to define modules displayed in tabs
Module title : Product tabs
Module position : home-1
Module Suffix : NOT USED
In the content field of the Custom HTML, add tags to define modules to display in tabs. The following tags is the one used in demo site.
{jatabs type="modules" module="tabs" position="left" widthTabs="200" mouseType="click"} {/jatabs}
If this is the first time you use JA Tab plugin, please check the detail documentation of the plugin.
Detail Documentation4. JA Masshead Module
Module position : masshead
Module Suffix : NOT USED
- Back-end Settings
-
HTML used in Configuration Condition field in the setting panel
[Masshead Itemid="513" title="skateboards" ][/Masshead]
[Masshead Itemid="493" title="Skateboards" ][/Masshead]
[Masshead Itemid="494" title="Protection" ][/Masshead]
[Masshead Itemid="495" title="Scooters" ][/Masshead]
[Masshead Itemid="497" title="Contact Us" ][/Masshead]
[Masshead Itemid="511,510" title="All Categories" ][/Masshead]
[Masshead Itemid="546" title="All Categories" ][/Masshead]
[Masshead Itemid="512" title="Decks" ][/Masshead]
[Masshead Itemid="514" title="wheels" ][/Masshead]
[Masshead Itemid="547" title="Trucks" ][/Masshead]
[Masshead Itemid="548" title="Wheels" ][/Masshead]
[Masshead Itemid="549" title="Bearings" ][/Masshead]
[Masshead Itemid="481" title="All Categories" ][/Masshead]
[Masshead Itemid="483" title="List All Categories" ][/Masshead]
[Masshead Itemid="519" title="Account Maintenace"][/Masshead]
[Masshead Itemid="520" title="Edit Address"][/Masshead]
- Front-end Appearance
For more detail, please check the documentation of the module.
Detail Documentation5. Search Module
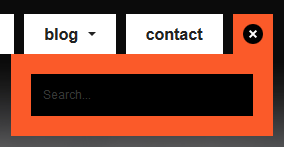
To have such search module, please follow the instruction:
5.1 Create Search menu
Add new menu item in Main menu, select menu type: External URL.
5.2 Create Search module
This module is Joomla default module, that means when you install Joomla fresh, this module is ready to use.
Module position : head-search
Module Suffix : NOT USED
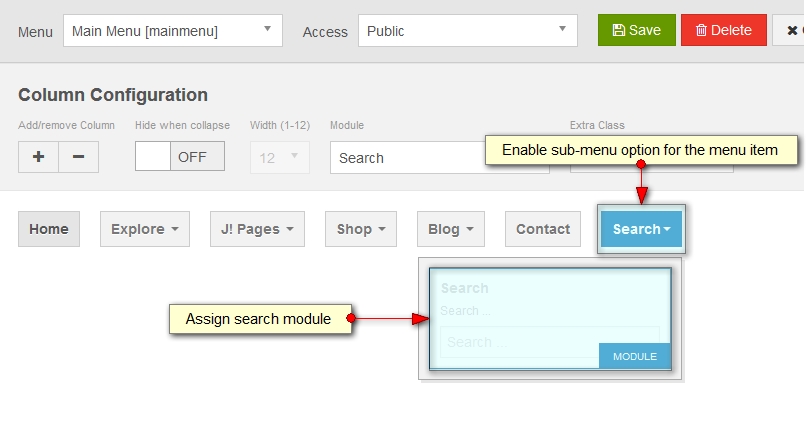
5.3 Assign Search module to sub-menu of Search menu
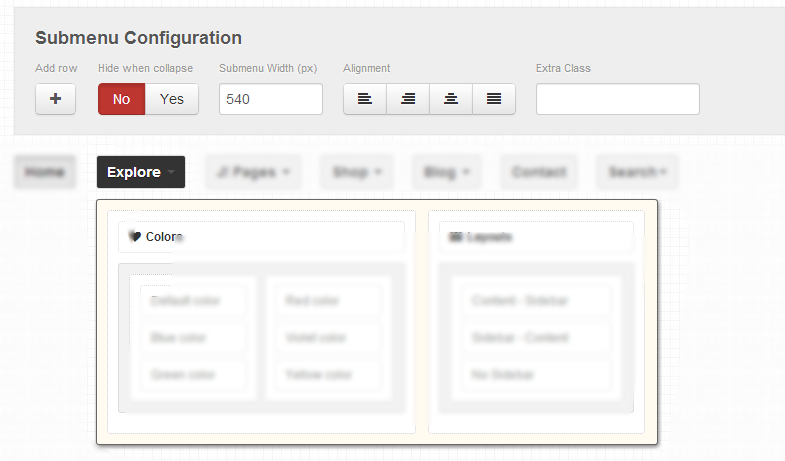
Open the Megamenu setting panel, select "Search" menu > Enable submenu option and assign Search module to the sub-menu.
6. Footer module
This module is Joomla default module, that means when you install Joomla fresh, this module is ready to use.
Module position : footer
Module Suffix : NOT USED
- Back-end Settings
- Front-end Appearance

7. Menu module
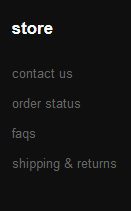
7.1 Store
Front-end Appearance

In the image above, you can see the list of menus are displayed in a module position, to have the same module in your site, please follow the instructions below.
Step 1: Create "store" menu
Go to: Administrator >> Menus >> Menu Manager >> Add New Menu: store. Then go to Administrator >> Menus >> store >> Add New Menu Items for the Menu.
Back-end setting for the menu items
- contact us
- order status
- faqs, shipping & returns have the same config with order status item
Step 2: Create new "Menu" module
This module is Joomla default module, that means when you install Joomla fresh, this module is ready to use.
Go to Administrator >> Module Manager >> Add new Menu Module
Module position : footer-1
Module Suffix : NOT USED
- Back-end Settings
- Front-end Appearance
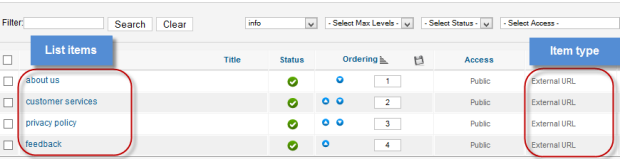
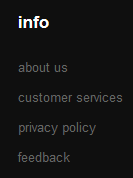
7.2 Info
Step 1: Create "info" menu and create menu items under the menu
Step 2: Create new "Menu" module
Module position : footer-2
Module Suffix : NOT USED
- Back-end Settings
- Front-end Appearance
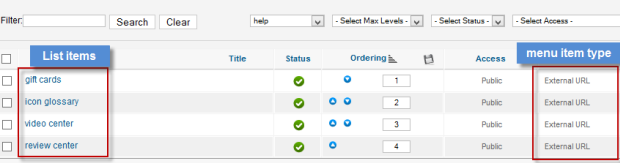
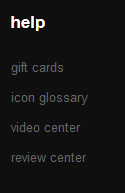
7.3 Help
Step 1: Create "help" menu and create menu items under the menu
Step 2: Create new "Menu" module
Module position : footer-3
Module Suffix : NOT USED
- Back-end Settings
- Front-end Appearance
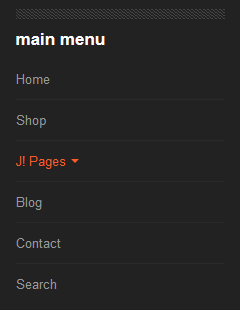
7.4 Main Menu
Module position : sidebar-1
Module Suffix : _menu
- Back-end Settings
- Front-end Appearance
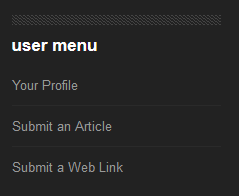
7.5 User Menu
Module position : sidebar-1
Module Suffix : _menu
- Back-end Settings
- Front-end Appearance
8. AcyMailing Module
Module position : footer-6
Module Suffix : NOT USED
- Back-end Settings
- Front-end Appearance

9. Breadcrumbs
Module position : navhelper
Module Suffix : NOT USED
- Back-end Settings
- Front-end Appearance

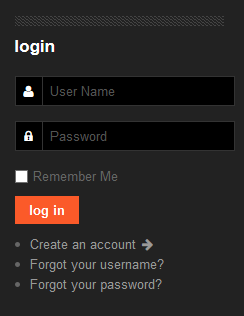
10. Login
This module is Joomla default module, that means when you install Joomla fresh, this module is ready to use.
Module position : sidebar-1
Module Suffix : NOT USED
- Back-end Settings
- Front-end Appearance
11. Who's online
This module is Joomla default module, that means when you install Joomla fresh, this module is ready to use.
Module position : sidebar-1
Module Suffix : NOT USED
- Back-end Settings
- Front-end Appearance

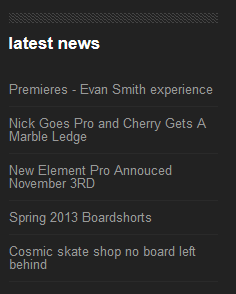
12. Latest News
This module is Joomla default module, that means when you install Joomla fresh, this module is ready to use.
Module position : sidebar-1
Module Suffix : NOT USED
- Back-end Settings
- Front-end Appearance
Custom HTML Modules
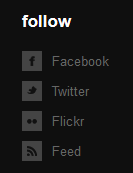
1. Follow
Module position : footer-4
Module Suffix : NOT USED
<ul class="social-list">

<li class="facebook"><a href="#" title="Facebook"><span class="icon"> </span>Facebook</a></li>

<li class="twitter"><a href="#" title="Twitter"><span class="icon"> </span>Twitter</a></li>

<li class="flickr"><a href="#" title="Flickr"><span class="icon"> </span>Flickr</a></li>

<li class="feed"><a href="#" title="Feed"><span class="icon"> </span>Feed</a></li>

</ul>
- Back-end Settings
- Front-end Appearance
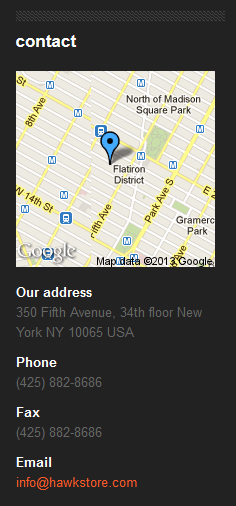
2. Location
Module position : footer-5
Module Suffix : NOT USED
<p>Mail to: <a href="#">contact@hawkstore.com </a></p>

<p>Phone: +123 456 7890</p>

<p>Address: 2411 Any Street. Any Town.</p>

<p>United Kingdom.</p>
- Back-end Settings
- Front-end Appearance

3. About JA Hawkstore
Module position : sidebar-1
Module Suffix : NOT USED
<p>Orci sed In morbi pede Quisque quis convallis Vestibulum consectetuer pharetra. Et leo in augue magna non dictumst ac volutpat Vivamus enim. Adipiscing vitae risus Curabitur Nulla ac id Curabitur cursus pellentesque tincidunt. Ut Suspendisse eu tincidunt dis vel leo nunc In Sed cursus. Nam convallis neque at dolor quis a id Nullam nunc auctor. Proin pellentesque hac.</p>
- Back-end Settings
- Front-end Appearance

4. Contact
Module position : sidebar-1
Module Suffix : NOT USED
<div class="contact-page"><img src="/images/joomlart/demo/contact.jpg" border="0" alt="" />

<p><strong>Our address</strong> 350 Fifth Avenue, 34th floor New York NY 10065 USA</p>

<p><strong>Phone</strong> (425) 882-8686</p>

<p><strong>Fax</strong> (425) 882-8686</p>

<p><strong>Email</strong> info@hawkstore.com</p>

</div>
- Back-end Settings
- Front-end Appearance
K2 Configuration
1. Installation
If you are new to K2 Component, please follow THIS GUIDE to know more about the component, how to install, how to use.
2. Configuring K2 component
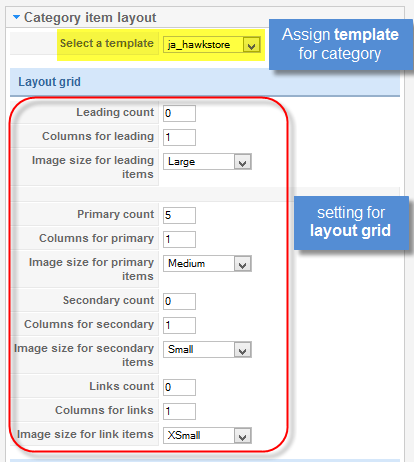
We provide a template for K2: ja_hawkstore. Assign categories for the template to use the template in your site. In our demo site, the template: ja_smashboard is assigned to all categories except from Smashboard category.
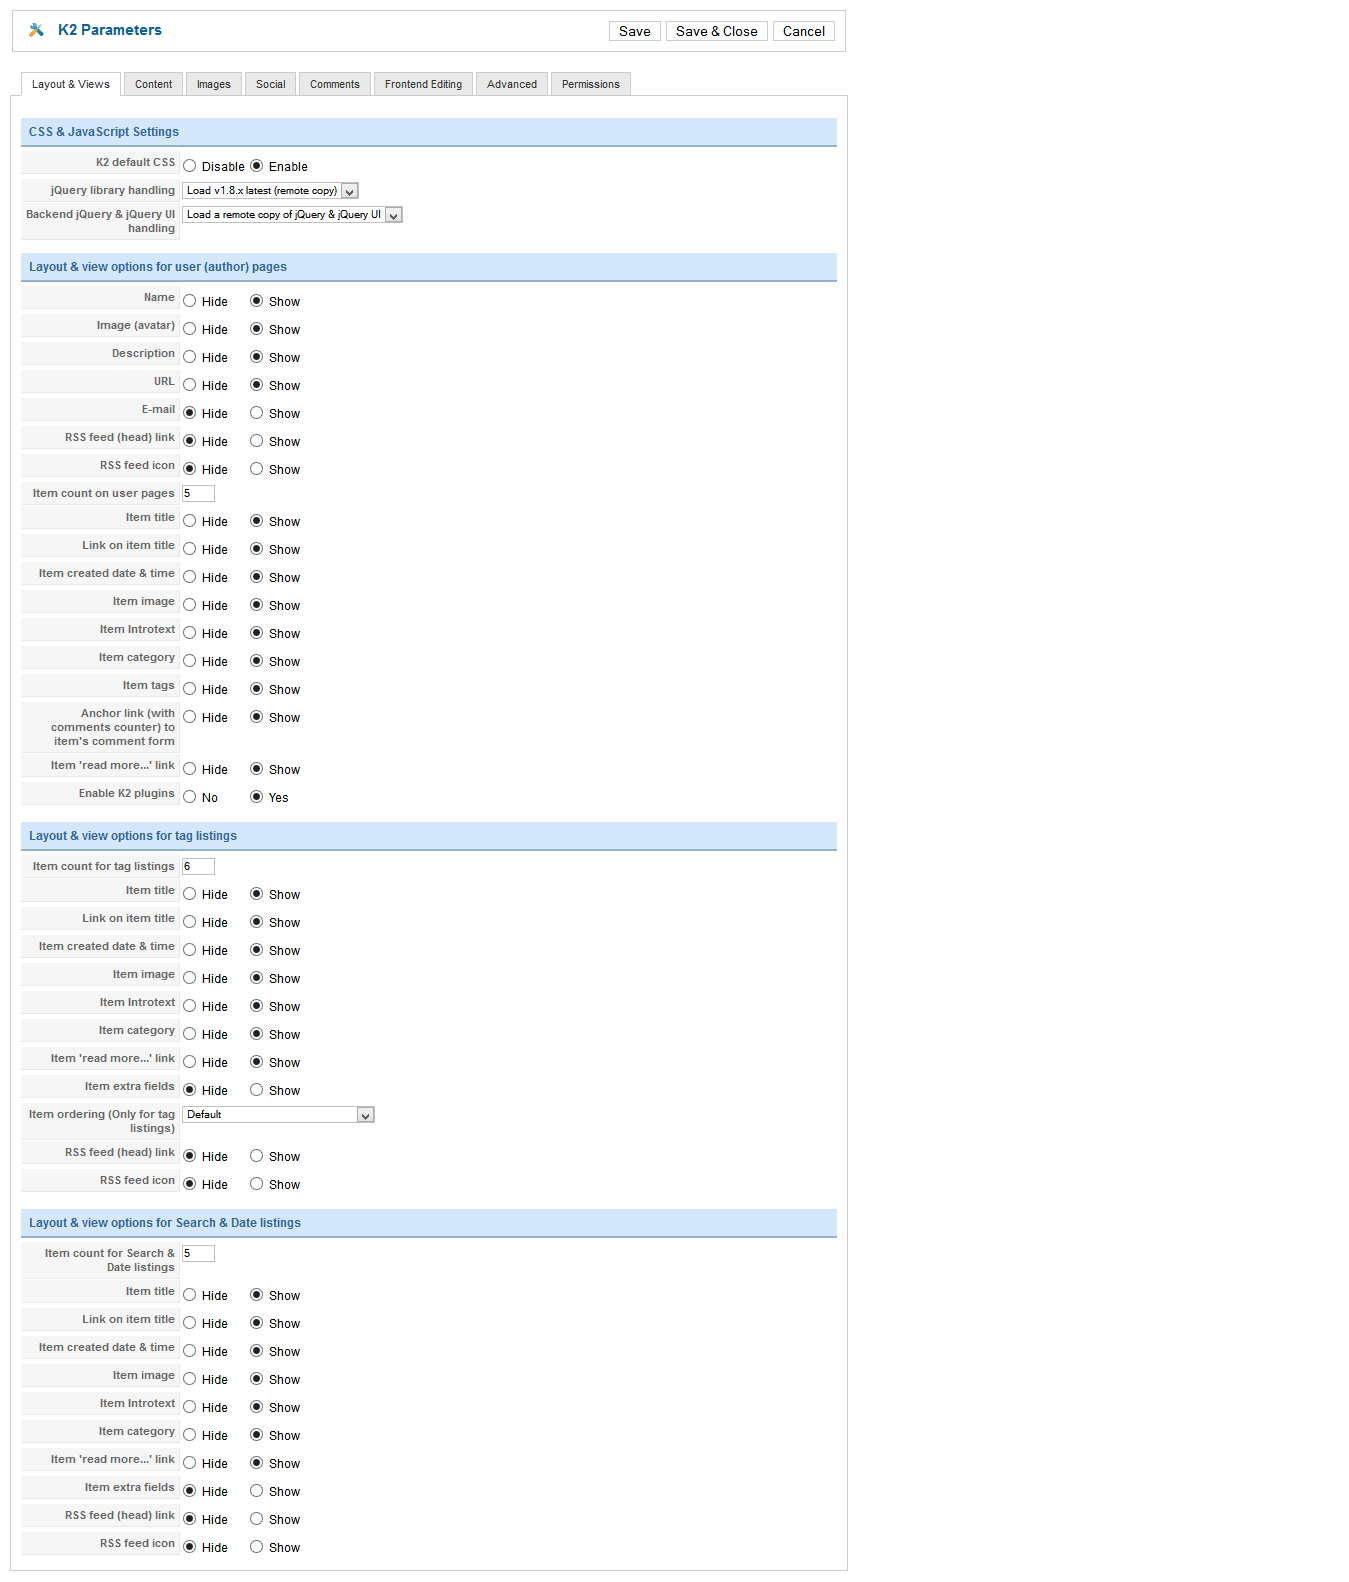
2.1 Global Configuration (click Parameter button on the top right side)
Back-end Setting
- Layout & View Settings
- Content Settings
- Images Settings
- Social Settings
- Comments Settings
- Frontend & Editing Settings
- Advanced Settings
2.2 Category Configuration
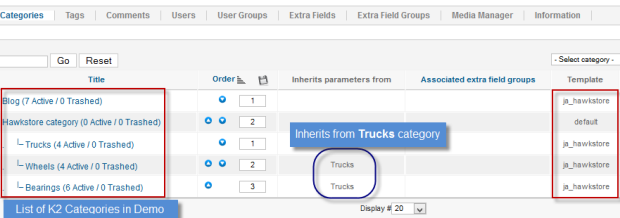
To build your website like our demo, navigate to: Administrator >> Components >> K2 >> Categories.
- K2 Categories in Demo site
- Assign Template and Layout Grid settings
Back-end settings for each category
3. Configurations for K2 Modules
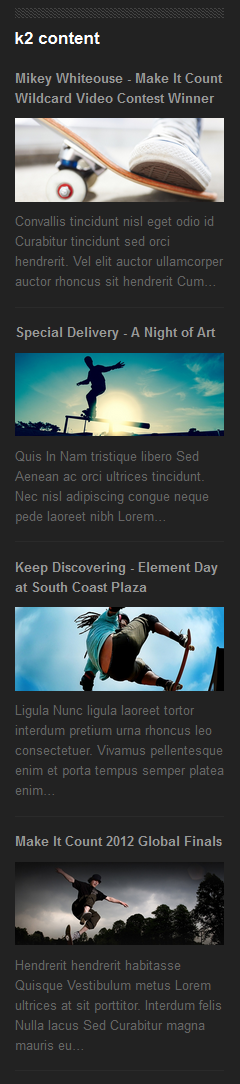
3.1 K2 Comments
Module position : sidebar-1
Module Suffix : NOT USED
- Back-end Settings
- Front-end Appearance
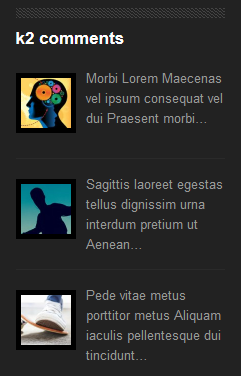
3.2 K2 Content
Module position : sidebar-1
Module Suffix : NOT USED
- Back-end Settings
- Front-end Appearance
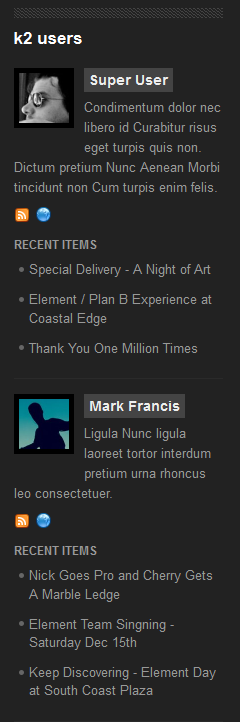
3.3 K2 Users
Module position : sidebar-1
Module Suffix : NOT USED
- Back-end Settings
- Front-end Appearance
3.5 K2 Tools
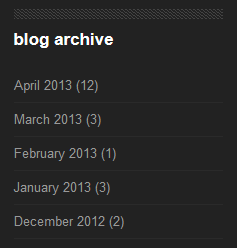
3.5.1 Blog Archive
Module position : sidebar-1
Module Suffix : NOT USED
- Back-end Settings
- Front-end Appearance
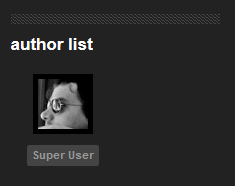
3.5.2 Author list
Module position : sidebar-1
Module Suffix : NOT USED
- Back-end Settings
- Front-end Appearance
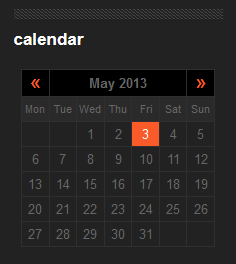
3.5.3 Calendar
Module position : sidebar-1
Module Suffix : NOT USED
- Back-end Settings
- Front-end Appearance
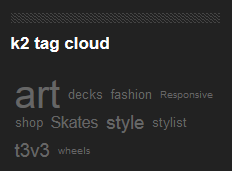
3.5.4 K2 Tag Cloud
Module position : sidebar-1
Module Suffix : NOT USED
- Back-end Settings
- Front-end Appearance
Virtuemart Configuration
1. Installation
2. Configuring Virtuemart Component
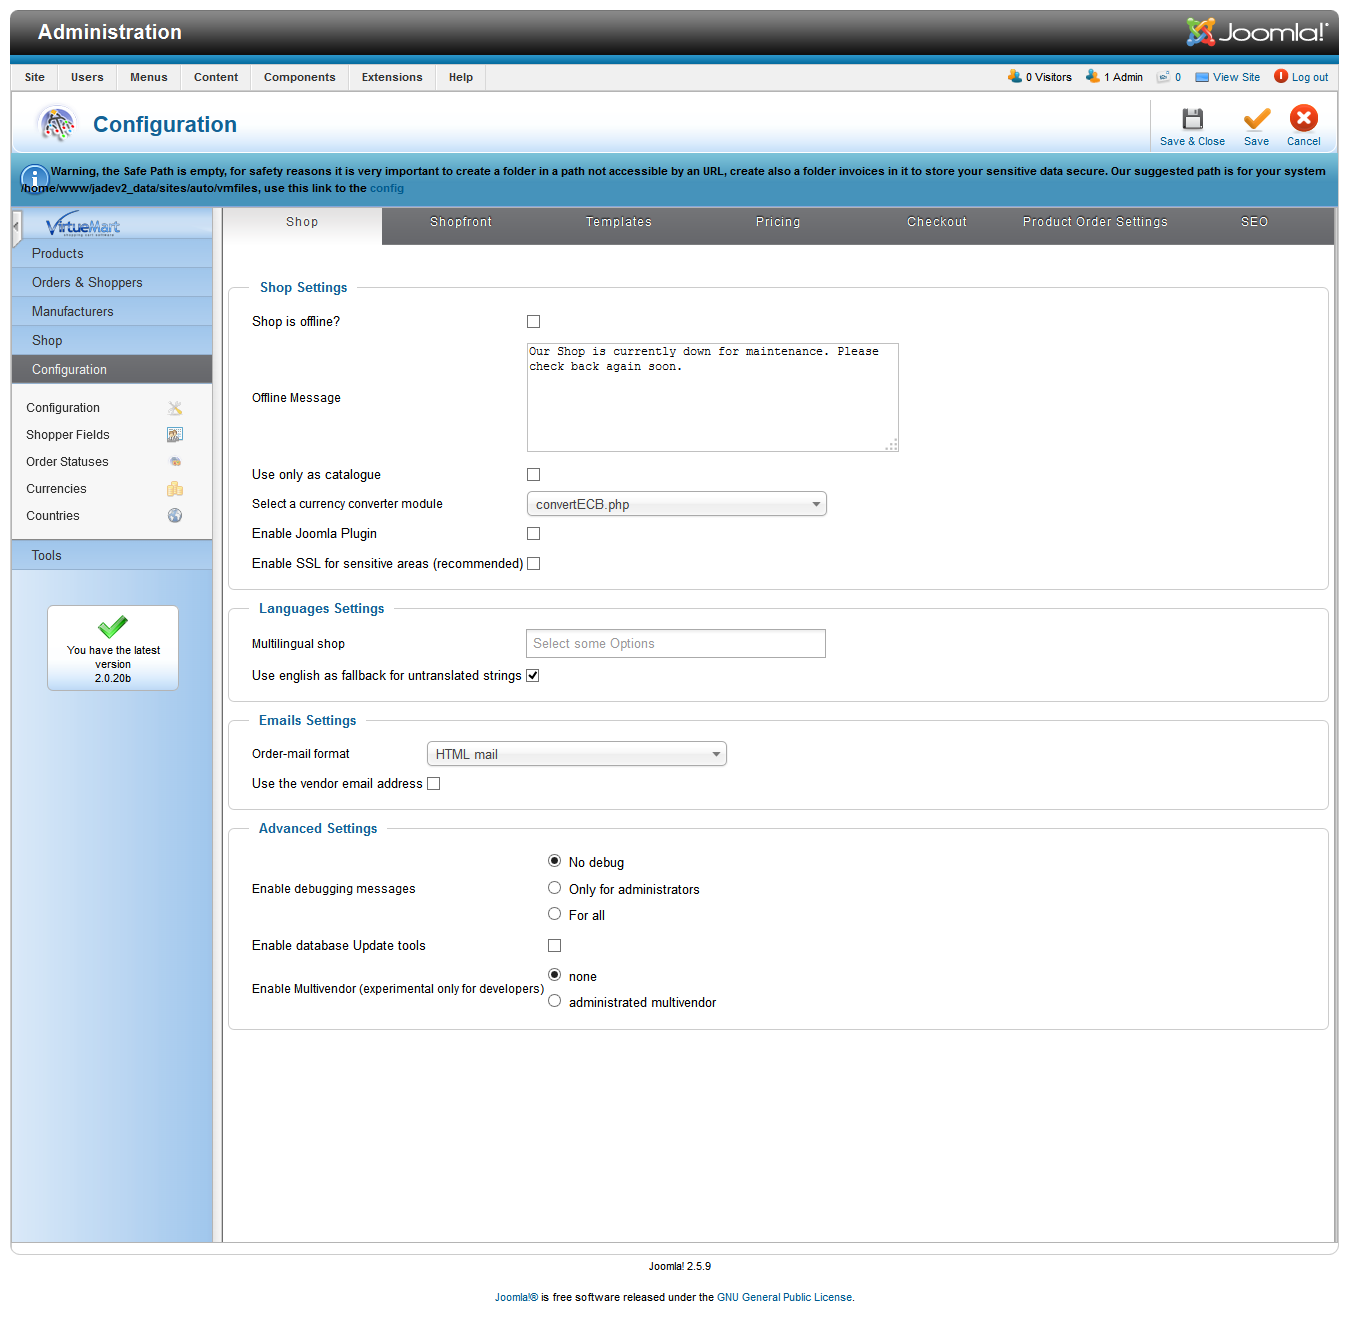
2.1 Global Configuration
Go to: Administration >> Components >> Virtuemart >> Configuration >> Configuration.
Back-end Setting
2.2 Categories Configuration
To build your website like our demo, navigate to: Administrator >> Components >> Virtuemart >> Product Categories and create create Products normally.
3. Configurations for Virtuemart Modules as on our Demo
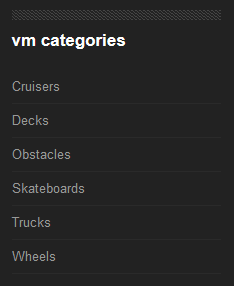
3.1 VM Categories Module
Module position : sidebar-1
Module Suffix : NOT USED
- Back-end Settings
- Front-end Appearance
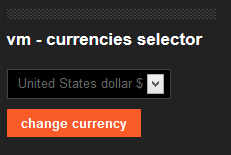
3.2 VM - Currencies Selector
Module position : sidebar-1
Module Suffix : NOT USED
- Back-end Settings
- Front-end Appearance
3.3 VM - Currencies Selector
Module position : sidebar-1
Module Suffix : NOT USED
- Back-end Settings
- Front-end Appearance
3.4 VirtueMart Products
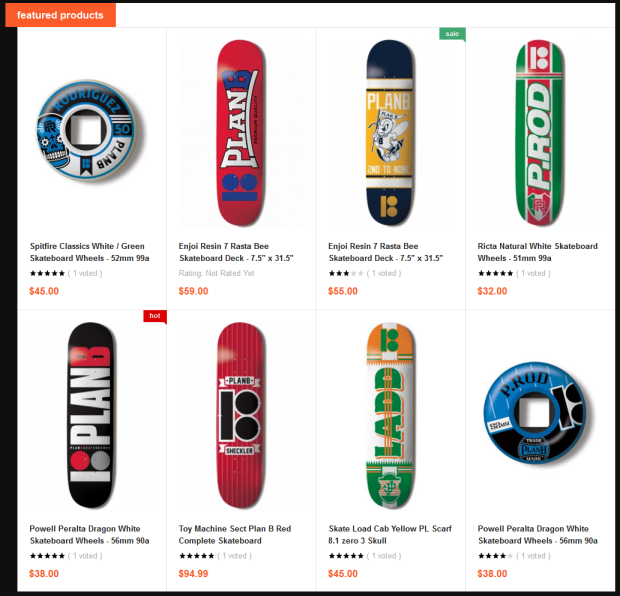
3.4.1 Featured Products
Module position : home-2
Module Suffix : NOT USED
- Back-end Settings
- Front-end Appearance
3.4.2 Hot Product
Module position : mega
Module Suffix : NOT USED
- Back-end Settings
- Front-end Appearance

3.5 VM - Search in Shop
Module position : sidebar-1
Module Suffix : NOT USED
- Back-end Settings
- Front-end Appearance

3.6 Virtuemart Shopping Cart
3.6.1 VM - Shopping cart
Module position : mycart
Module Suffix : cart-scroller
- Back-end Settings
- Front-end Appearance
3.6.2 VM - Shopping cart
Module position : sidebar-1
Module Suffix : cart-scroller
- Back-end Settings
- Front-end Appearance
Template Customization
1. Template Override
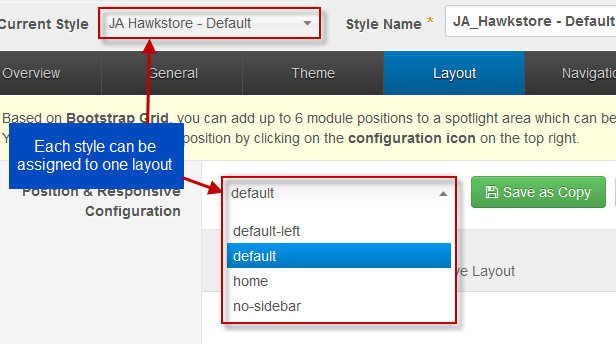
In summary, to override template, you clone a style then edit as you wish. After all, assign the cloned style to specific menus. The assigned menus will override the same menus in the default style.
Each style can be configured to use one theme and one layout so in one website, you can have menus with different themes and layouts.
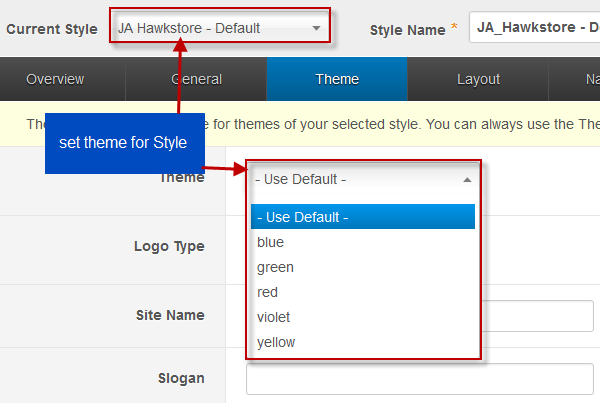
2. Themes Settings
JA Hawkstore supports up to 6 themes, the themes are available when you install the JA Hawkstore template.
3. Layout Settings
JA Hawkstore supports 4 layouts:
The following video tutorials will show you how to work with Layouts: Configure and Customize.
Layout Configuration
T3 comes with ease of layout customization. The visual layout configuration is easier than ever before.
Layout Customization
The video tutorial guides you on how to customize the layouts, add new layout, and customize blocks in a layout.
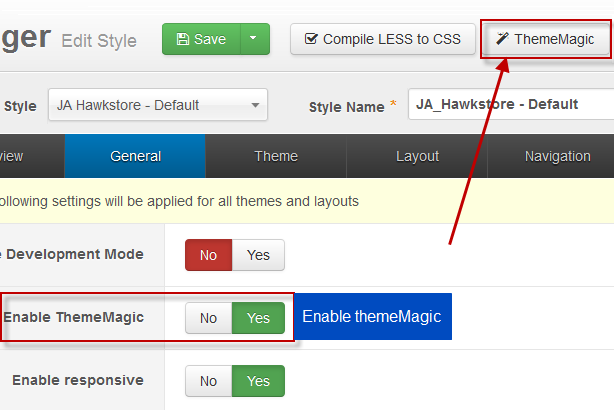
4. ThemeMagic Settings
JA Hawkstore is developed with T3 so you can customize themes with ThemeMagic.
To customize themes with the feature, firstly, you have to enable the option.
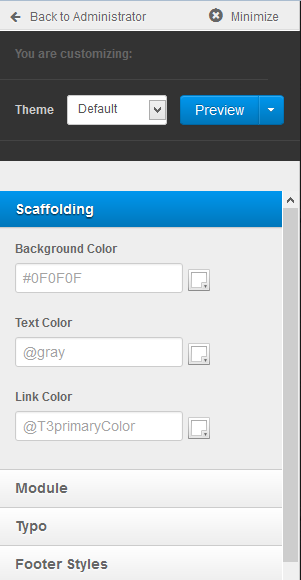
In the setting panel, you can customize all the themes. The left panel is the setting area while the right panel is your site front-end. Each time you change settings, click on "Preview" button to view the change in front-end on the right panel.
The following video tutorials will show you how to customize themes and customize ThemeMagic.
ThemeMagic Customization
After the tutorial, you can be able to customize your theme quickly using ThemeMagic as well as how to add new group and parameters to ThemeMagic.
Mega Menu Configuration
To configure Mega Menu, go to: Extensions --> Template manager --> open JA Hawkstore template, in the Navigation setting, you can configure Mega Menu.
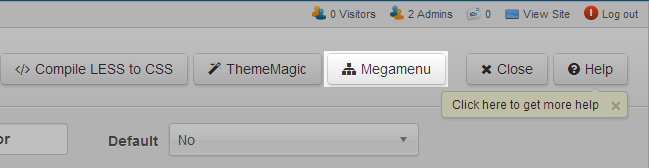
Step 1: Enable Mega Menu
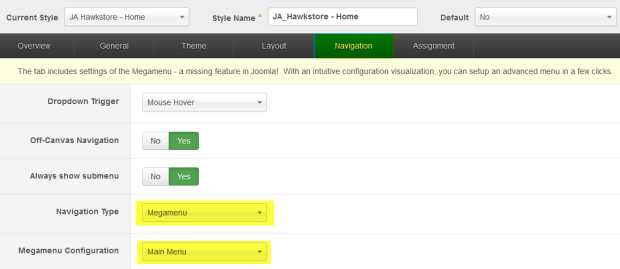
Step 2: Open Mega Menu page
Step 3: Select Menu to configure Mega Menu
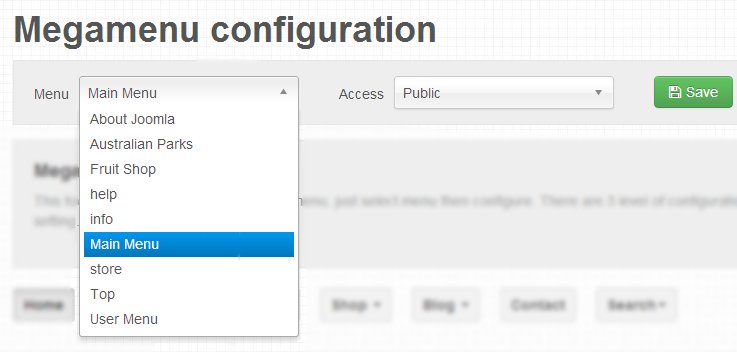
Step 4: Configure Mega Menu
Mega Menu Configuration
This is the video tutorial for Mega Menu configuration, you will learn how to build up a Mega Menu, how to use Mega Menu settings effectively, how to add icons, how to style menu items with our T3 Framework.
Recommendation
The above userguide should help one in replicating the Demo site settings for the template and extension on their site.
Recommended :
If you are new or are confused, we recommend installing Quickstart on your localhost and use it as reference for configs. This is the best way to work with any template. Links to all the resources are provided above, you should carefully read them to take the maximum advantage of our products.
Support :
Please raise your support queries in the forum and make sure you follow the support guidelines. We spend more time in getting the information from users in case the support guidelines are not followed.