Important:
JA Appolio version 1.0.1+ has some updates and changes: module position and class suffix. The guide is based on version 1.0.1, so if your site is running on version 1.0.0, please upgrade. Check out the Upgrade and Updates section in the documentation to see the changes.
About JA Appolio
A wholenew responsive Joomla template for product portfolio and showcase websites, structured with clean and well organized sections along with parallax design, this Joomla showcase template will help you tell a story about your products and deliver it in the most attractive way.
1. Main Features
- Parallax design
- Fully Responsive Template
- Joomla 2.5 and Joomla 3 native
- Bootstrap 2 & Bootstrap 3 integration
- 4 Themes supported by default
- 2 layouts supported by default
2. JA Extensions Supported
- JA Slideshow Lite module
- JA Content Popup module
- JA Masshead module
- JA Extension Manager
- JA Google Map plugin
- JA Disqus Debate plugin
- JA Tabs plugin
- T3 Framework
3. Supported Third party extensions
- Social Login
- Easyblog
3. Supported Joomla pages (by default)
- Login
- Registration Page
- Edit User Profile
- Web Links
- News Feeds
- Contact Us
- Smart Search
- Offline Page
- 404 Page
- Tagged Items
System requirement
JA Appolio is compatible with Joomla 3 and Joomla 2.5. Please make sure your system meets the following requirements:
Joomla 3 System requirement
Software
- Software: PHP (Magic Quotes GPC off): 5.3.1 + (5.4+ recommended)
Databases
- MySQL(InnoDB support required): 5.1+
- MSSQL 10.50.1600.1+
- PostgreSQL 8.3.18+
Web Severs
- Apache 2.x+
- Microsoft IIS 7
- Nginx 1.0 (1.1 recommended)
Joomla 2.5+ system requirement
Software
- Software: PHP 5.2.4+ (5.4+ recommended)
- MySQL: 5.0.4+
Web Sever
- Apache: 2.x+
- Microsoft: IIS 7
- Nginx: 1.0 (1.1 recommended)
Browser requirement
The requirements are the same with both Joomla 2.5 and Joomla 3
- Firefox 4+
- IE (Internet Explorer) 8+
- Google Chrome 10+
- Opera 10+
- Safari 5+
Development Environment
The requirements are the same with both Joomla 2.5 and Joomla 3
During development process, Localhost is preferred. You can use the following servers on your PC to develop your site.
Windows
- WAMPSEVER
- XAMPP for Windows
Linux
- LAMP Bubdle
- XAMPP for Linux
Mac OS
- MAMP & MAMP Pro
- XAMPP for Mac OS
Download & Installation
1. Plan your site Development
- Making a New Site ? - If you are planning to make a new site, then use our Quickstart package to clone the demo site and replace the demo content with yours. Check How to install Quickstart Package.
- Installing on your live site ? - If you are planning to use this template on your already live site. Then you should follow How to make your site look like demo site guide first to know about the steps involved.
2. Download Template and Extensions
Browse and Download: Go to the Download page of JA Appolio and download the Template zip file.
3. Install Template and Extensions
- Install the template that you download in your Joomla system.
- JA Appolio template will install with Settings used on the demo website, so you can postpone the configuration until you complete the setup (install other modules / plugins used in the demo website).
4. Build demo with our Demo Builder
The demo builder service allows you to build demo for any Joomla template. All infomation of the demo will be sent to your email. You will have one day to explore our template before it's deleted.
Note:
Custom HTML Module: To match the design of the template, we also style (CSS) for Custom HTML modules using different div classes. You will need to check the HTML codes and make sure to use the recommended HTML markup to get correct display. We provide the HTML code in this user-guide.
Building homepage
The Homepage layout includes Video position and parallax position. The "parallax" position includes number of sections, the content of the sections are loaded from modules.
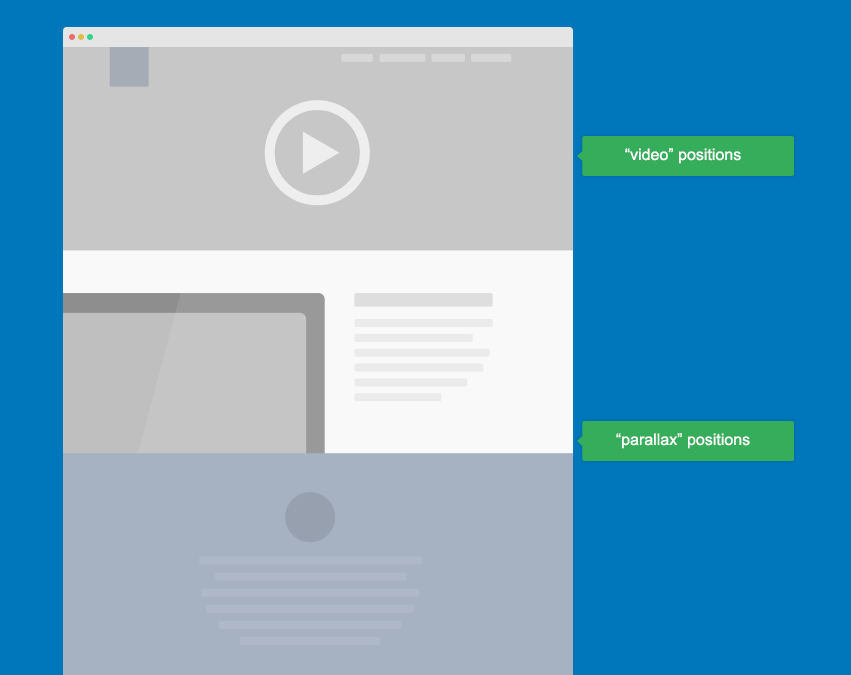
1. "video" position
The video position in Homepage includes 2 content types: video background and social login.
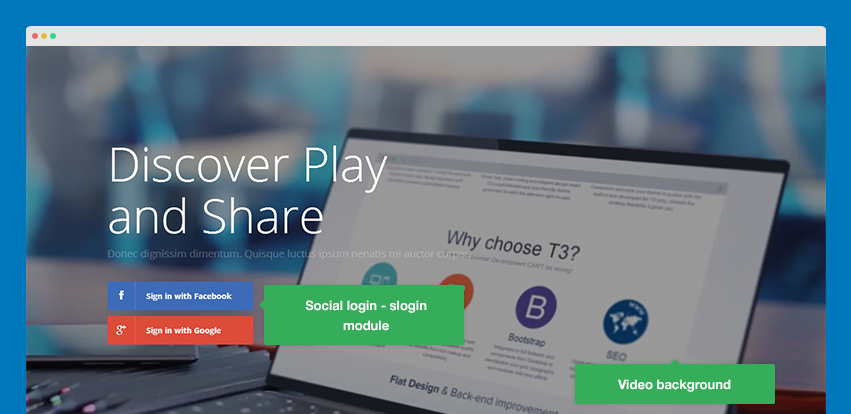
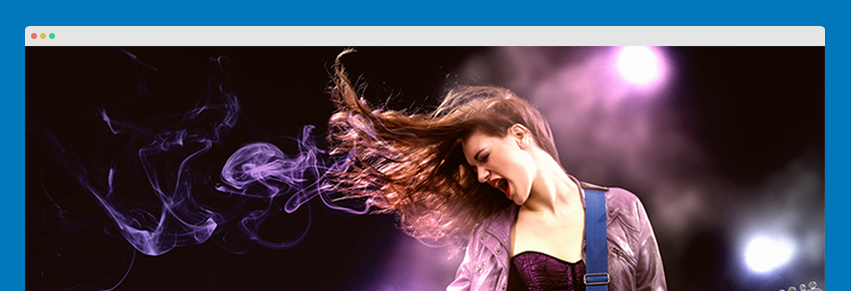
1.1 Video Background
Module type: Custom HTML
Module Position: video
Module Suffix: NOT USED
Module type: Custom HTML
HTML
<div class="video-shuffle-wrap">
<div class="video-shuffle" data-js-view="video-shuffle">
<div class="mask"> </div>
<video loop autoplay style="width: 100%; height: auto;" poster="/images/stories/joomla/poster.png">
<source src="/images/stories/joomla/welcome.mp4" type="video/mp4">
<object type="application/x-shockwave-flash" data="http://releases.flowplayer.org/swf/flowplayer-3.2.1.swf" width="100%" height="1011" >
<param name="movie" value="http://releases.flowplayer.org/swf/flowplayer-3.2.1.swf" />
<param name="allowFullScreen" value="true" />
<param name="wmode" value="transparent" />
<param name="flashVars" value="config={'playlist':['http%3A%2F%2F10.0.0.102%2Fja_works%2Fja_appolio%2Fimages%2Fstories%2Fjoomla%2Fposter.png',{'url':'http%3A%2F%2F10.0.0.102%2Fja_works%2Fja_appolio%2Fimages%2Fstories%2Fjoomla%2Fwelcome.mp4','autoPlay':true, 'controls': null}]}" />
<img alt="Sample Video" src="/http%3A%2F%2F10.0.0.102%2Fja_works%2Fja_appolio%2Fimages%2Fstories%2Fjoomla%2Fposter.png" width="100%" height="auto" title="No video playback capabilities, please download the video below" />
</object>
</video>
</div>
</div>
1.2 Slogin Module
Alternative layout: appolio
Module Position: video
Module Suffix: slogin container
Back-end Setting:
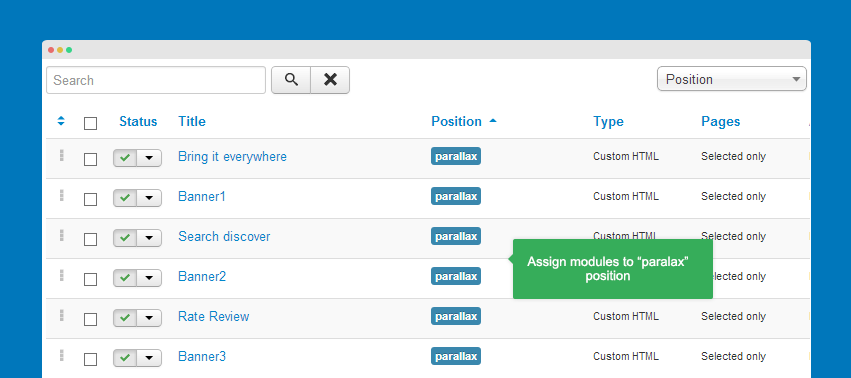
2. "parallax" position
Note:
The "parallax" position includes number of sections, each section is configured to have different animation. The section content is modules content that are assigned to parallax position.
2.1 Create content
As I mentioned above, content in each section is loaded from module. So we will create modules, add content to the modules and assign to position parallax.
2.2 Add animation for module
When you view JA Appolio demo, you will see each section has different animation. To add animation for module content, please put class suffix for the module in the Advanced tab.
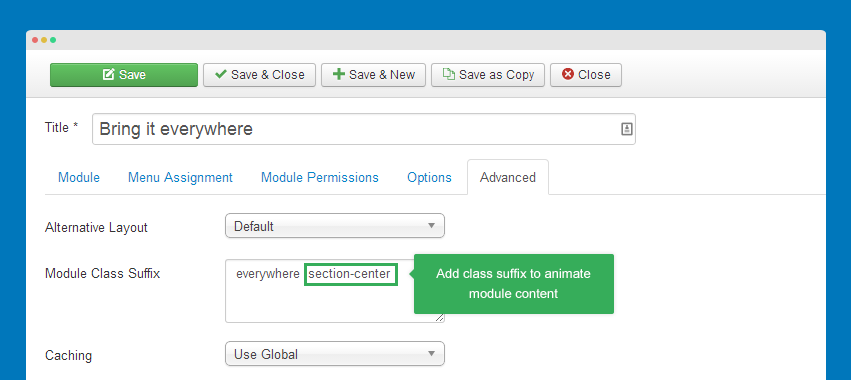
List of supported class suffixes for animation
-
section-centermodule content is zoomed out, opacity increases with zoom effect. -
section-imageanimate image by moving image from left or right side to site content area
Module configuration in "parallax" position
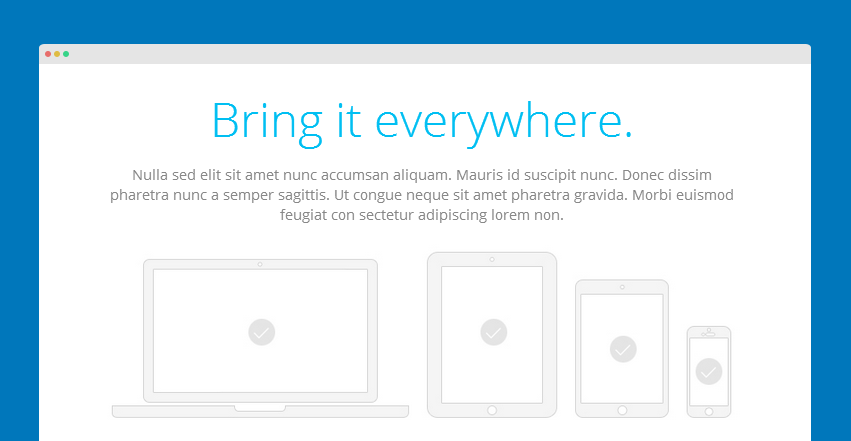
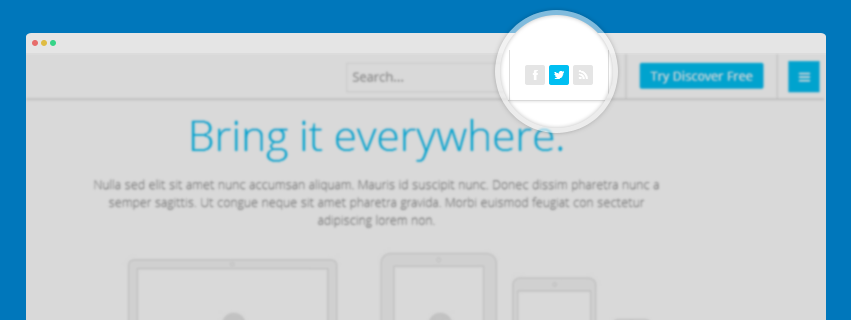
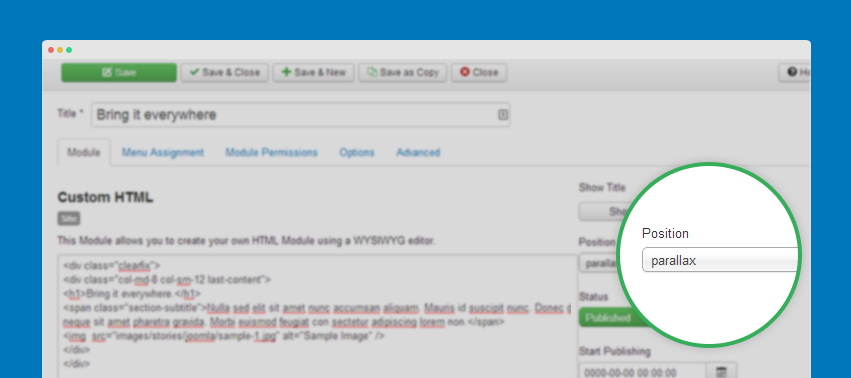
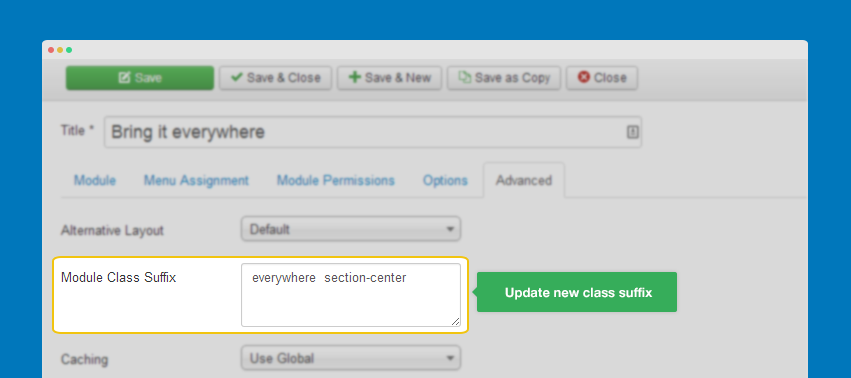
1. Bring it everywhere
Module Position: parallax
Module Suffix: everywhere  section-center
Module type: Custom HTML
HTML code
<div class="clearfix">
<div class="col-md-8 col-sm-12 last-content">
<h1>Bring it everywhere.</h1>
<span class="section-subtitle">Nulla sed elit sit amet nunc accumsan aliquam. Mauris id suscipit nunc. Donec dissim pharetra nunc a semper sagittis. Ut congue neque sit amet pharetra gravida. Morbi euismod feugiat con sectetur adipiscing lorem non.</span>
<img  src="/images/stories/joomla/sample-1.jpg" alt="Sample Image" />
</div>
</div>
- Module Back-end Settings
- Front-end Appearance
2. Banner1
Module Position: parallax
Module Suffix:  no-container onepage-mask
Module type: Custom HTML
HTML code
<img src="/images/stories/joomla/sample-2.jpg" alt="Sample Image" />
- Module Back-end Settings
- Front-end Appearance
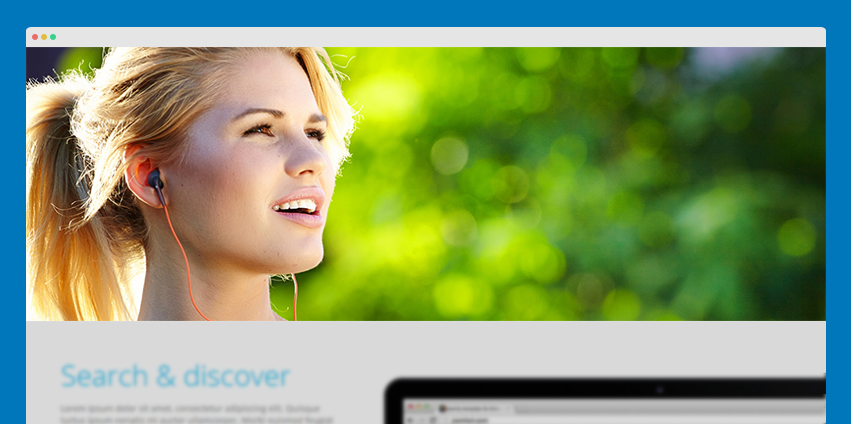
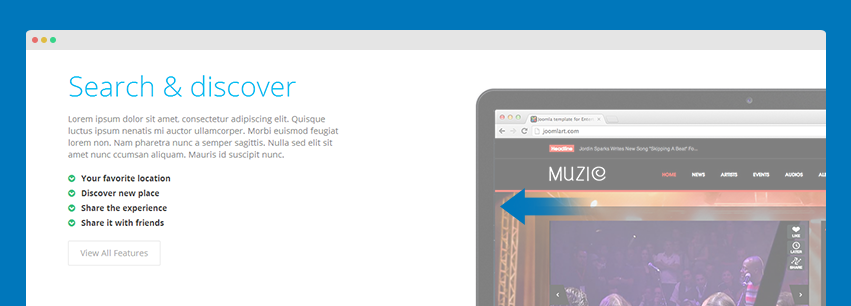
3. Search discover
Module Position: parallax
Module Suffix: discover section-image
Module type: Custom HTML
HTML code
<div class="clearfix">
<div class="col-md-6 col-sm-6 col-xs-12 content-left">
<h1 class="section-title">Search & discover</h1>
<span>Lorem ipsum dolor sit amet, consectetur adipiscing elit. Quisque luctus ipsum nenatis mi auctor ullamcorper. Morbi euismod feugiat lorem non. Nam pharetra nunc a semper sagittis. Nulla sed elit sit amet nunc ccumsan aliquam. Mauris id suscipit nunc.</span>
<ul class="check-list">
<li><i class="fa fa-chevron-circle-down"></i>Your favorite location</li>
<li><i class="fa fa-chevron-circle-down"></i>Discover new place</li>
<li><i class="fa fa-chevron-circle-down"></i>Share the experience</li>
<li><i class="fa fa-chevron-circle-down"></i>Share it with friends</li>
</ul>
<a href="/index.php/about" class="btn btn-primary" title="View All Features">View All Features</a>

</div>
<div class="col-md-6 col-sm-6 col-xs-12 img-right">
<img  src="/images/stories/joomla/sample-4.jpg" alt="Sample Image" />

</div>
<div class="discussions-inner animate">
<div class="text three-lines">
<h4>
  Have Discussions
</h4>
<p>
  Talk about what matters to your team and stay in the loop with comments and activity.
</p>
</div>
</div>
</div>
- Module Back-end Settings
- Front-end Appearance
4. Banner2
Module Position: parallax
Module Suffix: no-container section-mask
Module type: Custom HTML
HTML code
<img src="/images/stories/joomla/sample-3.jpg" alt="Sample Image" />
- Module Back-end Settings
- Front-end Appearance

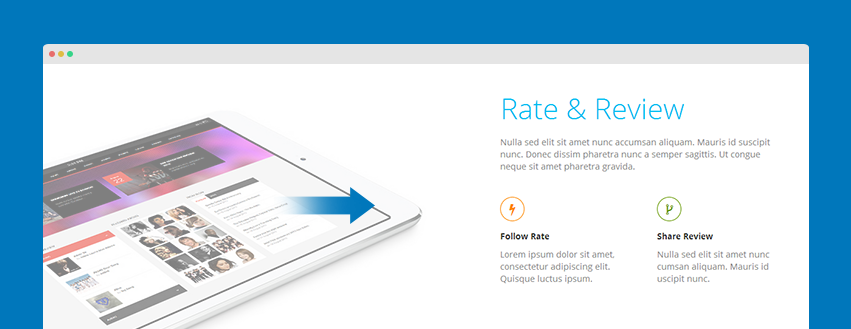
5. Rate Review
Module Position: parallax
Module Suffix: review section-image
Module type: Custom HTML
HTML code
<div class="clearfix">
<div class="col-md-6 col-sm-6 col-xs-12 img-left">
<img  src="/images/stories/joomla/sample-5.jpg" alt="Sample Image" />
</div>
<div class="col-md-6 col-sm-6 col-xs-12 pull-right">
<h1>Rate & Review</h1>
<span>Nulla sed elit sit amet nunc accumsan aliquam. Mauris id suscipit nunc. Donec dissim pharetra nunc a semper sagittis. Ut congue neque sit amet pharetra gravida.</span>
<ul>
<li>
<i class="fa fa-bolt icon-orange"></i>
<span>Follow Rate</span>
<p>Lorem ipsum dolor sit amet, consectetur adipiscing elit. Quisque luctus ipsum.</p
</li>
<li class="pull-right">
<i class="fa fa-code-fork icon-green"></i>
<span>Share Review</span>
<p>Nulla sed elit sit amet nunc cumsan aliquam. Mauris id uscipit nunc. </p
</li>
<ul>
</div>
</div>
- Module Back-end Settings
- Front-end Appearance
6. Banner3
Module Position: parallax
Module Suffix:  no-container onepage-mask
Module type: Custom HTML
HTML code
<img src="/images/stories/joomla/sample-6.jpg" border="0" alt="Sample Image" />
- Module Back-end Settings
- Front-end Appearance
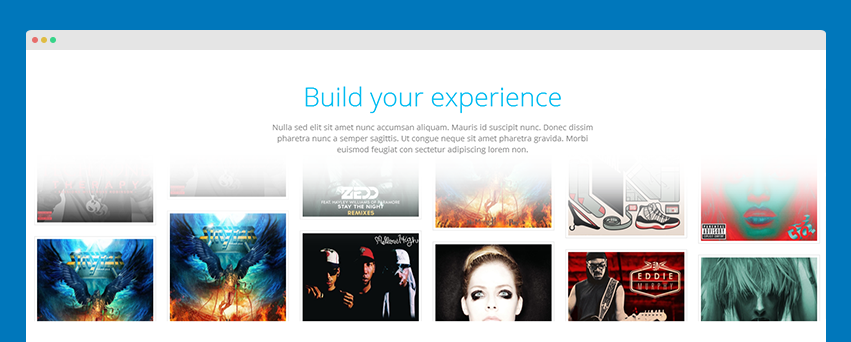
7. Build your experience
Module Position: parallax
Module Suffix:  no-container section-center
Module type: Custom HTML
HTML code
<div class="col-md-5 col-sm-12 last-content">
<h1>Build your experience</h1>
<span class="section-subtitle">Nulla sed elit sit amet nunc accumsan aliquam. Mauris id suscipit nunc. Donec dissim pharetra nunc a semper sagittis. Ut congue neque sit amet pharetra gravida. Morbi euismod feugiat con sectetur adipiscing lorem non.</span></div>
<div class="main-col">
<div class="shadow"> </div>
<div class="background">
<div class="col col1 col-md-1 col-sm-1 col-xs-1 "> </div>
<div class="col col2 col-md-1 col-sm-1 col-xs-1 "> </div>
<div class="col col3 col-md-1 col-sm-1 col-xs-1 "> </div>
<div class="col col4 col-md-1 col-sm-1 col-xs-1"> </div>
<div class="col col5 col-md-1 col-sm-1 col-xs-1"> </div>
<div class="col col6 col-md-1 col-sm-1 col-xs-1"> </div>
<div class="col col7 col-md-1 col-sm-1 col-xs-1"> </div>
<div class="col col8 col-md-1 col-sm-1 col-xs-1 "> </div>
<div class="col col9 col-md-1 col-sm-1 col-xs-1"> </div>
<div class="col col10 col-md-1 col-sm-1 col-xs-1"> </div>
<div class="col col11 col-md-1 col-sm-1 col-xs-1"> </div>
<div class="col col12 col-md-1 col-sm-1 col-xs-1"> </div>
</div>
</div>
- Module Back-end Settings
- Front-end Appearance
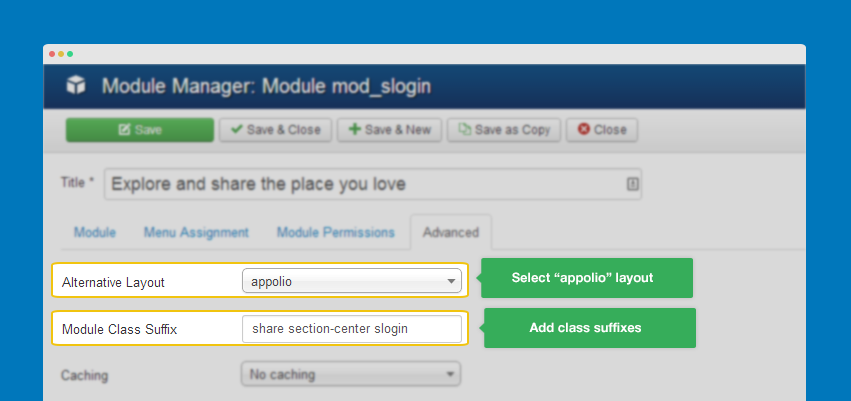
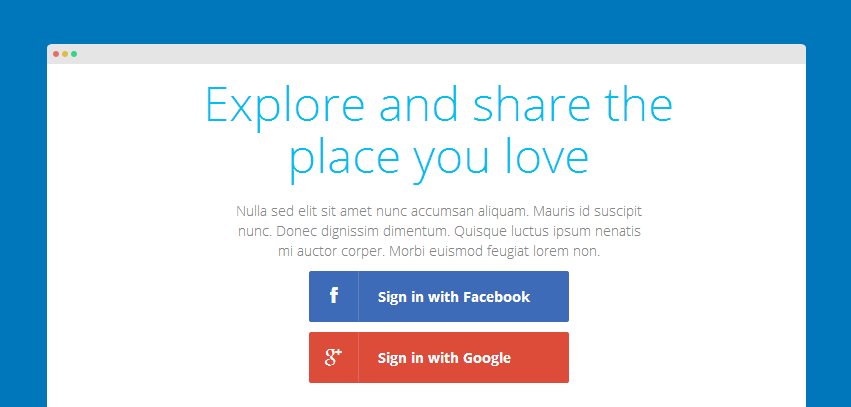
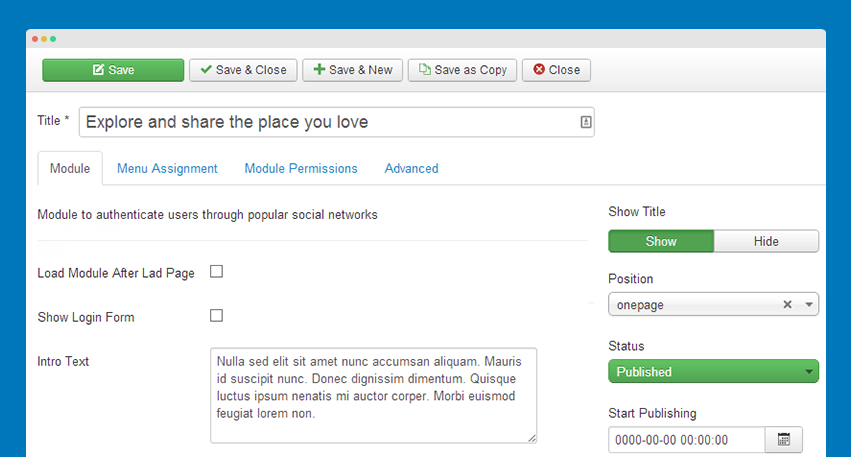
8. Explore and share the place you love
Module Position: parallax
Module Suffix: share section-center slogin
Module type: Slogin Module
Alternative Layout: appolio
Note:
We add a alternative layout for the module, please make sure you select the appolio for alternative layout.
- Module Back-end Settings
- Front-end Appearance
Extension Configuration
JA Extension Configuration
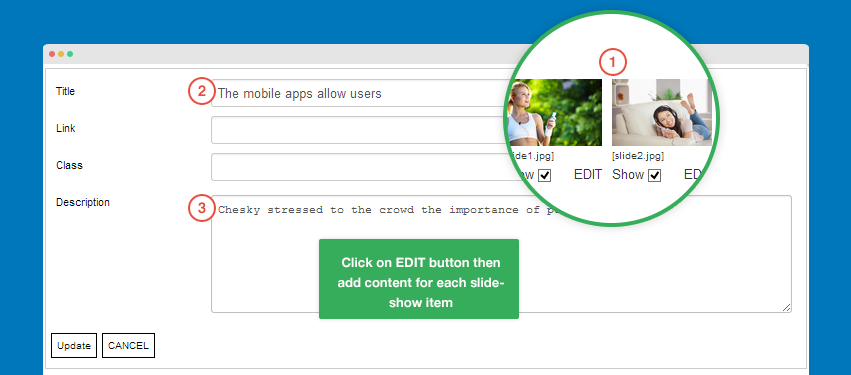
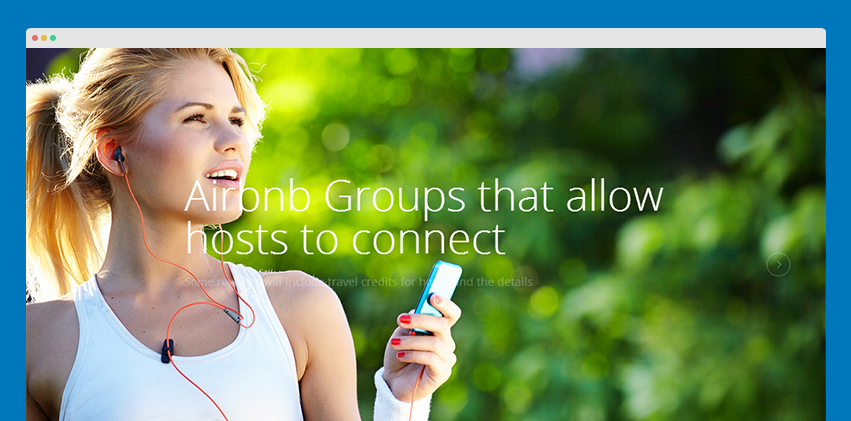
1. JA Slideshow Lite module
Module Position: parallax
Module Suffix:  slideshow
To add content for each slideshow item, click on EDIT button in the image then add title, description, link.
- Module Back-end Settings
- Front-end Appearance
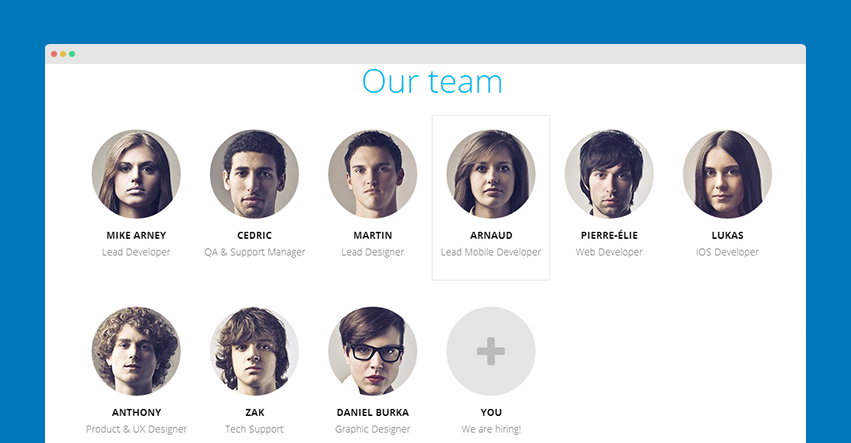
2. JA Content Popup module
2.1 Our team
Module Position: parallax
Module Suffix:  section-center column-6
- Module Back-end Settings
- Front-end Appearance
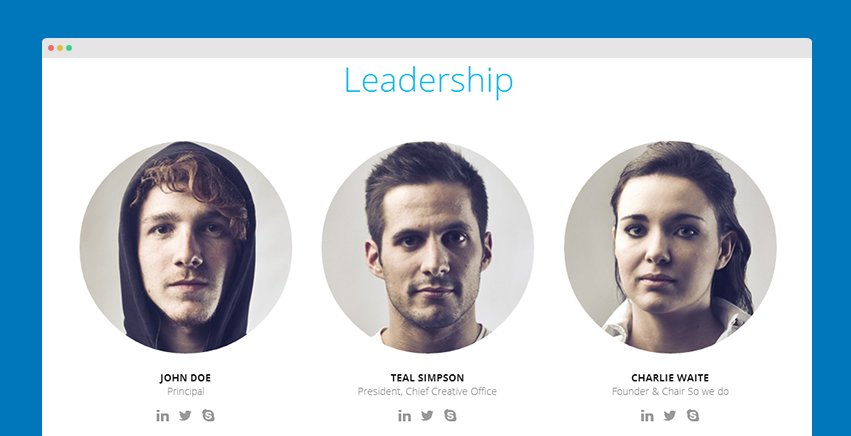
2.2 Leadership
Module Position: parallax
Module Suffix:  section-center column-3
- Module Back-end Settings
- Front-end Appearance
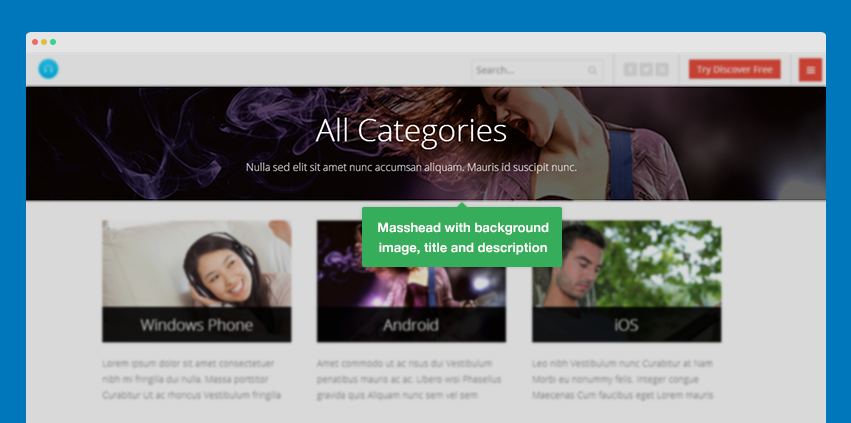
3. JA Masshead module
Module Position: parallax
Module Suffix:  slideshow
Configuration Conditions
[Masshead Itemid="494" title="All Categories" ]Nulla sed elit sit amet nunc accumsan aliquam. Mauris id suscipit nunc.[/Masshead]
[Masshead Itemid="599" title="Windows Phone" ]Nulla sed elit sit amet nunc accumsan aliquam. Mauris id suscipit nunc.[/Masshead]
[Masshead Itemid="600" title="Android" ]Nulla sed elit sit amet nunc accumsan aliquam. Mauris id suscipit nunc.[/Masshead]
[Masshead Itemid="601" title="IOS" ]Nulla sed elit sit amet nunc accumsan aliquam. Mauris id suscipit nunc.[/Masshead]
- Module Back-end Settings
- Front-end Appearance
4. JA Tabs Plugin
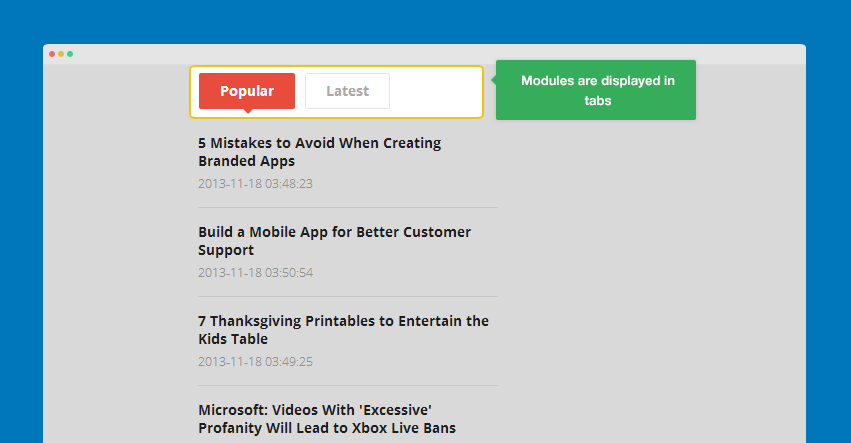
JA Tabs allow you to load any module to display in tabs. To do that, please follow the steps below.
Step 1: Install, enable and configure JA Tabs Plugin
Step 2: Create content to display in tabs
In demo site, we create 2 Articles Category modules, assign to "ja-tabs" position.
Popular
Module Position: ja-tabs
Module Suffix:  NOT USED
Latest
Module Position: ja-tabs
Module Suffix:  NOT USED
Step 3: Define content in tabs
We will create a custom html module to define content to display in tabs.
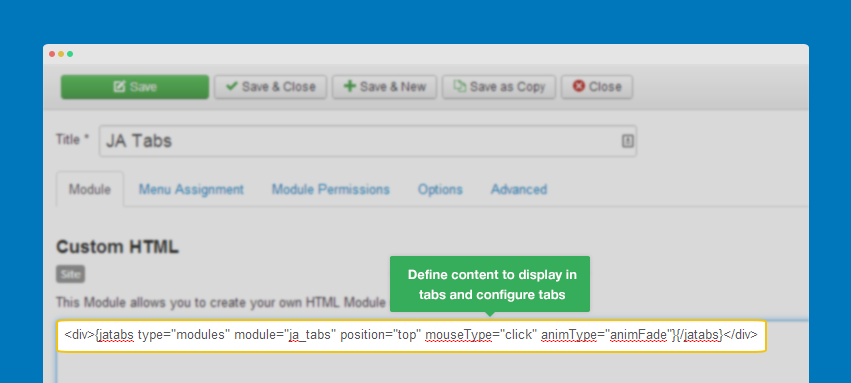
Note:
The tabs settings in the Custom HTML will override the settings in JA Tabs setting panel.
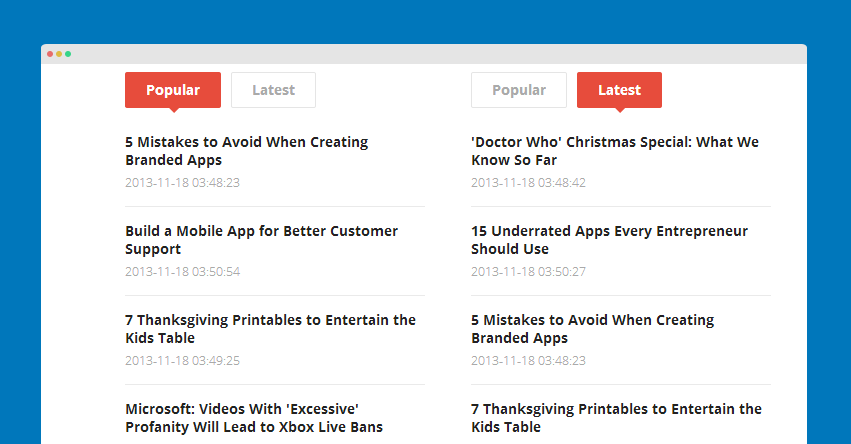
Front-end Appearance
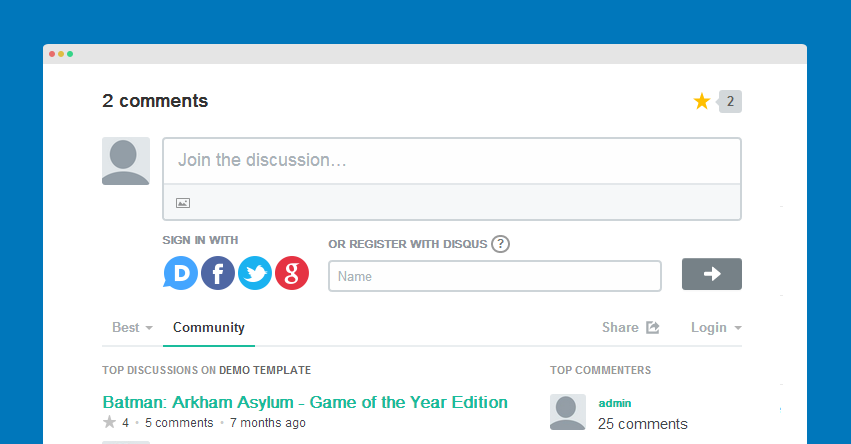
5. JA Disqus Debate Plugin
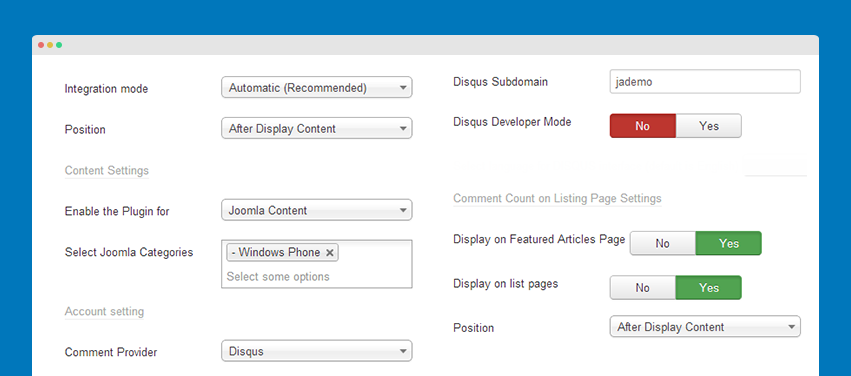
You can enable Diqus comment or IntenseDebate comment system for selected categories.
- Plugin Back-end Settings
- Front-end Appearance
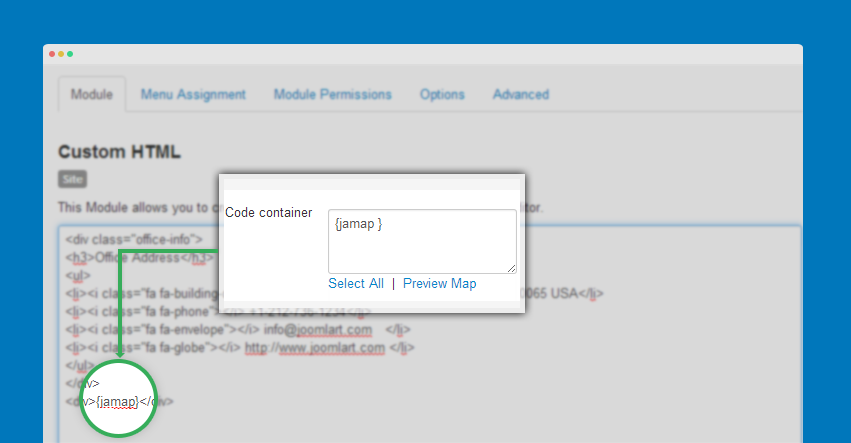
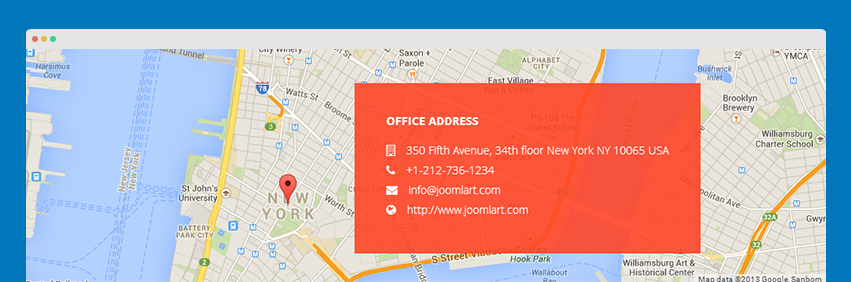
6. JA Google Map Plugin
You can define Code container that will be inserted to content to embed Google map, the default is (jamap}. You can insert the Code container to any place in article, custom HTML ... that you want to embed google map.
- Front-end Appearance
Default Joomla Extension Configuration
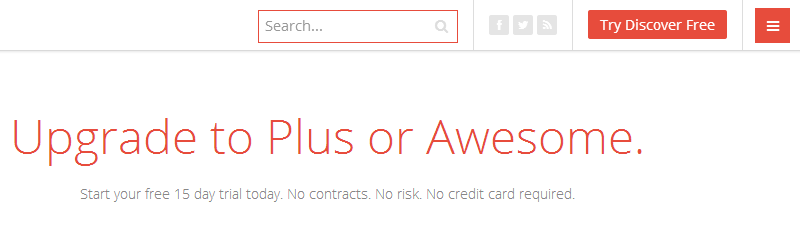
1. Search Module
Module Position: head-search
Module Suffix: NOT USED
- Module Back-end Settings
- Front-end Appearance
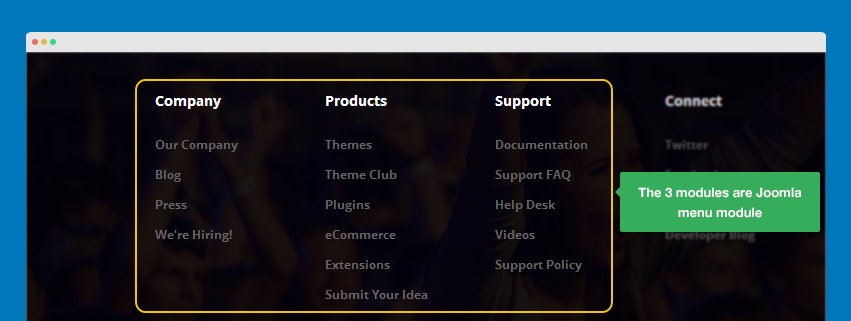
2. Menu Module
We used 3 Menu Modules in position footer-1, footer-2, footer-3.
Module Position: footer-1
Module Suffix: NOT USED
- Module Back-end Settings
- Front-end Appearance
Custom HTML Module
1. Footer Logo
Module Position: footer-logo
Module Suffix: right
HTML code
<a href="/index.php">JA November</a>
- Module Back-end Settings
- Front-end Appearance
![]()
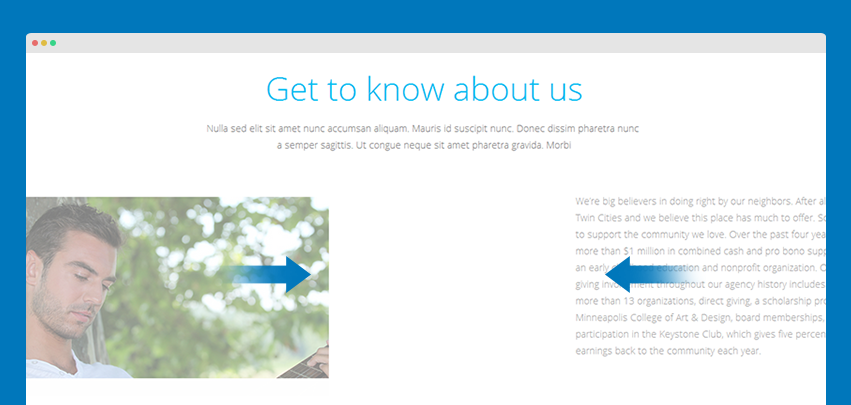
2. Get to know about us
Module Position: parallax
Module Suffix: about-page twocolumn section-twocolumn
HTML code
<div class="header-about col-md-12 col-xs-12">
<h1>Get to know about us</h1>
<p>Nulla sed elit sit amet nunc accumsan aliquam. Mauris id suscipit nunc. Donec dissim pharetra nunc <br />a semper sagittis. Ut congue neque sit amet pharetra gravida. Morbi</p>
</div>
<div class="row content-about1">
<div class="col-sm-6 col-xs-12">
<img border="0" alt="" src="/images/stories/joomla/article-large-6.jpg" />
</div>
<div class="col-sm-6 col-xs-12">
<p>We’re big believers in doing right by our neighbors. After all, we grew up in the Twin Cities and we believe this place has much to offer. So we do what we can to support the community we love. Over the past four years, we’ve provided more than $1 million in combined cash and pro bono support to Way to Grow, an early childhood education and nonprofit organization. Other community giving involvement throughout our agency history includes pro bono work for more than 13 organizations, direct giving, a scholarship program through the Minneapolis College of Art & Design, board memberships, and ongoing participation in the Keystone Club, which gives five percent of our company’s earnings back to the community each year.</p>
</div>
</div>
- Module Back-end Settings
- Front-end Appearance
3. Banner4
Module Position: parallax
Module Suffix:  no-container section-mask
HTML code
<img src="/images/stories/joomla/sample-6.jpg" alt="Sample Image" />
- Module Back-end Settings
- Front-end Appearance
4. Social
Module Position: social
Module Suffix: NOT USED
HTML code
<!-- AddThis Follow BEGIN -->
<div class="addthis_toolbox">
<a class="addthis_button_facebook_follow" addthis:userid="joomlart"><i class="fa fa-facebook"></i></a>
<a class="addthis_button_twitter_follow" addthis:userid="JoomlArt"><i class="fa fa-twitter"></i></a>
<a class="addthis_button_rss_follow" addthis:userid="joomla.org/rss.html"><i class="fa fa-rss"></i></a>
</div>
<script type="text/javascript" src="//s7.addthis.com/js/300/addthis_widget.js#pubid=ra-523d4894767843b5"></script>
<!-- AddThis Follow END -->
- Module Back-end Settings
- Front-end Appearance
Menu System
1. Push Menu
JA Appolio uses Push Menu that is based on Off-canvas feature of T3 Framework. Follow the steps below to configure the Push Menu.
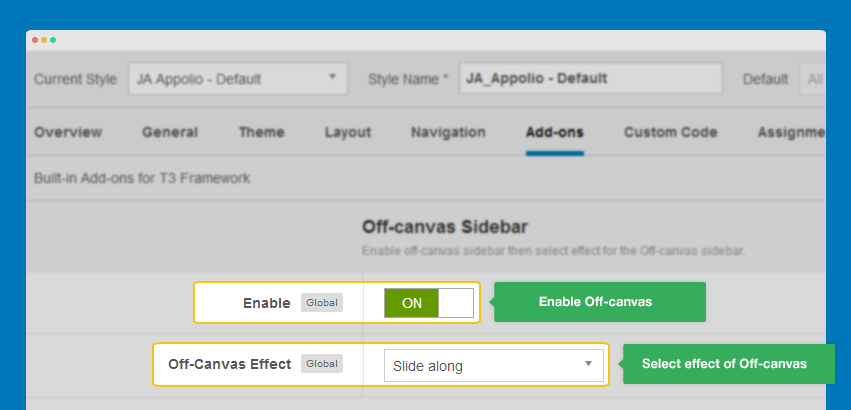
Step 1: Enable Off-canvas
Open JA Appolio setting panel, select Add-on tab then enable Off-canvas option.
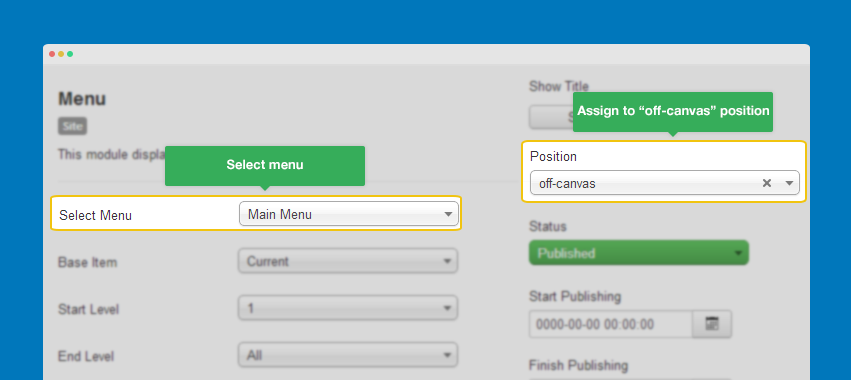
Step 2: Create Menu module
Now we will create a menu module, assign menu for the module.
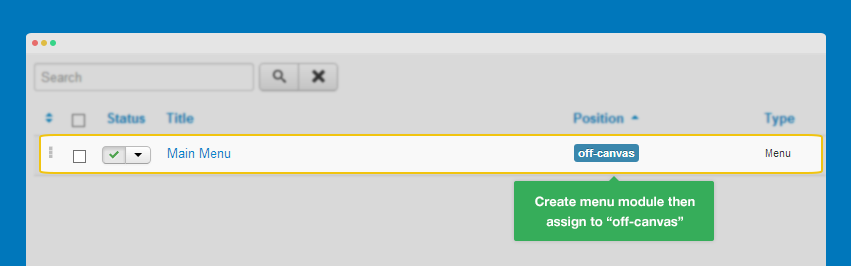
Select menu you want to display in off-canvas then assign to "off-canvas" position. In demo site, we assigned main menu to the module.
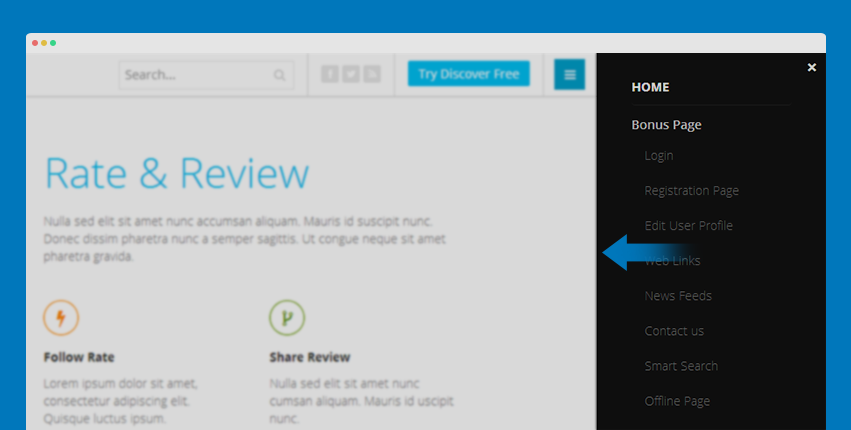
Front-end Appearance
Note:
The Push Menu can be customized to display in the left side.
To move the Push Menu to left side, please open the off-canvas file in templates\ja_appolio\tpls\blocks.
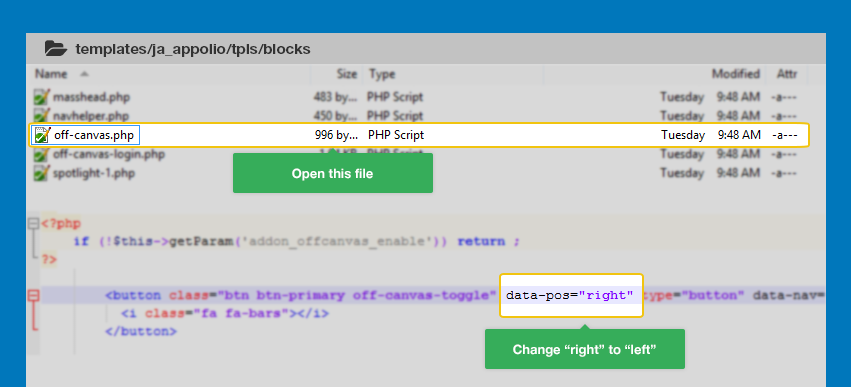
Now, find the following code:
data-pos="right"
Then change it to:
data-pos="left"
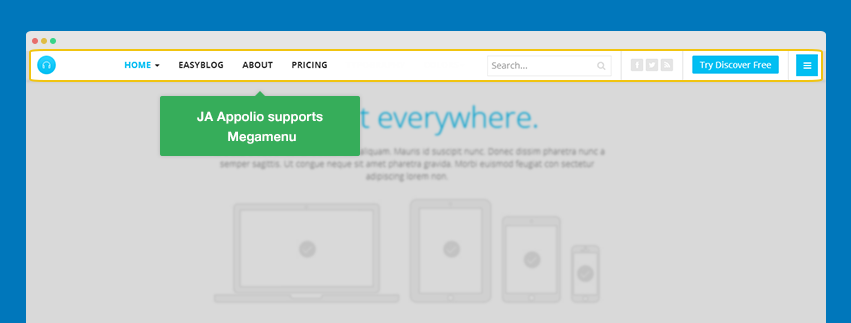
2. Megamenu
JA Appolio supports Megamenu that is a core feature of T3 Framework.
To enable Megamenu, from back-end of JA Appolio template, open Navigation tab.
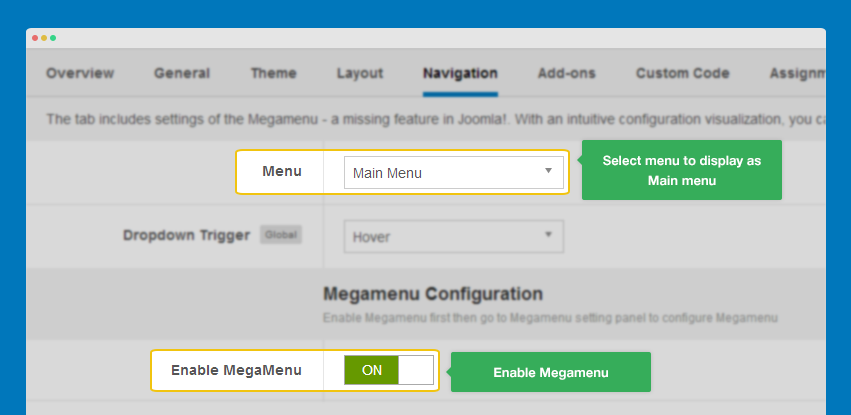
Select the menu that will be displayed as main menu (mainnav position) then enable Megamenu.
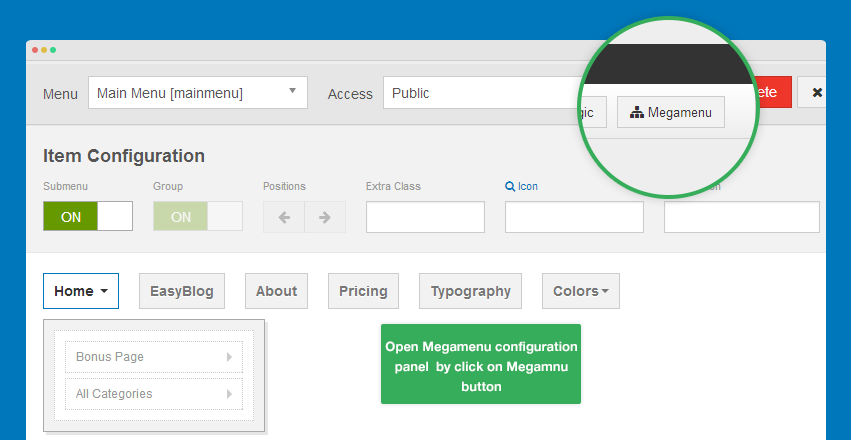
After saving, we will configure Megamenu by hit "Megamenu" button.
3. Login sidebar
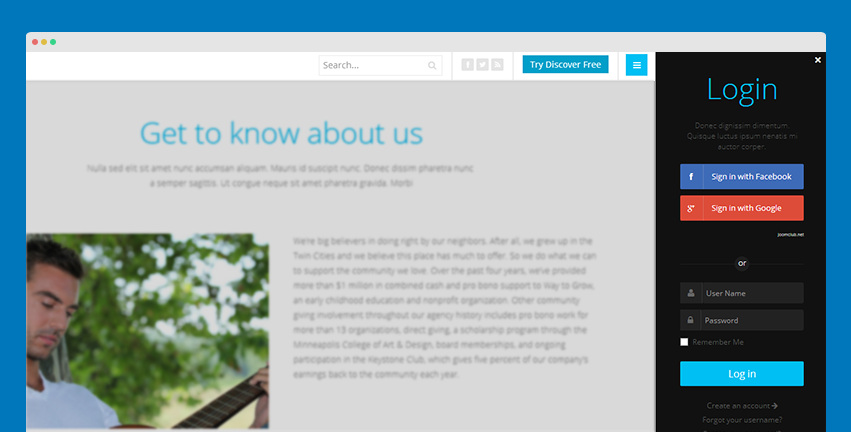
In demo site, when click on Try Discover Free, you will see the sidebar with 2 login forms: Joomla Login and Social login.
To make a sidebar, create 2 modules: Joomla module and Slogin Module then assign the 2 modules to action position.
3.1 Login Module
Module Position: action
Module Suffix: NOT USED
3.2 Slogin Module
Module Position: action
Module Suffix: NOT USED
Alternative layout: appolio
Note:
You can customize the "Try Discover Free" string. The text is stored in language file of JA Appolio template.
The en-GB.tpl_ja_appolio.ini file is located in language\en-GB.

TPL_TRY_DISCOVER_FREE ="Try Discover Free"
Third Party Extensions
JA Appolio supports Easyblog and Social Login components.
1. EasyBlog Component
JA Appolio supports EasyBlog styles by default. In order to have the EasyBlog design, you should download the EasyBlok theme for JA Appolio, extract the files and add them to your site.
1.2 Install EasyBlog component
Quick Guide:
- Step 1: Install Easyblog component
- Step 2: Download JA Appolio theme for Easyblog
- Step 3: Extract zip file and upload to your your_site_folder. You should see folder ja_appolio in
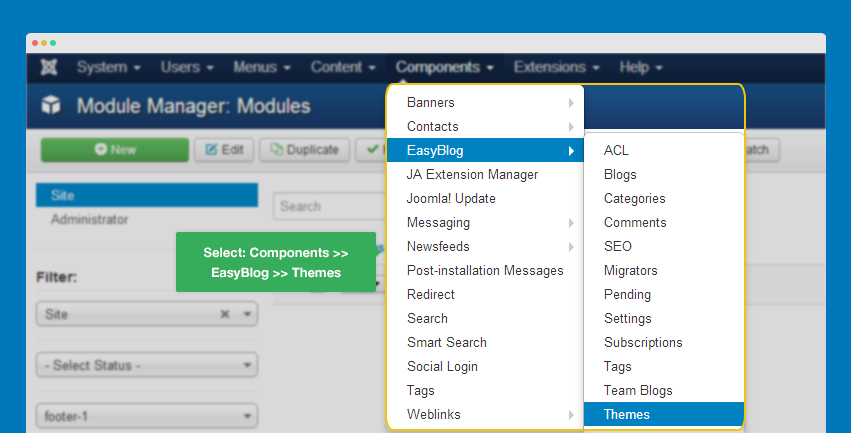
/components/com_easyblog/themes. - Step 4: Go to back-end panel >> Components >> Easyblog >> Themes >> select ja_appolio.
The following screenshots are for the Step 4.
- Access: Components >> Easyblog >> Themes
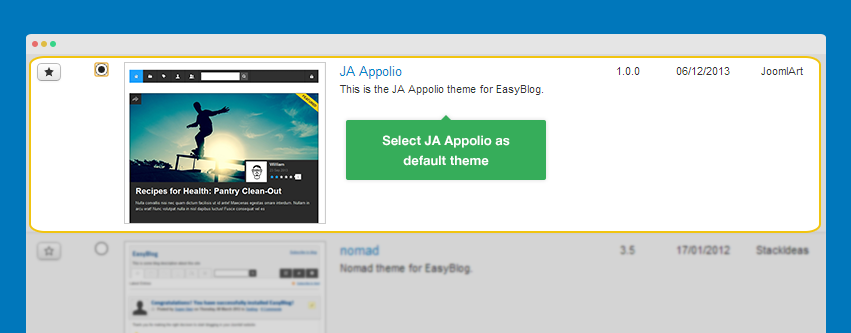
- Change the default theme to ja_appolio
1.3 Configure EasyBlog Component
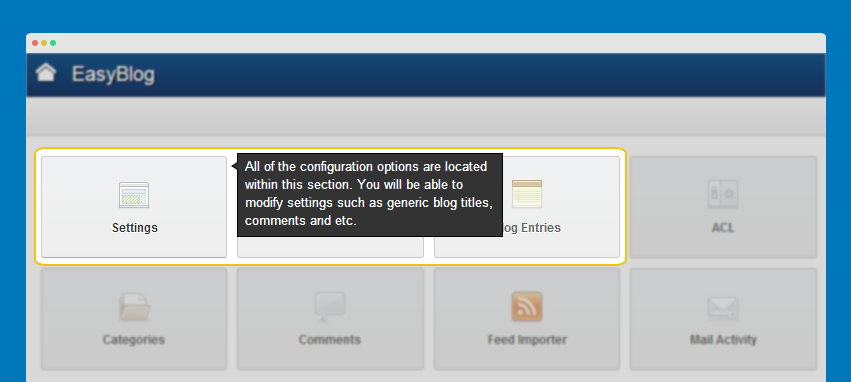
Recommendation:
Most of settings are default settings, when you select ja-appolio theme, you will get the almost same style as our demo.
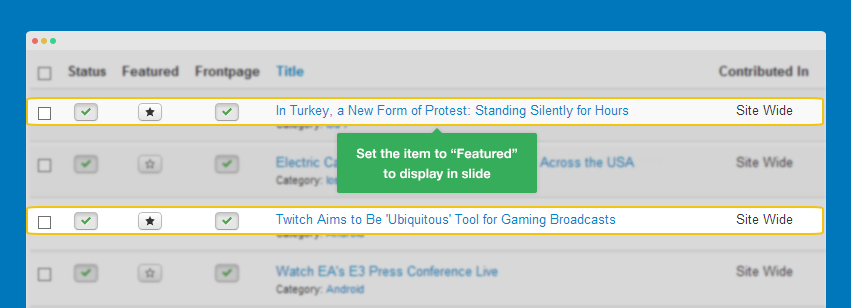
1.4 Configure Easyblog Slide
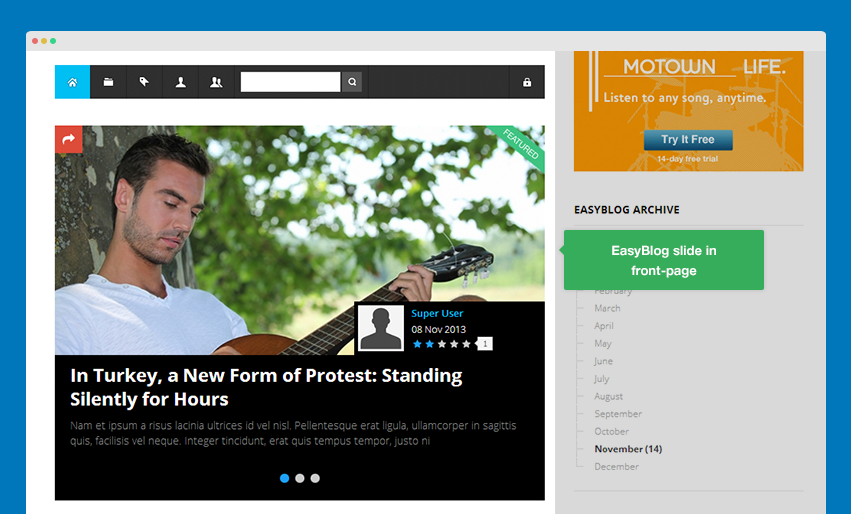
The EasyBlog slide displays featured EasyBlog items. So to display items in EasyBlog slide, just set the items to "Featured".
1.5 EasyBlog Module Configuration
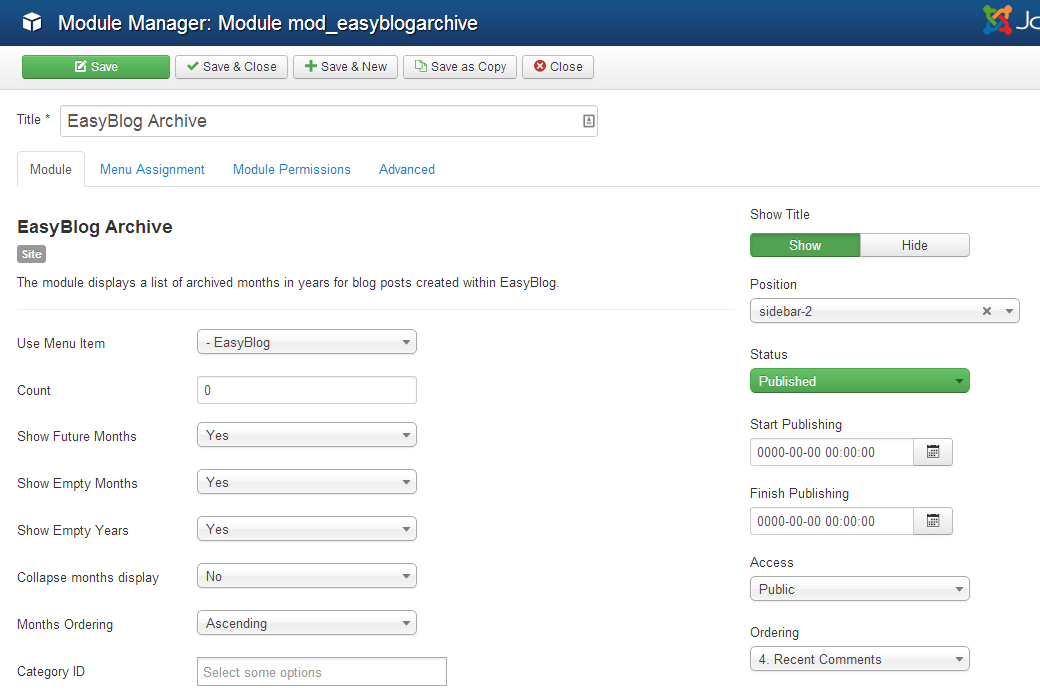
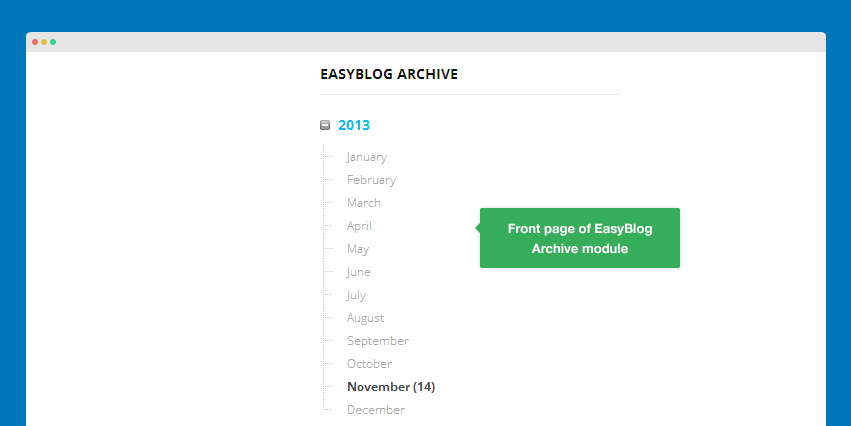
1.5.1 Blog Archive Module
Module Position : sidebar-2
Module Suffix : NOT USED
- Back-end Settings
- Front-end Appearance
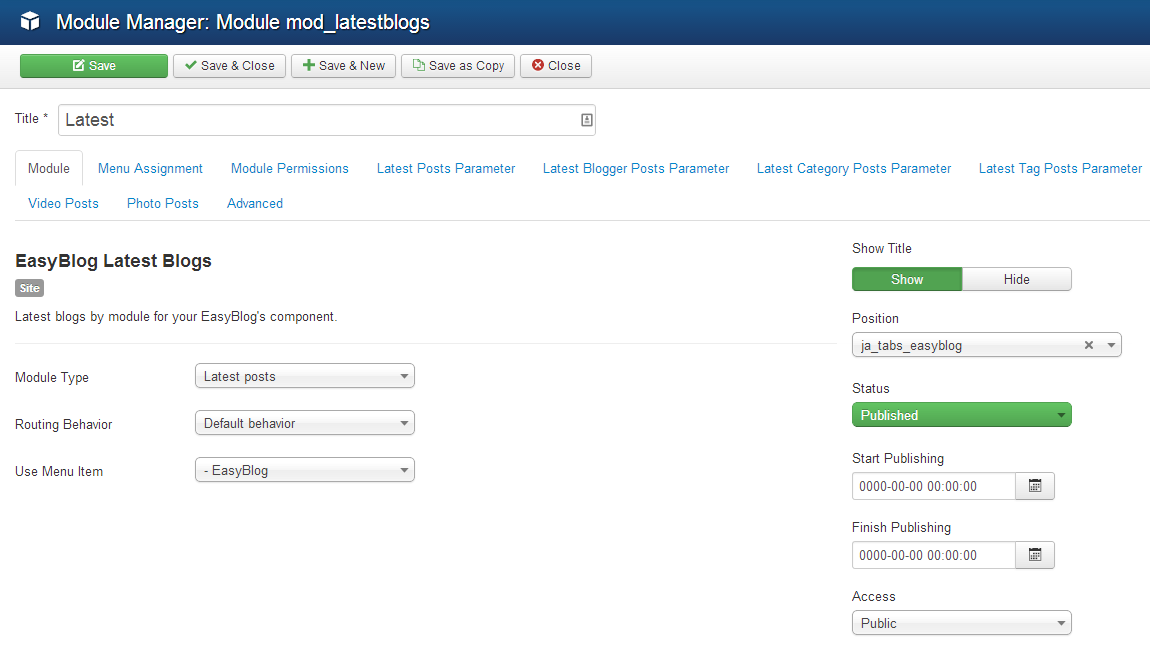
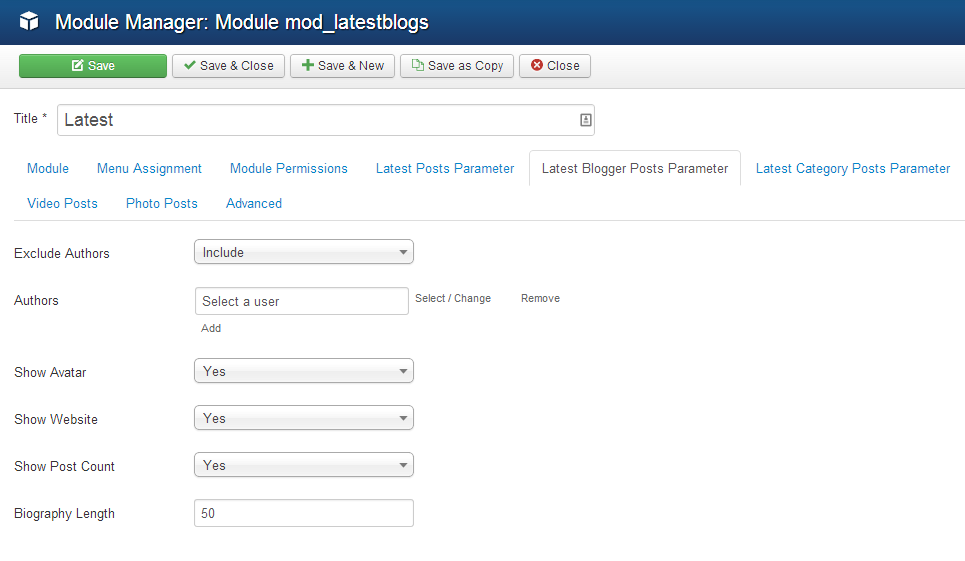
1.5.2 EasyBlog Latest Blogs Module
Module Position : ja_tabs_easyblog
Module Suffix : NOT USED
- Detail Settings
- Latest Blogger Setting
- Latest Blog Settings
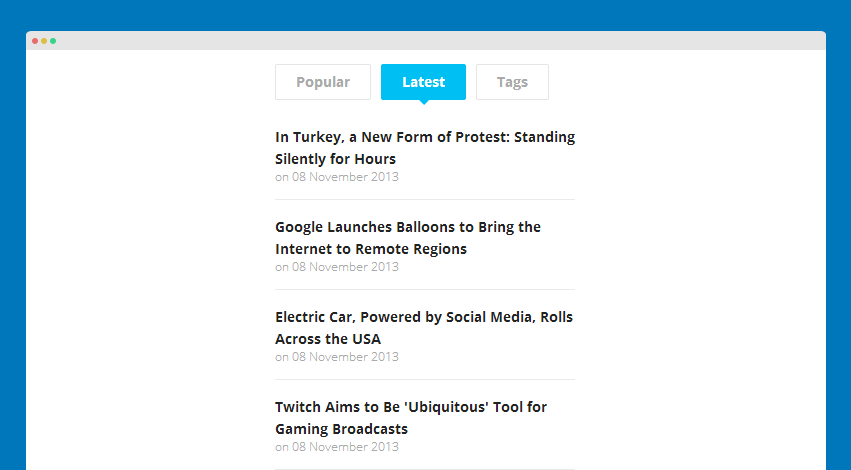
- Front-end Appearance
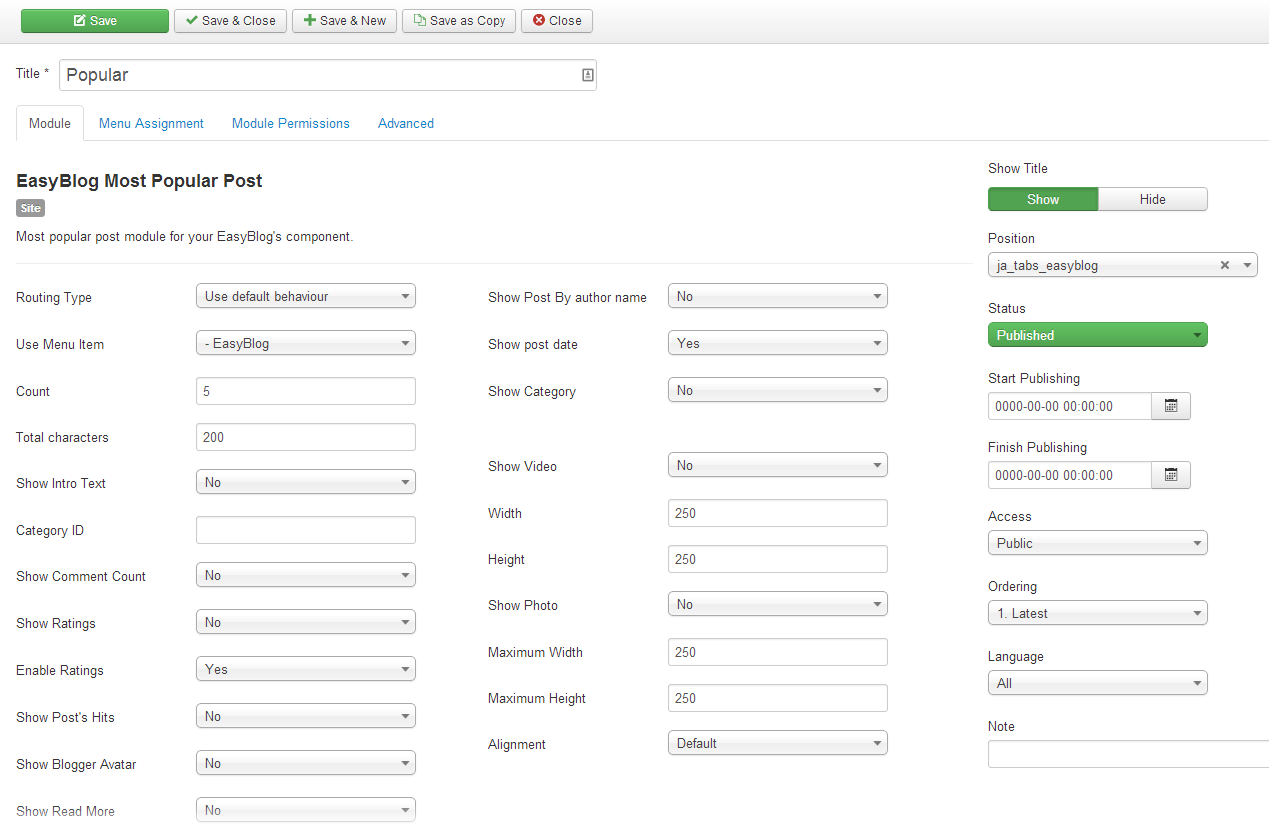
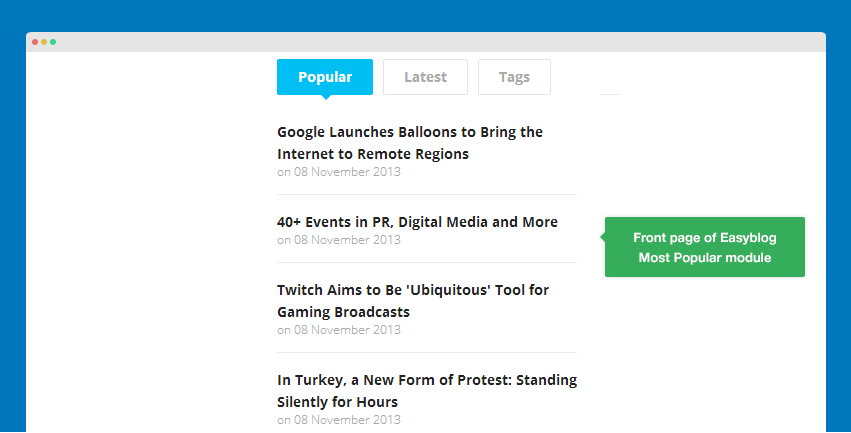
1.5.3 EasyBlog Most Popular Module
Module Position : ja_tabs_easyblog
Module Suffix : NOT USED
- Back-end Settings
- Front-end Appearance
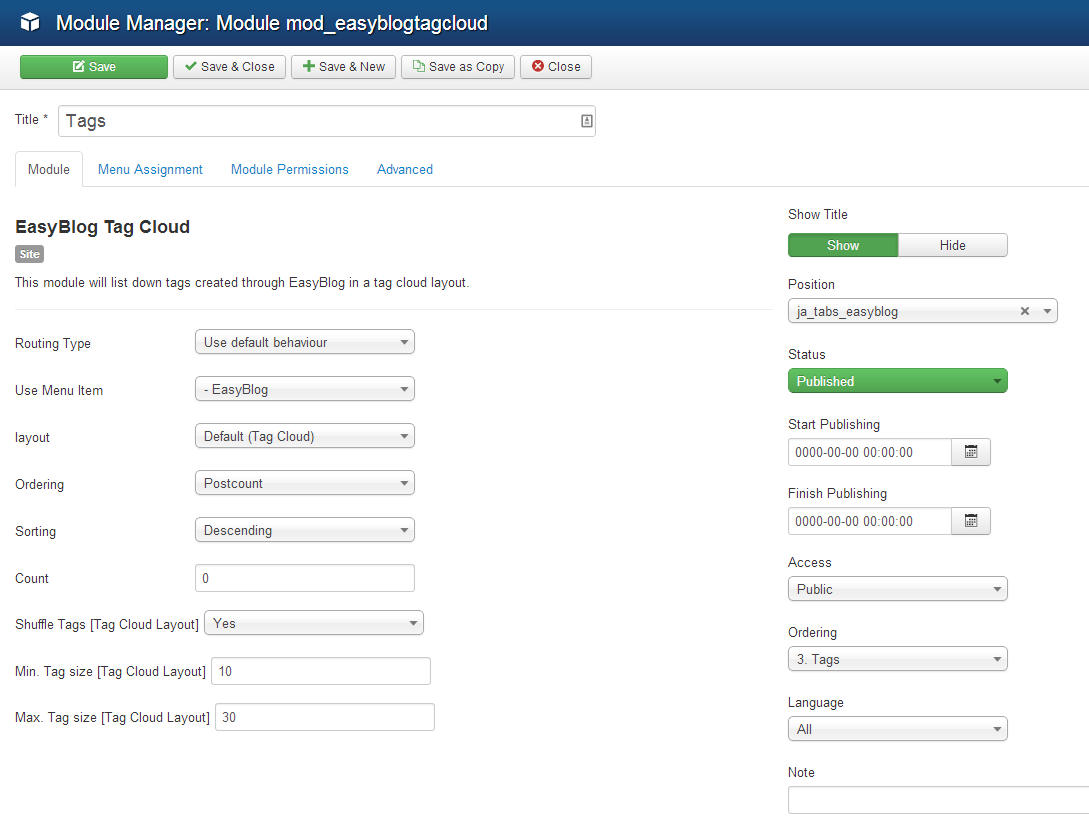
1.5.4 EasyBlog Tag Cloud Module
Module Position : ja_tabs_easyblog
Module Suffix : NOT USED
- Back-end Settings
- Front-end Appearance

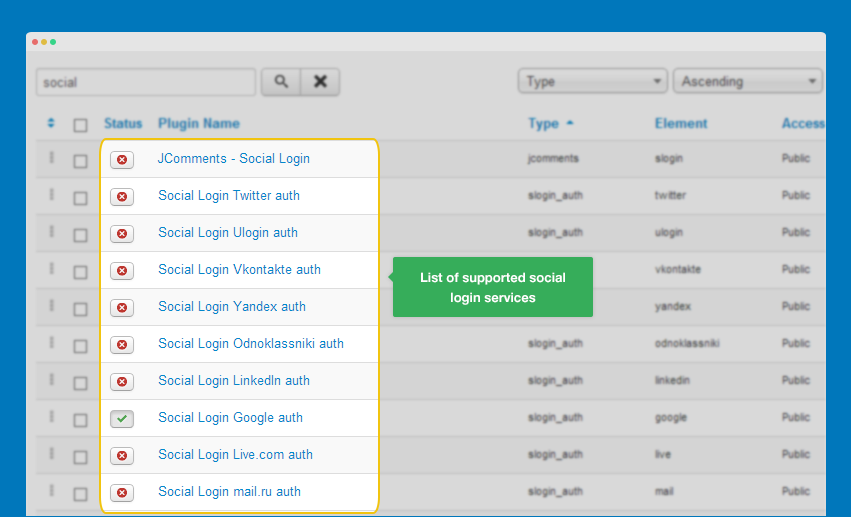
2. Social Login Component
JA Appolio allows users to login with social networks like: Facebook, Twitter, Google Plus ...
2.1 Enable Social Networks
After installation the component, go to: Extensions >> Plugin, find Slogin plugins, enable the networks you want and add authorization for the social network.
2.2 Create Slogin Modules
Now create Slogin module, assign the module to the page, position you want it to be.
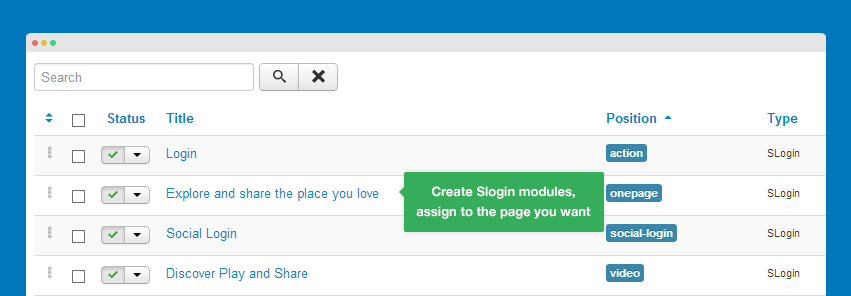
Now configure the module
Front-end Appearance

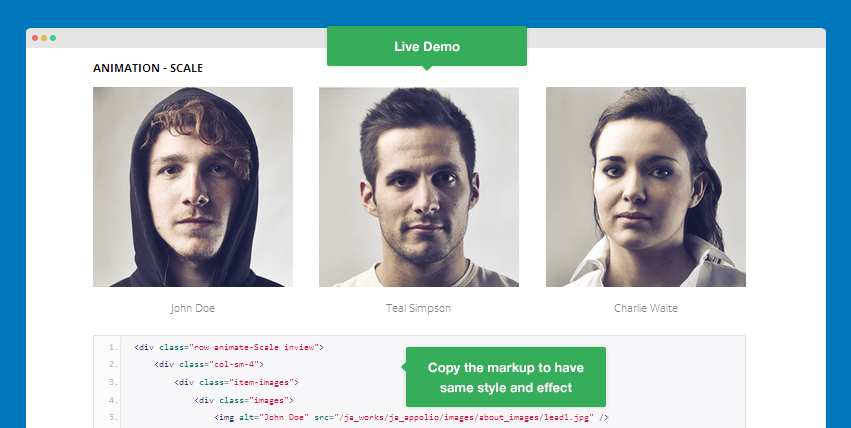
Content Style and Effect
JA Appolio uses many styles and effects in content, to make it easy for you to get the markup to build your own content, we created a typography page.
The Typography page include the markup and the live demo of the markup. You can copy the markup, fix content and you will have style, effect as our demo.
Template Configuration
Theme Settings
JA Appolio supports 4 themes by default, you can switch to any theme you want. To change theme, open Theme tab.
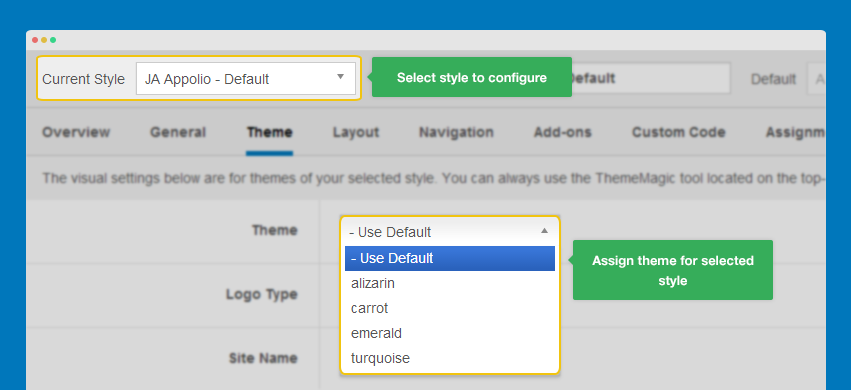
The Theme tab allows you to change logo, select text logo if you want.
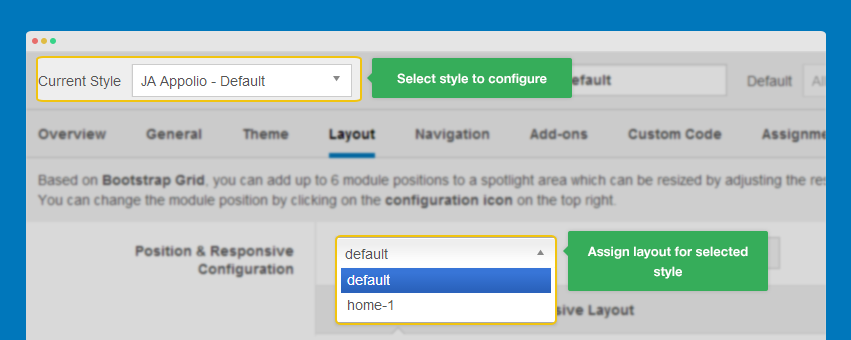
Layout Settings
There are 2 layouts used in the template: default and home-1. Select style then assign layout you want for the style.
Layout Structure
You can change the structure of those layouts, changing module positions of the layout ...
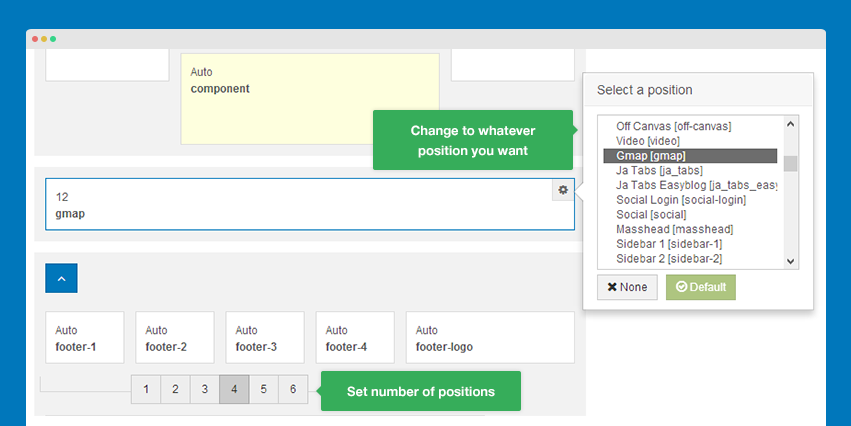
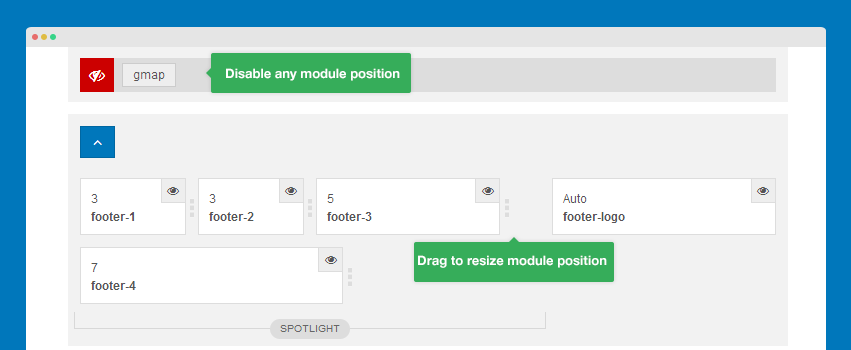
Responsive Layouts
JA Appolio is a responsive template based on multiple supported responsive layouts.
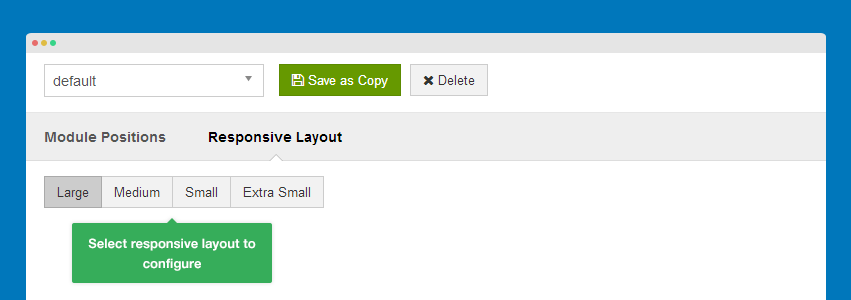
In each responsive layout, you can disable any module position, drag to resize module positions inside a spotlight block.
Upgrade and changes
1. Version 1.0.1
Version 1.0.1 was released on 13th, Dec, 2013 with bug fixes and some changes.
The main change that should be paid attention when upgrading is the position name update, (position onepage is changed to parallax) and the class suffix.
Re-assign Module position

For the modules that you assigned to position onepage, you have to re-assign to position parallax and also change the class suffix.
Update Class suffix
Please check the list below to see the class suffix that has been changed and the updated ones in version 1.0.1
Version 1.0.0
onepage
Version 1.0.1
section
Version 1.0.0
onepage-image
Version 1.0.1
section-image
Version 1.0.0
onepage-center
Version 1.0.1
section-center
Version 1.0.0
onepage-mask
Version 1.0.1
section-mask
Version 1.0.0
onepage-3 onepage-image
Version 1.0.1
discover section-image
Version 1.0.0
onepage-5 onepage-image
Version 1.0.1
review section-image
Version 1.0.0
no-container onepage-center
Version 1.0.1
no-container section-center
Version 1.0.0
about-page about1 onepage-twocolumn
Version 1.0.1
about-page twocolumn section-twocolumn
Recommendation
The above userguide should help one in replicating the Demo site settings for the template and extension on their site.
Recommended :
If you are new or are confused. We recommend installing Quickstart on your localhost and use it as reference for configs. This is the best way to work with any template. Links to all the resources are provided above, you should carefully read them to take the maximum advantage of our products.
Support :
Please raise your support queries in the forum and make sure you follow the support guidelines. We spend more time in getting the information from user incase the support guidelines are not followed.