Add extra fields
In Purity III, we add additional parameters - extra fields. These are the how-to steps in adding extra fields in Purity III.
In this writing, we will represent steps to adding extra fields used in Portfolio page.
Basically, this consists the following steps:
- Create extra field group by adding
portfolio.xmlfile. - Define extra fields in the created
portfolio.xmlfile. - Adding style for extra fields.
- Assign extra field group in Joomla category content - Portfolio category.
- Assign extra field for each article in Portfolio category
Step 1: create portfolio.xml file
Create a portfolio.xml file in templates/purity_iii/etc/extrafields/. The .xml file is to declare extra fields for Portfolio content type.
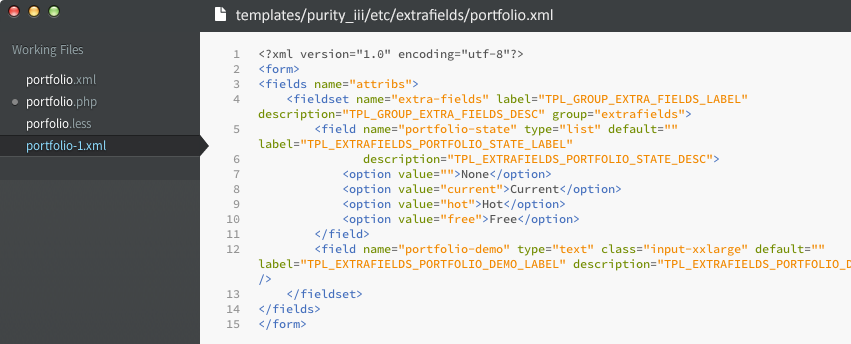
<?xml version="1.0" encoding="utf-8"?>
<form>
    <fields name="attribs">
        <fieldset name="extra-fields" label="Extra Fields" description="Extra Fields">
            <field name="portfolio-state" type="list" default="" label="Special State"
                   description="Product Special State">
                <option value="">None</option>
                <option value="current">Current</option>
                <option value="hot">Hot</option>
                <option value="free">Free</option>
            </field>
            <field name="portfolio-demo" type="text" class="input-xxlarge" default="" label="Demo Link" description="Product demo link" />
        </fieldset>
    </fields>
</form>
Step 2: add style for extra fields
You can add style for each fields in any .less file in templates\purity_iii\less. In Purity III, style of extra fields used in Portfolio layout is stored in portfolio.less file in templates\purity_iii\less\layouts.
// Porfolio Extra Fields
// ---------------------
.porfolio {
  // State
  .item-state {
    width: 70px;
    height: 70px;
    background: url(../../images/porfolio-item-states.png) no-repeat center top;
    display: block;
    text-indent: -9999em;
    position: absolute;
    top: -3px;
    right: -3px;
  }
  .state-free {
    background-position: center;
  }
  .state-hot {
    background-position: center bottom;
  }
  // Demo URL
  .item-demo-url {
    margin-top: @t3-global-margin / 2;
  }
}
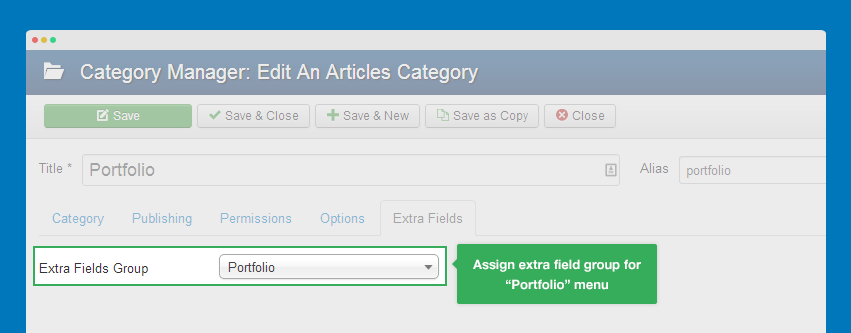
Step 3: create content category.
Create a content category name Portfolio. In the tab Extra fields, select Portfolio for option Extra field group.
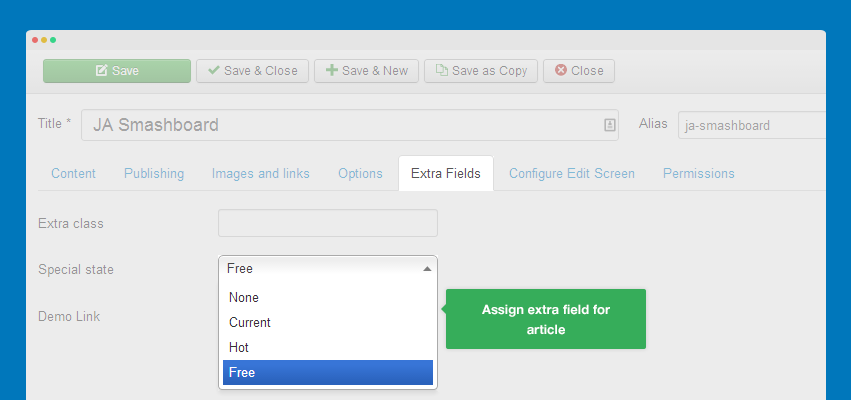
Step 4: assign extra fields for articles in Portfolio category
When create an article, after assigning to Portfolio category for this newly created article, these extra fields then appears under the tab Extra fields.
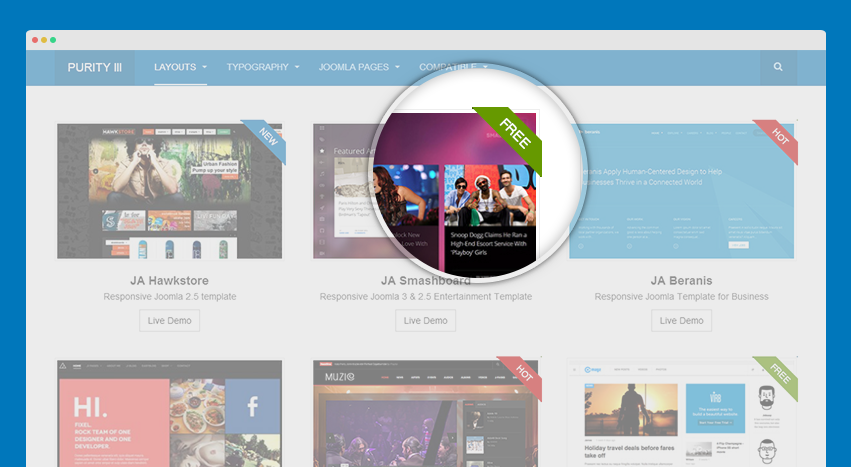
Front-end Appearance
Create an override layout
Purity III provide a variety of custom layouts for Joomla com_content such as: Blog, Magazine, Portfolio, Features Intro, Glossary, and etc. These layouts mainly use the default article content type, except the Portfolio layout, which uses the additional extra fields: Special of state and Demo link apart from all the original field from a standard article.
Basically, this consists the following steps:
1. Create a content type
- Preparing extra fields for the new content type
- Create a content category
- Assign articles to the category
2. Create a custom layout
- Create Menu items - a layout overrides type
In this writing, we will represent the process of creating Portfolio layout, an overridden layout from Joomla default layout.
1: Create Portfolio content type
We put the step into an independent section because it can be used for any layout, not only Portfolio layout. Check it out now.
2. Create poftfolio layout
In this section, we will introduce you how to create the Portfolio layout for the category view using “Menu Items” Layout Overrides type
To create 1 Layout Overrides type “Menu Items”, we need a xml file and a php file with the same name. In this case, we need to create 2 portfolio.xml and portfolio.php file under the templates/purity_iii/html/com_content/category folder. The portfolio.xml file will consist all the info on Portfolio layout and the parameters for this layout, meanwhile, the portfolio.php is a template layout file.
2.1 portfolio.xml
This file has the similar structure with the default.xml file or blog.xml under the components/com_content/view/category/tmpl folder.
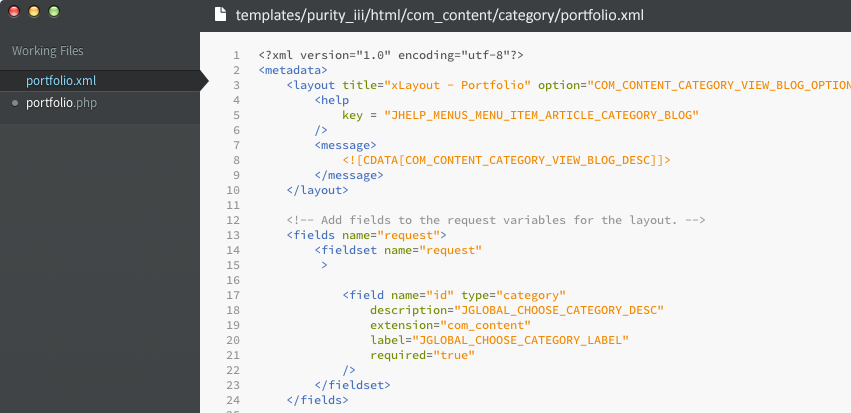
<?xml version="1.0" encoding="utf-8"?>
<metadata>
  <layout title="xLayout - Portfolio" option="COM_CONTENT_CATEGORY_VIEW_BLOG_OPTION">
    <help
      key = "JHELP_MENUS_MENU_ITEM_ARTICLE_CATEGORY_BLOG"
    />
    <message>
      <![CDATA[COM_CONTENT_CATEGORY_VIEW_BLOG_DESC]]>
    </message>
  </layout>

  <!-- Add fields to the request variables for the layout. -->
  <fields name="request">
    <fieldset name="request"
     >

      <field name="id" type="category"
        description="JGLOBAL_CHOOSE_CATEGORY_DESC"
        extension="com_content"
        label="JGLOBAL_CHOOSE_CATEGORY_LABEL"
        required="true"
      />
    </fieldset>
  </fields>

  <!-- Add fields to the parameters object for the layout. -->
<fields name="params">
    <fieldset name="basic" label="Basic">
        <!-- use layout type list, default layout type of view category -->
        <field name="layout_type" type="hidden" default="list" />
        <field name="display_num" type="text"
           description="Number of items"
           label="# Items"
           size="3"
           default="12"
            />
        …. (các params trong group basic)
    </fieldset>

    <fieldset name="article" label="COM_CONTENT_ATTRIBS_FIELDSET_LABEL">
  ….
    </fieldset>
    ….
</fields>
</metadata>
2.2 portfolio.php
Similarly, the layout default of the view category, layout porfolio will display these items in a category. In this section, I’ll mainly explain how the data in the Extra fields of the content type Portfoio.
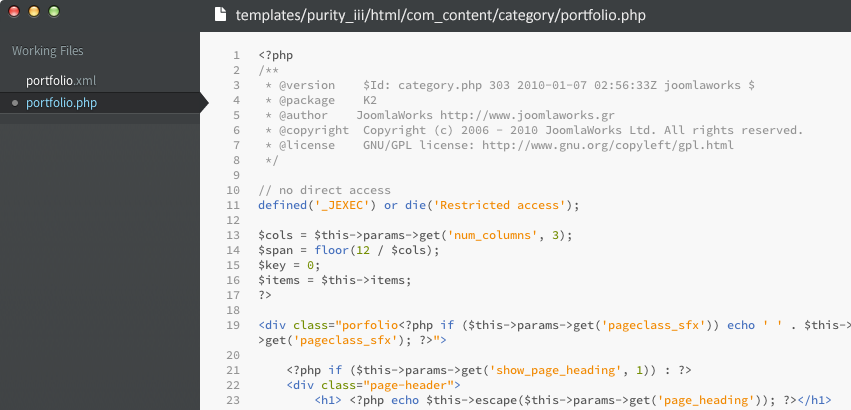
<?php
/**
 * @version    $Id: category.php 303 2010-01-07 02:56:33Z joomlaworks $
 * @package    K2
 * @author    JoomlaWorks http://www.joomlaworks.gr
 * @copyright  Copyright (c) 2006 - 2010 JoomlaWorks Ltd. All rights reserved.
 * @license    GNU/GPL license: http://www.gnu.org/copyleft/gpl.html
 */

// no direct access
defined('_JEXEC') or die('Restricted access');

$cols = $this->params->get('num_columns', 3);
$span = floor(12 / $cols);
$key = 0;
$items = $this->items;
?>

<div class="porfolio<?php if ($this->params->get('pageclass_sfx')) echo ' ' . $this->params->get('pageclass_sfx'); ?>">

  <?php if ($this->params->get('show_page_heading', 1)) : ?>
  <div class="page-header">
    <h1> <?php echo $this->escape($this->params->get('page_heading')); ?></h1>
  </div>
  <?php endif; ?>

  <?php //JAHelper::loadModules('inline') ?>
  <!-- Item list -->
  <div class="porfolio-items">

  <?php foreach ($items as $item):
    ?>
    <?php if ($key % $cols == 0) : ?>
    <!-- Row -->
    <div class="row row-porfolio">
  <?php endif ?>

      <div class="col-xs-6 col-md-<?php echo $span ?>">
        <?php
        // Load category_item.php by default
        $this->item = $item;
        echo $this->loadTemplate('item');
        ?>
      </div>

      <?php if ((($key+1) % $cols == 0) || $key+1 == count($this->items)) : ?>
      </div>
      <!-- // Row -->
    <?php endif ?>
      <?php
      $key++;
    endforeach; ?>

  </div>
  <!-- // Item list -->

  <!-- Pagination -->
  <?php
  if ($this->pagination->getPagesLinks()): ?>
    <div class="pagination-wrap">
      <?php echo $this->pagination->getPagesLinks(); ?>
      <p class="counter pagination-counter">
        <?php echo $this->pagination->getPagesCounter(); ?>
      </p>
    </div>
  <?php endif; ?>
  <!-- //Pagination -->

</div>
The extra fields data used to display an item in Portfolio, in sub layout portfolio_item.php. While creating a Portfolio item, these extra fields will be stored in the artcile’s field attributes and we can access as follow:
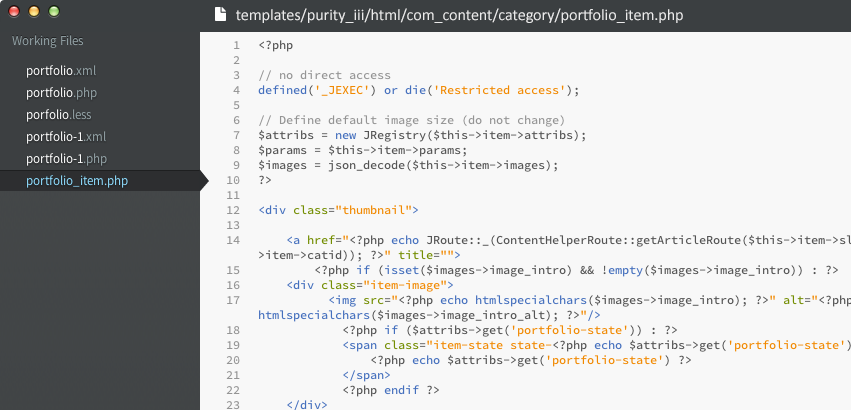
<?php
$attribs = new JRegistry($this->item->attribs);
// get extra fields
$state = $attribs->get('portfolio-state');
$demo_link = $attribs->get('portfolio-demo');
?>
From here, we can use these extra fields as other fields in the article.
2.3 Template style Portfolio
Step 1 & 2: create a content type: Portfolio and layout Portfolio for view category of com_content. Purity III has already styled the Portfolio layout, those styles are stored under these files here from the templates/purity_iii folder:
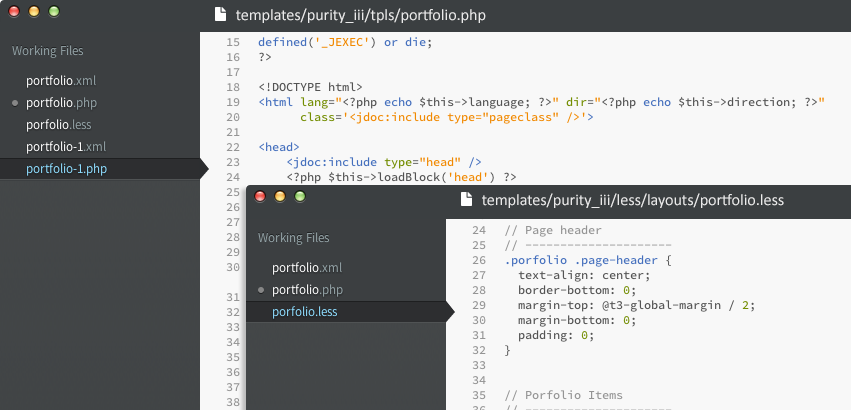
tpls/portfolio.php- layout fileless/layouts/portfolio.less(while compile less to css, it will become the css/layouts/fortfolio.css file)
In the portfolio.php file, you can define the CSS file for Portfolio layout. It's the same for other layouts.
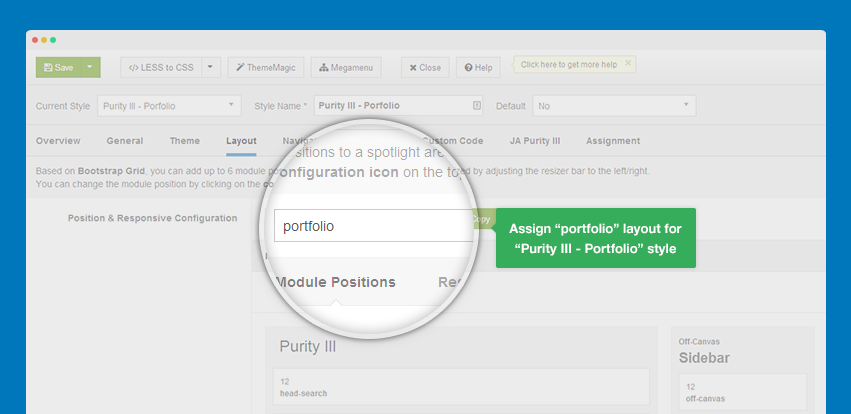
<?php $this->addCss('layouts/porfolio') ?>
In template manager, create Purity III - Portfolio style, assign the Portfolio layout for this style under the Layout tab.
3. Using the Portfolio layout
After creating a category named Portfolio and successfully assigned the content type Portfolio for this category, we have to create a menu item using this Portfolio layout.
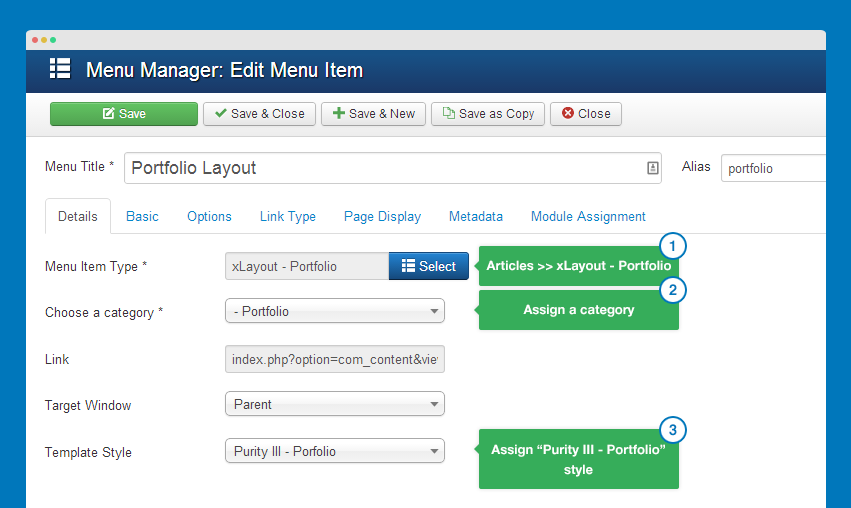
- Create new menu item
- Select menu type Article, Select xLayout - Portfolio
- Select category Portfolio
- Select template style Purity III - Portfolio
- Config other options, other fields then click Save
4. For other layouts?
Similar to the Portfolio layout, Purity III provides other layouts such as Magazine, Blog, Feature-intro, Glossary, etc. These layouts using the same content type: Article, default content type of Joomla com_content.
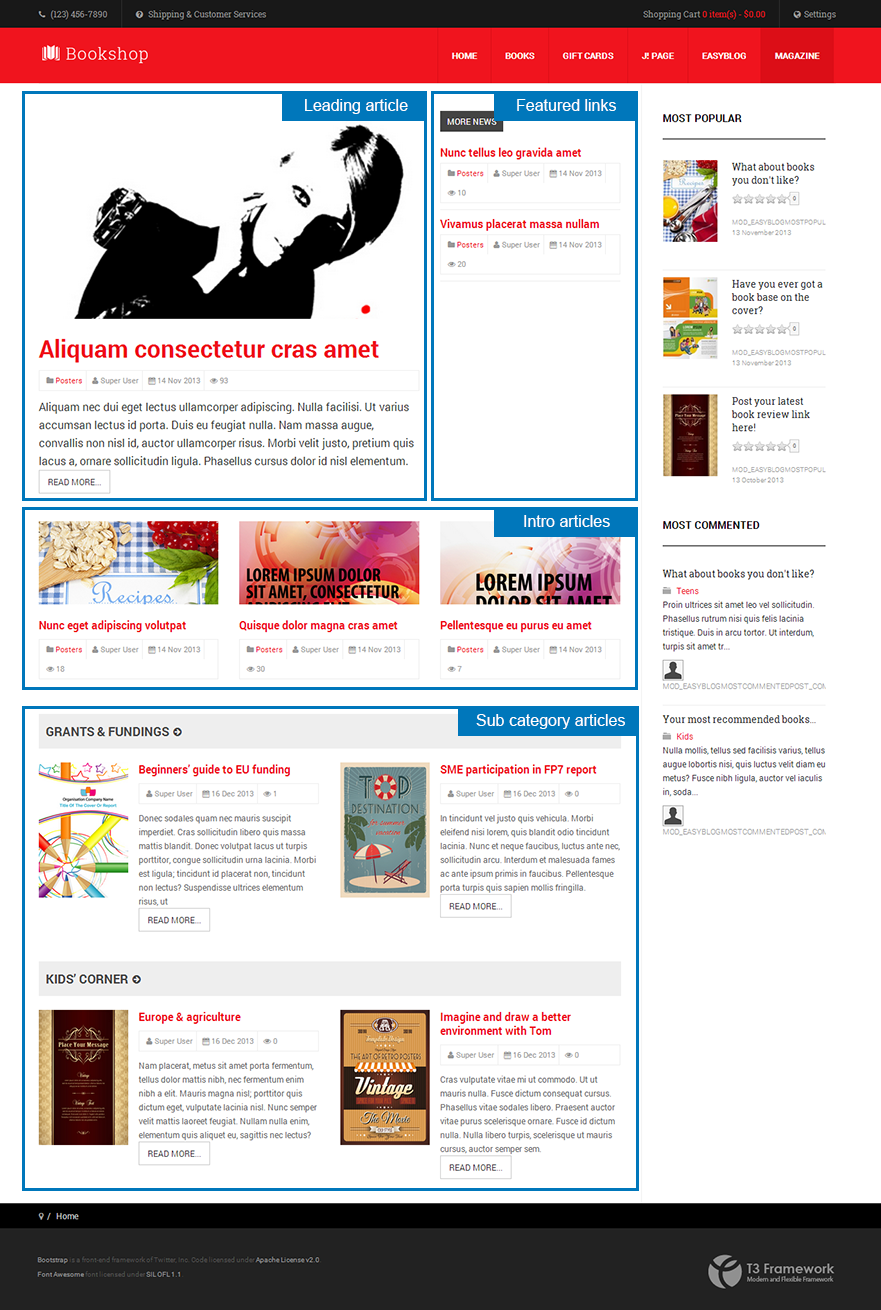
Magazine layout:
Magazine layout consists those following files in the Purity III template templates/purity_iii
- html/layouts
- html/com_content/category/magazine.xml
- html/com_content/category/magazine.php
- html/com_content/category/magazine_featured.php
- html/com_content/category/magazine_list.php
- html/com_content/category/magazine-sub.php
- tpls/magazine.php
- less/layouts/magazine.less
- helper.php (is used to query data for Magazine layout)
Blog layout:
Blog layout consists those files in the Purity III template templates/purity_iii.
- html/layouts
- html/com_content/category/xblog.xml
- html/com_content/category/xblog.php
- html/com_content/category/xblog_item.php
- tpls/blog.php
- less/layouts/blog.less
Feature-intro 1 layout:
Layout Feature-intro includes those following files in the Purity III template templates/purity_iii.
- html/layouts
- html/com_content/category/features-intro.xml
- html/com_content/category/features-intro.php
- html/com_content/category/features-intro_item.php
- tpls/features-intro-1.php
- less/layouts/features-intro.less
Glossary layout:
Layout Glossary includes those following files in thje Purity III template (templates/purity_iii):- html/com_content/category/glossary.xml
- html/com_content/category/glossary.php
- html/com_content/category/glossary_group.php
- less/extras/glossary.less
References:
Looking for layout Overrides in Joomla 1.6? Check it out now.
Move layout to other templates
If you are using an other templates developed with T3 Framework, you can move any layout in Purity III to your template.
Important:
In this thread, we are going to move "Magazine" layout to JA Bookshop - a Joomla template developed with T3 framework. The instruction is the same for other layouts.
The qualifications of template that you can move layout in Purity III to:
- Joomla 3.x
- The template must be developed with T3 Framework (version 2.1.0 and above)
- The template should use base-bs3 (bootstrap 3). Otherwise, you must customize layout & less files to make it work with bootstrap 2.
Here are quick steps to bring Magazine layout into a Joomla template developed with T3 framework:
Step 1: move files/folder
Copy files and folders in templates/purity_iii into corresponding path of your template folder:
helper.php
html/layouts
html/com_content/category/magazine.php
html/com_content/category/magazine.xml
html/com_content/category/magazine-sub.php
html/com_content/category/magazine_featured.php
html/com_content/category/magazine_list.php
tpls/magazine.php
less/layouts/magazine.less
Step 2: move language
Please move language for Magazine layout. Open your template language file (it should be located in: language/en-GB/en-GB.tpl_ja_bookshop)then add the following language.
; Overwrite menu item
TPL_MAGAZINE_HOME_LABEL          ="Magazine Home"
TPL_MAGAZINE_HOME_FEATURE_CONFIG_LABEL   ="Configuration for Featured articles"
TPL_MAGAZINE_FEATURED_NUM_COLUMNS_DESC   ="Number of columns which to show Feature Articles"
TPL_MAGAZINE_FEATURED_NUM_COLUMNS_LABEL  ="# Featured columns"
TPL_MAGAZINE_FEATURED_NUM_LINKS_DESC     ="Number of featured links articles"
TPL_MAGAZINE_FEATURED_NUM_LINKS_LABEL    ="# Featured links articles"
TPL_MAGAZINE_HOME_CATEGORY_LIST_CONFIG_LABEL      ="Configuration for category list"
TPL_MAGAZINE_HIGHLIGHT_NUM_ARTICLE_DESC  ="Number of category articles"
TPL_MAGAZINE_HIGHLIGHT_NUM_ARTICLE_LABEL ="# Articles"
TPL_MAGAZINE_HIGHLIGHT_NUM_COLUMN_DESC   ="Number of columns which to show articles for a category"
TPL_MAGAZINE_HIGHLIGHT_NUM_COLUMN_LABEL  ="# columns"
TPL_MAGAZINE_HIGHLIGHT_SHOW_INTRO_DESC   ="Show Intro text in category list articles"
TPL_MAGAZINE_HIGHLIGHT_SHOW_INTRO_LABEL  ="Article intro text"
TPL_MAGAZINE_ENTRY_INTRO_POSITION_DESC   ="Select positions to show Article Info"
TPL_MAGAZINE_ENTRY_INTRO_POSITION_LABEL  ="Article Info positions"
TPL_MAGAZINE_ENTRY_INTRO_POS_FEATURED    ="Featured Leading"
TPL_MAGAZINE_ENTRY_INTRO_POS_INTRO       ="Featured Intro"
TPL_MAGAZINE_ENTRY_INTRO_POS_LINKS       ="Featured Links"
TPL_MAGAZINE_ENTRY_INTRO_POS_HIGHLIGHT   ="Category list articles"
TPL_MAGAZINE_HOME_CONFIG_LABEL           ="General Configuration for Magazine Home"

TPL_MAGAZINE_SUB_LABEL                   ="Magazine category"
TPL_MAGAZINE_SUB_CONFIG_LABEL            ="Configuration for category layout"
TPL_MAGAZINE_SUB_INTRO_POSITION_DESC     ="Select positions to show Article Info"
TPL_MAGAZINE_SUB_INTRO_POSITION_LABEL    ="Article Info positions"
TPL_MAGAZINE_SUB_INTRO_POS_LEADING       ="Leading"
TPL_MAGAZINE_SUB_INTRO_POS_INTRO         ="Intro"
TPL_MAGAZINE_SUB_INTRO_POS_LINKS         ="Links"
TPL_MAGAZINE_SUB_SHOW_INTRO_DESC         ="Show Intro Text in category intro articles"
TPL_MAGAZINE_SUB_SHOW_INTRO_LABEL        ="Show Intro Text"

TPL_MAGAZINE_ARTICLE_LABEL               ="Magazine Article"
TPL_MAGAZINE_ARTICLE_LAYOUT_LABEL        ="Article Layout"

TPL_MAGAZINE_ARTICLE_INFO_LABEL          ="Article Info Options"
Step 3: create magazine style
You can create Magazine template style by duplicate the default style
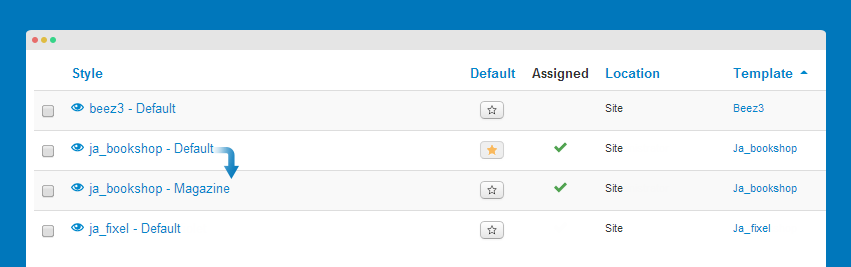
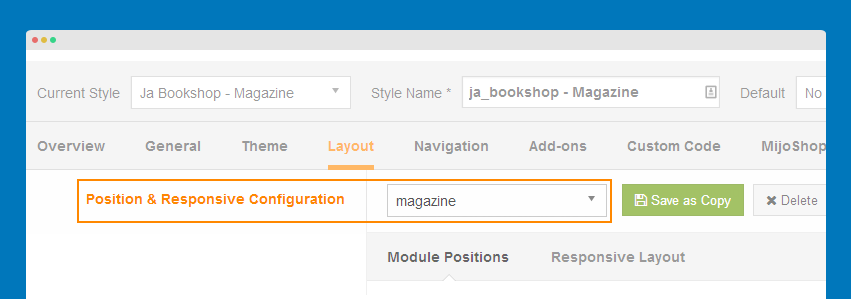
Assign magazine layout for the template style
Step 4: add content to display for Magazine page
Create a Joomla com_content category then add articles to the category.
Step 5: create Magazine menu item
Please make sure the menu type is Articles >> xLayout - Magazine. Assign the new created category for this menu item
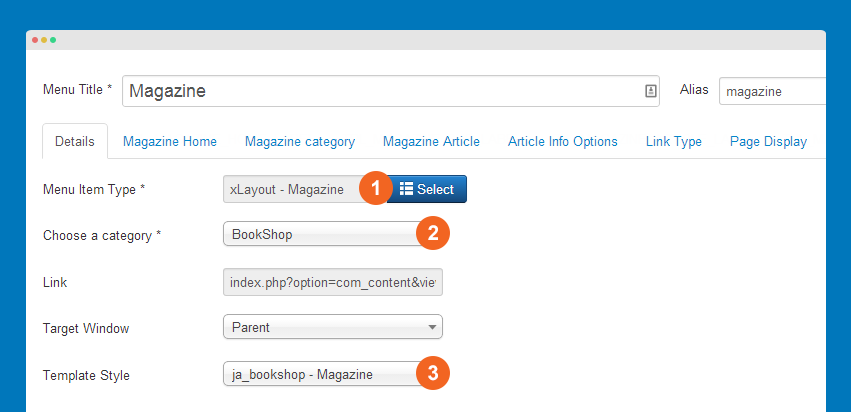
Want to check details of menu setting for each layout? Check it out
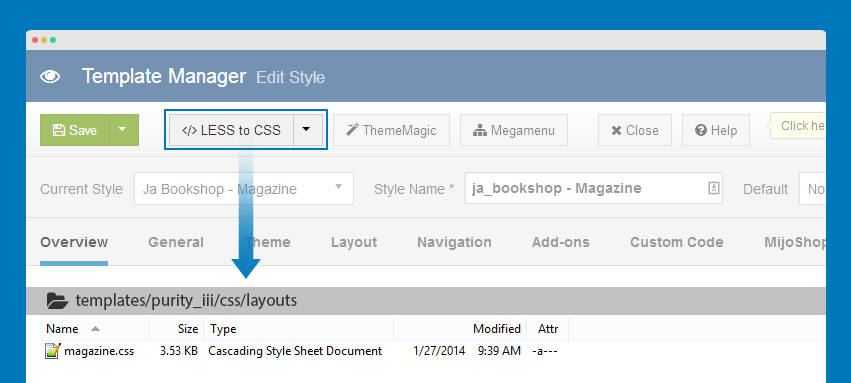
Step 6: compile LESS to CSS
The step will help to to compile magazine.less to magazine.css file. Open any template style, then hit the Compile LESS to CSS button.
Important:
If your template uses bootstrap 2, you may need to customize MARKUP and CSS in .php and .php files.
Front-end Appearance
Override Article info
In Purity III, the article info is overriden, so that it has different style in the comparision with default style.
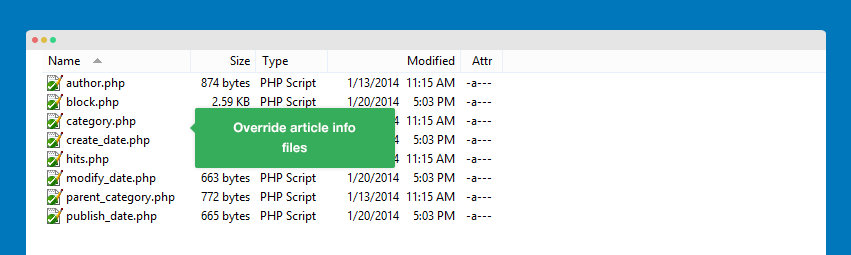
List of override info
author.php
block.php
category.php
create_date.php
hits.php
modify_date.php
parent_category.php
publish_date.php

If you want to customize any of info, open its file then customize.
Customize author info
<?php
/**
 * @package     Joomla.Site
 * @subpackage  Layout
 *
 * @copyright   Copyright (C) 2005 - 2013 Open Source Matters, Inc. All rights reserved.
 * @license     GNU General Public License version 2 or later; see LICENSE.txt
 */

defined('JPATH_BASE') or die;

$author = $displayData['item']->author;
$author = ($displayData['item']->created_by_alias ? $displayData['item']->created_by_alias : $author);
?>
<dd class="createdby" title="<?php echo JText::sprintf('COM_CONTENT_WRITTEN_BY', $author) ?>">
  <i class="fa fa-user"></i>
  <?php if (!empty($displayData['item']->contactid ) && $displayData['params']->get('link_author') == true) : ?>
    <?php
    echo JHtml::_('link', JRoute::_('index.php?option=com_contact&view=contact&id='.$displayData['item']->contactid), $author) ?>
  <?php else :?>
    <?php echo $author ?>
  <?php endif; ?>
</dd>
Override module layout
It's the general instruction for all templates developed with T3 framework.
In this section, we will show you steps to override Articles Archive module. It's the same for any other module.
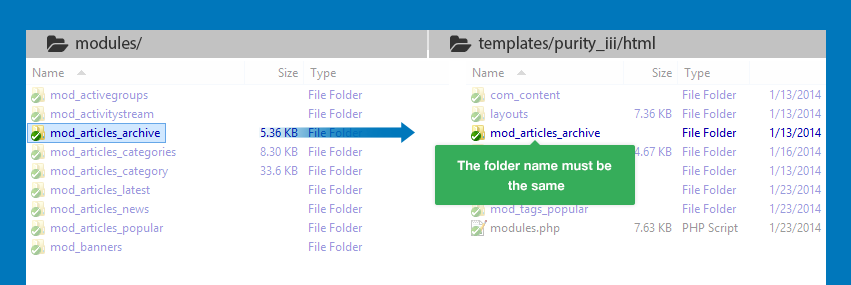
Step 1: create override module folder
Create a folder for override module in templates/purity_iii/html, please make sure the folder name must be the same with the one in site_root_folder/modules.
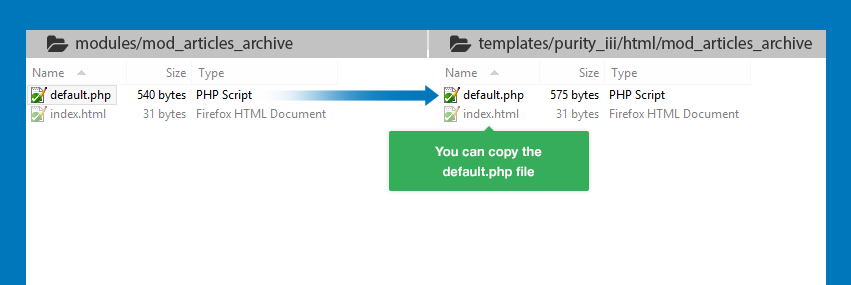
Step 2: create override layout file
In each module, its default layout is defined in default.php file, the file is located in mod_articles_archive/tmpl/. So the easiest way to create override layout file is copy the default.php.
List of override modules in Purity III (by default)
- mod_articles_archive
- mod_articles_category
- mod_footer
- mod_search
- mod_tag_popular