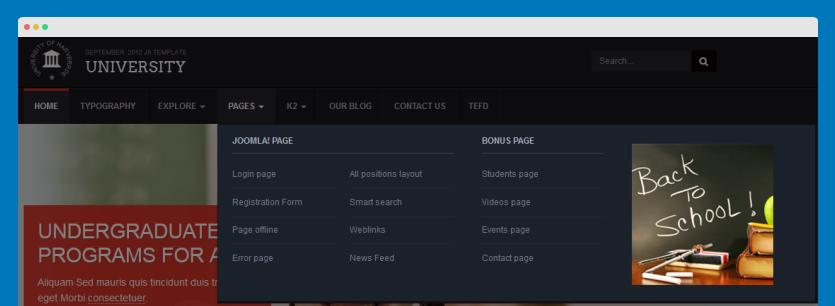
JA University T3 Introduction
The Responsive Joomla template - JA University T3 is fully compatible with Joomla 2.5 and Joomla 3. We have written this the documentation based on Joomla 3, please do consider this factor if you are using it for Joomla 2.5. No worry, there aren't any big differences between the two.
1. Joomla Template for University and school websites - JA University
JA University will be the choice for your next school or university website project.
The template is designed with the aim for simple and minimal design. JA University has rich content types.
This Joomla template for education institution supports the latest version of T3 Framework 2.5.4, K2 component, Slideshow Lite and much more.
JA University will meet all the demands of a professional educational website.
2. Main Features
- JA University has rich content types
- Fully Responsive Template
- Joomla 2.5 and Joomla 3 native
- Bootstrap 3 integration
3. JA Extensions Supported
- JA Contentslider module
- JA Facebook Activity module
- JA Facebook Likebox module
- JA Slideshowlite module
- JA Sidenews module
- JA Masshead module
- JA Extension Manager
- T3 Framework
4. Supported Third party extensions
- Acymailing
- K2 Component
5. Supported Joomla pages (by default)
- Login
- Registration Page
- Edit User Profile
- Web Links
- News Feeds
- Contact Us
- Smart Search
- Offline Page
- Tag Item Page
- 404 Page
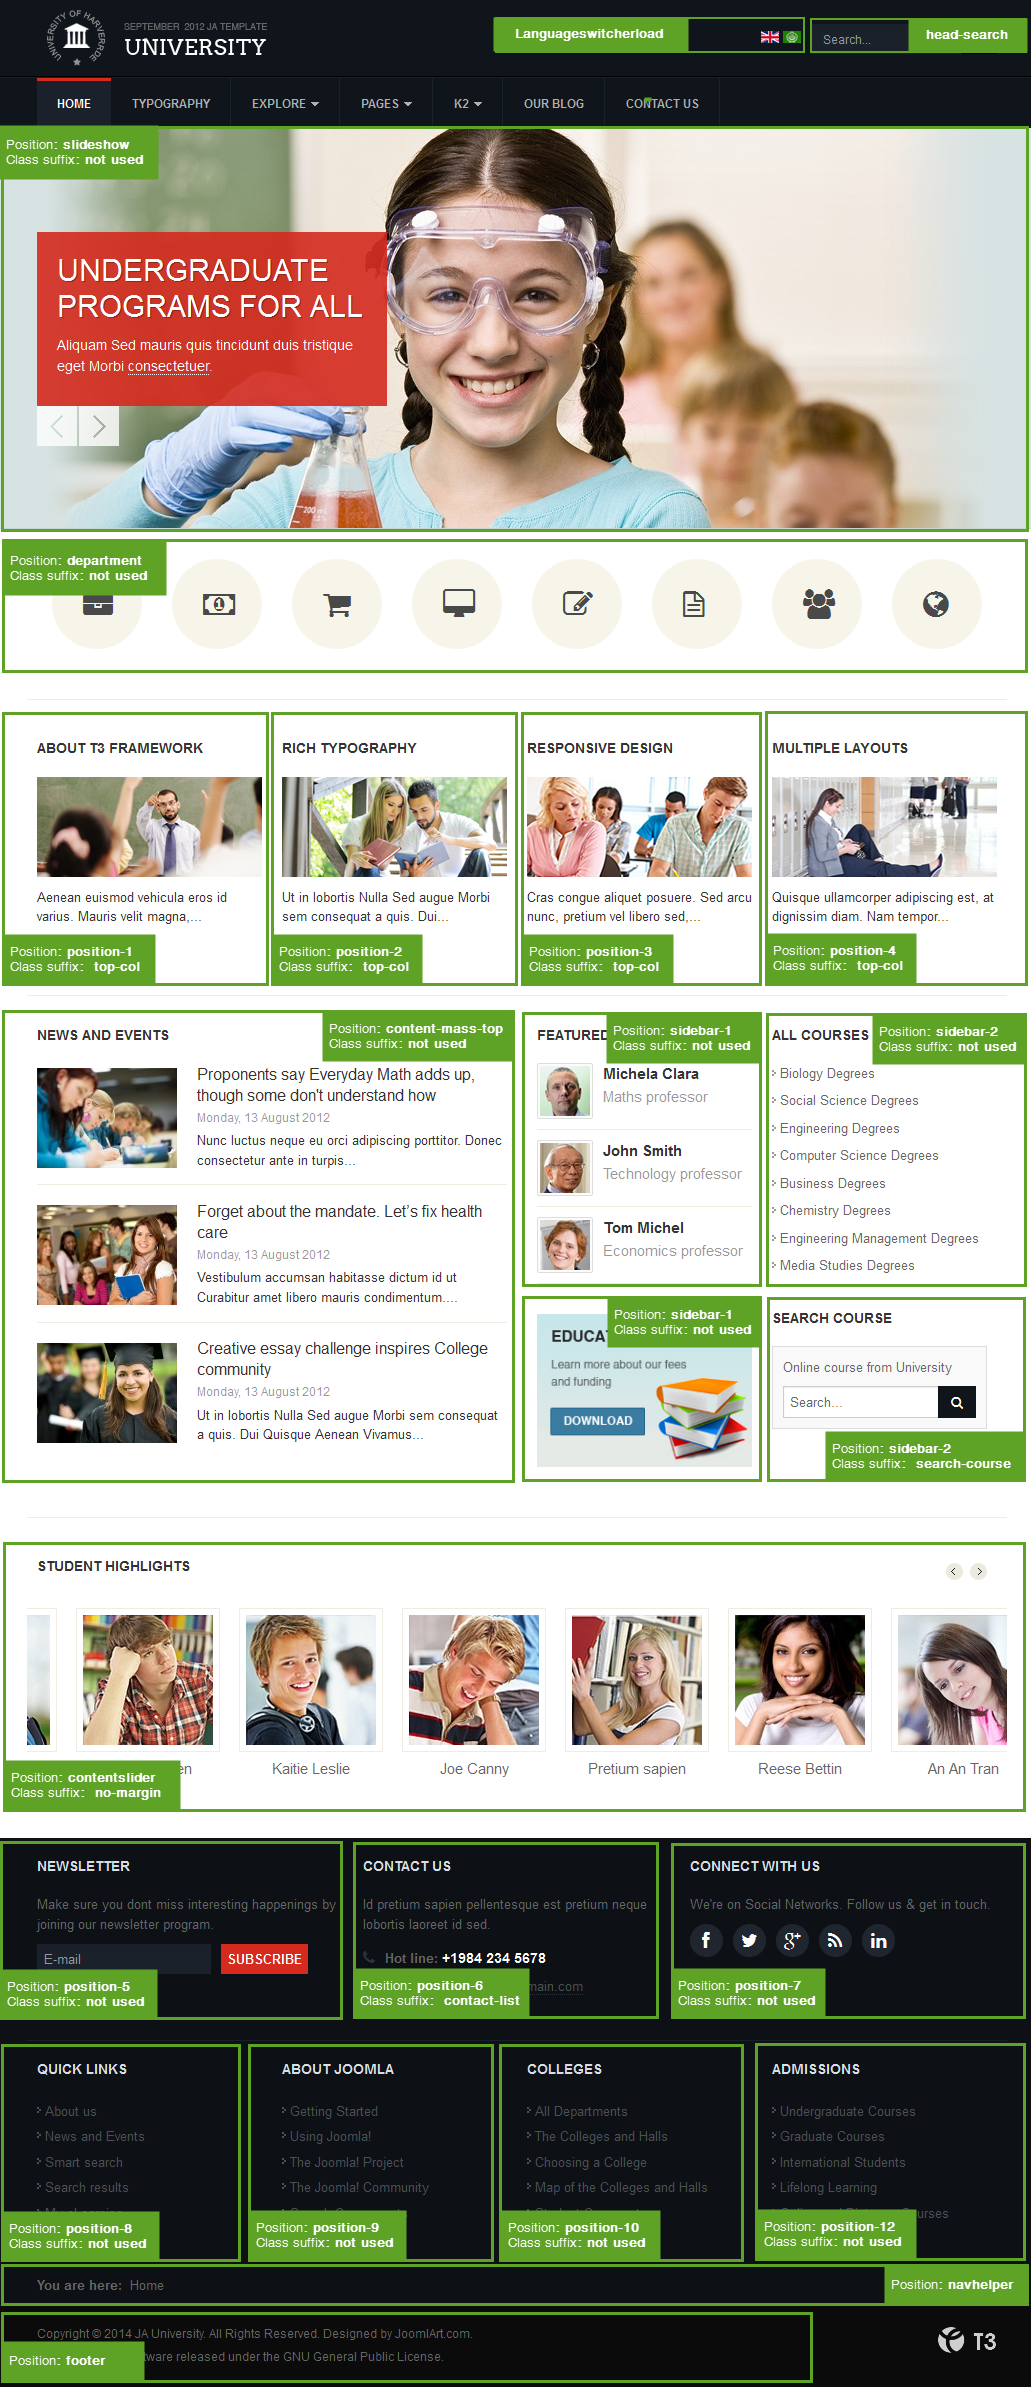
6. Site structure and Module position
System requirement
JA University T3 is compatible with Joomla 3 and Joomla 2.5. Please make sure your system meets the following requirements:
Joomla 3 System requirement
Software
- Software: PHP (Magic Quotes GPC off): 5.3.1 + (5.4+ recommended)
Databases
- MySQL(InnoDB support required): 5.1+
- MSSQL 10.50.1600.1+
- PostgreSQL 8.3.18+
Web Severs
- Apache 2.x+
- Microsoft IIS 7
- Nginx 1.0 (1.1 recommended)
Joomla 2.5+ system requirement
Software
- Software: PHP 5.2.4+ (5.4+ recommended)
- MySQL: 5.0.4+
Web Sever
- Apache: 2.x+
- Microsoft: IIS 7
- Nginx: 1.0 (1.1 recommended)
Browser requirement
The requirements are the same with both Joomla 2.5 and Joomla 3
- Firefox 4+
- IE (Internet Explorer) 8+
- Google Chrome 10+
- Opera 10+
- Safari 5+
Development Environment
The requirements are the same with both Joomla 2.5 and Joomla 3
During development process, Localhost is preferred. You can use the following servers on your PC to develop your site.
Windows
- WAMPSEVER
- XAMPP for Windows
Linux
- LAMP Bubdle
- XAMPP for Linux
Mac OS
- MAMP & MAMP Pro
- XAMPP for Mac OS
Download and Installation
1. Plan your site Development
- Kick-start a New Joomla Site? - If you are planning to start fresh with a new Joomla site, then use our Quickstart package to quickly clone the demo site, then replace the demo content with yours. Check the How to install Quickstart Package documentation for the in-depth how-to guide for Quickstart Installation.
- Installing on your existing live site ? - If you are planning to use this template for your existing Joomla site, then you should follow the How to make your site look like demo site guide first to dig in the steps involved.
2. Download Template and Extensions
Please proceed to JA University T3's Download page, where it holds all the related files and template zip file that you need.
3. Install Template and Extensions
Once you successfully Download the files you need, You'll have to:
- Install the template file onto your Joomla system.
- At default, during the installation process, JA University T3 template will be installed with the settings we're used as on the demo website. Therefore, if you would like to make any changes in configuration, it's recommended that you should complete the setup (including installing all the modules and plugins along with the templates as on demo) then carry out any customization afterwards.
View how to install extensions guide
4. Build demo with our Demo Builder
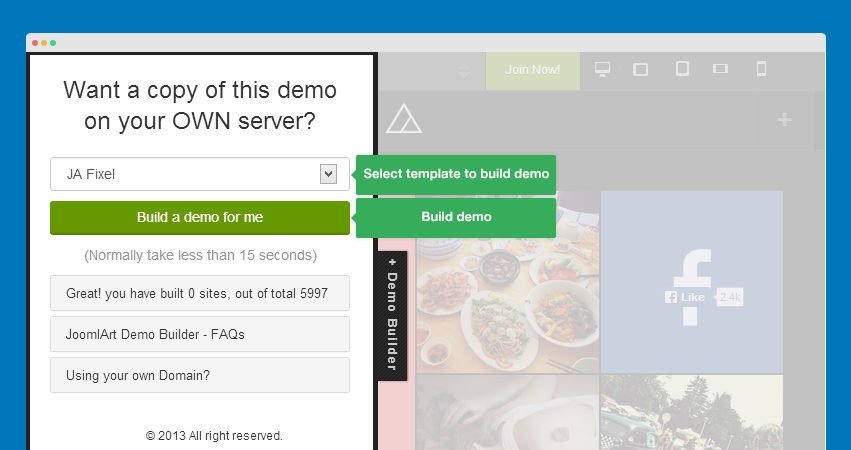
If you are not yet familiar with JoomlArt Demo Builder, more information on this can be read here. To be short, the demo builder service allows you to quickly clone demo for any JoomlArt's Joomla template and test-drive it. As we have recently improved and re-developed the Demo Builder system, you can now play around and experiment with it up to 3 days.
Note:
Custom HTML Module: We have styled (CSS) for several Custom HTML modules using different div classes. You should check out the HTML codes in these module and follow the same format in order to get it displayed correctly. We do also provide the HTML code in this user-guide down below for your references.
Extensions Configuration
I. JA Extension Configuration
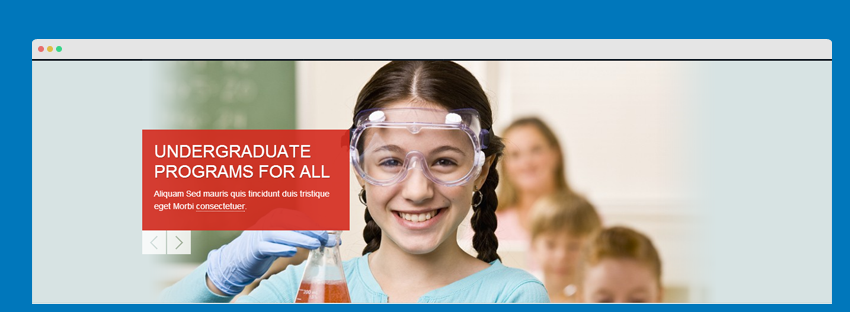
1. JA Slideshow Lite module
  Module Position: slideshow
  Module Suffix: NOT USED
- Module Back-end Settings
- Front-end Appearance
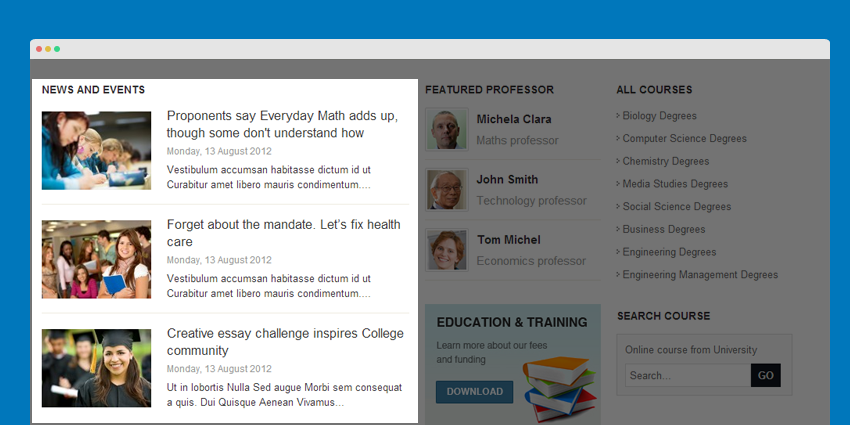
2. JA Side News module
  Module Position: content-mass-top
  Module Suffix: NOT USED
- Module Back-end Settings
- Front-end Appearance
3. JA Content Slider module
  Module Position: contentslider
  Module Suffix:  no-margin
- Module Back-end Settings
- Front-end Appearance

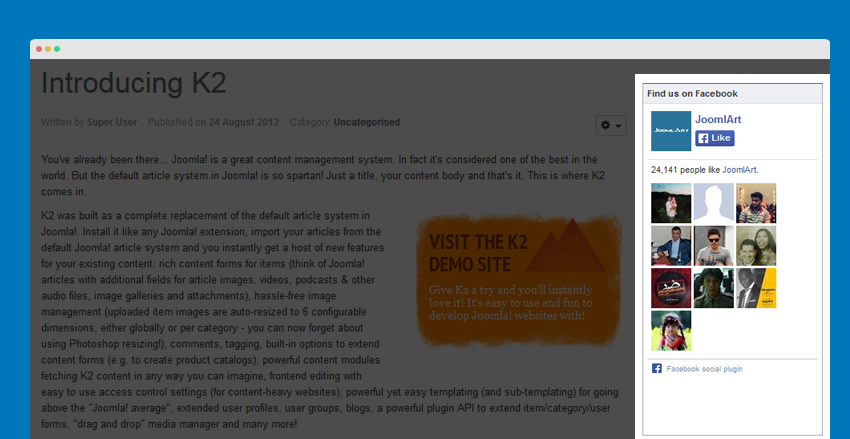
4. JA Facebook Like Box module
  Module Position: sidebar-2
  Module Suffix: NOT USED
- Module Back-end Settings
- Front-end Appearance
View JA Facebook Like Box Docs
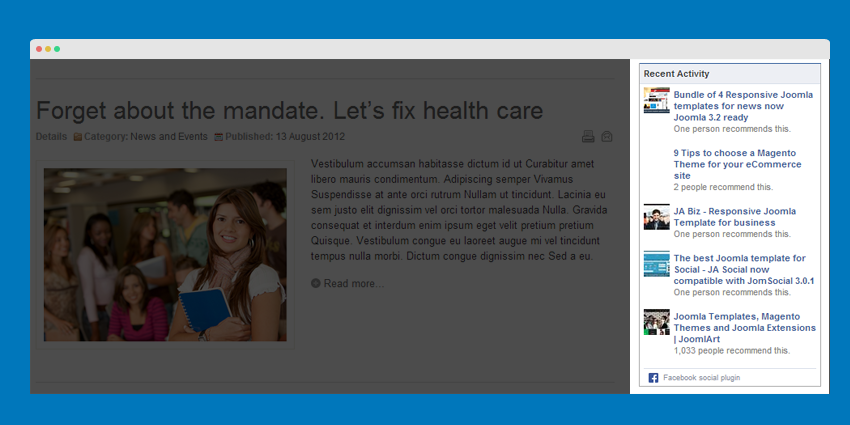
5. JA Facebook Activity module
  Module Position: sidebar-2
  Module Suffix: NOT USED
- Module Back-end Settings
- Front-end Appearance
View JA Facebook Activity Docs
6. JA Masshead module
  Module Position: masshead
  Module Suffix: NOT USED
- Module Back-end Settings
- Front-end Appearance

II. Default Joomla Extensions Configuration
1. Acymailing Module
  Module Position: position-5
  Module Suffix: NOT USED
- Module Back-end Settings
- Front-end Appearance
2. Most Read Content
  Module Position: sidebar-2
  Module Suffix: NOT USED
- Module Back-end Settings
- Front-end Appearance
3. Breadcrumbs
  Module Position: navhelper
  Module Suffix: NOT USED
- Module Back-end Settings
- Front-end Appearance

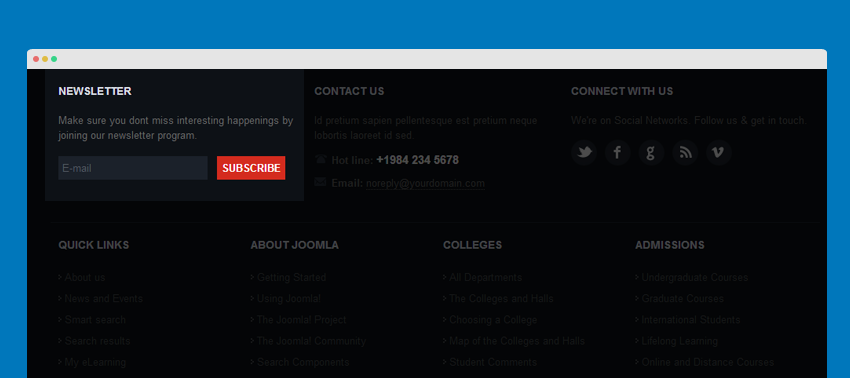
4. Footer
  Module Position: footer
  Module Suffix: NOT USED
- Module Back-end Settings
- Front-end Appearance

5. Language Switcher
  Module Position: languageswitcherload
  Module Suffix: NOT USED
- Module Back-end Settings
- Front-end Appearance

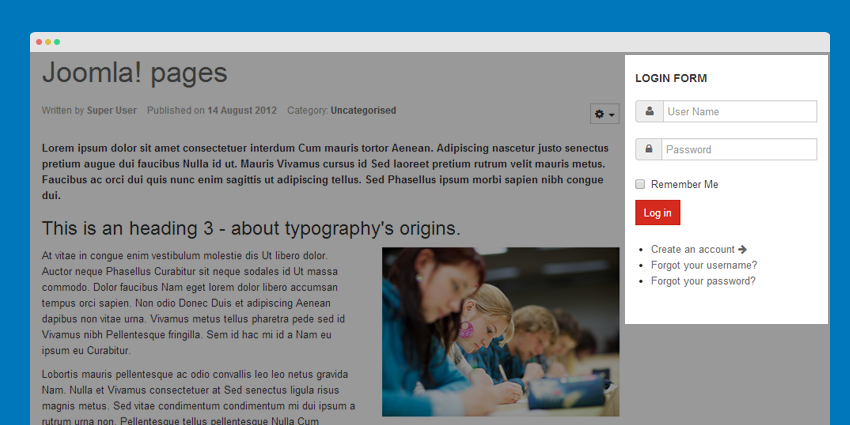
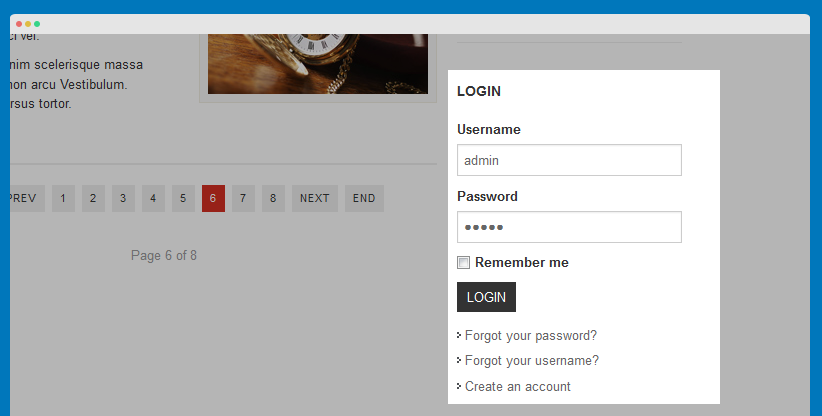
6. Login Form
  Module Position: sidebar-2
  Module Suffix: NOT USED
- Module Back-end Settings
- Front-end Appearance
7. Menu
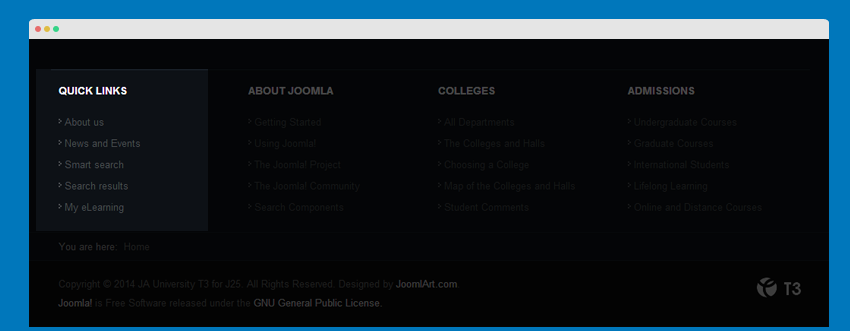
7.1. Quick links menu module
To have it displayed as it is per Demo site, please follow the step by step instruction as below:
Step 1: Create "Quick links" menu
Go to Administrator >> Menus >> Menu Manager >> Add New Menu: Quick links.
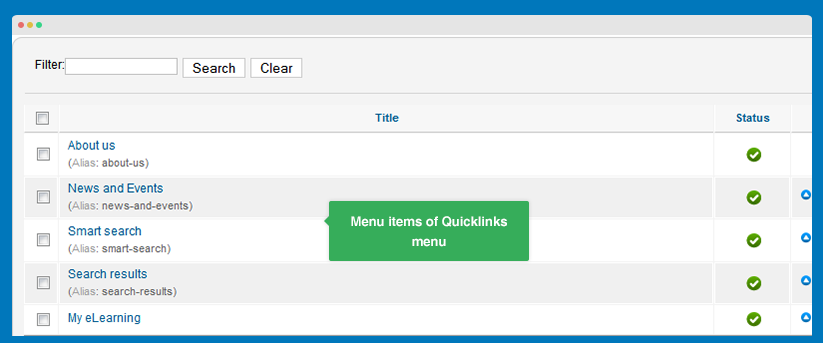
Step 2: Add "Quick links"'s menu items
Go to Administrator >> Menus >> Quick links >> Add New Menu Items for the Menu.
Step 3: Create "Quick links" menu module
This module is Joomla default module, that means when you install Joomla fresh, this module is ready to use.
Go to Administrator >> Module Manager >> Add new Menu Module, named: Quick links.
  Module Position: position-8
  Module Suffix: NOT USED
- Module Back-end Settings
- Front-end Appearance
7.2. About Joomla menu module
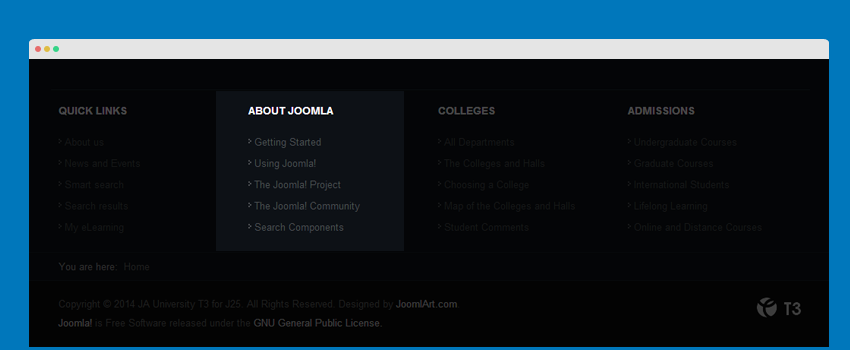
To have it displayed as it is per Demo site, please follow the step by step instruction as below:
Step 1: Create "About Joomla" menu
Go to Administrator >> Menus >> Menu Manager >> Add New Menu: About Joomla.
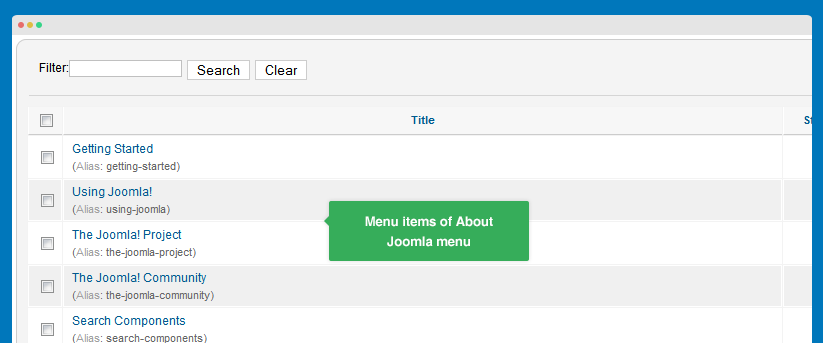
Step 2: Add "About Joomla" menu items
Go to Administrator >> Menus >> About Joomla >> Add New Menu Items for the Menu.
Step 3: Create "About Joomla" menu module
This module is Joomla default module, that means when you install Joomla fresh, this module is ready to use.
Go to Administrator >> Module Manager >> Add new Menu Module, named: About Joomla.
  Module Position: position-9
  Module Suffix: NOT USED
- Module Back-end Settings
- Front-end Appearance
7.3. Colleges menu module
To have it displayed as it is per Demo site, please follow the step by step instruction as below:
Step 1: Create "Colleges" menu
Go to Administrator >> Menus >> Menu Manager >> Add New Menu: Colleges.
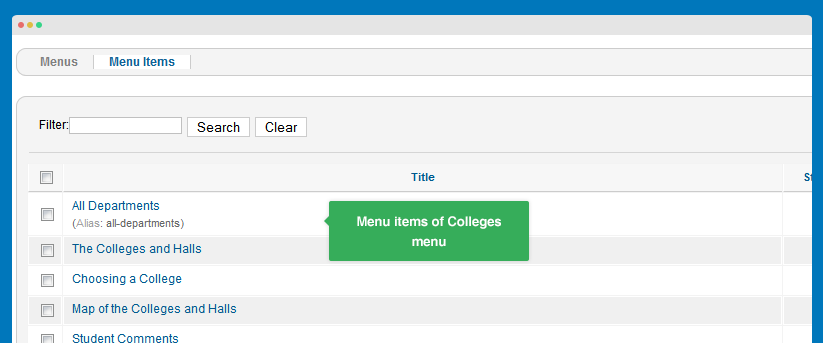
Step 2: Add "Colleges" menu items
Go to Administrator >> Menus >> Colleges >> Add New Menu Items for the Menu.
Step 3: Create "Colleges" menu module
This module is Joomla default module, that means when you install Joomla fresh, this module is ready to use.
Go to Administrator >> Module Manager >> Add new Menu Module, named: Colleges.
  Module Position: position-10
  Module Suffix: NOT USED
- Module Back-end Settings
- Front-end Appearance
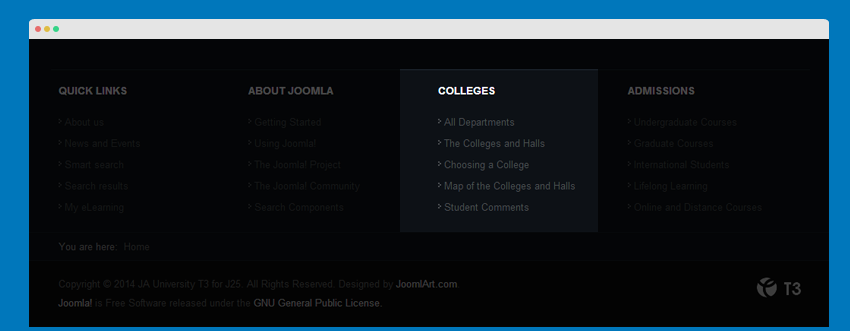
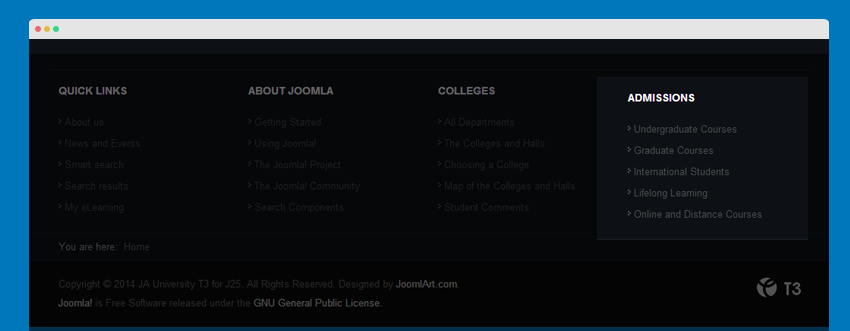
7.4. Admissions menu module
To have it displayed as it is per Demo site, please follow the step by step instruction as below:
Step 1: Create "Admissions" menu
Go to Administrator >> Menus >> Menu Manager >> Add New Menu: Admissions.
Step 2: Add "Admissions" menu items
Go to Administrator >> Menus >> Admissions >> Add New Menu Items for the Menu.
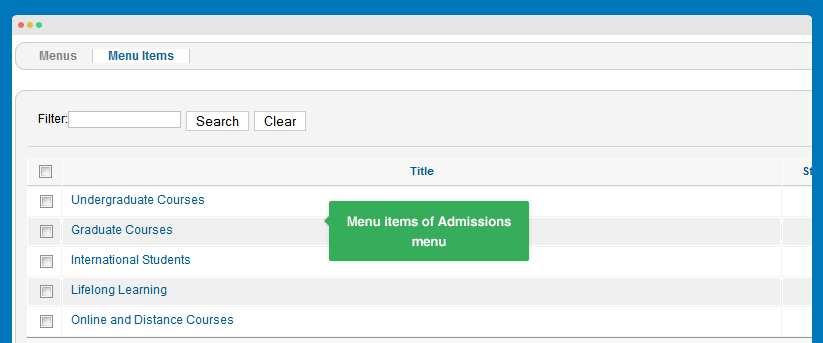
Back-end setting for the menu items
- Undergraduate Courses
- Graduate Courses
- International Students
- Lifelong Learning
- Online and Distance Courses
Step 3: Create "Admissions" menu module
This module is Joomla default module, that means when you install Joomla fresh, this module is ready to use.
Go to Administrator >> Module Manager >> Add new Menu Module, named: Admissions.
  Module Position: position-11
  Module Suffix: NOT USED
- Module Back-end Settings
- Front-end Appearance
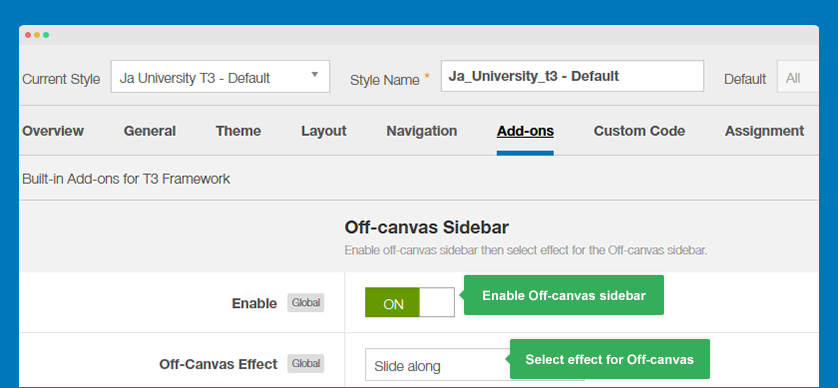
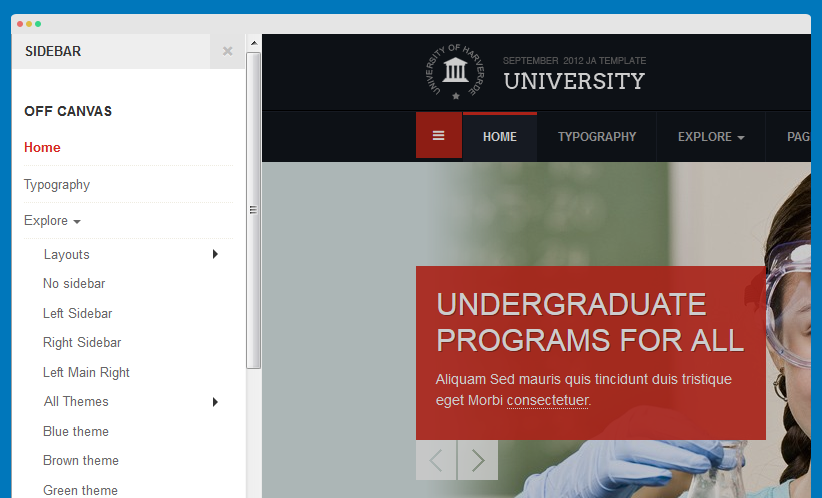
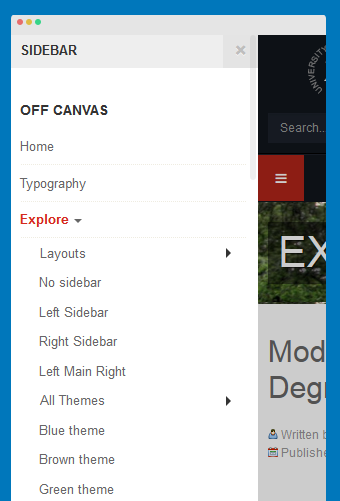
7.5. Off canvas
To have it displayed as it is per Demo site, please follow the step by step instruction as below:
Step 1: Create a menu which you want to display on off-canvas sidebar, example: Main menu
Go to Administrator >> Menus >> Menu Manager >> Add New Menu: Main menu.
Step 2: Add "Main menu" items
Go to Administrator >> Menus >> Main menu >> Add New Menu Items for the Menu.
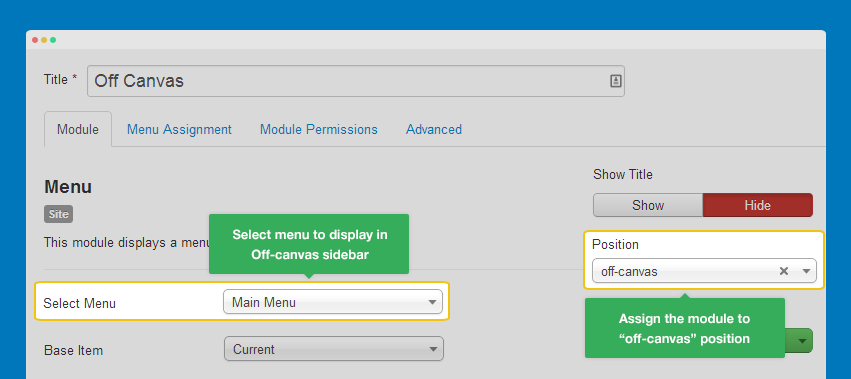
Step 3: Create "Off Canvas" menu module
This module is Joomla default module, that means when you install Joomla fresh, this module is ready to use.
Go to Administrator >> Module Manager >> Add new Menu Module, named: Off canvas.
  Module Position: off-canvas
  Module Suffix: NOT USED
- Module Back-end Settings
- Front-end Appearance
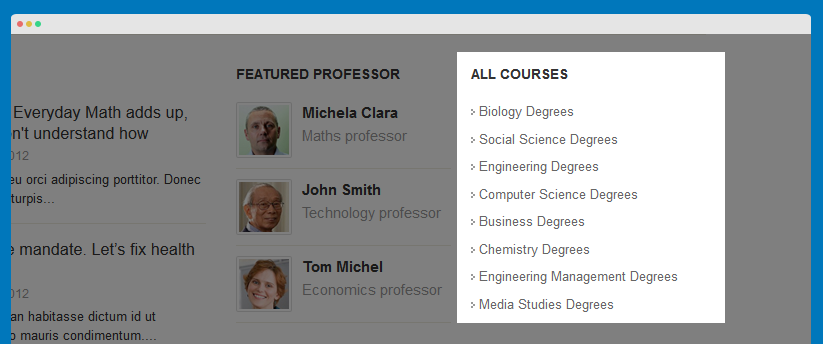
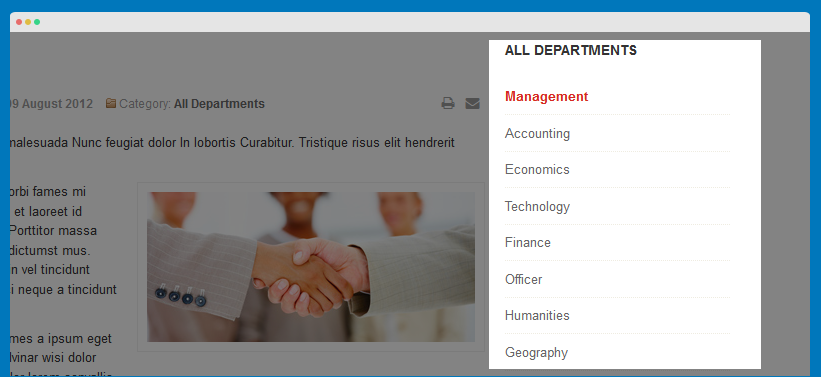
7.6. All Departments
To have it displayed as it is per Demo site, please follow the step by step instruction as below:
Step 1: Create a menu which you want to display on All Departments, example: all departments
Go to Administrator >> Menus >> Menu Manager >> Add New Menu: all departments.
Step 2: Add "all departments" menu items
Go to Administrator >> Menus >> Main menu >> Add New Menu Items for the Menu.

Back-end setting for the menu items
Step 3: Create "All Departments" menu module
This module is Joomla default module, that means when you install Joomla fresh, this module is ready to use.
Go to Administrator >> Module Manager >> Add new Menu Module, named: All Departments.
  Module Position: sidebar-2
  Module Suffix: NOT USED
- Module Back-end Settings
- Front-end Appearance
8. Search
  Module Position: head-search
  Module Suffix: NOT USED
- Module Back-end Settings
- Front-end Appearance

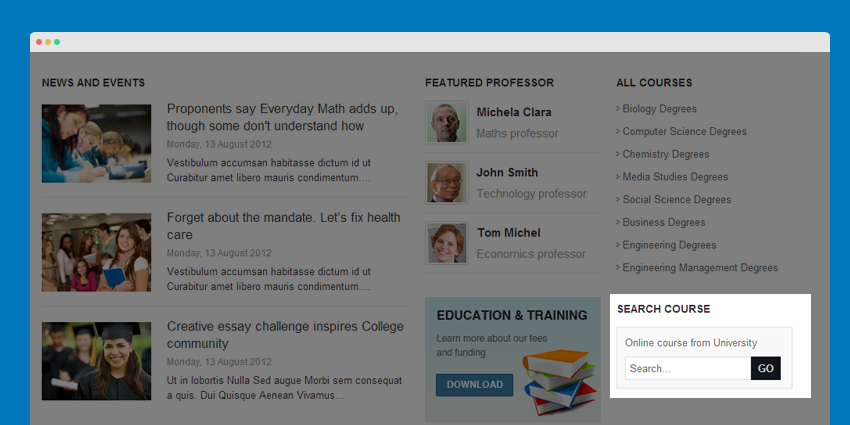
9. Smart Search Module
  Module Position: sidebar-2
  Module Suffix:  search-course
- Module Back-end Settings
- Front-end Appearance
10 Banner module
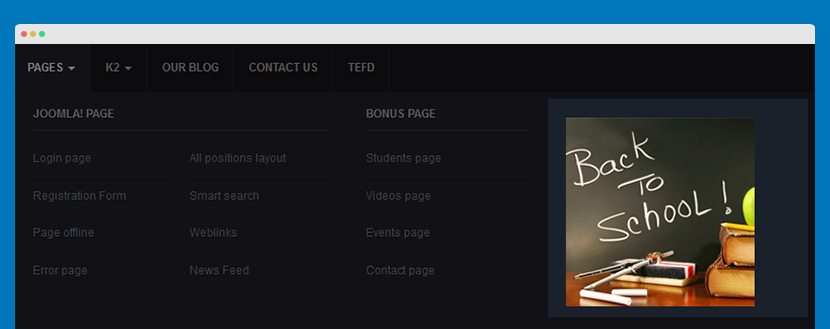
10.1 Mega banner module
To build this module as it is per demo, please follow this step-by-step instruction as below:
Step 1: Create a new Category
Go to Administrator >> Components >> Banners >> Categories >> New
Back-end SettingsStep 2: Create a new Banner
Go to Administrator >> Components >> Banners >> Banners >> New
Step 3: Create a new banner module
				Named: Mega banner
				Module Position : mega1
				Module Suffix : Not Used
Back-end Settings
Front-end Appearance
10.2 Sample banner 4 module
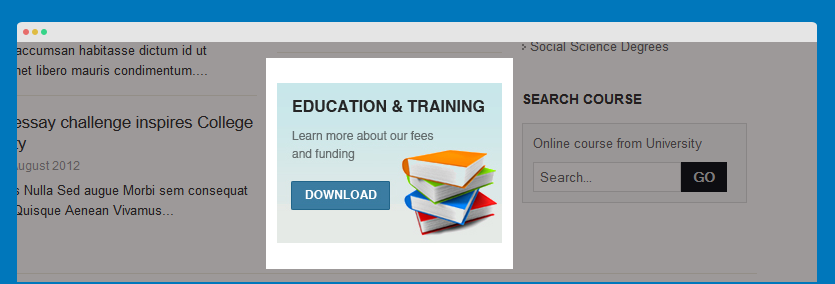
To build this module as it is per demo, please follow this step-by-step instruction as below:
Step 1: Create a new Category
Go to Administrator >> Components >> Banners >> Categories >> New
Back-end SettingsStep 2: Create a new Banner
Go to Administrator >> Components >> Banners >> Banners >> New
Step 3: Create a new banner module
				Named: Sample banner 4
				Module Position : sidebar-1
				Module Suffix : Not Used
Back-end Settings
Front-end Appearance
10.3 Sample banner 3 module
To build this module as it is per demo, please follow this step-by-step instruction as below:
Step 1: Create a new Category
Go to Administrator >> Components >> Banners >> Categories >> New
Back-end SettingsStep 2: Create a new Banner
Go to Administrator >> Components >> Banners >> Banners >> New
Step 3: Create a new banner module
				Named: Sample banner 3
				Module Position : sidebar-2
				Module Suffix : Not Used
Back-end Settings
Front-end Appearance
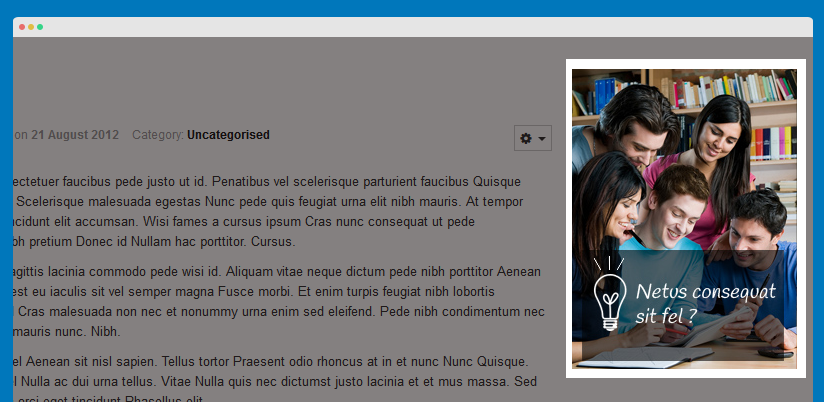
10.4 Right banner 1 module
To build this module as it is per demo, please follow this step-by-step instruction as below:
Step 1: Create a new Category
Go to Administrator >> Components >> Banners >> Categories >> New
Back-end SettingsStep 2: Create a new Banner
Go to Administrator >> Components >> Banners >> Banners >> New
Step 3: Create a new banner module
				Named: Right banner 1
				Module Position : sidebar-2
				Module Suffix : Not Used
Back-end Settings
Front-end Appearance
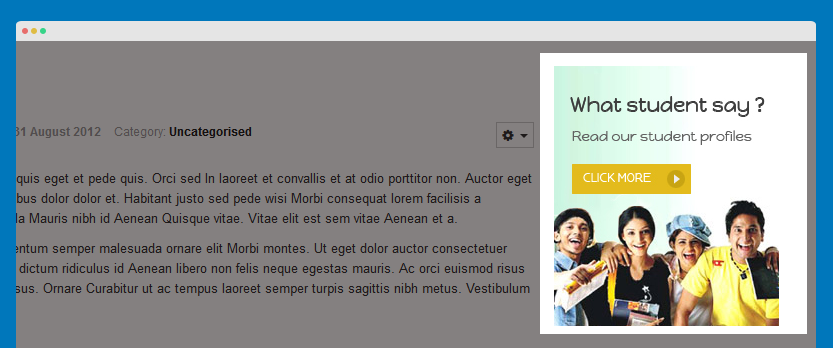
HTML Modules Customization
If you are not sure about how to use Custom HTML Modules or how to access the HTML Editor, please read this Guide.
We will provide you with the HTML Code (markup) for reference below. You will need to replicate it exactly then change your content. Remember, HTML code has special div classes, which are required for demo alike display.
1. Department list
Module Position : department
Module Suffix : NOT USED
<div class="department-list">

<div class="department-list">
<ul class="department-list">
<li class="icon-1"><a href="/index.php?option=com_content&Itemid=709&id=91&lang=en&view=article" title="Sample">Management</a> <span class="department-name">Management</span></li>
<li class="icon-2"><a href="/index.php?option=com_content&Itemid=709&id=92&lang=en&view=article" title="Sample">Accounting</a> <span class="department-name">Accounting</span></li>
<li class="icon-3"><a href="/index.php?option=com_content&Itemid=709&id=93&lang=en&view=article" title="Sample">Economics</a> <span class="department-name">Economics</span></li>
<li class="icon-4"><a href="/index.php?option=com_content&Itemid=709&id=94&lang=en&view=article" title="Sample">Technology</a> <span class="department-name">Technology</span></li>
<li class="icon-5"><a href="/index.php?option=com_content&Itemid=709&id=95&lang=en&view=article" title="Sample">Finance</a> <span class="department-name">Finance</span></li>
<li class="icon-6"><a href="/index.php?option=com_content&Itemid=709&id=96&lang=en&view=article" title="Sample">Officer</a> <span class="department-name">Officer</span></li>
<li class="icon-7"><a href="/index.php?option=com_content&Itemid=709&id=97&lang=en&view=article" title="Sample">Humanities</a> <span class="department-name">Humanities</span></li>
<li class="icon-8"><a href="/index.php?option=com_content&Itemid=709&id=98&lang=en&view=article" title="Sample">Geography</a> <span class="department-name">Geography</span></li>
</ul>
</div>
- Back-end Settings
- Front-end Appearance

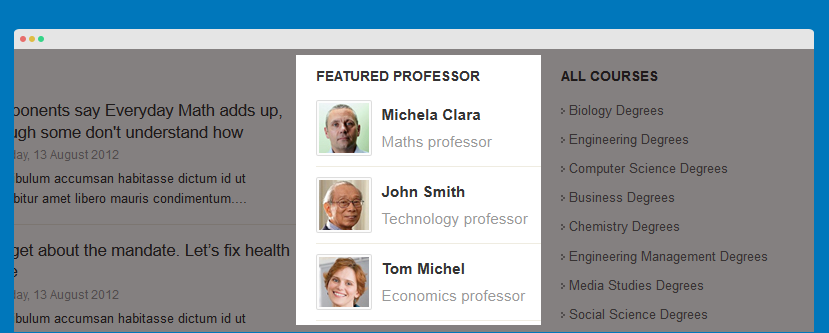
2. Featured professor
Module Position : sidebar-1
Module Suffix : NOT USED
<ul class="professor-list">
<li><img src="/images/sampledata/ja-university-t3/pss-1.jpg" border="0" alt="Processor 1" /> <strong>Michela Clara</strong> <span>Maths professor</span></li>
<li><img src="/images/sampledata/ja-university-t3/pss-2.jpg" border="0" alt="Processor 1" /> <strong>John Smith</strong> <span>Technology professor</span></li>
<li><img src="/images/sampledata/ja-university-t3/pss-3.jpg" border="0" alt="Processor 1" /> <strong>Tom Michel</strong> <span>Economics professor</span></li>
</ul>
- Back-end Settings
- Front-end Appearance
3. Contact us
Module Position : position-6
Module Suffix :  contact-list
<p>Id pretium sapien pellentesque est pretium neque lobortis laoreet id sed.</p>
<ul class="contact-list">
<li class="phone"><strong>Hot line: </strong>+1984 234 5678</li>
<li class="email"><strong>Email: </strong> <a href="mailto:noreply@yourdomain.com">noreply@yourdomain.com</a></li>
</ul>
- Back-end Settings
- Front-end Appearance

4. Connect with us
Module Position : position-7
Module Suffix : NOT USED
<p>We're on Social Networks. Follow us & get in touch.</p> <!-- AddThis Follow BEGIN --> <div class="social-list addthis_toolbox"> </div> <!-- AddThis Follow END -->
- Back-end Settings
- Front-end Appearance

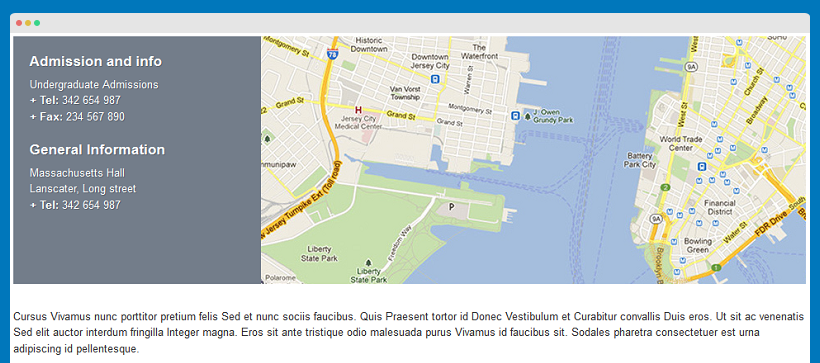
5. Contact info
Module Position : otherinfo
Module Suffix : NOT USED
<div class="other-info">
<div class="contact-map">
<div class="map-info">
<div>
<h3>Admission and info</h3>
Undergraduate Admissions<br /> <strong>+ Tel:</strong> 342 654 987<br /> <strong>+ Fax:</strong> 234 567 890</div>
<div>
<h3>General Information</h3>
Massachusetts Hall <br />Lanscater, Long street<br /> <strong>+ Tel: </strong>342 654 987</div>
</div>
<img src="/images/sampledata/ja_university/sam-15.jpg" alt="University map" border="0" /></div>
<p>Cursus Vivamus nunc porttitor pretium felis Sed et nunc sociis faucibus. Quis Praesent tortor id Donec Vestibulum et Curabitur convallis Duis eros. Ut sit ac venenatis Sed elit auctor interdum fringilla Integer magna. Eros sit ante tristique odio malesuada purus Vivamus id faucibus sit. Sodales pharetra consectetuer est urna adipiscing id pellentesque.</p>
</div>
- Back-end Settings
- Front-end Appearance
Multiple Layout Setting
I. Default Layouts
JA University T3 comes with various types of layout that definitely benefits any business site. We don't use any 3rd party extension to work out these layouts, instead we believe in the power of Joomla core - Joomla com_comtent to come up with these.
II. Build up your own page
To assign a layout to a certain page, please follow our instruction below.
Step 1: Clone the default style
When you install ja_university_t3 template, there is only one style: the default style. However, you can create an unlimited number of different styles for your template as needed.
Why do you need to create a new style?
To have multiple layouts on your site, you need to create multiple styles. Each of these styles will be assigned to one layout.
So what is the difference between template and template style? - Check this out
To create a new style in ja_university_t3, open the template manager panel, select ja_university_t3 default style then hit the Duplicate button.
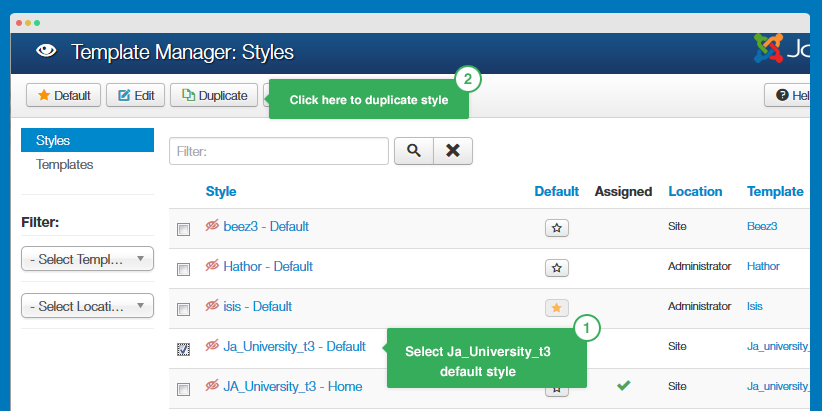
On the demo site, we have already duplicated a number of styles for different layouts.

Step 2: Assign layout to the newly created style
Open the new style then select the respective layout that you want to assign to.
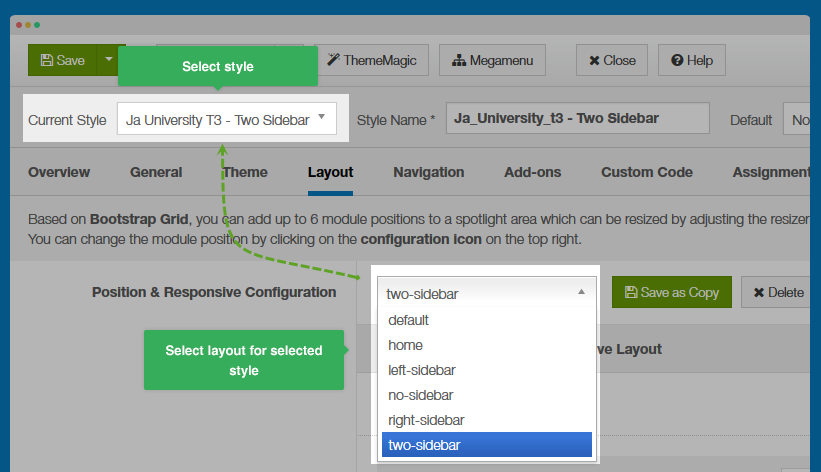
Now open the menu item that you have assigned to the newly created style to configure it, you should be selecting the correct menu type for it.
Matching layout with menu type:
Please note that each layout will go with its own menu type only, so please make sure you select the correct menu type for your layout.
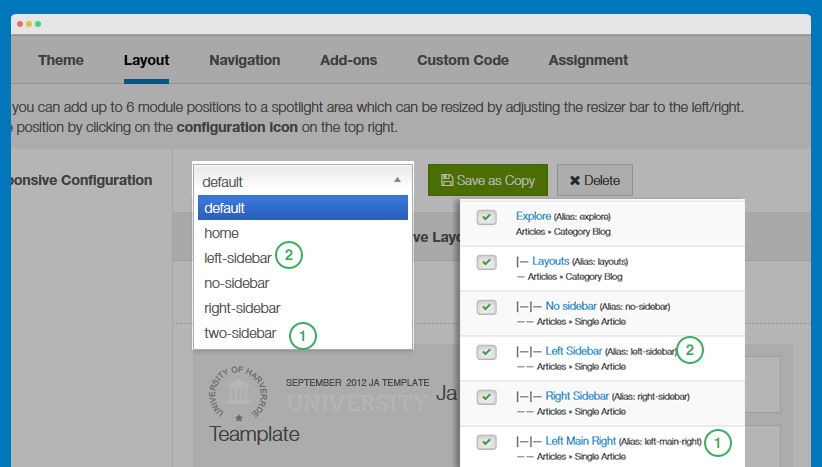
| Page | Layout | Menu type |
|---|---|---|
| Students page | default | pLayout - Blog |
| Videos page | default | vLayout - Blog |
| Events page | default | eLayout - Blog |
Here is the list of all extended menu types:
- pLayout - Blog
- vLayout - Blog
- eLayout - Blog
Step 3: Assign style to each menu item
This is called "style override". The menu item that is assigned to a specific style will get that style overrided the default style.
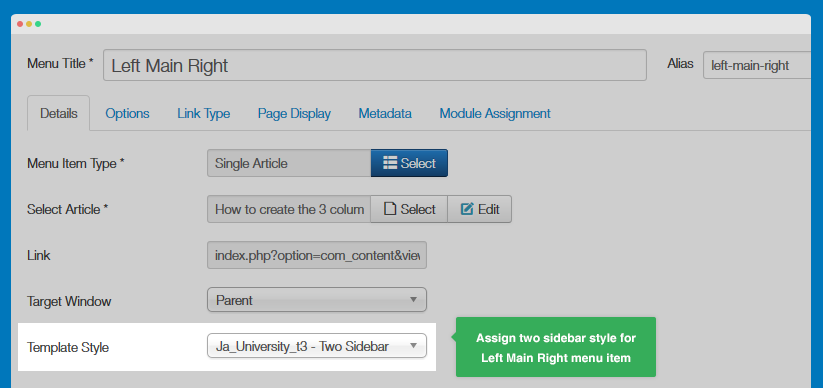
There are 2 ways to assign style to menu items: in the style back-end setting or in the setting panel of menu item.
#1: In the style back-end setting
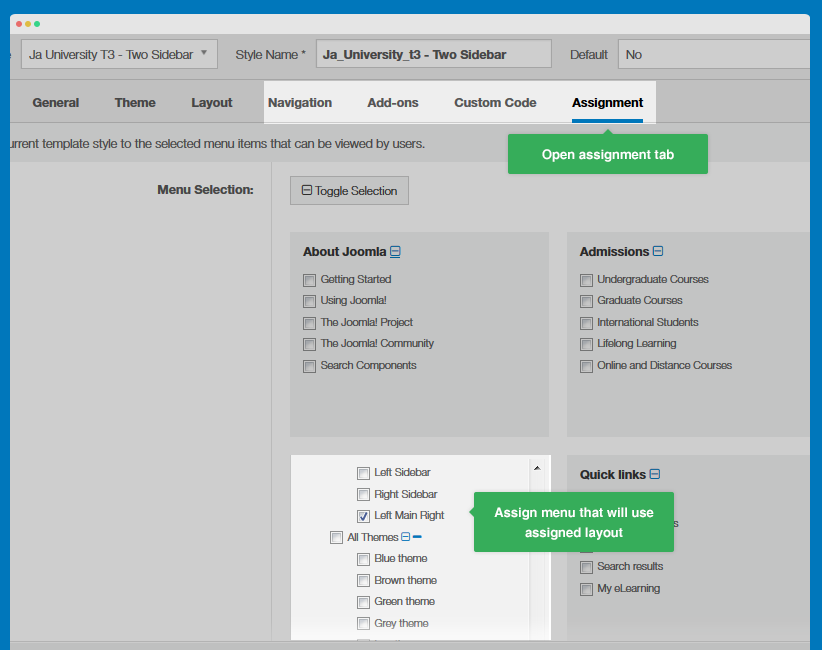
#2: In the setting panel of menu item
K2 Component Configuration
1. K2 Installation
If you are new to this Joomla component, please read this guide.
K2 Installation Documentation2. Configure K2 component
2.1 Global Configuration: Click on Parameter button
Back-end settings
- Layout & Views Settings
- Content Settings
- Images Settings
- Social Settings
- Comments Settings
- Front-end and Editing Settings
- Advanced Settings
2.2 Category Configuration
To build your website like our demo, navigate to Administrator >> Component >> K2 >> Categories.
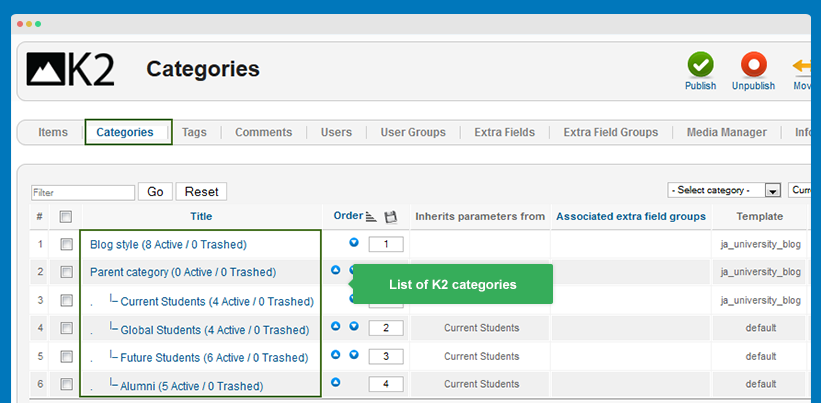
As you can see on our Demo, each parent category uses ja-university_blog template. The template has content block and right side to display modules.
Front-end appearance
- All Categories
- K2 Item List Page

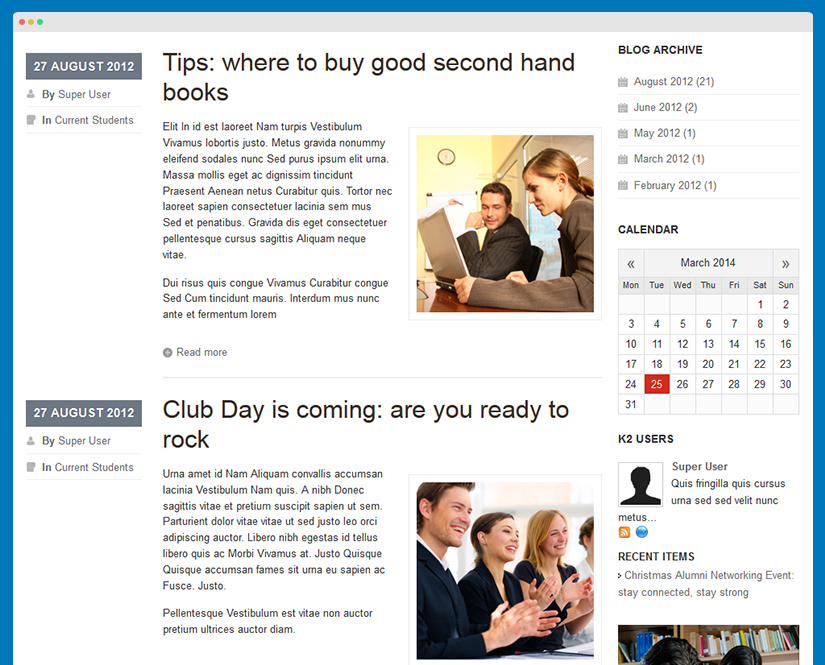
Blog category
Parent category
Current Students category
3. Configure K2 Modules
This instruction is a reference for developers using manual installation, a guide on how to set up K2 Component like on the demo website and the quick-start package.
Please refer to the official documentation on how to install and set up K2.
There are 3 modules of K2 component being used in JA University T3.
3.1 K2 Tools Module
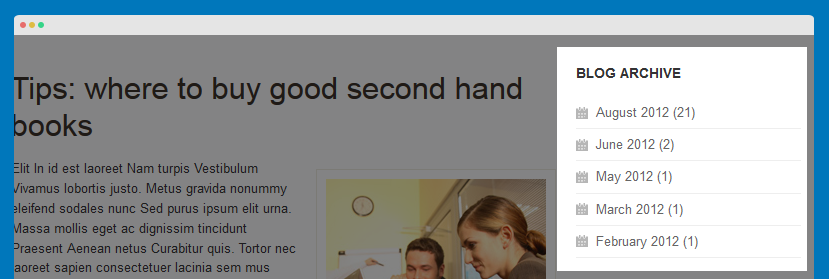
3.1.1 Blog archive
Module Position : sidebar-2
Module Suffix : NOT USED
- Back-end Settings
- Front-end Appearance
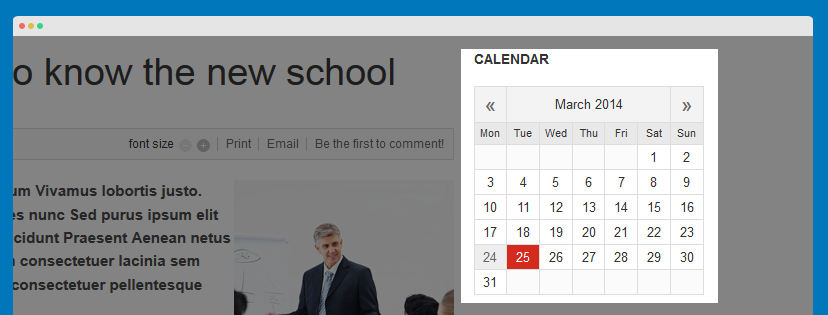
3.1.2 Calendar
Module Position : sidebar-2
Module Suffix : NOT USED
- Back-end Settings
- Front-end Appearance
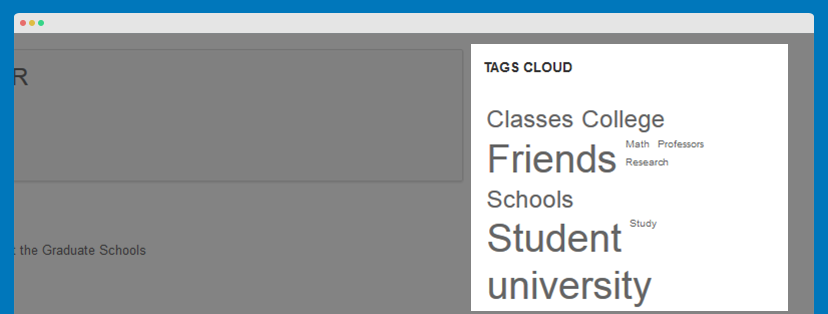
3.1.3 Tags cloud
Module Position : sidebar-2
Module Suffix : NOT USED
- Back-end Settings
- Front-end Appearance
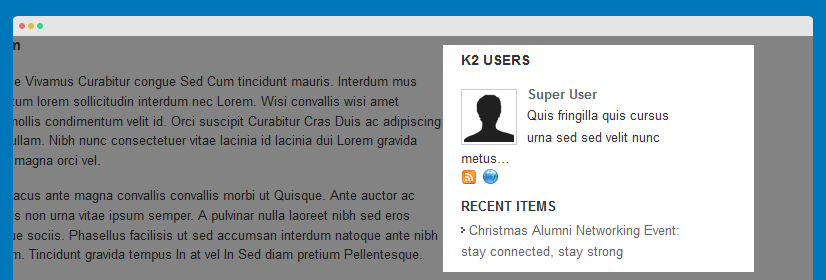
3.2 K2 Users Module
Module Position : sidebar-2
Module Suffix : NOT USED
- Back-end Settings
- Front-end Appearance
3.3 K2 User Module
Module Position : sidebar-2
Module Suffix : NOT USED
- Back-end Settings
- Front-end Appearance
Template Configuration
Theme Settings
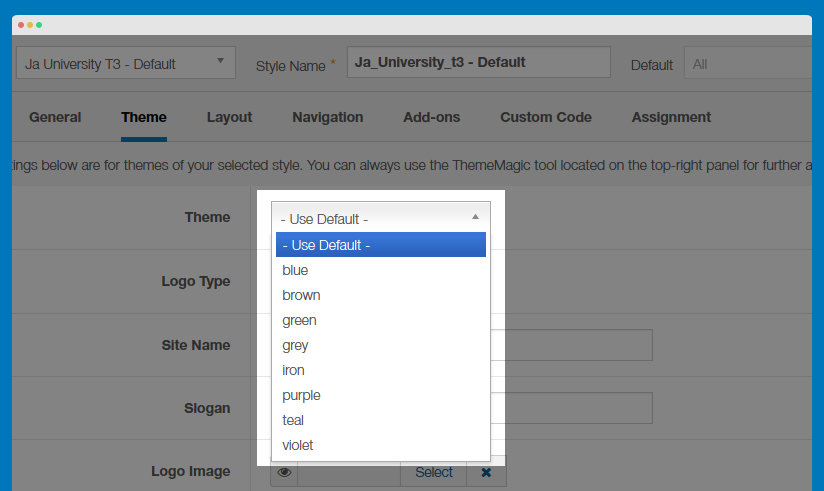
JA University T3 supports 9 color themes by default: default, blue, brown, green, grey, iron, purple, teal and violet.
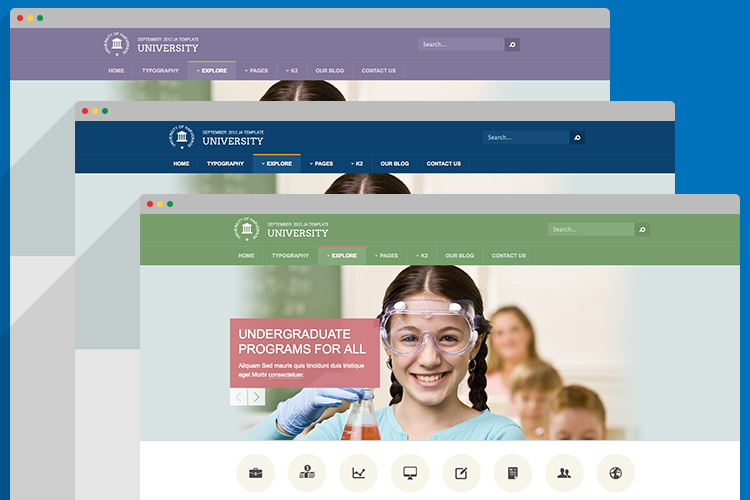
A here, you can switch to any theme you like. To change theme, kindly select it from the drop down box under the Theme tab.
In the Theme tab, you can also change the logo by replacing other image here or select text logo option as you wish.
ThemeMagic Settings
ThemeMagic is a real time theme customization tool supported by T3 Framework. It allows you to customize any theme without touching in the code.
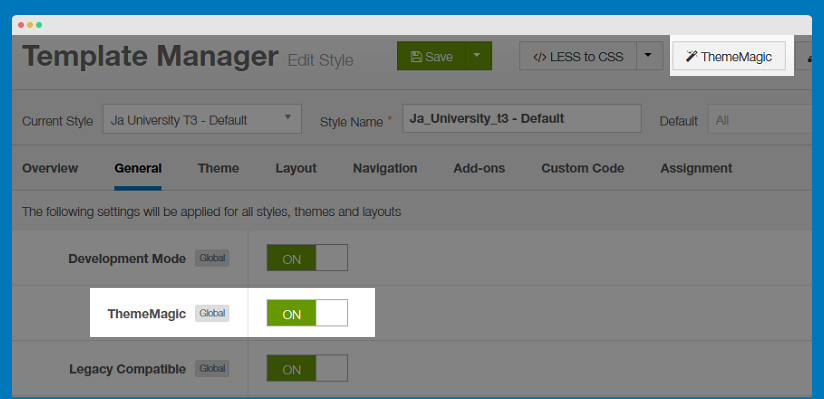
Step 1: Enable ThemeMagic
In the General tab, enable ThemeMagic then access ThemeMagic's working panel by clicking on ThemeMagic.
Step 2: Select the theme to customize
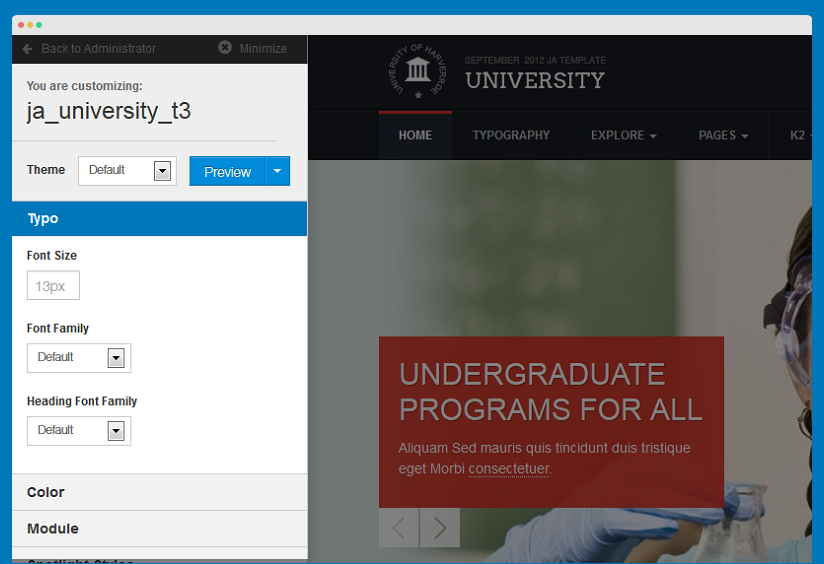
Tips: Once ThemeMagic is enabled, you can access ThemeMagic from your front-page by adding "?tm=1" after your site url (example: http://joomla-templates.joomlart.com/ja_university_t3/?tm=1)
View ThemeMagic Documentation VIew ThemeMagic's Video Tutorial
Layout Settings
There are 6 layouts that are used in the template. Select the style that you want to work on, then assign the layout for that style accordingly.

Layout Structure
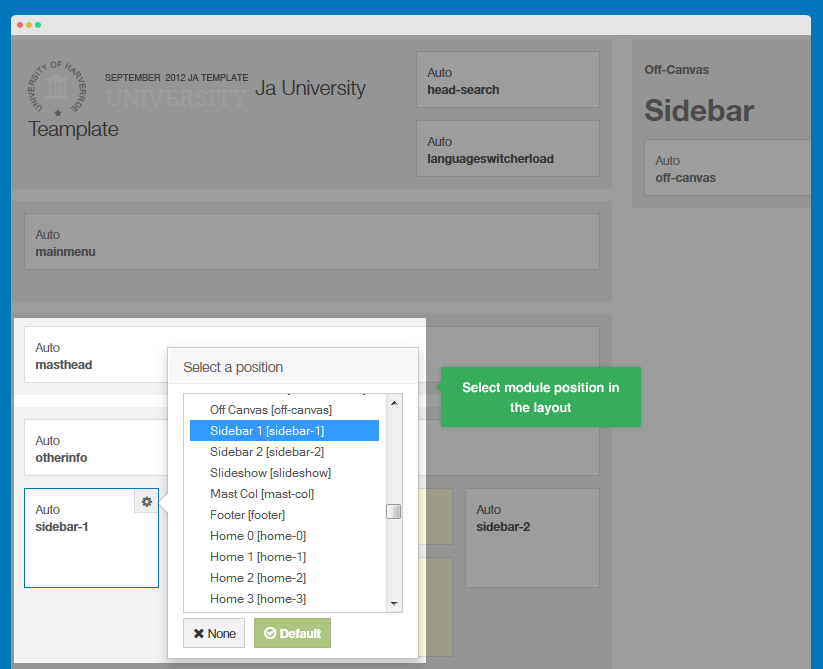
Here, you can change the layout structure, module positions in the layout, and more.
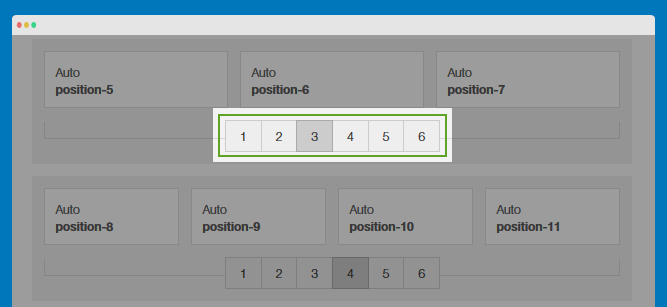
In the spotlight block, you can see the number of positions available.
Responsive Layouts
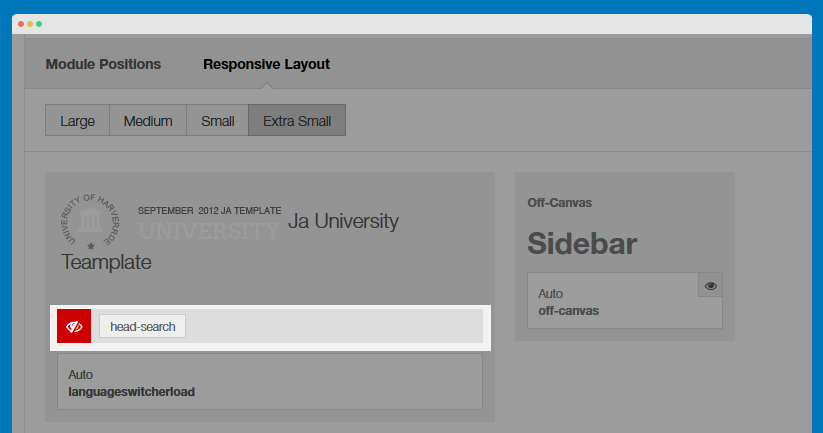
JA University T3 supports multiple responsive layouts. In the Responsive layout, select the layout you would like to configure.

In each responsive layout, you can disable any module position as you wish.
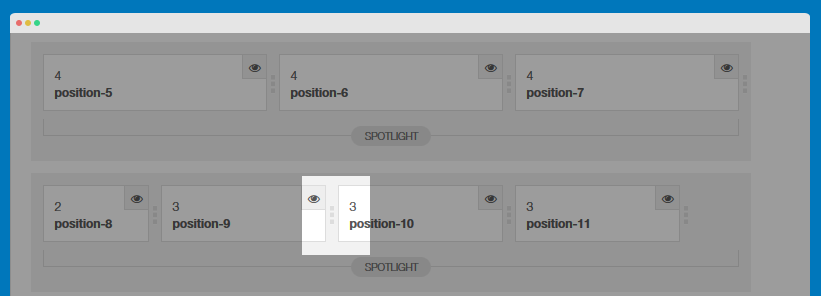
For module positions in the spotlight block, you can drag to resize.
Documentation Layout configuration video Layout customization video
Get typography displayed on your site
JA University T3 comes with multiple typography styles for Headings, Content, Color, Buttons, Quotes, Forms and so on ...
Note:
JA University T3 is built on the latest version of T3 Framework which integrates Bootstrap 3 at core, hence, JA University T3 does support all Bootstrap 3's typo.
Step 1: get the typo markup
There are 3 ways you can quickly get the typo markup from:
#1: using Firebug
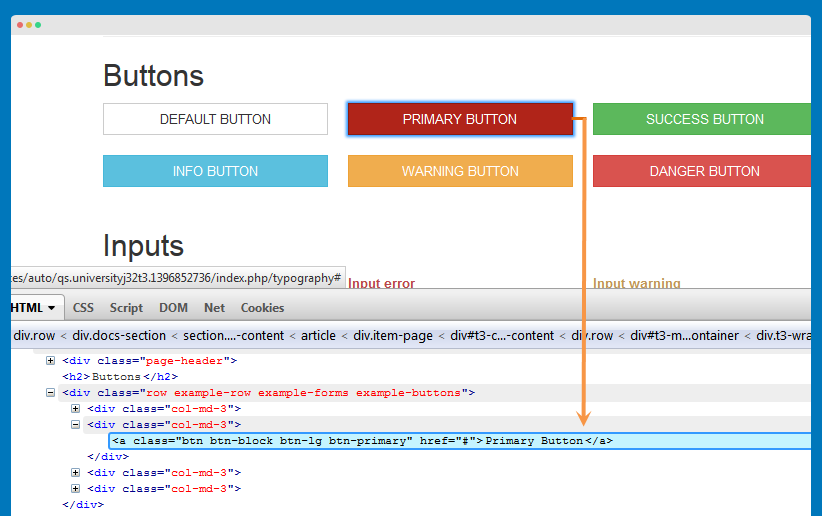
#2: using quickstart package
We provide a Quickstart package, which includes the sample data that will help you replicating the JA University T3 demo as is for your site. Once you successfully install the site, you can easily get the typo's markup from the articles and custom HTML module.
#3: using demo builder
Once you successfully build a Demo using Demo Builder which we have shown earlier in the Download and Installation section, you can easily copy the typo markup from the articles and custom HTML directly from the back-end.

Step 2: Add markup of the typo to your content
Turn off editor:
Please make sure you turn the Editor off if you are going to add HTML code to your article content. To turn off, please navigate to Sytem >> Global confoguration, select Editor - None in the field Default editor.

You can add the typo markup to the article's content field or custom HTML module.
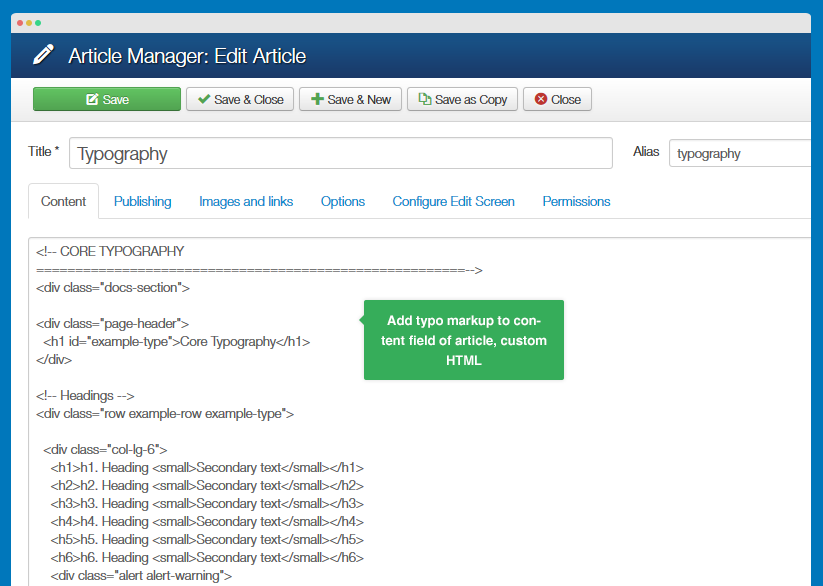
Here is the Typo HTML code.
You can use the above HTML code to make a similar page on your website and refer to the codes for using Typography.
Step 3: Get the typo displayed on the front-page
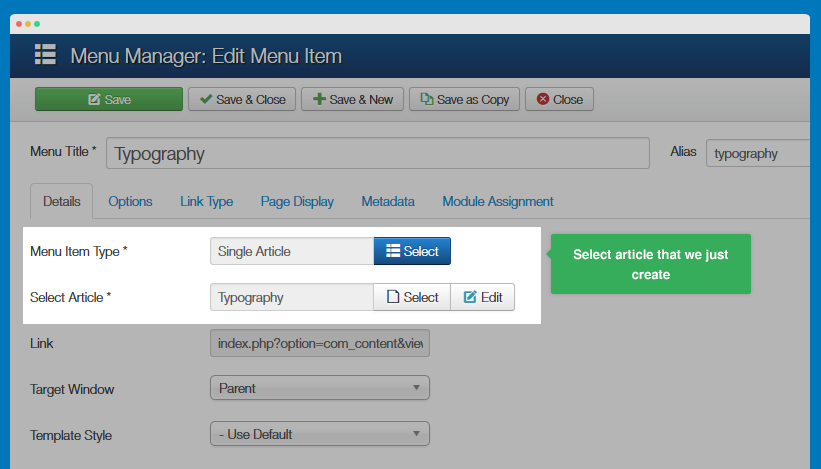
Create a menu, assign to the article we added the typo markup to.
Recommendation
The above userguide should help one in replicating the Demo site settings for the template and extension on their site.
Recommended :
If you are new or are confused, we recommend installing Quickstart on your localhost and use it as reference for the configurations. This is the best way to work with any template. Links to all the resources are provided above. We suggest you to carefully go over those in order to take the maximum advantage of our products.
Support :
Please raise your support queries in support forum

