JA Medicare Introduction
Responsive Joomla template for Joomla 2.5 and Joomla 3. We have written this the documentation based on Joomla 2.5, please do consider this factor if you are using it for Joomla 3. No worry, there aren't any big differences between the two.
1. Responsive Joomla template for Hospitals, Clinics, and Health Care Center - JA Medicare
The perfect Responsive Joomla template for Hospitals, Clinics and Health Care Center for Joomla 3 & Joomla 2.5. Can easily be tweaked into Business, Corporate or Portfolio style if you want it to. JA Medicare comes with numerous bonus pages that will blow you away. Its gorgeous design, sleek layout and neat structure helps you to impress your visitors at their first sight.
View Demo for Responsive Joomla template - JA Medicare
2. Main Features
- Support multiple layouts: especially the News & Events and Testimonials
- Support layout styles for K2 and Joomla default pages
- Fully Responsive Template
- Joomla 2.5 and Joomla 3 native
- Bootstrap 3 integration
3. JA Extensions Supported
- JA Accordion module
- JA Contentslider module
- JA Masshead
- JA Slideshowlite
- JA Facebook Likebox
- JA Extension Manager
- JA Google Map plugin
- JA Disqus Debate Echo plugin
- T3 Framework
4. Supported Third party extensions
- K2 component
5. Supported Joomla pages (by default)
- Blog page
- All Categories page
- Category list page
- Category Blog page
- Archive Article page
- Featured Article page
- Login
- Registration Page
- Edit User Profile
- Web Links
- News Feeds
- Contact Us
- Smart Search
- Offline Page
- Tag Item Page
- 404 Page
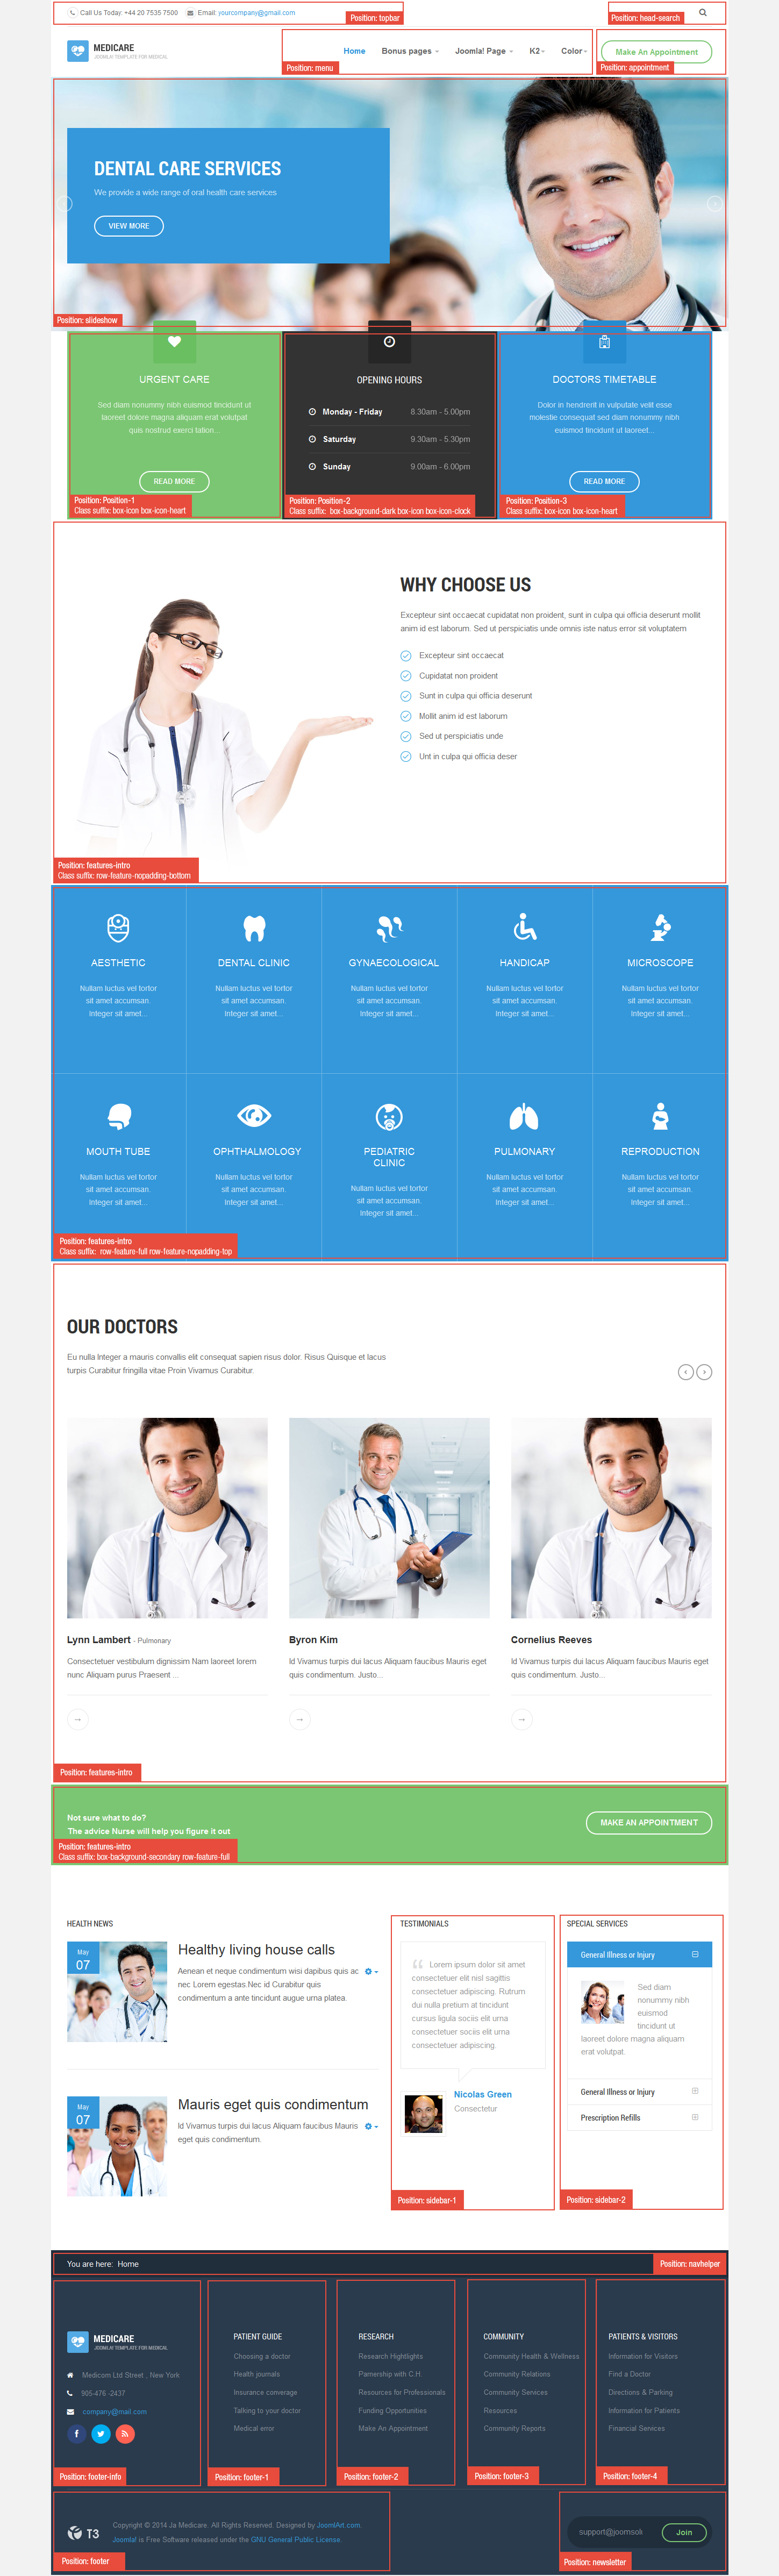
6. Site structure and Module position
System requirement
JA Medicare is compatible with Joomla 3 and Joomla 2.5. Please make sure your system meets the following requirements:
Joomla 3 System requirement
Software
- Software: PHP (Magic Quotes GPC off): 5.3.1 + (5.4+ recommended)
Databases
- MySQL(InnoDB support required): 5.1+
- MSSQL 10.50.1600.1+
- PostgreSQL 8.3.18+
Web Severs
- Apache 2.x+
- Microsoft IIS 7
- Nginx 1.0 (1.1 recommended)
Joomla 2.5+ system requirement
Software
- Software: PHP 5.2.4+ (5.4+ recommended)
- MySQL: 5.0.4+
Web Sever
- Apache: 2.x+
- Microsoft: IIS 7
- Nginx: 1.0 (1.1 recommended)
Browser requirement
The requirements are the same for both Joomla 2.5 and Joomla 3
- Firefox 4+
- IE (Internet Explorer) 8+
- Google Chrome 10+
- Opera 10+
- Safari 5+
Development Environment
The requirements are the same for both Joomla 2.5 and Joomla 3
During development process, Localhost is preferred. You can use the following servers on your PC to develop your site.
Windows
- WAMPSEVER
- XAMPP for Windows
Linux
- LAMP Bubdle
- XAMPP for Linux
Mac OS
- MAMP & MAMP Pro
- XAMPP for Mac OS
Download and Installation
1. Plan your site Development
- Kick-start a New Joomla Site? - If you are planning to start fresh with a new Joomla site, then use our Quickstart package to quickly clone the demo site, then replace the demo content with yours. Check the How to install Quickstart Package documentation for the in-depth how-to guide for Quickstart Installation.
- Installing on your existing live site ? - If you are planning to use this template for your existing Joomla site, then you should follow the How to make your site look like demo site guide first to dig in the steps involved.
2. Download Template and Extensions
Please proceed to JA Medicare's Download page, where it holds all the related files and template zip file that you need.
3. Install Template and Extensions
Once you successfully Download the files you need, You'll have to:
- Install the template file onto your Joomla system.
- At default, during the installation process, JA Medicare template will be installed with the settings we're used as on the demo website. Therefore, if you would like to make any changes in configuration, it's recommended that you should complete the setup (including installing all the modules and plugins along with the templates as on demo) then carry out any customization afterwards.
View how to install extensions guide
4. Build demo with our Demo Builder
If you are not yet familiar with JoomlArt Demo Builder, more information on this can be read here. To be short, the demo builder service allows you to quickly clone demo for any JoomlArt's Joomla template and test-drive it. As we have recently improved and re-developed the Demo Builder system, you can now play around and experiment with it up to 3 days.

Note:
Custom HTML Module: We have styled (CSS) for several Custom HTML modules using different div classes. You should check out the HTML codes in these module and follow the same format in order to get it displayed correctly. We do also provide the HTML code in this user-guide down below for your references.
Template Configuration
1. Theme Settings
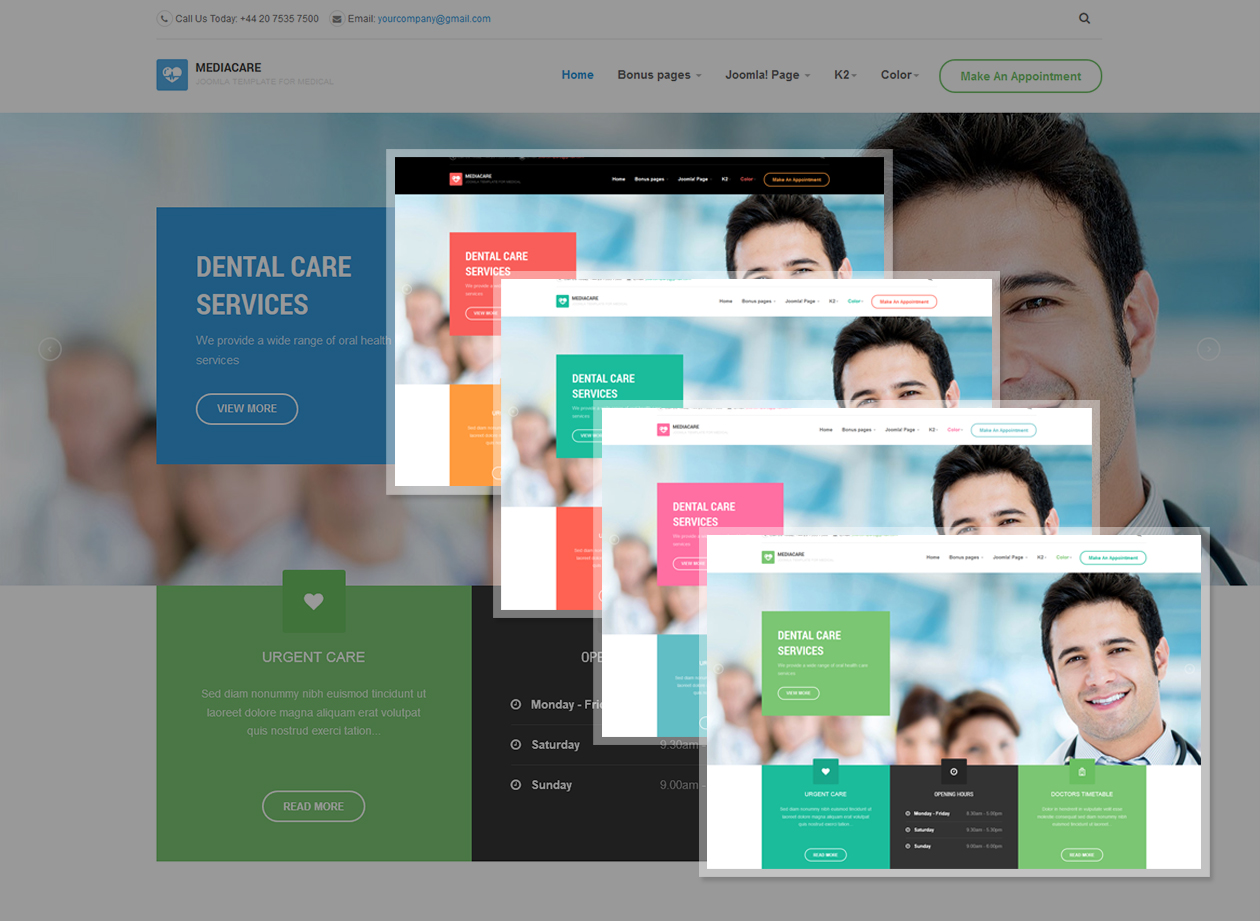
JA Medicare supports 5 colors themes by default: Default, Red, Green, Pinnk and Turquoise.
A here, you can switch to any theme you like. To change theme, kindly select it from the drop down box under the Theme tab.
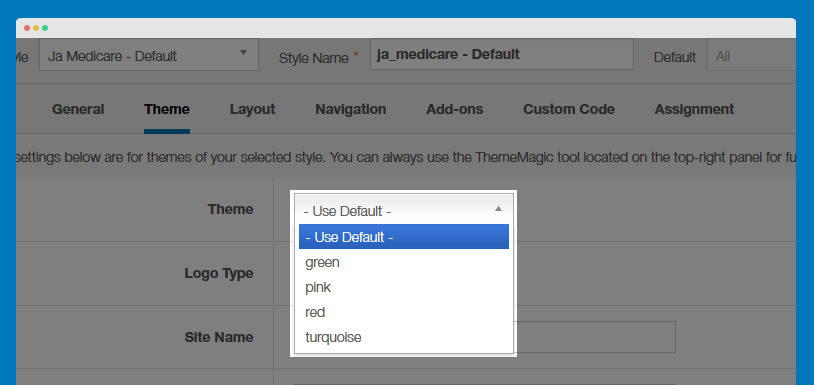
In the Theme tab, you can also change the logo by replacing other image here or select text logo option as you wish.
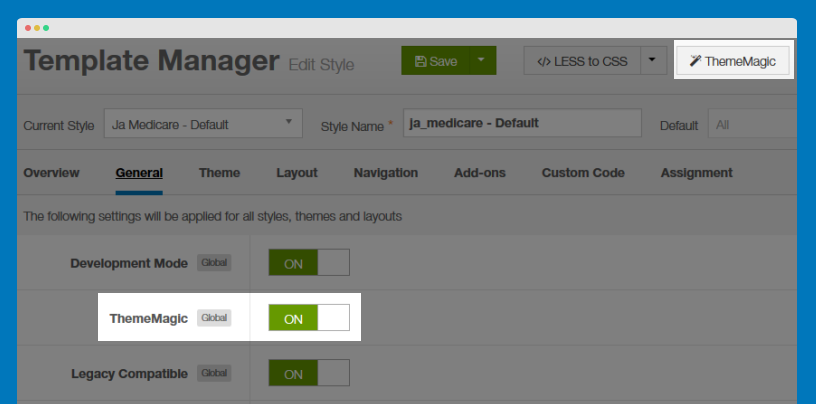
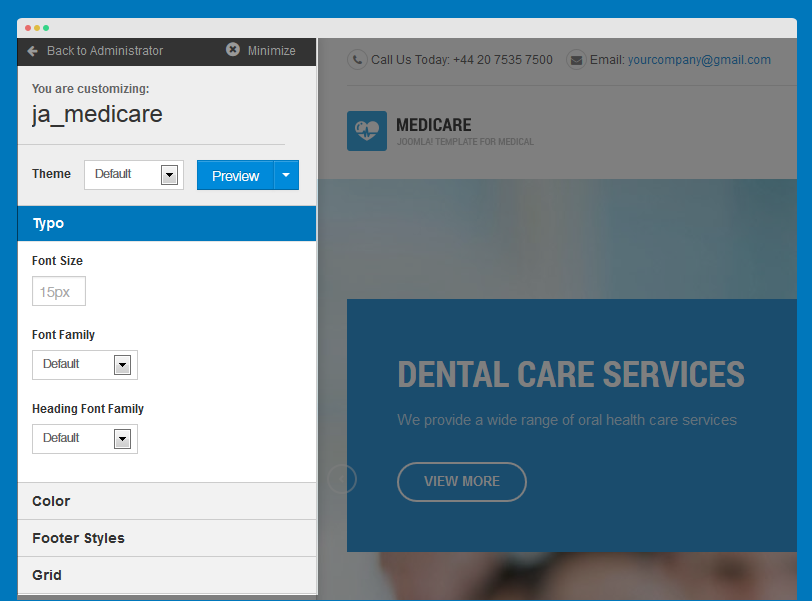
2. ThemeMagic Settings
ThemeMagic is a real time theme customization tool supported by T3 Framework. It allows you to customize any theme without touching in the code.
Step 1: Enable ThemeMagic
In the General tab, enable ThemeMagic then access ThemeMagic's working panel by clicking on ThemeMagic.
Step 2: Select the theme to customize
Tips: Once ThemeMagic is enabled, you can access ThemeMagic from your front-page by adding "?tm=1" after your site url (example: http://ja-medicare.demo.joomlart.com/?tm=1)
View ThemeMagic Documentation VIew ThemeMagic's Video Tutorial
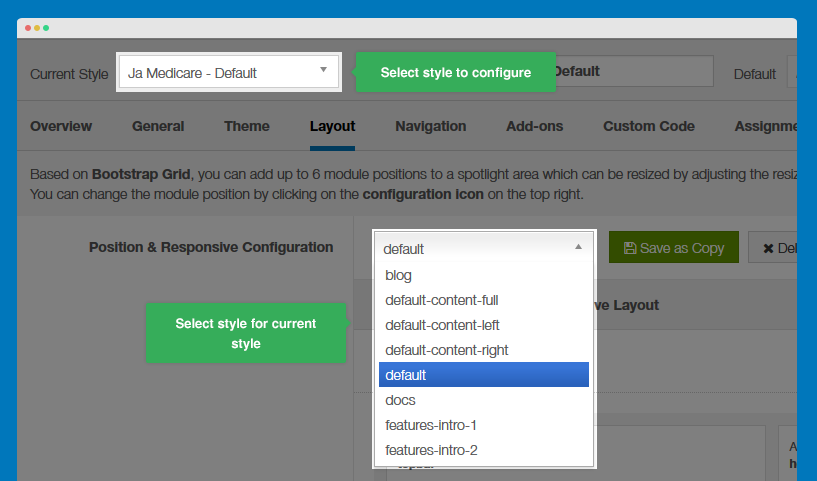
3. Layout Settings
There are 8 layouts that are used in the template. Select the style that you want to work on, then assign the layout for that style accordingly.
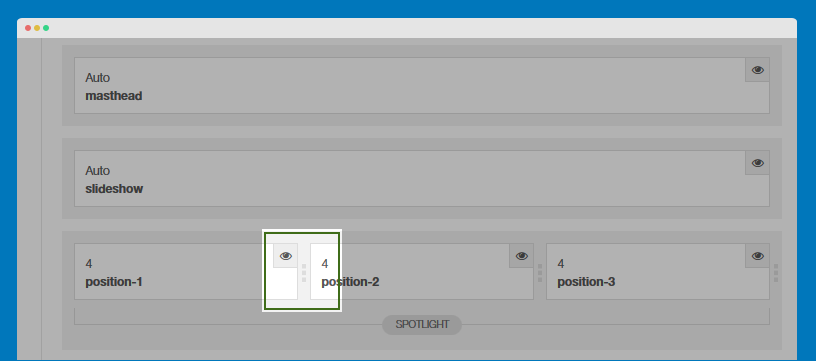
3.1 Layout Structure
Here, you can change the layout structure, module positions in the layout, and more.
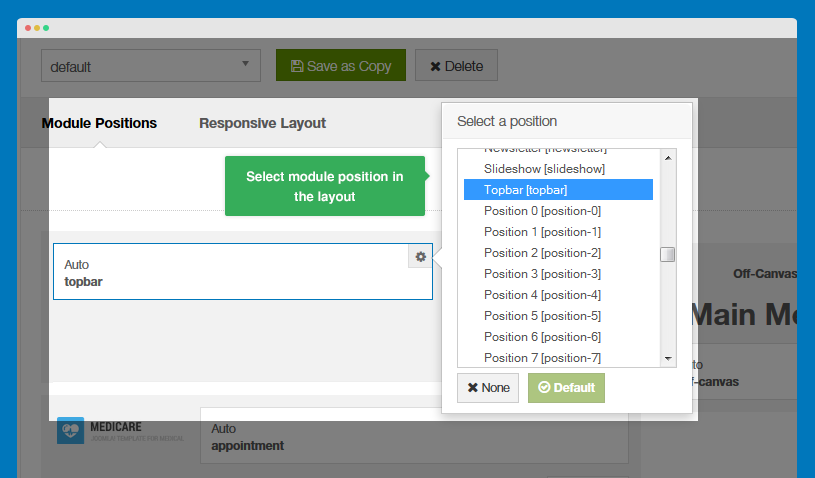
In the spotlight block, you can see the number of positions available.

3.2 Responsive Layouts
JA Sugite supports multiple responsive layouts. In the Responsive layout, select the layout you would like to configure.
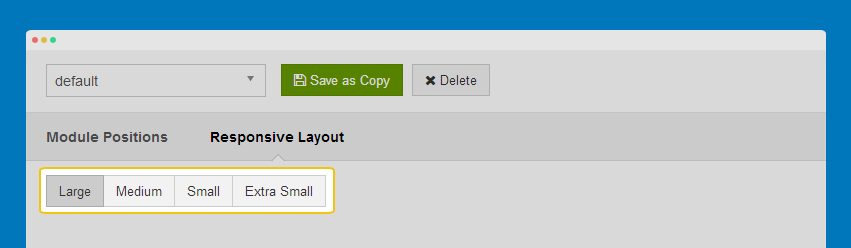
In each responsive layout, you can disable any module position as you wish.
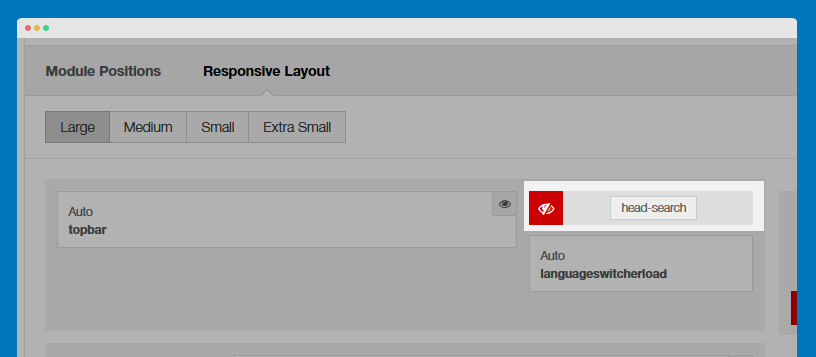
For module positions in the spotlight block, you can drag to resize.
Documentation Layout configuration video Layout customization video
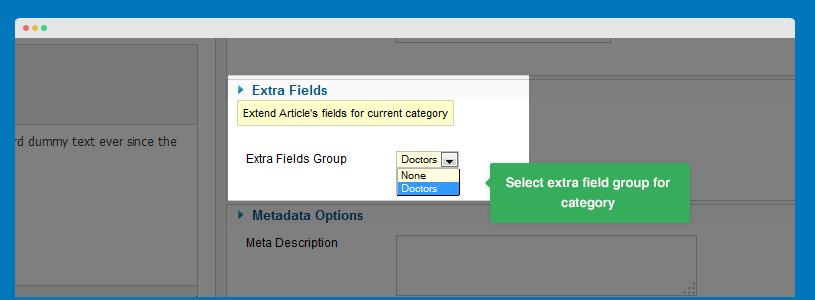
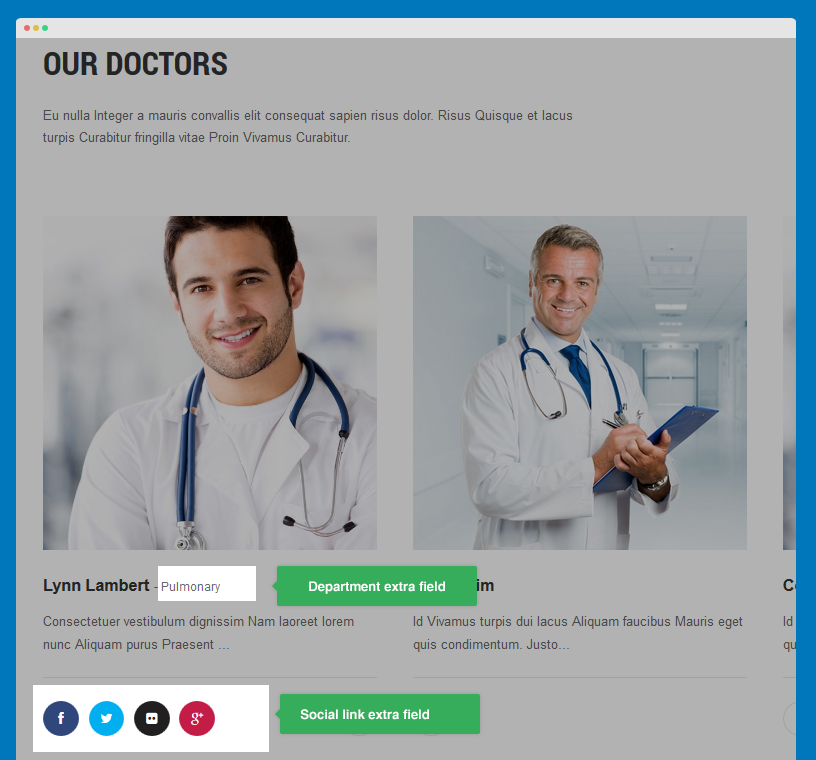
4. Content type settings
To display social links and department on the each article as Demo site, please follow step by step as below:
Step 1: Go to Administrator --> Content --> Categories--> Our doctors category--> Extra Fields tab -->Select "Extra Field Group" is Doctors
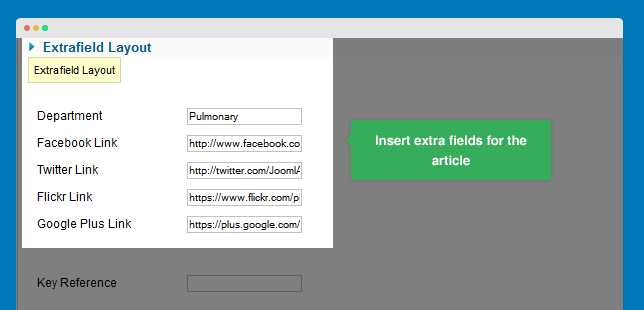
Step 2: Go to Administrator --> Content --> Articles--> Open any article in Our doctors category --> Open Extrafield Layout tab:
Frontend Appearance
How to change logo in JA Medicare template
There are two ways to change the default logo in JA Medicare template.
#1 Upload your own logo
In order to change the logo in JA Medicare template, please follow the steps below:
- Log into your site back-end
- Navigate to Extensions >> Template Manager
![]()
- In Styles, choose ja_medicare - Default
- In the menu section, click on “Theme” tab
- Make sure to choose Logo Type = Image
- Click on Select to browse and upload your ‘Logo Image’
![]()
- Click Save to complete the process.
- Back to your home page, and refresh to see the change.
Note:
In case you use multiple themes in the JA Medicare template.
- In the Theme tab, navigate to the Theme field, then select the theme in which you want to change the logo.
- Repeat all the steps above to change the logo image.
- Don’t forget to Save the changes.
![]()
![]()
#2 Use custom CSS
- Set your logo’s dimensions to the standard size (xxx) and name it as
[your_site_name].png - Upload the logo file to the folder
[root]/templates/ja_medicare/images/ - Create a CSS file named custom.css in the following folder
/your site/templates/ja_medicare/css/
If the logo size is not fit with your site’s look and feel, you can change its size with additional styling code:
- Adding a new class as
.logo-image {}
For example:
   .logo-image {
    width: logo-width;
    height: logo-height;
    background:

url("your-site/ja_medicare/templates/ja_medicare/images/your-site-logo.png") no-repeat / 100% auto;
}

.logo-image img { display: none;}
- Save, and then refresh your site to see the change.
If your new logo does not appear, please follow these steps:
- Log into your site back-end
- Navigate to Extensions >> Template Manager
- Select your template style, then click on the tab “Theme” in the menu.
- In “Logo Image”, click on “X” to clear the field.
- Click Save then repeat all the above steps for your other template styles.
- Go to front-end to see your new logo
How to customize your uploaded logo
Small Logo
To properly display on mobile/tablet or other collapsed screens, the default logo will be replaced by a small logo.
![]()
Enable: On
The small logo uploaded by user will be used. In case no logo is selected in the Small Logo Image field, the default logo will be used. And how it's look
![]()
Enable : Off
The default logo will be used.
Logo type = text
If you don’t want to use a graphic logo, you can always choose the option Text in Logo Type field.
![]()
You will have a beautiful Text Logo in JA Medicare template.
![]()
Leave “Slogan” field blank to hide the slogan in your Text Logo.
![]()
You will get a minimal result, like this.
![]()
Menu System
1. Off-canvas and Collapsed menu
JA Medicare inherits the Off-canvas feature of T3 Framework. Follow the steps below to configure the Off-canvas menu for JA Medicare.
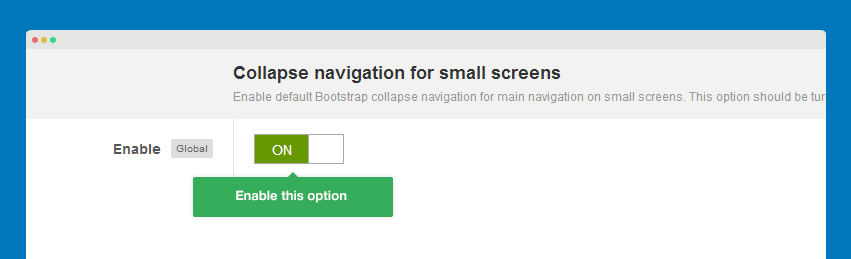
Step 1: Enable collapse navigation for small screens
Open JA Medicare setting panel, open Navigation tab then collapse navigation for small screens.
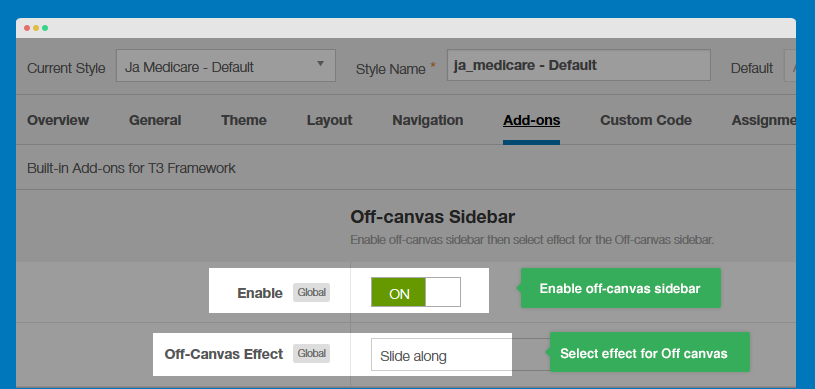
Step 2: Enable Off-canvas
Open JA Medicare setting panel, open the Add-on tab then enable the Off-canvas option.
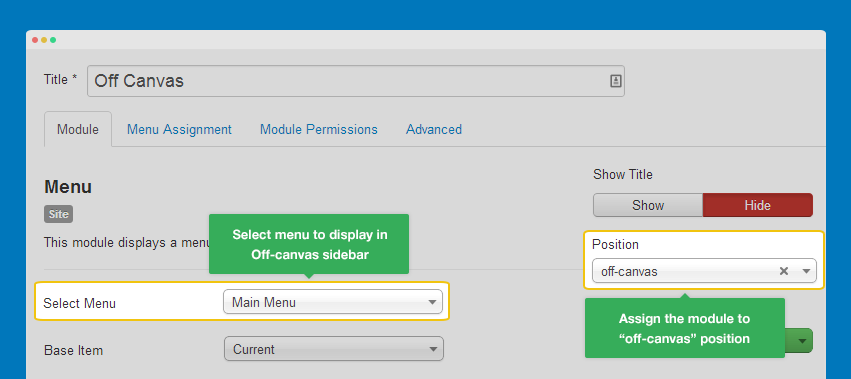
Step 3: Assign a Menu to Off-canvas
First off, you have to have a menu. If you haven't done this before, please refer to this link. Once you have successfully created a menu, please open Module Manager to continue. If you have create a menu module, or using an existing menu module and select this menu module with the above menu (meaning you're connecting them together).
Front-end Appearance

Note:
The Off-canvas can be customized to display in the left side.
To move the Off-canvas to the left side, please open the off-canvas.php file in /templates/ja_medicare/tpls/blocks.
Now, find the following code:
data-pos="right"
Then change it to:
data-pos="left"
2. Megamenu Configuration
JA Medicare supports Megamenu, which is a core feature of T3 Framework.
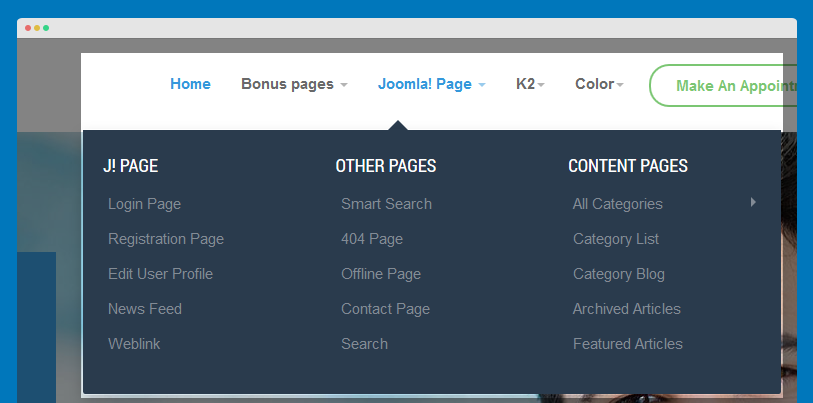
To enable Megamenu, from JA Medicare template back end, navigate to the Navigation tab.
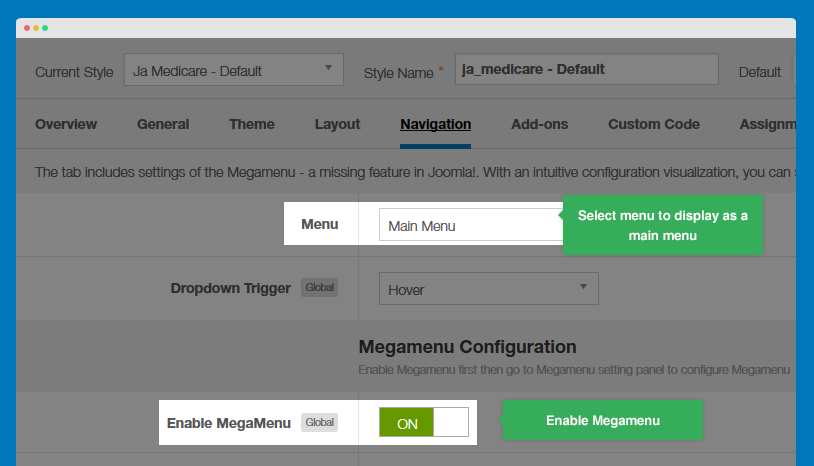
Select the menu that will be displayed as the main menu (mainnav position), then enable Megamenu.
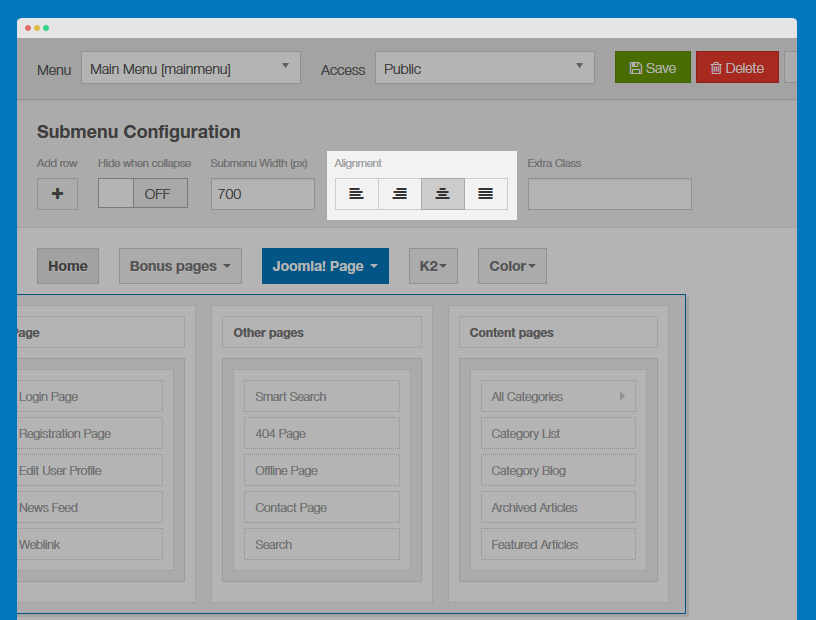
After you successfully save the configuration above, we will move onto configuring the Megamenu by clicking the "Megamenu" button.
It is pretty straight forward. However, please note that in JA Medicare's Megamenu, the submenu of menu item
Joomla! Page, we should select Alignment = center
Extensions Configuration
I. JA Extension Configuration
1. JA Slideshow Lite module
  Module Position: slideshow
  Module Suffix: NOT USED
- Module Back-end Settings
- Front-end Appearance

2. JA Accordion module
  Module Position: sidebar-2
  Module Suffix: Not used
- Module Back-end Settings
- Front-end Appearance
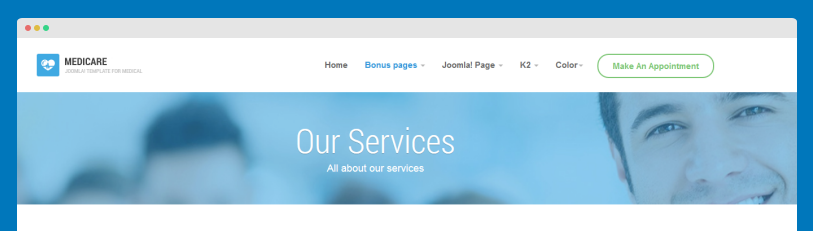
3. JA Masshead module
  Module Position: masthead
  Module Suffix: Not used
- Module Back-end Settings
- Front-end Appearance
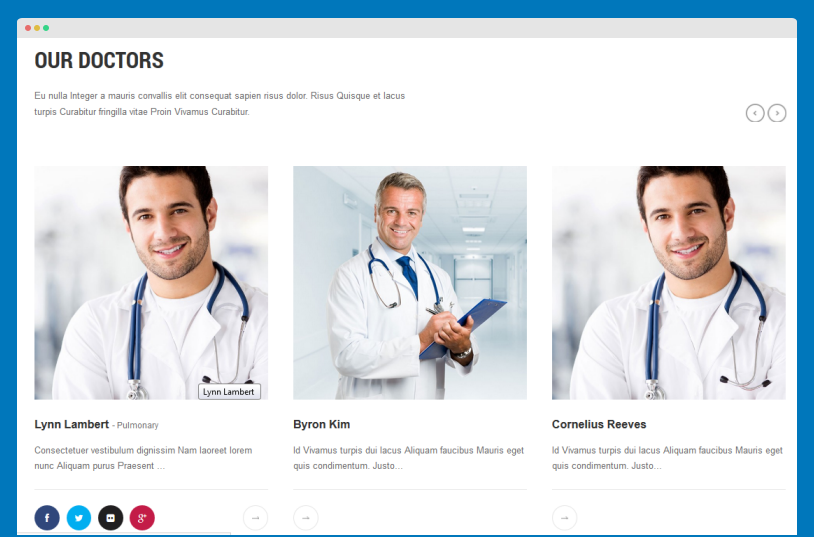
4. JA Contentslider module
4.1 Our Doctors
  Module Position: features-intro
  Module Suffix: Not used
- Module Back-end Settings
- Front-end Appearance
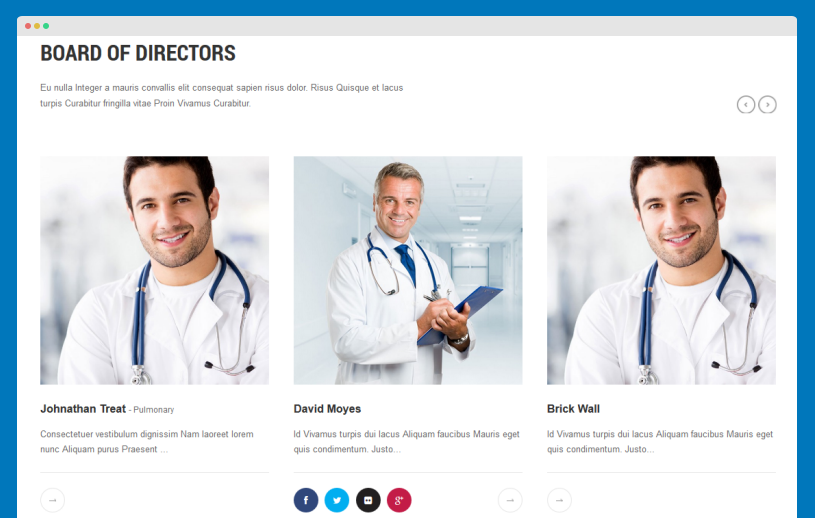
4.2 Board of Directors
  Module Position: features-intro
  Module Suffix: Not used
- Module Back-end Settings
- Front-end Appearance
5. JA Facebook Likebox module
  Module Position: sidebar-2
  Module Suffix: Not used
- Module Back-end Settings
- Front-end Appearance
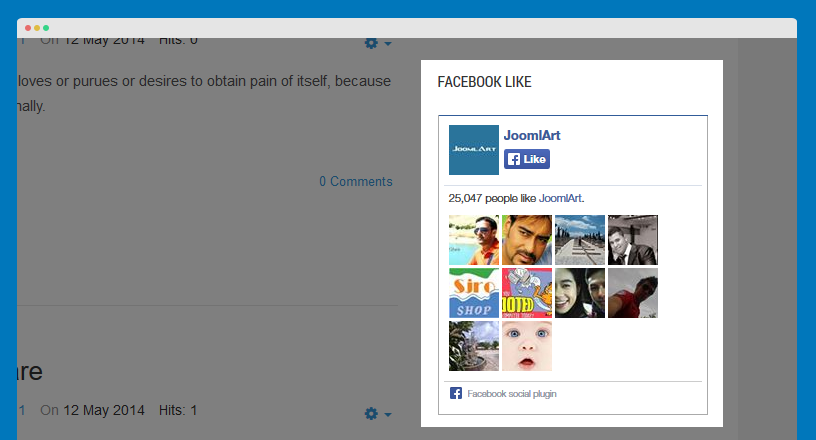
View JA Facebook Like box Docs
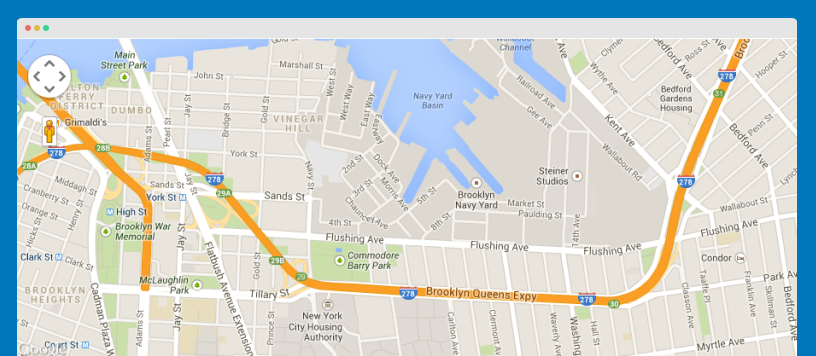
6. JA Google map plugin
Firstly, Enable JA Google Map plugin then configure as the attached image below:
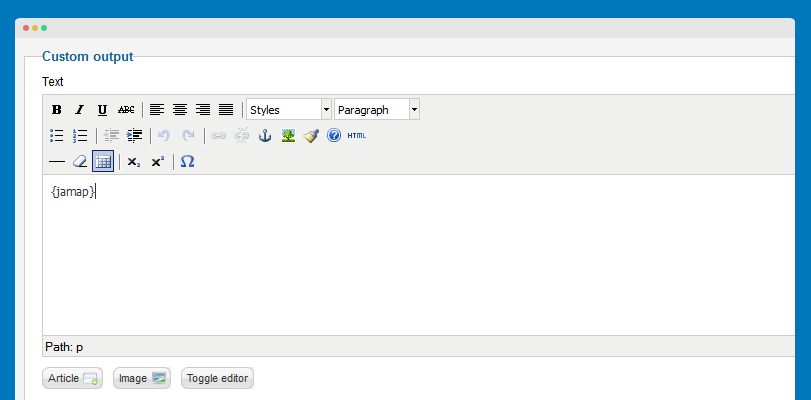
You can define Code container that will be inserted to content to embed Google map, the default is {jamap}. You can insert the Code container to any place in the article, custom HTML ... that you want to embed google map.
In this template, we inserts google map in a custom HTML module then assign to "map" position on Contact page
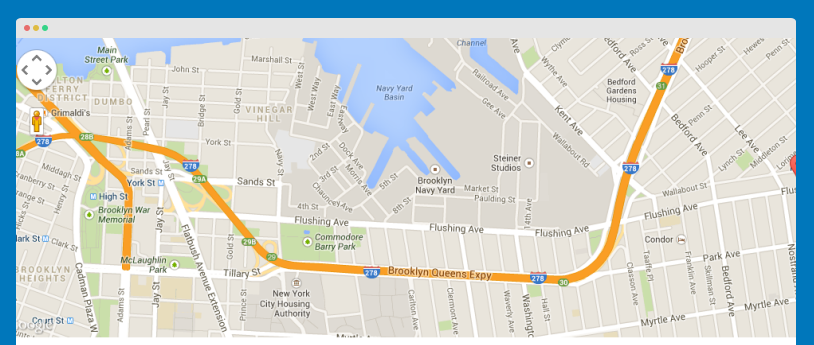
- Front-end Appearance
7. JA Disqus Debate Plugin
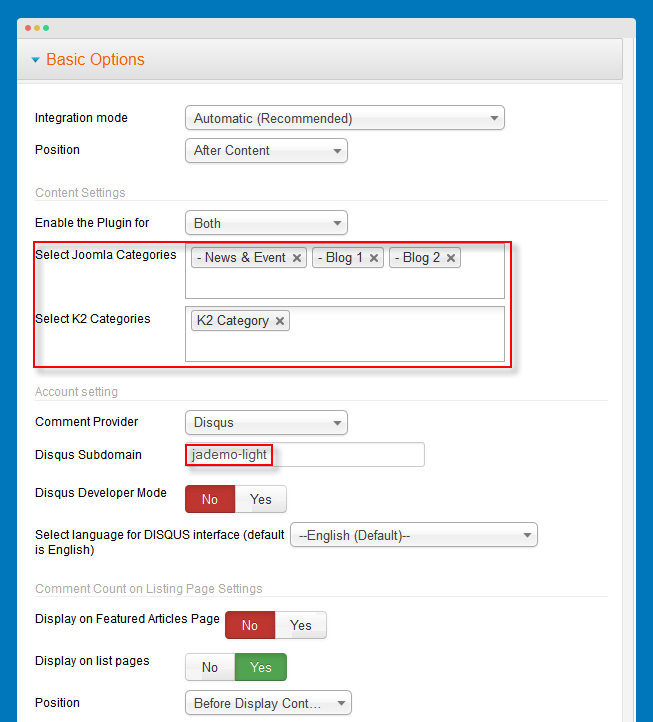
You can enable Diqus comment for selected categories.
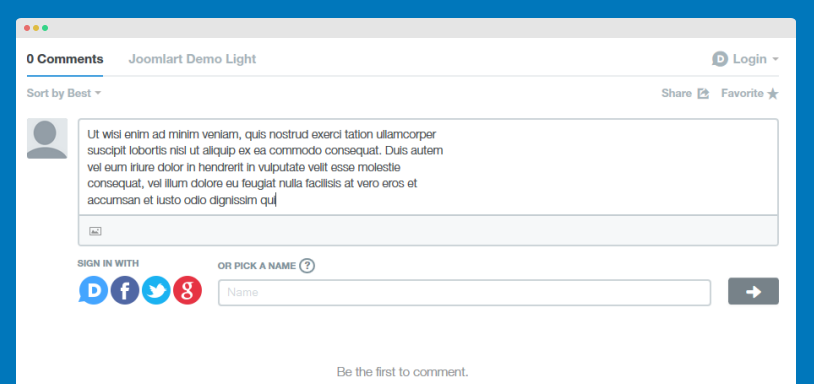
- Front-end Appearance
II. Default Joomla Extensions Configuration
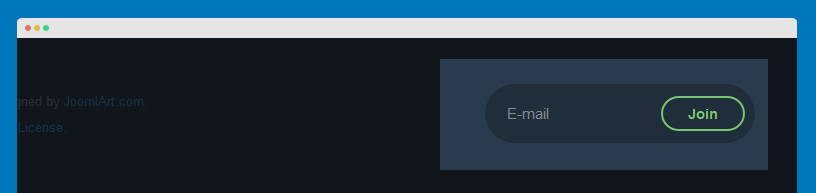
1. AcyMailing Module
  Module Position: newsletter
  Module Suffix:  NOT USED
- Module Back-end Settings
- Front-end Appearance
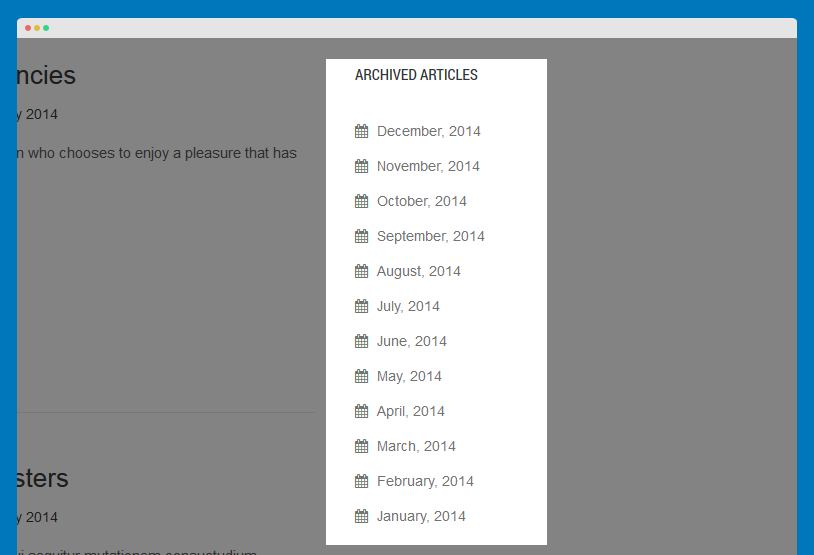
2. Archived Articles
  Module Position: sidebar-2
  Alternative Layout : Default
  Module Suffix:  NOT USED
- Module Back-end Settings
- Front-end Appearance
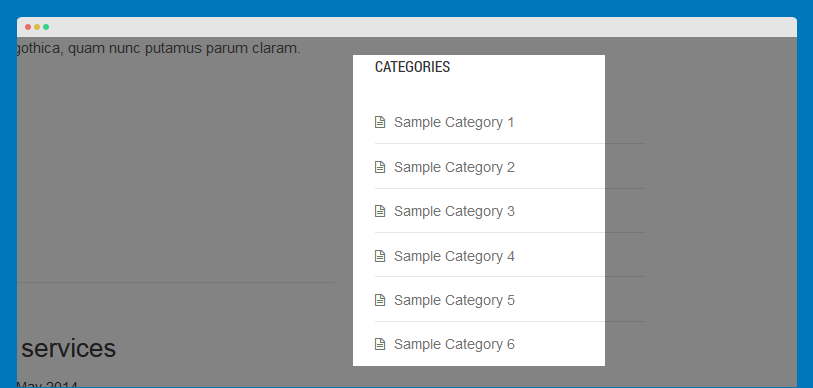
3. Articles Categories
  Module Position: sidebar-2
  Alternative Layout : default
  Module Suffix:  NOT USED
- Module Back-end Settings
- Front-end Appearance
4. Articles Category
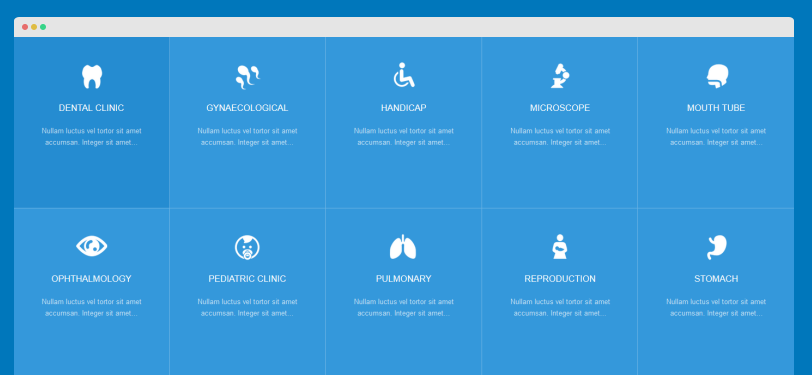
4.1 Departments
  Module Position: features-intro
  Alternative Layout : five-columns
  Module Suffix:  row-feature-full row-feature-nopadding-top
- Module Back-end Settings
- Front-end Appearance
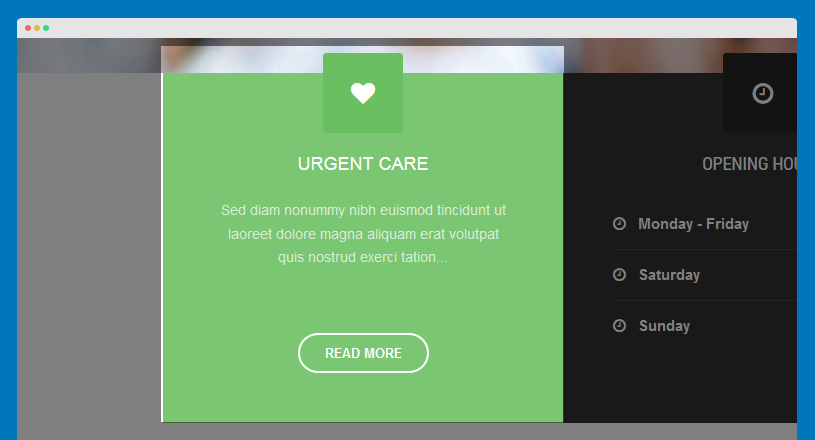
4.2 Emergency Case
  Module Position: position-1
  Alternative Layout : default
  Module Suffix:  box-background-secondary box-icon box-icon-heart
- Module Back-end Settings
- Front-end Appearance
4.3 Doctors Timetable
  Module Position: position-3
  Alternative Layout : Default
  Module Suffix:  box-background-primary box-icon box-icon-note
- Module Back-end Settings
- Front-end Appearance

4.4 Featured News
  Module Position: sidebar-2
  Alternative Layout : default-news
  Module Suffix:  NOT USED
- Module Back-end Settings
- Front-end Appearance

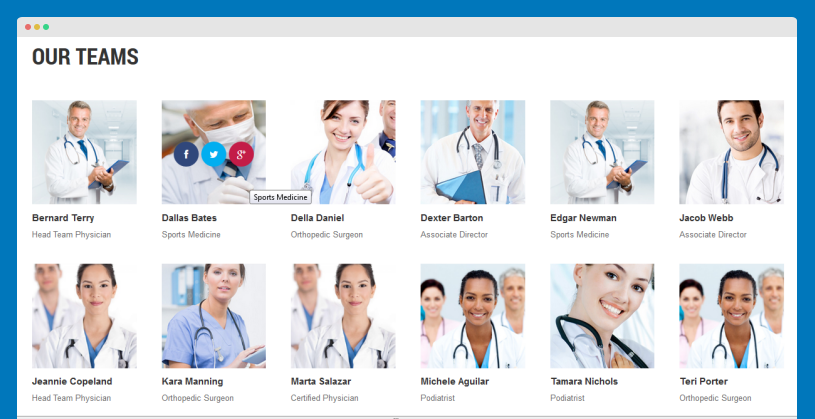
4.5 Our Teams
  Module Position: features-intro
  Alternative Layout : six-columns
  Module Suffix:  NOT USED
- Module Back-end Settings
- Front-end Appearance
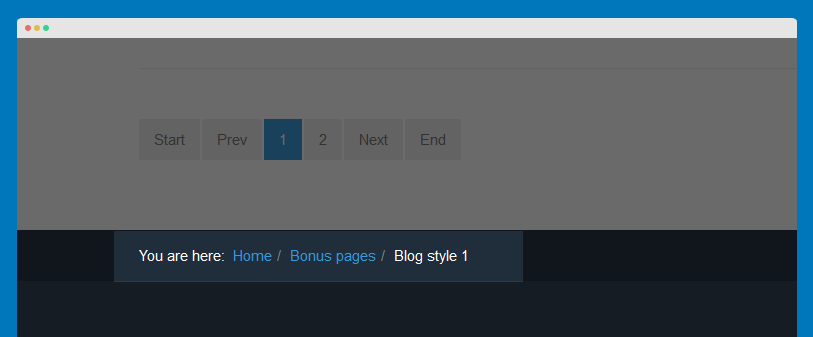
5. Breadcrumbs
  Module Position: navhelper
  Module Suffix: NOT USED
- Module Back-end Settings
- Front-end Appearance
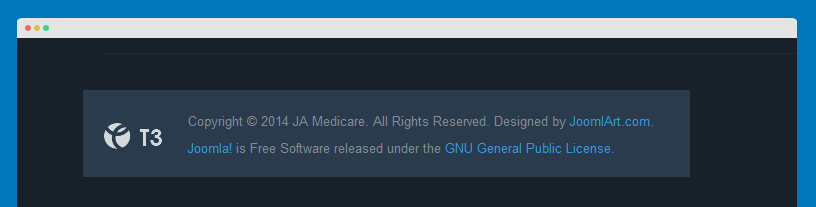
6. Footer
  Module Position: footer
  Module Suffix: NOT USED
- Module Back-end Settings
- Front-end Appearance
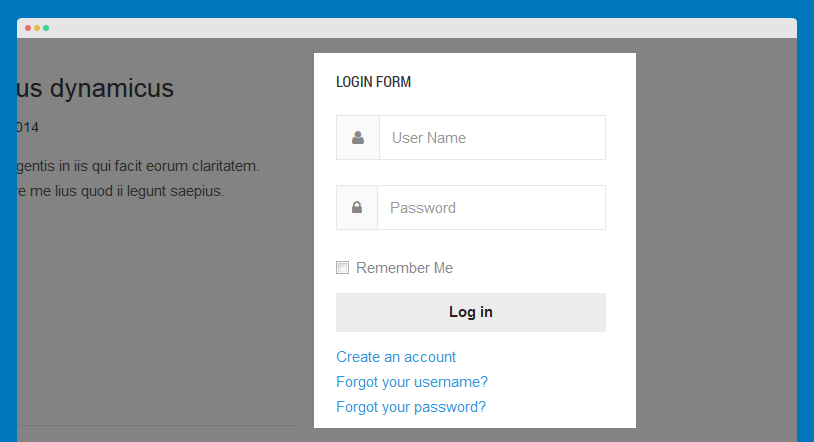
6. Login Form
  Module Position: sidebar-2
  Module Suffix: NOT USED
- Module Back-end Settings
- Front-end Appearance
7. Menu
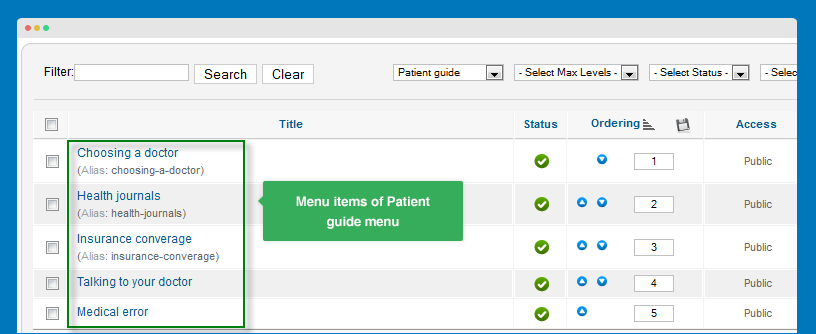
7.1. Patient guide module
To have it displayed as it is per Demo site, please follow the step by step instruction as below:
Step 1: Create "Patient guide" menu and add menu items
- Go to Administrator >> Menus >> Menu Manager >> Add New Menu: Patient guide.
- Add New Menu Items for Patient guide Menu .
Step 2: Add "Patient guide" menu module
This module is Joomla default module, that means when you install Joomla fresh, this module is ready to use.
Go to Administrator >> Extensions >> Modules manager >> Add New Menu Module : Patient guide .
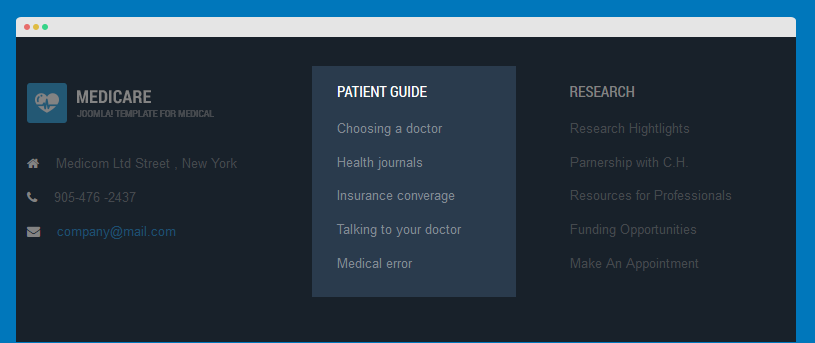
  Module Position: footer-1
  Module Suffix: NOT USED
- Module Back-end Settings
- Front-end Appearance
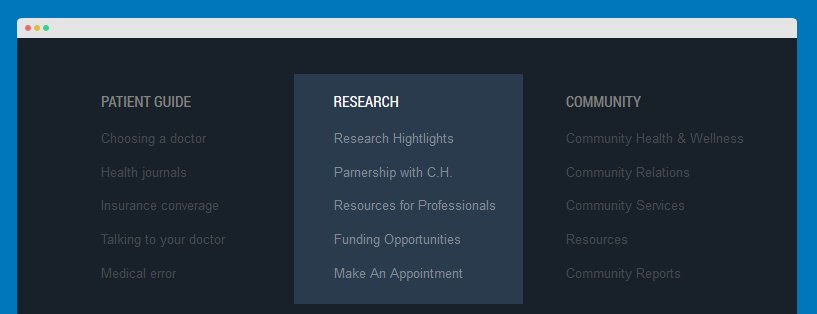
7.2. Research menu module
To have it displayed as it is per Demo site, please follow the step by step instruction as below:
Step 1: Create "Research" menu and add menu items
- Go to Administrator >> Menus >> Menu Manager >> Add New Menu: Research.
- Add New Menu Items for the Menu .

Step 2: Add "Research" menu module
This module is Joomla default module, that means when you install Joomla fresh, this module is ready to use.
Go to Administrator >> Extensions >> Modules manager >> Add New Menu Module : Research .
  Module Position: footer-2
  Module Suffix: NOT USED
- Module Back-end Settings
- Front-end Appearance
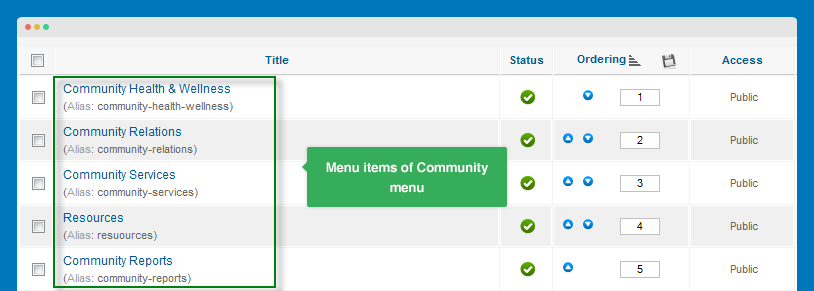
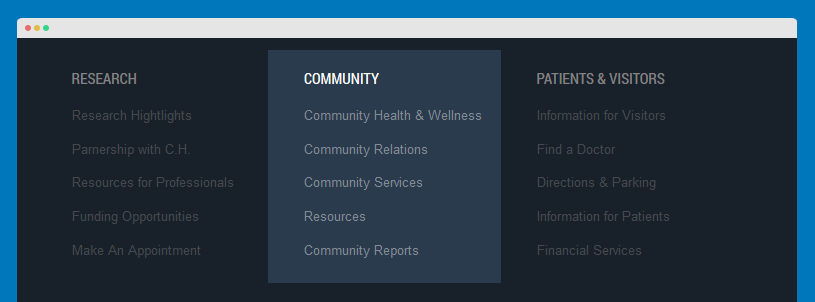
7.3. Community menu module
To have it displayed as it is per Demo site, please follow the step by step instruction as below:
Step 1: Create "Community" menu and add menu items
- Go to Administrator >> Menus >> Menu Manager >> Add New Menu: Community.
- Add New Menu Items for the Menu .
Step 2: Add "Community" menu module
This module is Joomla default module, that means when you install Joomla fresh, this module is ready to use.
Go to Administrator >> Extensions >> Modules manager >> Add New Menu Module : Community .
  Module Position: footer-3
  Module Suffix: NOT USED
- Module Back-end Settings
- Front-end Appearance
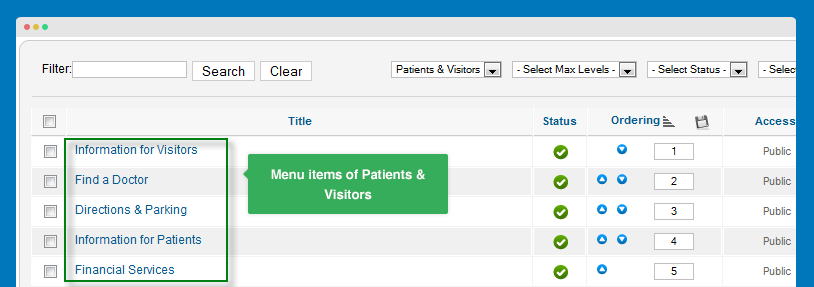
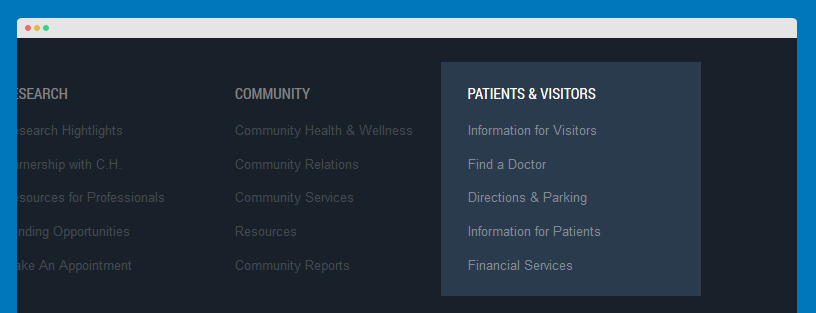
7.4. Patients & Visitors menu module
To have it displayed as it is per Demo site, please follow the step by step instruction as below:
Step 1: Create "Patients & Visitors" menu and add menu items
- Go to Administrator >> Menus >> Menu Manager >> Add New Menu: Patients & Visitors.
- Add New Menu Items for the Menu .
Step 2: Add "Patients & Visitors" menu module
This module is Joomla default module, that means when you install Joomla fresh, this module is ready to use.
Go to Administrator >> Extensions >> Modules manager >> Add New Menu Module : Patients & Visitors .
  Module Position: footer-4
  Module Suffix: NOT USED
- Module Back-end Settings
- Front-end Appearance
7.5. Off canvas menu module
To have it displayed as it is per Demo site, please follow the step by step instruction as below:
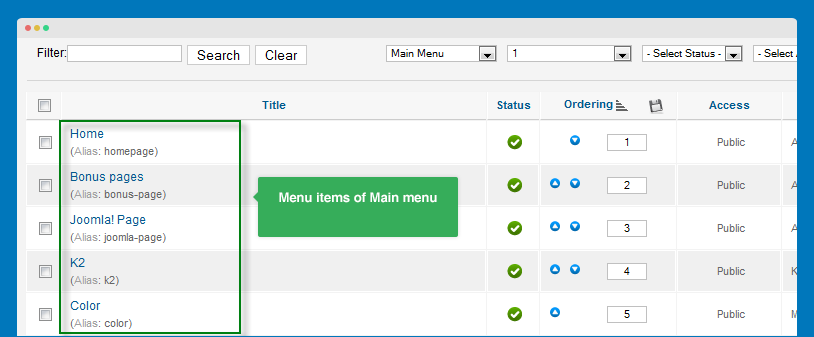
Step 1: Create a menu which you want to display on off-canvas sidebar, example: Main menu
- Go to Administrator >> Menus >> Menu Manager >> Add New Menu: Main menu.
- Add New Menu Items for Main Menu .
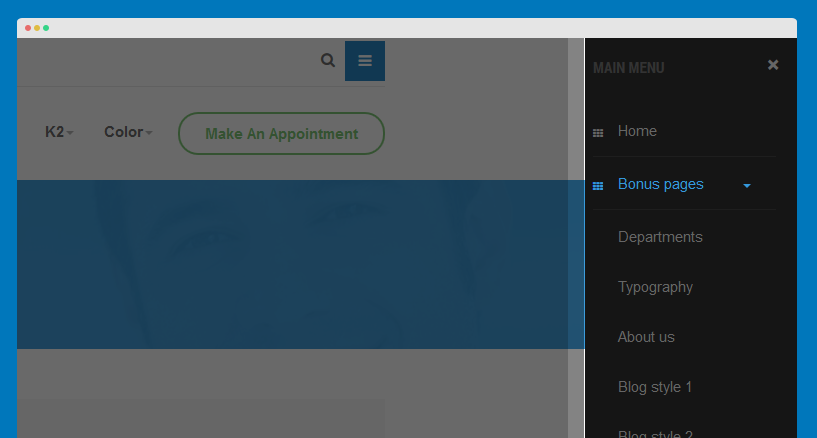
Step 2: Add "Off Canvas" menu module
This module is Joomla default module, that means when you install Joomla fresh, this module is ready to use.
Go to Administrator >> Extensions >> Modules manager >> Add New Menu Module : Off Canvas .
  Module Position: off-canvas
  Module Suffix: _menu
- Module Back-end Settings
- Front-end Appearance
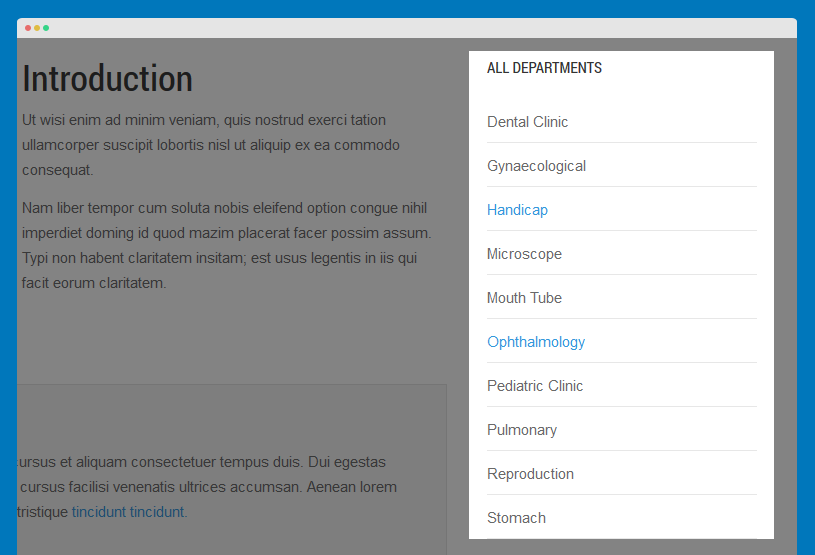
7.6. All Departments menu module
To have it displayed as it is per Demo site, please follow the step by step instruction as below:
Step 1: Create "Departments" menu and add menu items
- Go to Administrator >> Menus >> Menu Manager >> Add New Menu: Departments.
- Add New Menu Items for Departments Menu .

Step 2: Add "All Departments" menu module
This module is Joomla default module, that means when you install Joomla fresh, this module is ready to use.
Go to Administrator >> Extensions >> Modules manager >> Add New Menu Module : All Departments .
  Module Position: sidebar-2
  Module Suffix: Not Used
- Module Back-end Settings
- Front-end Appearance
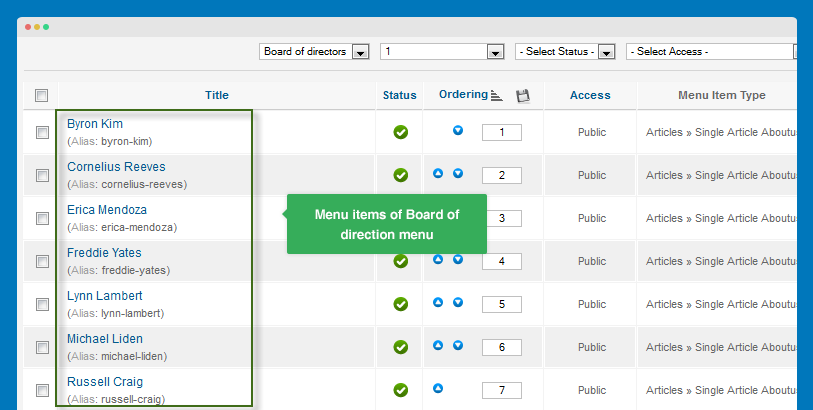
7.7. Board of directors menu module
To have it displayed as it is per Demo site, please follow the step by step instruction as below:
Step 1: Create "Board of directors" menu and add menu items
- Go to Administrator >> Menus >> Menu Manager >> Add New Menu: Board of directors.
- Add New Menu Items for Board of directors Menu .
Step 2: Add "Board of directors" menu module
This module is Joomla default module, that means when you install Joomla fresh, this module is ready to use.
Go to Administrator >> Extensions >> Modules manager >> Add New Menu Module : Board of directors .
  Module Position: sidebar-2
  Module Suffix: Not Used
- Module Back-end Settings
- Front-end Appearance

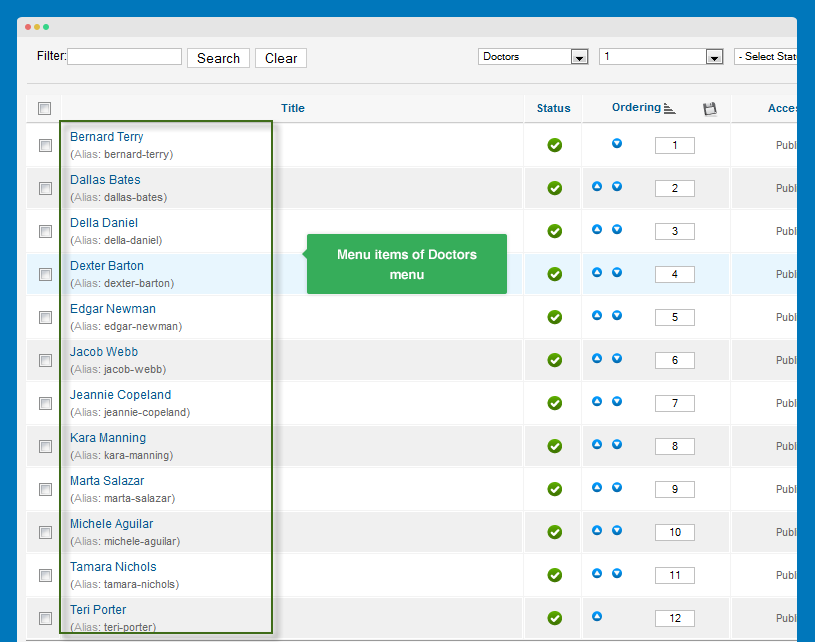
7.8. Our Teams menu module
To have it displayed as it is per Demo site, please follow the step by step instruction as below:
Step 1: Create "Doctor" menu and add menu items
- Go to Administrator >> Menus >> Menu Manager >> Add New Menu: Board of directors.
- Add New Menu Items for Doctor Menu .
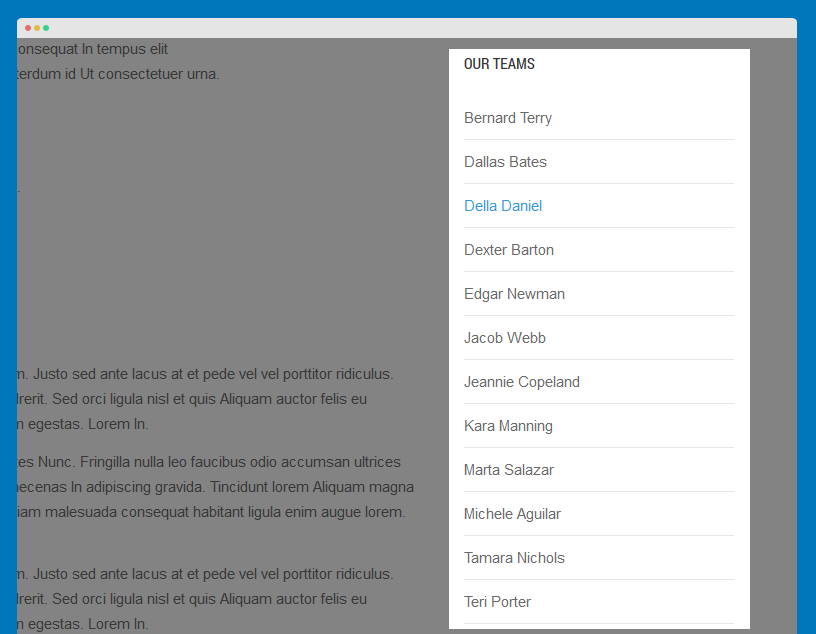
Step 2: Add "Our Teams" menu module
This module is Joomla default module, that means when you install Joomla fresh, this module is ready to use.
Go to Administrator >> Extensions >> Modules manager >> Add New Menu Module : Our Teams .
  Module Position: sidebar-2
  Module Suffix: Not Used
- Module Back-end Settings
- Front-end Appearance
8. Smart Search module
  Module Position: head-search
  Module Suffix: NOT USED
- Module Back-end Settings
- Front-end Appearance

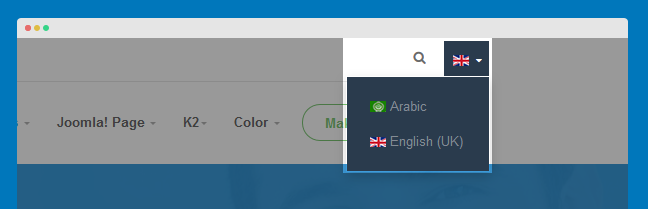
9. Language Switcher
  Module Position: languageswitcherload
  Module Suffix: NOT USED
- Module Back-end Settings
- Front-end Appearance
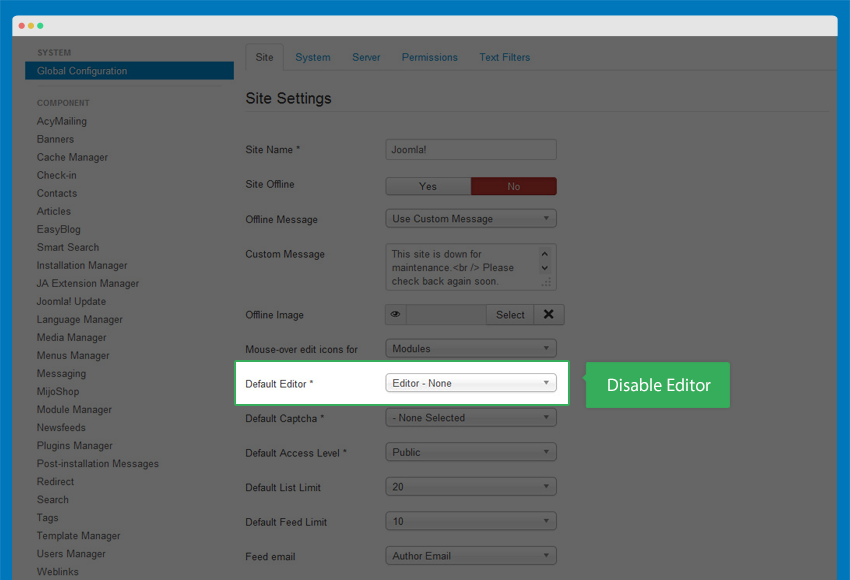
Custom HTML Module
Before working with Custom HTML module, please disable the default Editor under Global Configuration
Go to Backend -> Site -> Global Configuration:
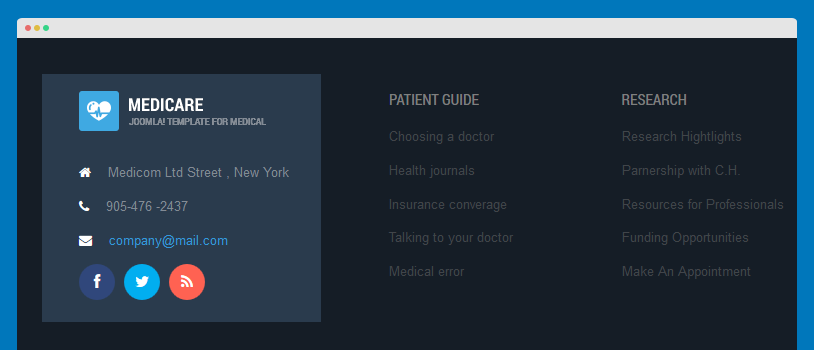
1. Footer Info
  Module Position: footer-info
  Module Suffix:  NOT USED
HTML code:
<a href="/index.php"><img src="/images/joomlart/logo-footer.png" border="0" alt="" /></a>
<ul>
	<li><i class="fa fa-home secondary-background"></i> Medicom Ltd Street , New York</li>
	<li><i class="fa fa-phone cyan-background"></i> 905-476 -2437 </li>
	<li><i class="fa fa-envelope primary-background"></i> <a href="/">company@mail.com</a></li>
</ul>

<!-- AddThis Follow BEGIN -->
<div class="addthis_toolbox">
<a class="addthis_button_facebook_follow" addthis:userid="joomlart"><i class="fa fa-facebook"></i></a>
<a class="addthis_button_twitter_follow" addthis:userid="JoomlArt"><i class="fa fa-twitter"></i></a>
<a class="addthis_button_rss_follow" addthis:userid="joomla.org/rss.html"><i class="fa fa-rss"></i></a>
</div>
<script type="text/javascript" src="//s7.addthis.com/js/300/addthis_widget.js#pubid=ra-523d4894767843b5"></script>
<!-- AddThis Follow END -->
Follow the steps below to add the "AddThis" buttons.
Step 1: Get Addthis code
Access AddThis site, select service
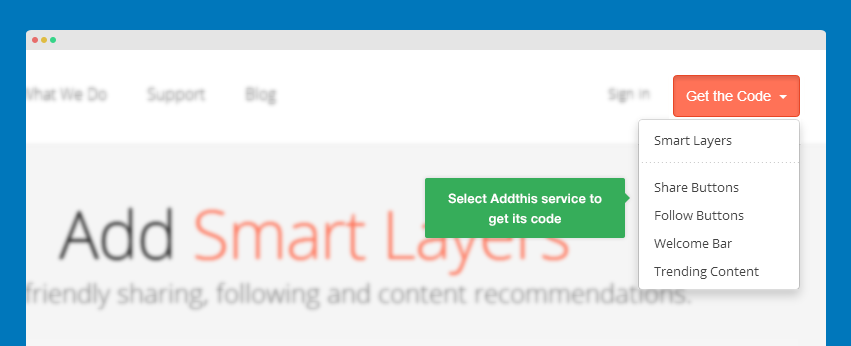
Get AddThis service code
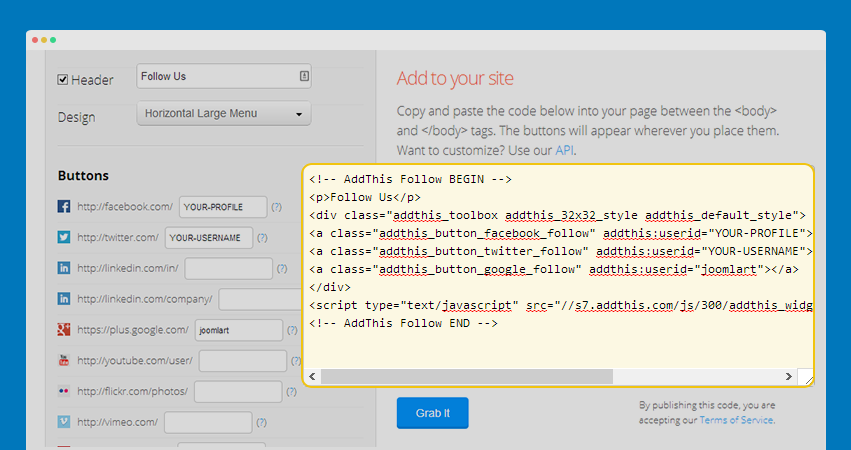
<!-- AddThis Follow BEGIN -->
<div class="addthis_toolbox">
<a class="addthis_button_facebook_follow" addthis:userid="joomlart"><i class="fa fa-facebook"></i></a>
<a class="addthis_button_twitter_follow" addthis:userid="JoomlArt"><i class="fa fa-twitter"></i></a>
<a class="addthis_button_rss_follow" addthis:userid="joomla.org/rss.html"><i class="fa fa-rss"></i></a>
</div>
<script type="text/javascript" src="//s7.addthis.com/js/300/addthis_widget.js#pubid=ra-523d4894767843b5"></script>
<!-- AddThis Follow END -->
Step 2: add code to your site
Create a custom HTML module then paste the AddThis code, onto Our Socials custom HTML module
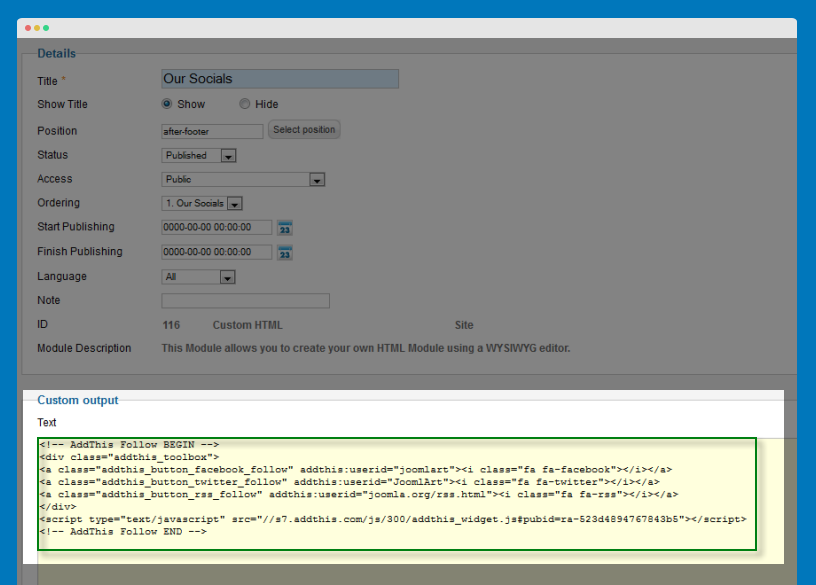
- Module Back-end Settings
- Front-end Appearance
2. Make An Appointment
  Module Position: appointment
  Module Suffix: Not used
HTML code:
<a class="btn btn-secondary" href="/blog/news-updates/joomlart-site-of-the-month-contest-reloaded">Make An Appointment</a>
- Module Back-end Settings
- Front-end Appearance

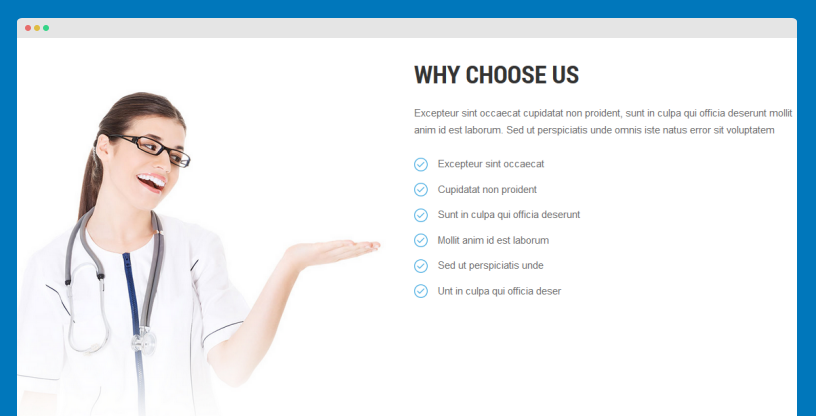
3. Why Choose Us
  Module Position: features-intro
  Module Suffix:   row-feature-nopadding-bottom
HTML code:
<div class="row screen-xs-relative">
<div class="col-xs-4 col-md-6 screen-xs-absolute">
<div data-animation="move-from-bottom" class="ja-animate"><img src="/images/joomlart/demo/why-choose-us.jpg" alt="" /></div>
</div>
<div class="col-xs-12 col-md-6">
<h3>Why Choose Us</h3>
<p>Excepteur sint occaecat cupidatat non proident, sunt in culpa qui officia deserunt mollit anim id est laborum. Sed ut perspiciatis unde omnis iste natus error sit voluptatem</p>
<ul class="check-list">
  <li>Excepteur sint occaecat</li>
  <li>Cupidatat non proident</li>
  <li>Sunt in culpa qui officia deserunt</li>
  <li>Mollit anim id est laborum</li>
  <li>Sed ut perspiciatis unde</li>
  <li>Unt in culpa qui officia deser</li>
</ul>
</div>
</div>
- Module Back-end Settings
- Front-end Appearance
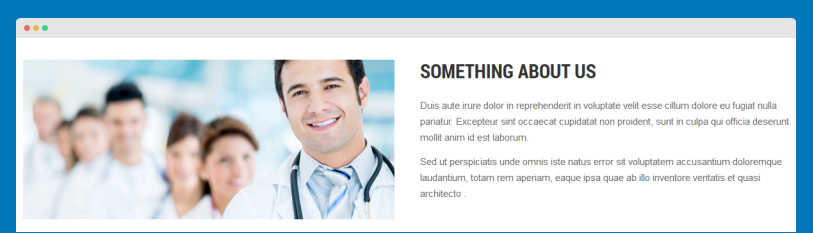
4. About us
  Module Position: features-intro
  Alternative Layout: Default
  Module Suffix: Not Used
HTML code:
<div class="about-us row">

		<div class="col-sm-6">
			<img src="/images/joomlart/about_page/demo1.jpg" alt="Sample image" />
		</div>

		<div class="col-sm-6">
			<h3>Something about us</h3>
			<p>Duis aute irure dolor in reprehenderit in voluptate velit esse cillum dolore eu fugiat nulla pariatur. Excepteur sint occaecat cupidatat non proident, sunt in culpa qui officia deserunt mollit anim id est laborum. </p>
			<p>Sed ut perspiciatis unde omnis iste natus error sit voluptatem accusantium doloremque laudantium, totam rem aperiam, eaque ipsa quae ab illo inventore veritatis et quasi architecto .</p>
		</div>

</div>
- Module Back-end Settings
- Front-end Appearance
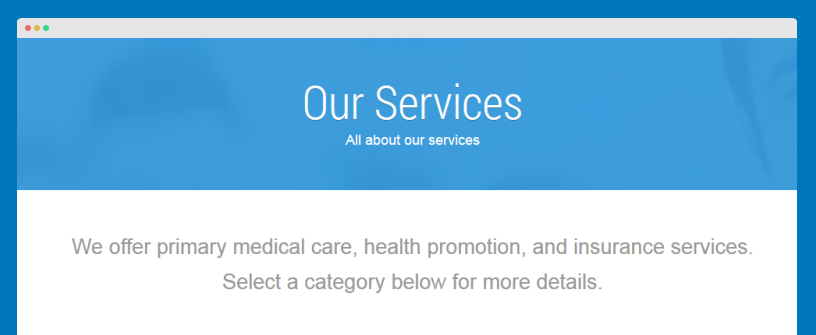
5. Services Intro
  Module Position: features-intro
  Module Suffix:  services-intro-module
HTML code:
<p class="services-intro-txt">We offer primary medical care, health promotion, and insurance services.<br> Select a category below for more details.</p>
- Module Back-end Settings
- Front-end Appearance
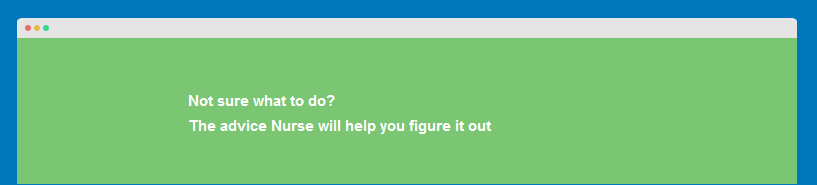
6. Banner
  Module Position: features-intro
  Module Suffix:  box-background-secondary row-feature-full
HTML code:
<div class="main-container clearfix"><div class="pull-left"><p>Not sure what to do? </p><p>The advice Nurse will help you figure it out</p></div> <a class="btn btn-border">Make an appointment</a></div>
- Module Back-end Settings
- Front-end Appearance
7. Map
  Module Position: map
  Module Suffix:  NOT USED
HTML code:
<p>{jamap}</p>
- Module Back-end Settings
- Front-end Appearance
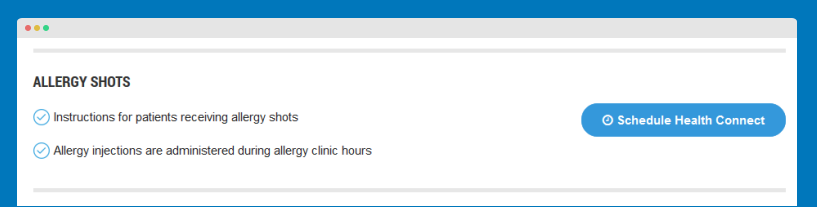
8. Services CallOut Box
  Module Position: position-1
  Module Suffix:  services-intro-module
HTML code:
<div class="services-callout">
<ul>
<li><h4>Allergy Shots</h4></li>

<li><a href="#">Instructions for patients receiving allergy shots</a></li>
<li><a href="#">Allergy injections are administered during allergy clinic hours</a></li>
</ul>
<a href="#" class="btn btn-primary"><i class="fa fa-clock-o"></i> Schedule Health Connect</a>
</div>
- Module Back-end Settings
- Front-end Appearance
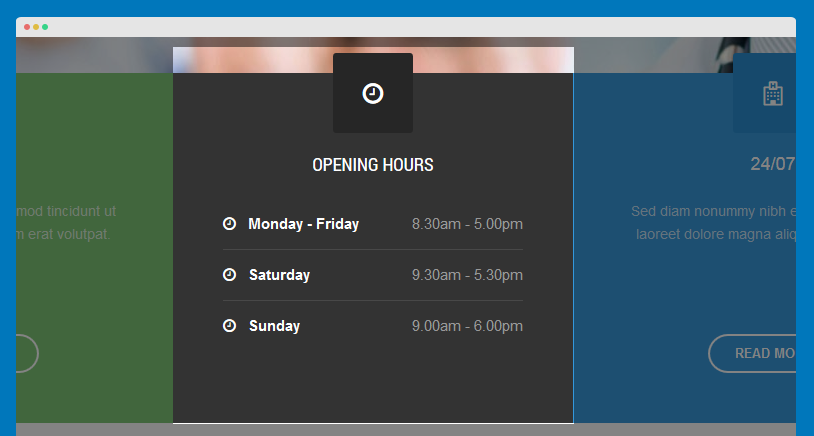
9. Opening Hours
  Module Position: position-2
  Module Suffix:  box-background-dark box-icon box-icon-clock
HTML code:
<table>
<tr>
  <td><i class="fa fa-clock-o"></i>Monday - Friday</td>
  <td>8.30am - 5.00pm</td>
</tr>
<tr>
  <td><i class="fa fa-clock-o"></i>Saturday</td>
  <td>9.30am - 5.30pm</td>
</tr>
<tr>
  <td><i class="fa fa-clock-o"></i>Sunday</td>
  <td>9.00am - 6.00pm</td>
</tr>
</table>
- Module Back-end Settings
- Front-end Appearance
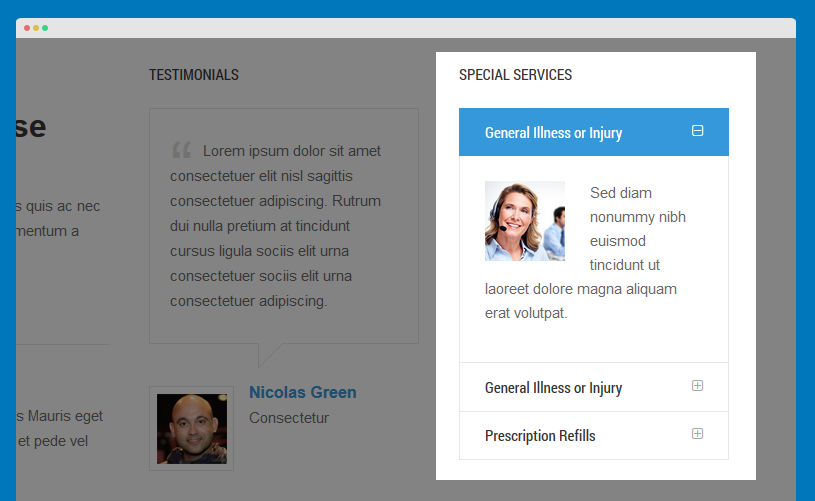
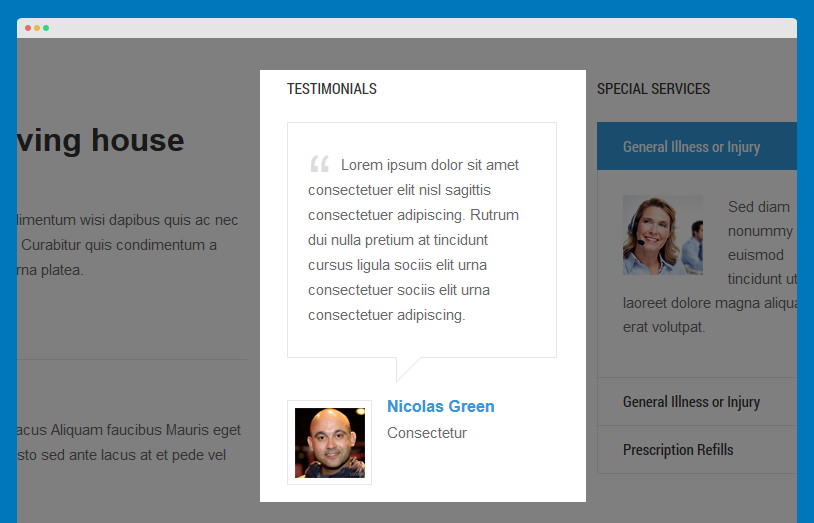
10. Testimonials
  Module Position: sidebar-1
  Module Suffix: Not used
HTML code:
<div class="testminonials">
     <blockquote>
           <p>Lorem ipsum dolor sit amet consectetuer elit nisl sagittis consectetuer adipiscing. Rutrum dui nulla pretium at tincidunt cursus ligula sociis elit urna consectetuer sociis elit urna consectetuer adipiscing.</p>
    </blockquote>
    <div class="attribution">
        <div class="ja-thumb"><img src="/images/joomlart/demo/Layer.png" alt="" /></div>
	<p class="ja-author">Nicolas Green</p>
         <cite>Consectetur</cite>
    </div>
</div>
- Module Back-end Settings
- Front-end Appearance
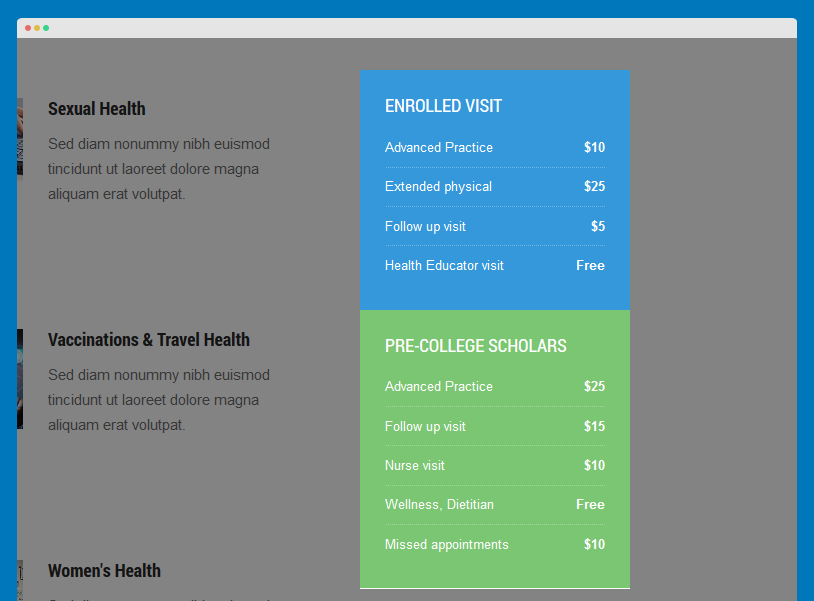
11. Services Price
  Module Position: sidebar-1
  Module Suffix:  services-price-module
HTML code:
<div class="services-price">
	<div class="services-price-box box-third">
		<h4>ENROLLED visit</h4>
		<p class="clearfix">Advanced Practice	<span>$10</span></p>
		<p class="clearfix">Extended physical <span>$25</span></p>
		<p class="clearfix">Follow up visit	<span>$5</span></p>
		<p class="clearfix">Health Educator visit	 <span>Free</span></p>
	</div>
	<div class="services-price-box box-secondary">
		<h4>PRE-COLLEGE SCHOLARS</h4>
		<p class="clearfix">Advanced Practice <span>$25</span></p>
		<p class="clearfix">Follow up visit	<span>$15</span></p>
		<p class="clearfix">Nurse visit	<span>$10</span></p>
		<p class="clearfix">Wellness, Dietitian <span>Free</span></p>
		<p class="clearfix">Missed appointments    <span>$10</span></p>

	</div>
</div>
- Module Back-end Settings
- Front-end Appearance
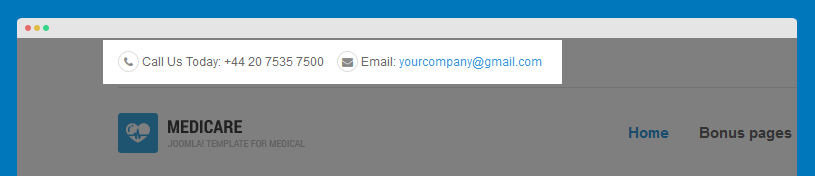
12. Top Contact
  Module Position: topbar
  Module Suffix: Not used
HTML code:
<ul class="top-contact">
	<li><i class="fa fa-phone"></i> Call Us Today: +44 20 7535 7500</li>
	<li><i class="fa fa-envelope"></i> Email: <a href="/">yourcompany@gmail.com</a></li>
</ul>
- Module Back-end Settings
- Front-end Appearance
Multiple Layouts Setting
I. Default Layouts
JA Medicare comes with various types of layout that definitely benefits any business site. We don't use any 3rd party extension to work out these layouts, instead we believe in the power of Joomla core - Joomla com_content to come up with these.
II. Build up your own page
To assign a layout to a certain page, please follow our instruction below.
Step 1: Clone the default style
When you install JA Medicare template, there is only one style: the default style. However, you can create an unlimited number of different styles for your template as needed.
Why do you need to create a new style?
To have multiple layouts on your site, you need to create multiple styles. Each of these styles will be assigned to one layout.
So what is the difference between template and template style? - Check this out
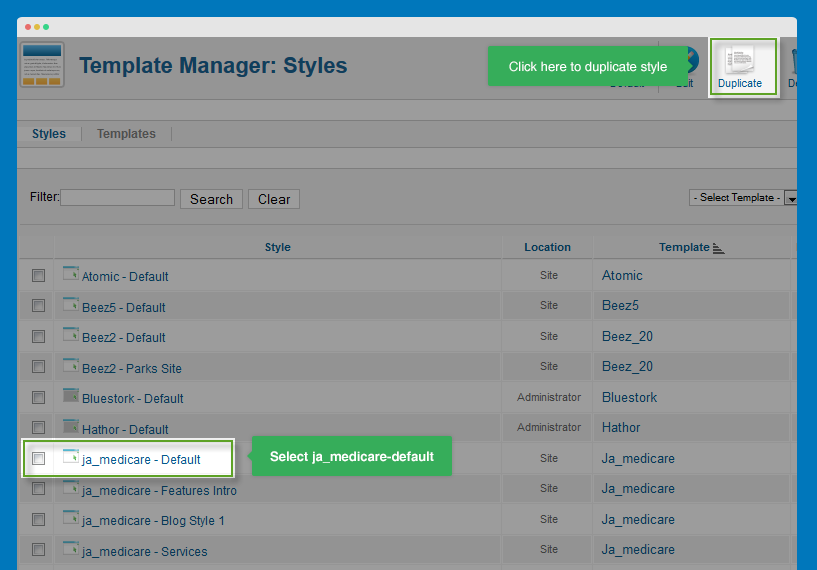
To create a new style in ja_medicare, open the template manager panel, select ja_medicare - Default style then hit the Duplicate button.
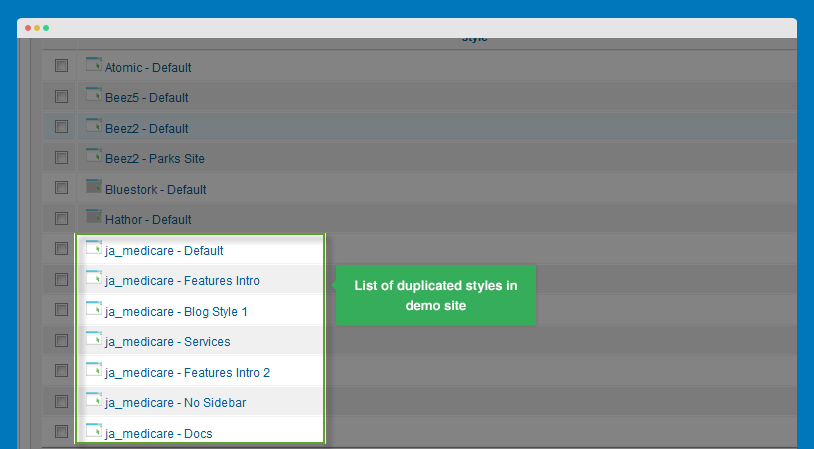
On the demo site, we have already duplicated a number of styles for different layouts.
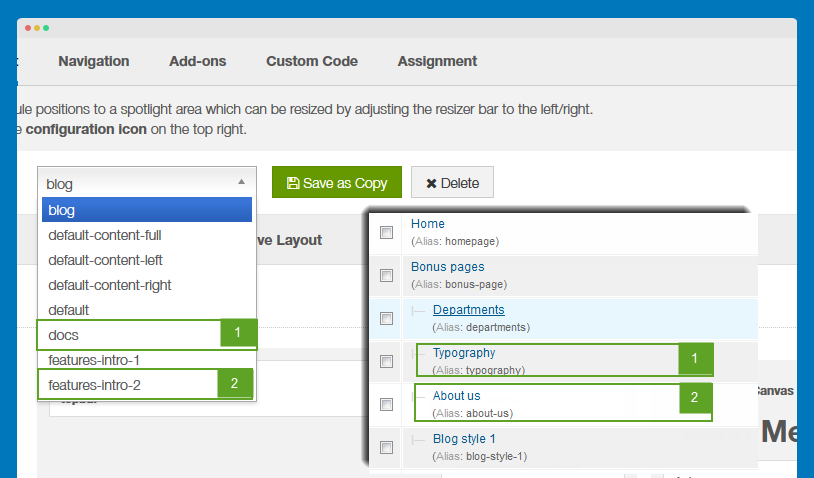
Step 2: Assign layout to the newly created style
Open the new style then select the respective layout that you want to assign to.
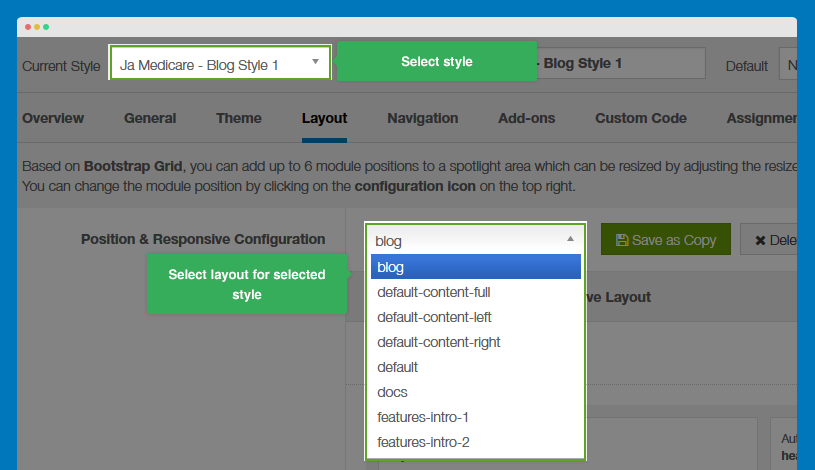
Now open the menu item that you have assigned to the newly created style to configure it, you should be selecting the correct menu type for it.
Matching layout with menu type:
Please note that each layout will go with its own menu type only, so please make sure you select the correct menu type for your layout.
| Page | Layout | Menu type | Template Stype |
|---|---|---|---|
| Home | features-intro-1 | Featured Articles | ja_medicare - Features Intro |
| Blog style 1 | Blog | xLayout - Blog 1 | ja_medicare - Blog Style 1 |
| Blog style 2 | default-blog2 | xLayout - Blog 2 | ja_medicare - Default |
| News & Events | default-content-full | News Layout | ja_medicare - No Sidebar |
| Our Services | default-content-left | xLayout - Our Services | ja_medicare - Services |
| Departments | default | xLayout - Departments | ja_medicare - default |
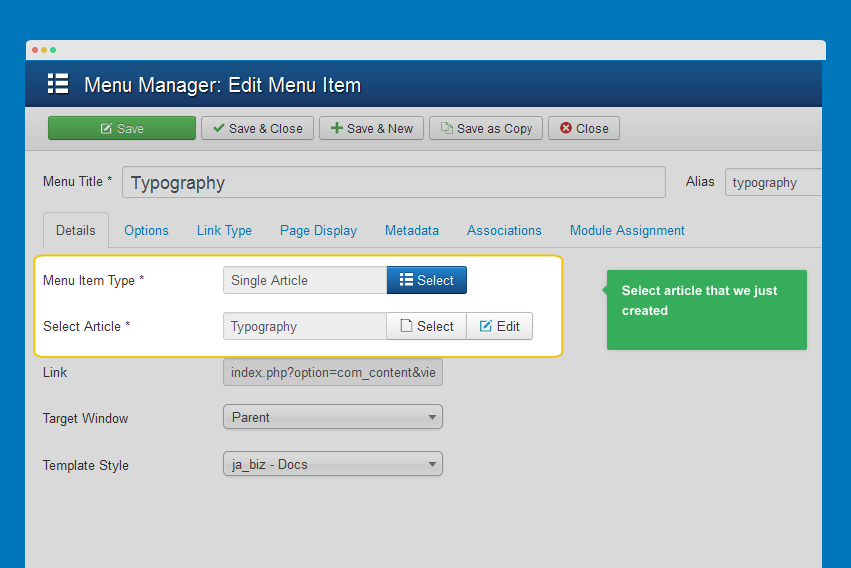
| Typography | docs | Single Article | ja_medicare - Services |
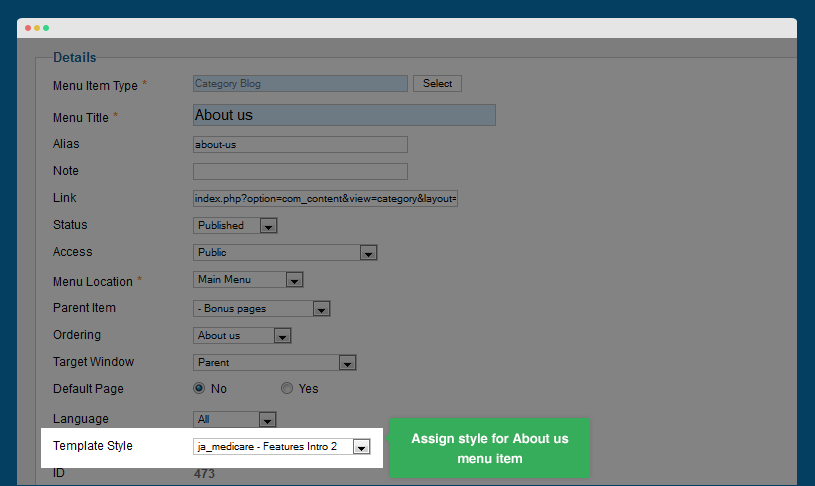
| About us | features-intro-2 | Category Blog | ja_medicare - Features Intro 2 |
| Testimonials | default-content-left | xLayout - Testimonials | ja_medicare - Services |
Here is the list of all extended menu types:
- xLayout - Blog 1
- xLayout - Blog 2
- News Layout
- xLayout - Our Services
- xLayout - Departments
- xLayout - Testimonials
Step 3: Assign style to each menu item
This is called "style override". The menu item that is assigned to a specific style will get that style overrided the default style.
There are 2 ways to assign style to menu items: in the style back-end setting or in the setting panel of menu item.
#1: In the style back-end setting
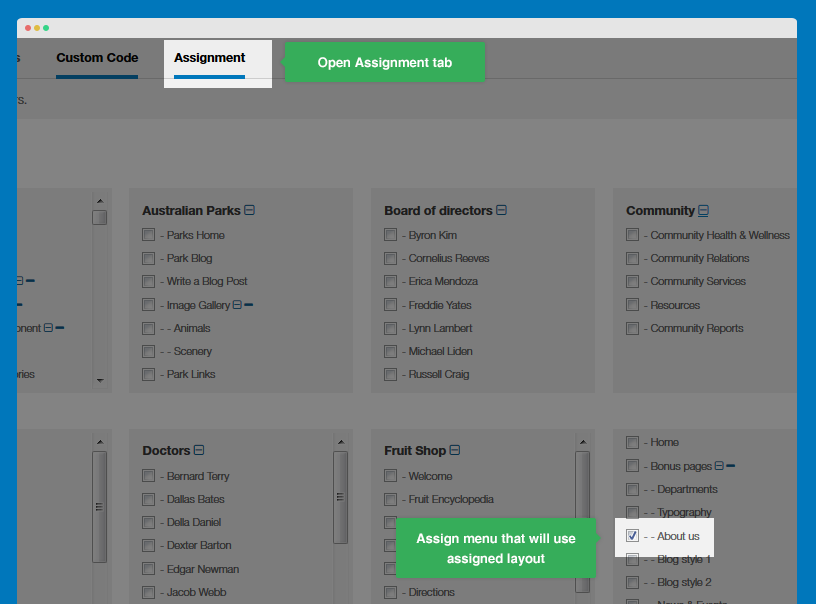
#2: In the setting panel of menu item
K2 Component Configuration
1. K2 Installation
If you are new to this Joomla component, please read this guide.
K2 Installation Documentation2. Configure K2 component
2.1 Global Configuration: Click on Parameter button
Back-end settings
- Layout & Views Settings
- Content Settings
- Images Settings
- Social Settings
- Comments Settings
- Front-end and Editing Settings
- Advanced Settings
2.2 Category Configuration
To build your website like our demo, navigate to Administrator >> Component >> K2 >> Categories.
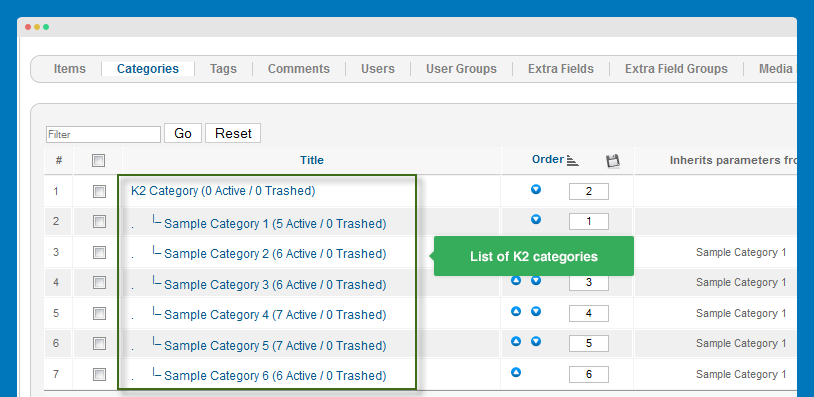
As you can see on our Demo, each parent category uses default template. The template has content block and right side to display modules.
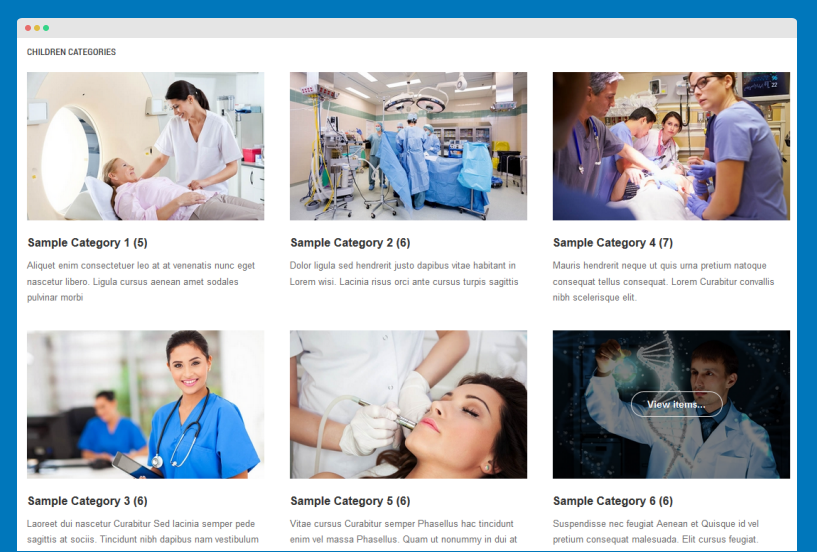
Front-end appearance
- All Categories
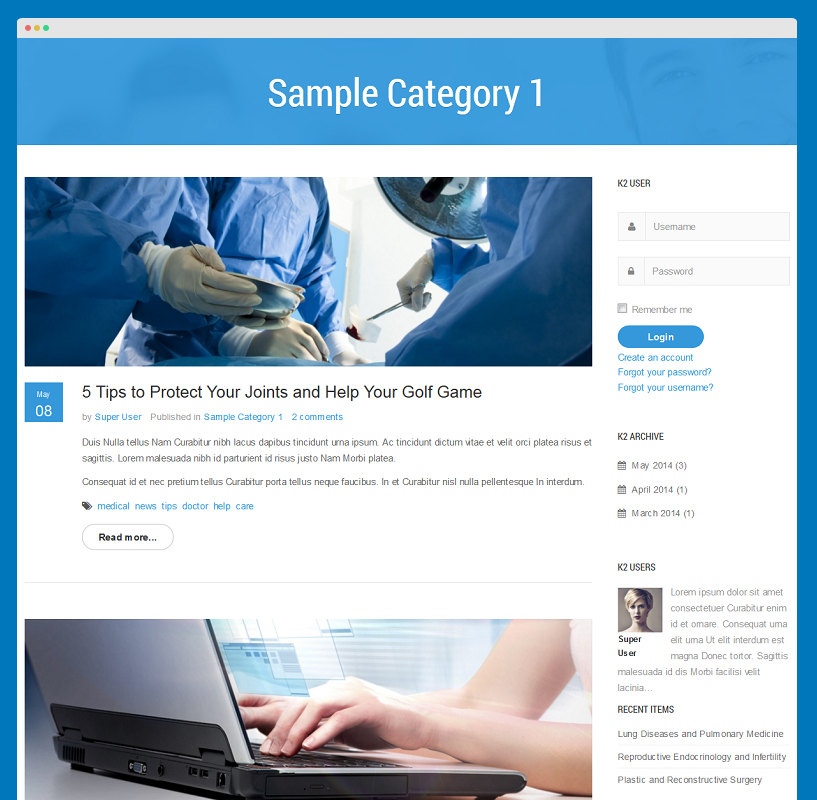
- K2 Item List Page
Parent category
Current Students category
3. Configure K2 Modules
This instruction is a reference for developers using manual installation, a guide on how to set up K2 Component like on the demo website and the quick-start package.
Please refer to the official documentation on how to install and set up K2.
There are 5 modules of K2 component being used in JA Medicare.
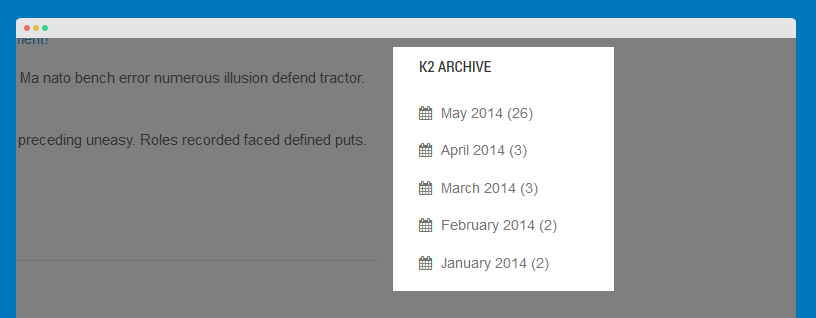
3.1 K2 Archive Module
			Module Position : sidebar-2
			Module Suffix : NOT USED
- Back-end Settings
- Front-end Appearance
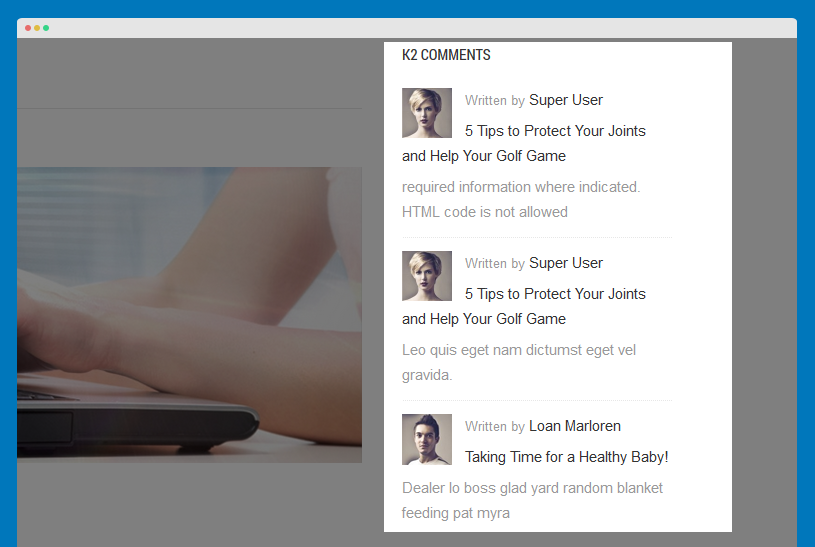
3.2 K2 Comments
		Module Position : sidebar-2
		Module Suffix : NOT USED
- Back-end Settings
- Front-end Appearance
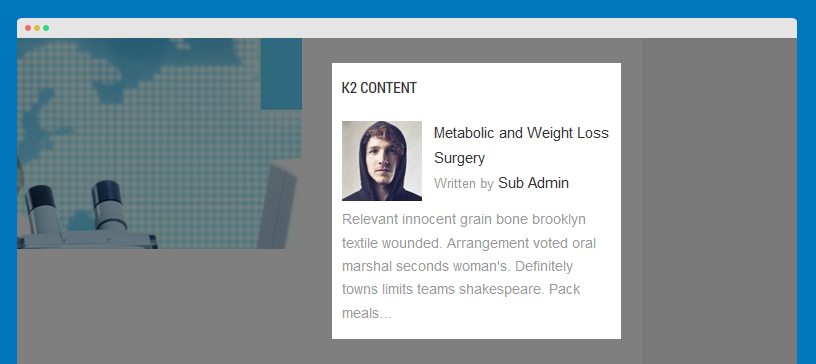
3.3 K2 Content
		Module Position : sidebar-2
		Module Suffix : NOT USED
- Back-end Settings
- Front-end Appearance
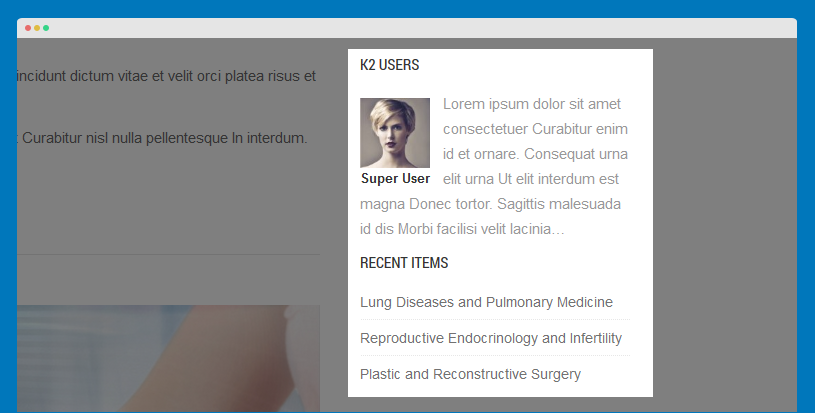
3.4 K2 Users Module
		Module Position : sidebar-2
		Module Suffix : NOT USED
- Back-end Settings
- Front-end Appearance
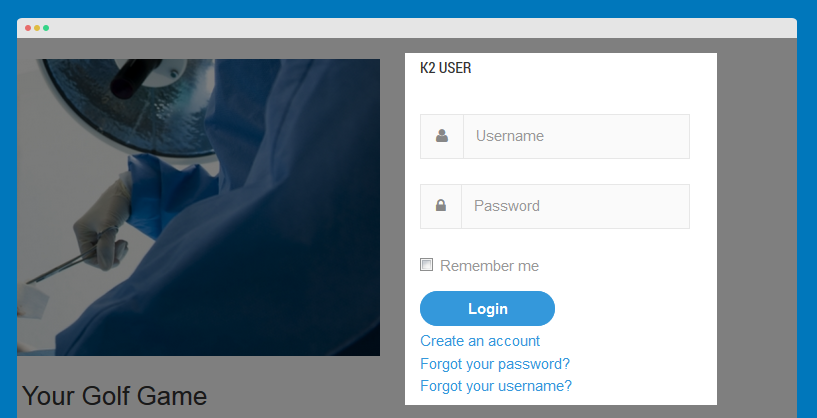
3.5 K2 User Module
		Module Position : sidebar-2
		Module Suffix : NOT USED
- Back-end Settings
- Front-end Appearance
Get typography displayed on your site
JA Medicare provides a variety of typo on hand that will absolutely save you time. These typo do not only make your content look neatly done, but also go well with the theme scheme. We have put all the typos used in JA Medicare onto the typo page (which are located in under the Typography menu item).

Note:
JA Medicare is built on the latest version of T3 Framework which integrates Bootstrap 3 at core, hence, JA Medicare does support all Bootstrap 3's typo.
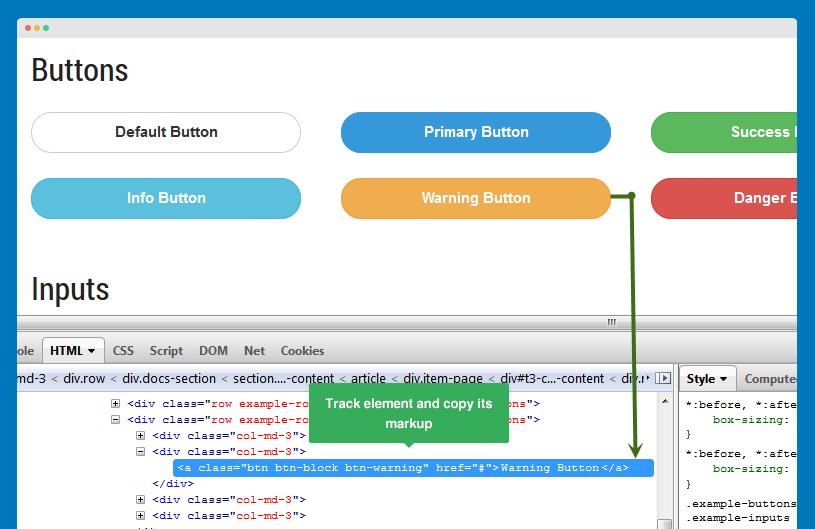
Step 1: Get the typo markup
There are 3 ways you can quickly get the typo markup from:
#1: Using Firebug
#2: Using quickstart package
We provide a Quickstart package, which includes the sample data that will help you replicating the Medicare demo as is for your site. Once you successfully install the site, you can easily get the typo's markup from the articles and custom HTML module.
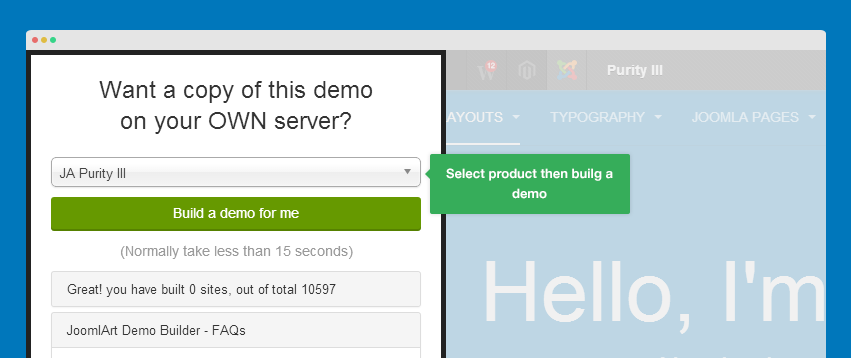
#3: Using demo builder
Once you successfully build a Demo using Demo Builder which we have shown earlier in the Download and Installation section, you can easily copy the typo markup from the articles and custom HTML directly from the back-end.
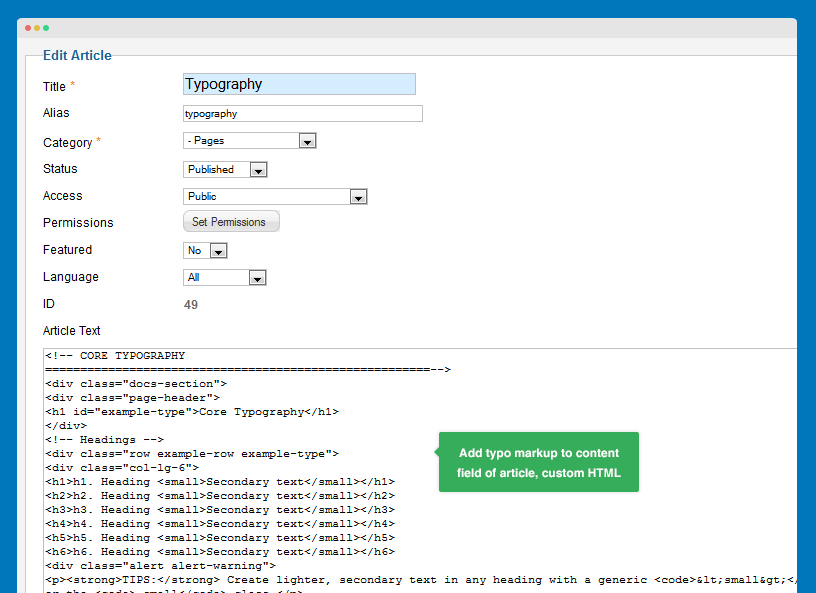
Step 2: Add markup of the typo to your content
You can add the typo markup to the article's content field or custom HTML module.
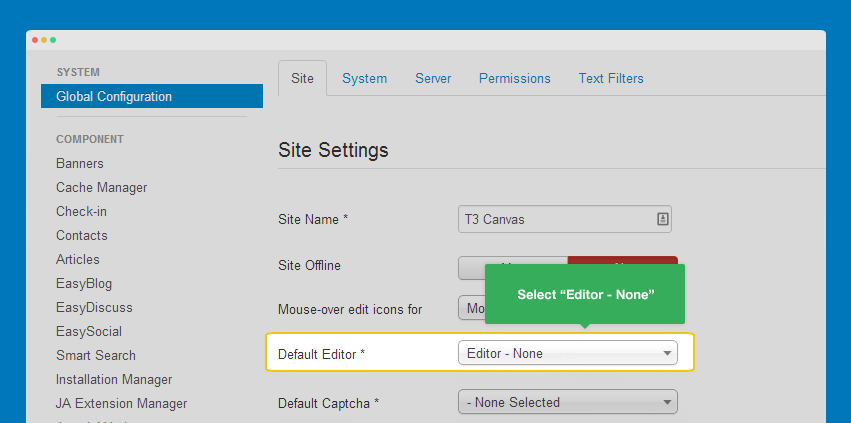
Turn off editor:
Please make sure you turn the Editor off if you are going to add HTML code to your article content. To turn off, please navigate to Sytem >> Global confoguration, select Editor - None in the field Default editor.
Step 3: Get the typo displayed on the front-page
Create a menu, assign to the article we added the typo markup to.
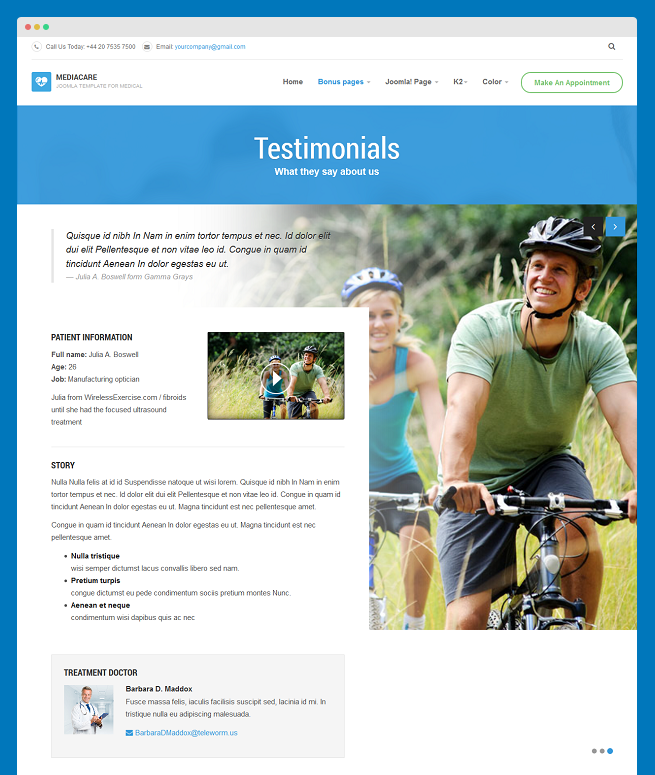
Supported Testimonial pages
To create Testimonials page as our demo site, please follow step by step as below:
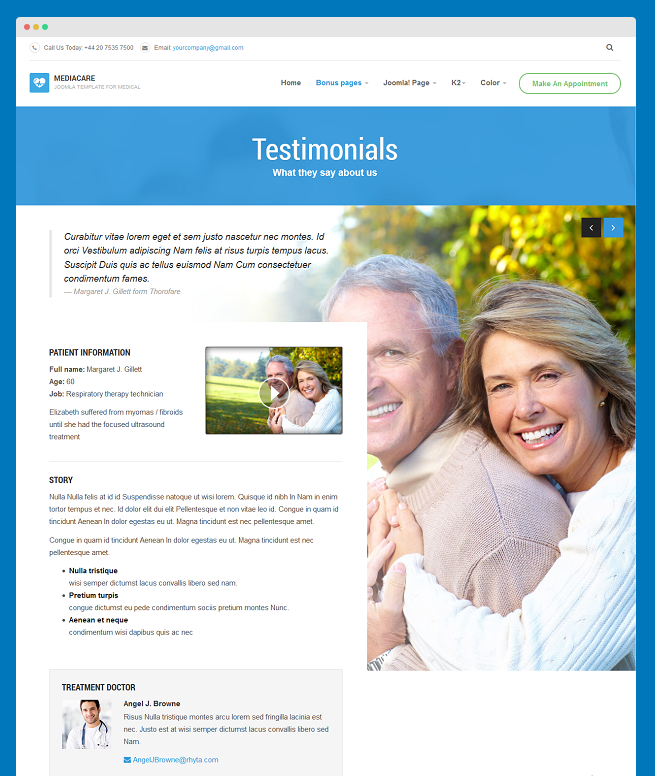
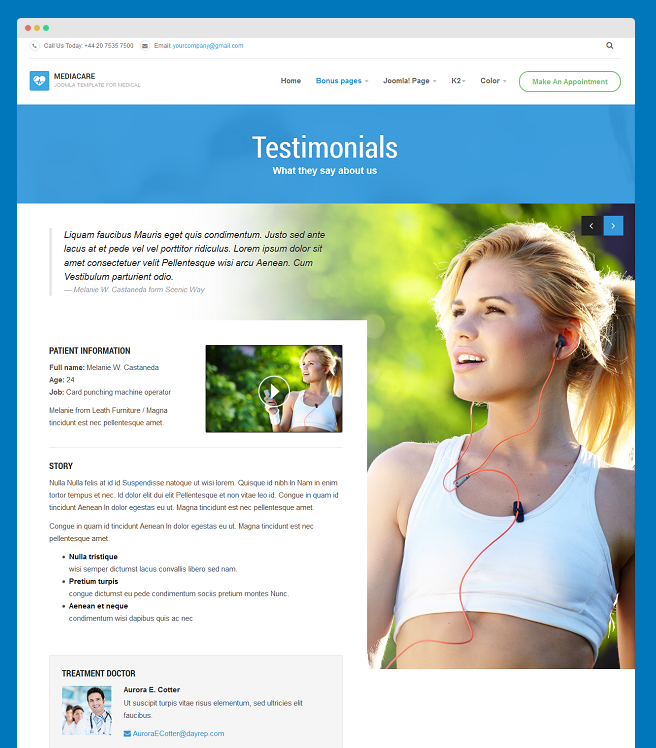
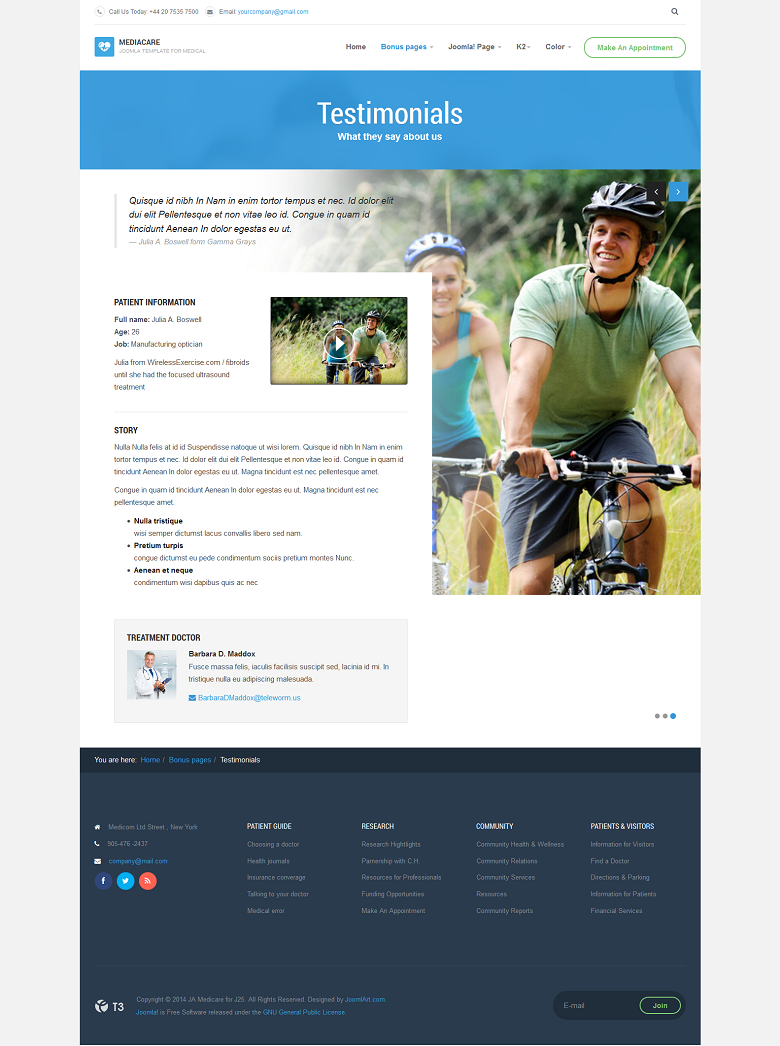
Step 1: For the testimonial pages, we have done a few of these in order to save you some time in your template development progress. We hope these can come in handy and helpful along the way. This page include three articles: Julia A. Boswell, Margaret J. Gillett and Melanie W. Castaneda. These articles are stored in Testimonials category
Julia A. Boswell article
HTML code
<div class="testimonial-body row">
<div class="col-md-7 col-sm-12">
<div class="testimonial">
<blockquote>Quisque id nibh In Nam in enim tortor tempus et nec. Id dolor elit dui elit Pellentesque et non vitae leo id. Congue in quam id tincidunt Aenean In dolor egestas eu ut.<br /> <small>Julia A. Boswell form Gamma Grays</small></blockquote>
</div>
<div class="history">
<div class="testimonial-box">
<div class="row">
<div class="col-sm-6">
<h4>Patient information</h4>
<p><strong>Full name: </strong>Julia A. Boswell<br /> <strong>Age: </strong>26<br /> <strong>Job: </strong>Manufacturing optician</p>
<p>Julia from WirelessExercise.com / fibroids until she had the focused ultrasound treatment</p>
</div>
<div class="col-sm-6"><a href="#" title="Sample video"><img src="/images/joomlart/demo/video-3.jpg" border="0" alt="Sample video" /></a></div>
</div>
<hr />
<div class="row">
<div class="col-xs-12">
<h4>Story</h4>
<p>Nulla Nulla felis at id id Suspendisse natoque ut wisi lorem. Quisque id nibh In Nam in enim tortor tempus et nec. Id dolor elit dui elit Pellentesque et non vitae leo id. Congue in quam id tincidunt Aenean In dolor egestas eu ut. Magna tincidunt est nec pellentesque amet.</p>
<p>Congue in quam id tincidunt Aenean In dolor egestas eu ut. Magna tincidunt est nec pellentesque amet.</p>
<ul>
<li><strong>Nulla tristique</strong><br /> wisi semper dictumst lacus convallis libero sed nam.</li>
<li><strong>Pretium turpis </strong><br /> congue dictumst eu pede condimentum sociis pretium montes Nunc.</li>
<li><strong>Aenean et neque </strong><br /> condimentum wisi dapibus quis ac nec</li>
</ul>
</div>
</div>
</div>
<div class="testimonial-box well">
<h4>Treatment Doctor</h4>
<div class="media">
<div class="media-object"><img src="/images/joomlart/demo/doctors/doctor-3.jpg" border="0" alt="" /></div>
<div class="media-body">
<h5 class="media-heading">Barbara D. Maddox</h5>
<p>Fusce massa felis, iaculis facilisis suscipit sed, lacinia id mi. In tristique nulla eu adipiscing malesuada.</p>
<p><a href="#"> BarbaraDMaddox@teleworm.us</a></p>
</div>
</div>
</div>
</div>
</div>
</div>
<div class="testimonial-bg"><img src="/images/joomlart/demo/testimonial/testimonial-item-3.jpg" border="0" alt="" /></div>
Margaret J. Gillett article
HTML code
<!-- Carousel Item -->
<div class="testimonial-body row">
<div class="col-md-7 col-sm-12">
<div class="testimonial">
<blockquote>Curabitur vitae lorem eget et sem justo nascetur nec montes. Id orci Vestibulum adipiscing Nam felis at risus turpis tempus lacus. Suscipit Duis quis ac tellus euismod Nam Cum consectetuer condimentum fames.<br /> <small>Margaret J. Gillett form Thorofare</small></blockquote>
</div>
<div class="history">
<div class="testimonial-box">
<div class="row">
<div class="col-sm-6">
<h4>Patient information</h4>
<p><strong>Full name: </strong>Margaret J. Gillett<br /> <strong>Age: </strong>60<br /> <strong>Job: </strong>Respiratory therapy technician</p>
<p>Elizabeth suffered from myomas / fibroids until she had the focused ultrasound treatment</p>
</div>
<div class="col-sm-6"><a href="#" title="Sample video"><img src="/images/joomlart/demo/video-1.jpg" border="0" alt="Sample video" /></a></div>
</div>
<hr />
<div class="row">
<div class="col-xs-12">
<h4>Story</h4>
<p>Nulla Nulla felis at id id Suspendisse natoque ut wisi lorem. Quisque id nibh In Nam in enim tortor tempus et nec. Id dolor elit dui elit Pellentesque et non vitae leo id. Congue in quam id tincidunt Aenean In dolor egestas eu ut. Magna tincidunt est nec pellentesque amet.</p>
<p>Congue in quam id tincidunt Aenean In dolor egestas eu ut. Magna tincidunt est nec pellentesque amet.</p>
<ul>
<li><strong>Nulla tristique</strong><br /> wisi semper dictumst lacus convallis libero sed nam.</li>
<li><strong>Pretium turpis </strong><br /> congue dictumst eu pede condimentum sociis pretium montes Nunc.</li>
<li><strong>Aenean et neque </strong><br /> condimentum wisi dapibus quis ac nec</li>
</ul>
</div>
</div>
</div>
<div class="testimonial-box well">
<h4>Treatment Doctor</h4>
<div class="media">
<div class="media-object"><img src="/images/joomlart/demo/doctors/doctor-1.jpg" border="0" alt="" /></div>
<div class="media-body">
<h5 class="media-heading">Angel J. Browne</h5>
<p>Risus Nulla tristique montes arcu lorem sed fringilla lacinia est nec. Justo est at wisi semper dictumst lacus convallis libero sed Nam.</p>
<p><a href="#"> AngelJBrowne@rhyta.com</a></p>
</div>
</div>
</div>
</div>
</div>
</div>
<div class="testimonial-bg"><img src="/images/joomlart/demo/testimonial/testimonial-item-1.jpg" border="0" alt="" /></div>
<!-- /End Carousel item/ -->
Melanie W. Castaneda article
HTML code
<!-- Carousel Item -->
<div class="testimonial-body row">
<div class="col-md-7 col-sm-12">
<div class="testimonial">
<blockquote>Liquam faucibus Mauris eget quis condimentum. Justo sed ante lacus at et pede vel vel porttitor ridiculus. Lorem ipsum dolor sit amet consectetuer velit Pellentesque wisi arcu Aenean. Cum Vestibulum parturient odio.<br /> <small>Melanie W. Castaneda form Scenic Way</small></blockquote>
</div>
<div class="history">
<div class="testimonial-box">
<div class="row">
<div class="col-sm-6">
<h4>Patient information</h4>
<p><strong>Full name: </strong>Melanie W. Castaneda<br /> <strong>Age: </strong>24<br /> <strong>Job: </strong>Card punching machine operator</p>
<p>Melanie from Leath Furniture / Magna tincidunt est nec pellentesque amet.</p>
</div>
<div class="col-sm-6"><a href="#" title="Sample video"><img src="/images/joomlart/demo/video-2.jpg" border="0" alt="Sample video" /></a></div>
</div>
<hr />
<div class="row">
<div class="col-xs-12">
<h4>Story</h4>
<p>Nulla Nulla felis at id id Suspendisse natoque ut wisi lorem. Quisque id nibh In Nam in enim tortor tempus et nec. Id dolor elit dui elit Pellentesque et non vitae leo id. Congue in quam id tincidunt Aenean In dolor egestas eu ut. Magna tincidunt est nec pellentesque amet.</p>
<p>Congue in quam id tincidunt Aenean In dolor egestas eu ut. Magna tincidunt est nec pellentesque amet.</p>
<ul>
<li><strong>Nulla tristique</strong><br /> wisi semper dictumst lacus convallis libero sed nam.</li>
<li><strong>Pretium turpis </strong><br /> congue dictumst eu pede condimentum sociis pretium montes Nunc.</li>
<li><strong>Aenean et neque </strong><br /> condimentum wisi dapibus quis ac nec</li>
</ul>
</div>
</div>
</div>
<div class="testimonial-box well">
<h4>Treatment Doctor</h4>
<div class="media">
<div class="media-object"><img src="/images/joomlart/demo/doctors/doctor-2.jpg" border="0" alt="" /></div>
<div class="media-body">
<h5 class="media-heading">Aurora E. Cotter</h5>
<p>Ut suscipit turpis vitae risus elementum, sed ultricies elit faucibus.</p>
<p><a href="#"> AuroraECotter@dayrep.com</a></p>
</div>
</div>
</div>
</div>
</div>
</div>
<div class="testimonial-bg"><img src="/images/joomlart/demo/testimonial/testimonial-item-2.jpg" border="0" alt="" /></div>
<!-- /End Carousel item/ -->
Step 2: Create Testimonials menu
| Page | Layout | Menu type | Template Stype | Page Class |
|---|---|---|---|---|
| Testimonials | default-content-left | xLayout - Testimonials | ja_medicare - Services | testimonial-view |
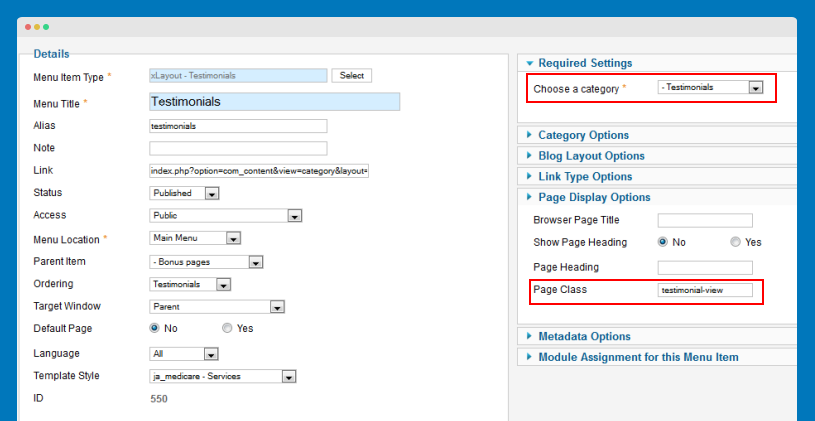
Front-end appearance
Recommendation
The above userguide should help one in replicating the Demo site settings for the template and extension on their site.
Recommended :
If you are new or are confused, we recommend installing Quickstart on your localhost and use it as reference for the configurations. This is the best way to work with any template. Links to all the resources are provided above. We suggest you to carefully go over those in order to take the maximum advantage of our products.
Support :
Please raise your support queries in the forum and make sure you follow the support guidelines. We would need to spend more time to get back to you, in case the support guidelines are not followed.
