Introduction
1. Get to Know Your Template
- Everyone should read the Template's Overview Article! This is a quick and complete overview of the template, from the colours included, to all of the powerful Joomlart complimentary extensions that come with it. You'll also find links to the LIVE Demo Site, the Download area, as well as the Forum to ask questions.
- Need Help Getting Around Joomlart.com? We've created a QUICK ACCESS GUIDE for help you become a Joomlart Power User. This is a wonderful reference which is full of tips on quickly finding template info, demo sites, module position guides and more. We don't want you to miss a thing!
Plan your site Development.
- Making a New Site ? - If you are planning to make a new site, use our Quickstart package to clone the demo site and replace the demo content with yours. Check How to install Quickstart Package.
- Installing on your live site ? - If you are planning to use this template on your already live site, read How to make your site look like demo site guide first to know about the steps involved. Then you can follow the userguide below.
The user guide covers the following aspects :
- Installing Template on your Joomla
- Installing T3 Framework 2 Plugin
- Installing complimentary / included extensions
- Custom HTML Modules
- Mega Menu configs
- K2 Configuration
System requirement
JA Lens is compatible with Joomla 3 and Joomla 2.5. Please make sure your system meets the following requirements:
Joomla 3 System requirement
Software
- PHP (Magic Quotes GPC off): 5.3.1 + (5.4+ recommended)
Databases
- MySQL(InnoDB support required): 5.1+
- MSSQL 10.50.1600.1+
- PostgreSQL 8.3.18+
Web Severs
- Apache 2.x+
- Microsoft IIS 7
- Nginx 1.0 (1.1 recommended)
Joomla 2.5+ system requirement
Software
- PHP 5.2.4+ (5.4+ recommended)
- MySQL: 5.0.4+
Web Sever
- Apache: 2.x+
- Microsoft: IIS 7
- Nginx: 1.0 (1.1 recommended)
Browser requirement
The requirements are the same with both Joomla 2.5 and Joomla 3
- Firefox 4+
- IE (Internet Explorer) 8+
- Google Chrome 10+
- Opera 10+
- Safari 5+
Development Environment
The requirements are the same with both Joomla 2.5 and Joomla 3
During development process, Localhost is preferred. You can use the following servers on your PC to develop your site.
Windows
- WAMPSEVER
- XAMPP for Windows
Linux
- LAMP Bubdle
- XAMPP for Linux
Mac OS
- MAMP & MAMP Pro
- XAMPP for Mac OS
Install the Template
1. Install Template and Extensions
- Install the template that you download in your Joomla 2.5 system.
- We'll be installing JA Lens template with the settings as is used on the demo website, other customization should be postponed until you complete the initial setup (including modules & plugins as is on the demo).
If you are new to Joomla installation procedure, please check the following documentation. This guide will show you step by step instructions to install Template and Extensions to your Joomla 2.5 and Joomla 3 system.
Template Configuration:
We'll be installing JA Lens template with the settings as is used on the demo website, other customization should be postponed until you complete the initial setup (including modules & plugins as is on the demo).
Once completed the setup, you can come back to the template back-end and check the various options for customizing your template. Refer to this Universal T3 V2 Back-end Config Guide for options on how to customize your installed template.
Links to resources on T3 V2 Framework templates and advanced configurations :
- Overview
- Developer Guides
- Customization FAQs
- Mega Menu - A missing menu system for Joomla
- Video Tutorials (valid for Joomla 1.6 and 2.5)
Error? - I see “Missing T3” error on the website front-end?
T3v2 Framework based templates need the T3 Framework Plugin to be installed and enabled.
2. Install T3v2 Framework Plugin (T3 system plugin)
Download and install T3v2 Framework Plugin (aka T3 System plugin). Follow this guide if you are not familiar with the installation procedure. After the plugin is installed, enable it.
Install Extensions
Install complimentary / included extensions
- Free Extensions : (aka complimentary / included extensions). We use many extensions in our demo site to provide greater flexibility and features. These are provided for free to our members.
- Custom HTML Module : To match the design of the template, we also style (CSS) for Custom HTML modules using different div classes. You will need to check the HTML codes and make sure to use the recommended HTML markup to get correct display. We provide the HTML code in this userguide.
- 3rd Party Extensions : This template uses JA Comment Component (with its plugins) that is also used for JA Kranos Joomla J17. You will need to download JA Comment package, it is available to Developer members and JAEC members only.
If you are new to Joomla installation procedure, please check the following documentation.
Detail DocumentationKnow your Module Positions :
- View Module Position Image (used positions only).
- Use Module Position Overlay in Template (used & empty module positions).
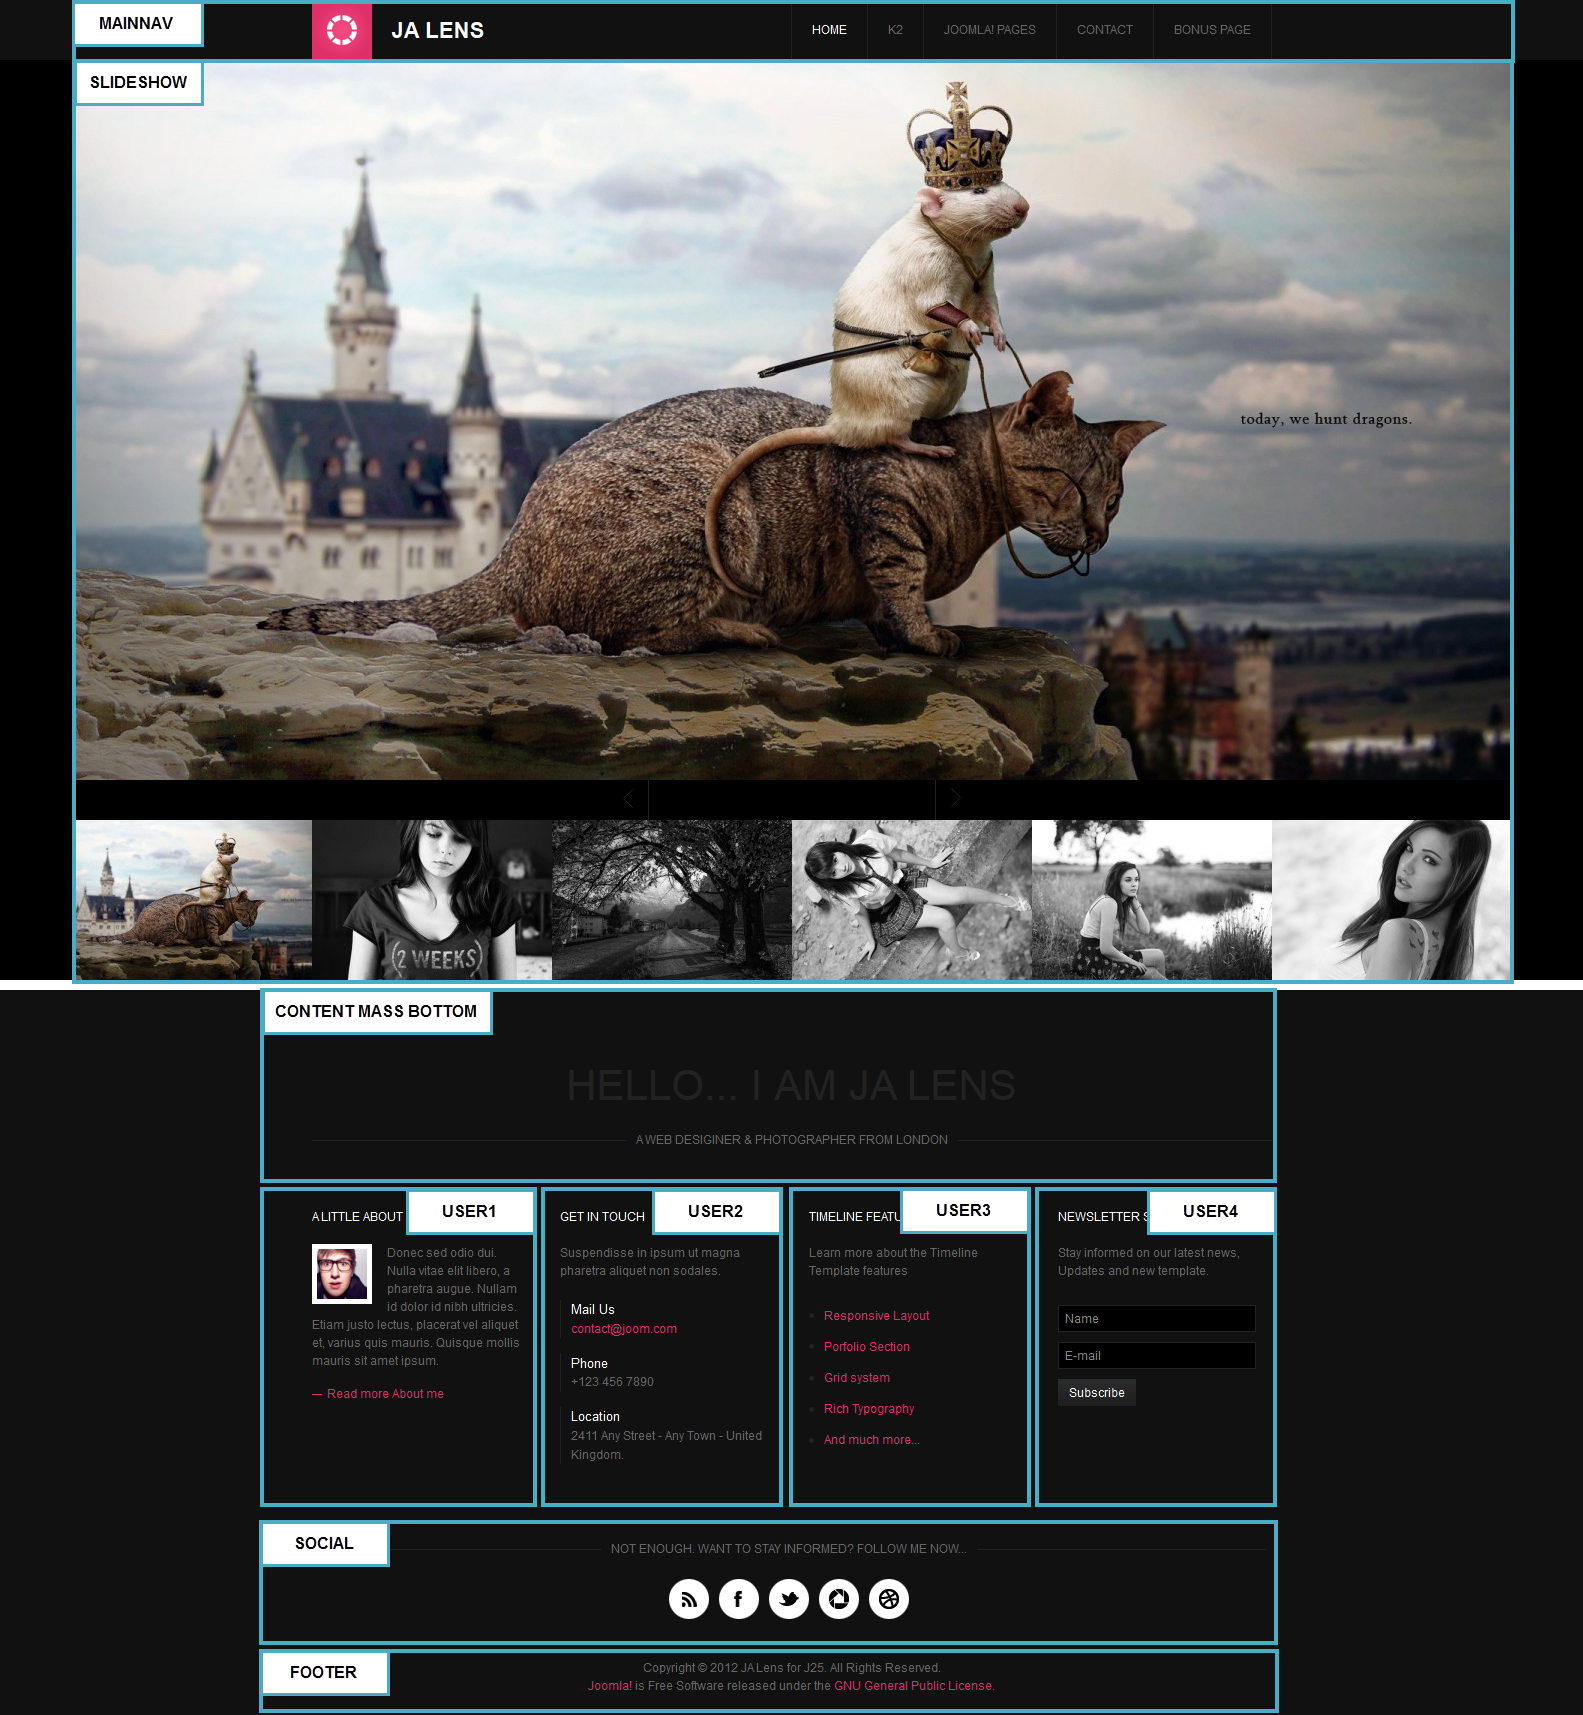
List of modules / plugins used in JA Lens Template Demo :
- JA Slide Show Lite Module
- JA Tabs Plugin
- JA Popup Plugin
- JA Lazy Load Plugin
Extensions Configuration
1. JA SlideShow Lite Module
Module Position : slideshow
Module Suffix : NOT USED
- Back-end Settings
- Front-end Appearance
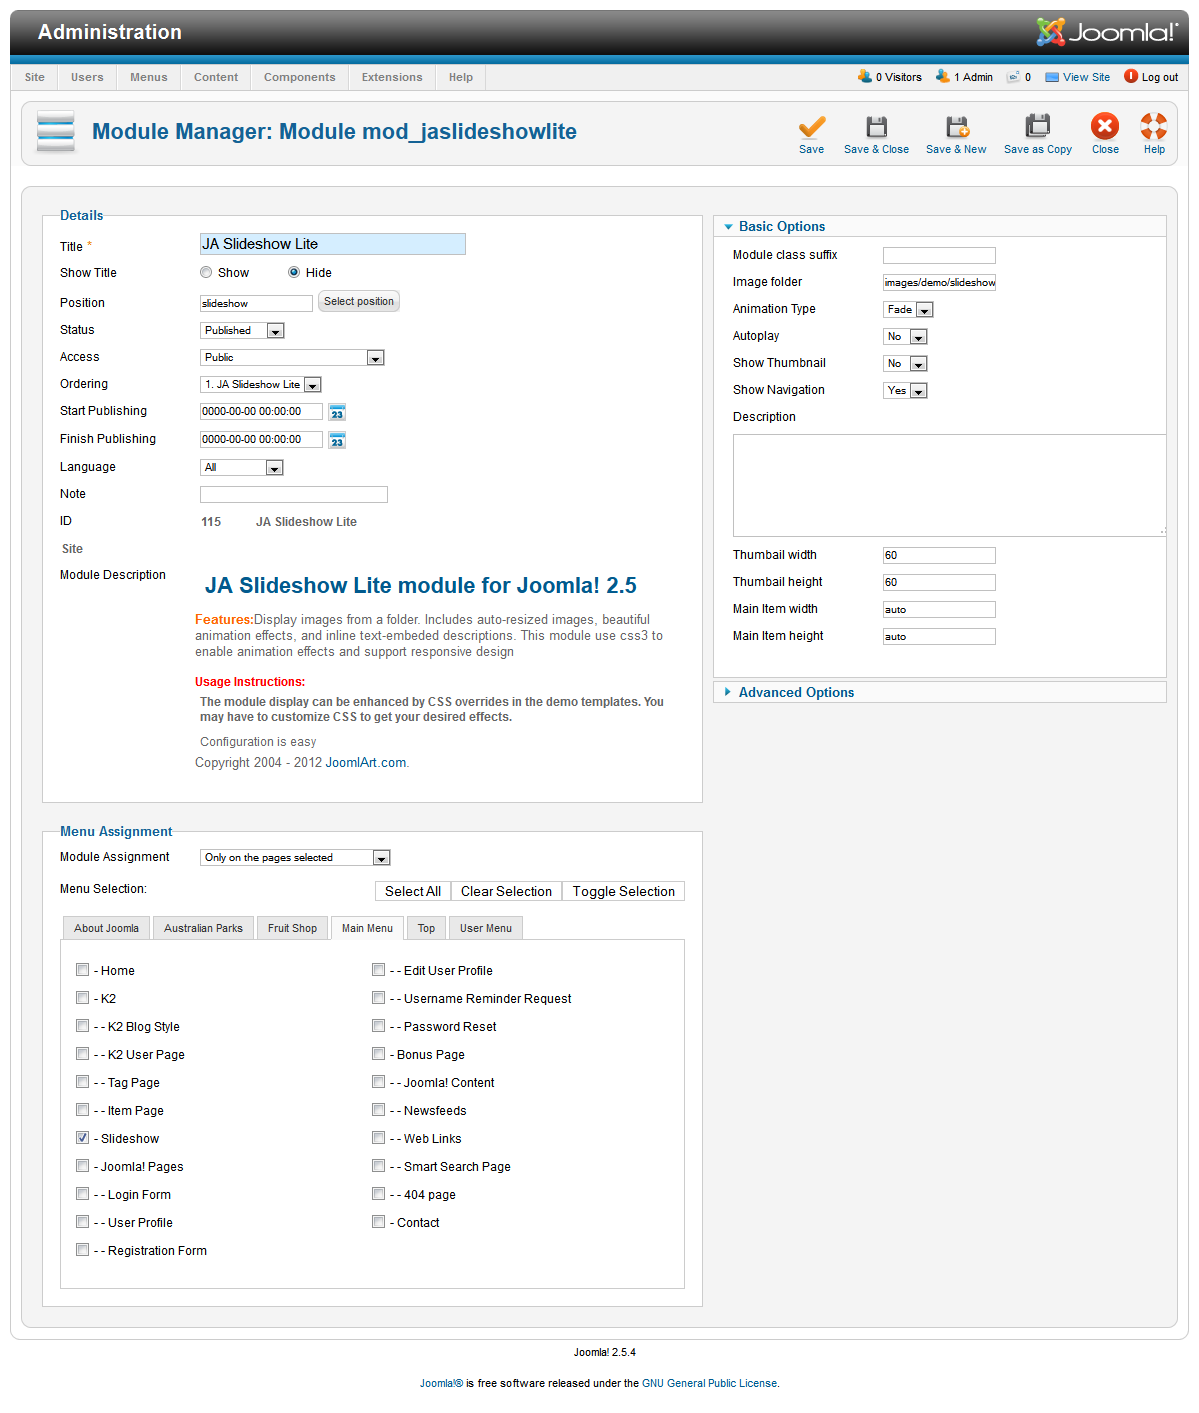
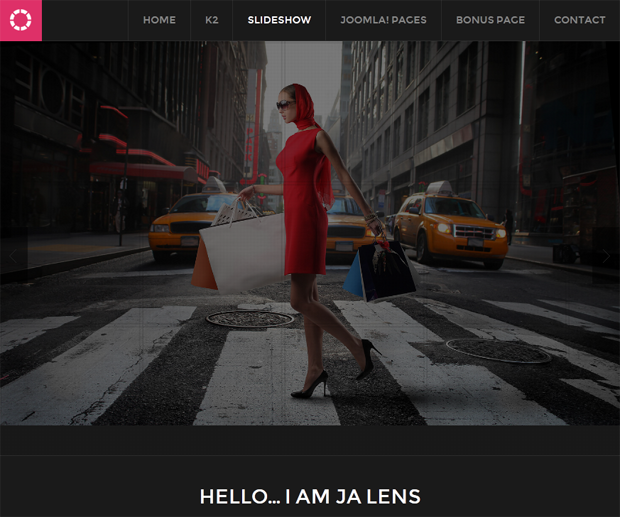
For more detail, please check the documentation of the module.
Detail documentation2. JA Tabs Plugin
To have tabs with content displayed in front-end, you have 3 steps.
Step 1: Configure the plugin
- Back-end Settings
- Front-end Appearance
Step 2: Create custom Module to load tabs to display in a module position
Tabs Lens
Module Position : right
Module Suffix : tabs
{jatabs type="modules" module="ja_tabs" position="top" mouseType="click" animType="animFade"} {/jatabs}
Step 3: Assign content to display in tabs
In this demo, we create 2 custom modules to display in tabs.
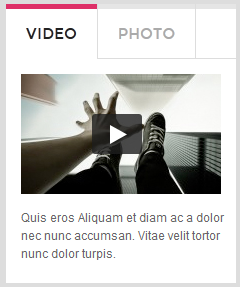
Custom HTML module: Video
Code:
Module Position : ja_tabs
Module Suffix : NOT USED
HTML Code:
<p><a class="video" href="http://www.youtube.com/watch?v=aBvyc5P7Fsg" title="JA Elastica - Web Responsive Design Template for Joomla "><img src="/images/demo/vimeo.jpg" border="0" alt="Sample video" title="Sample video" /></a> <span style="color:#000080"><span ></span>Quis eros Aliquam et diam ac a dolor nec nunc accumsan. Vitae velit tortor nunc dolor turpis.</p>
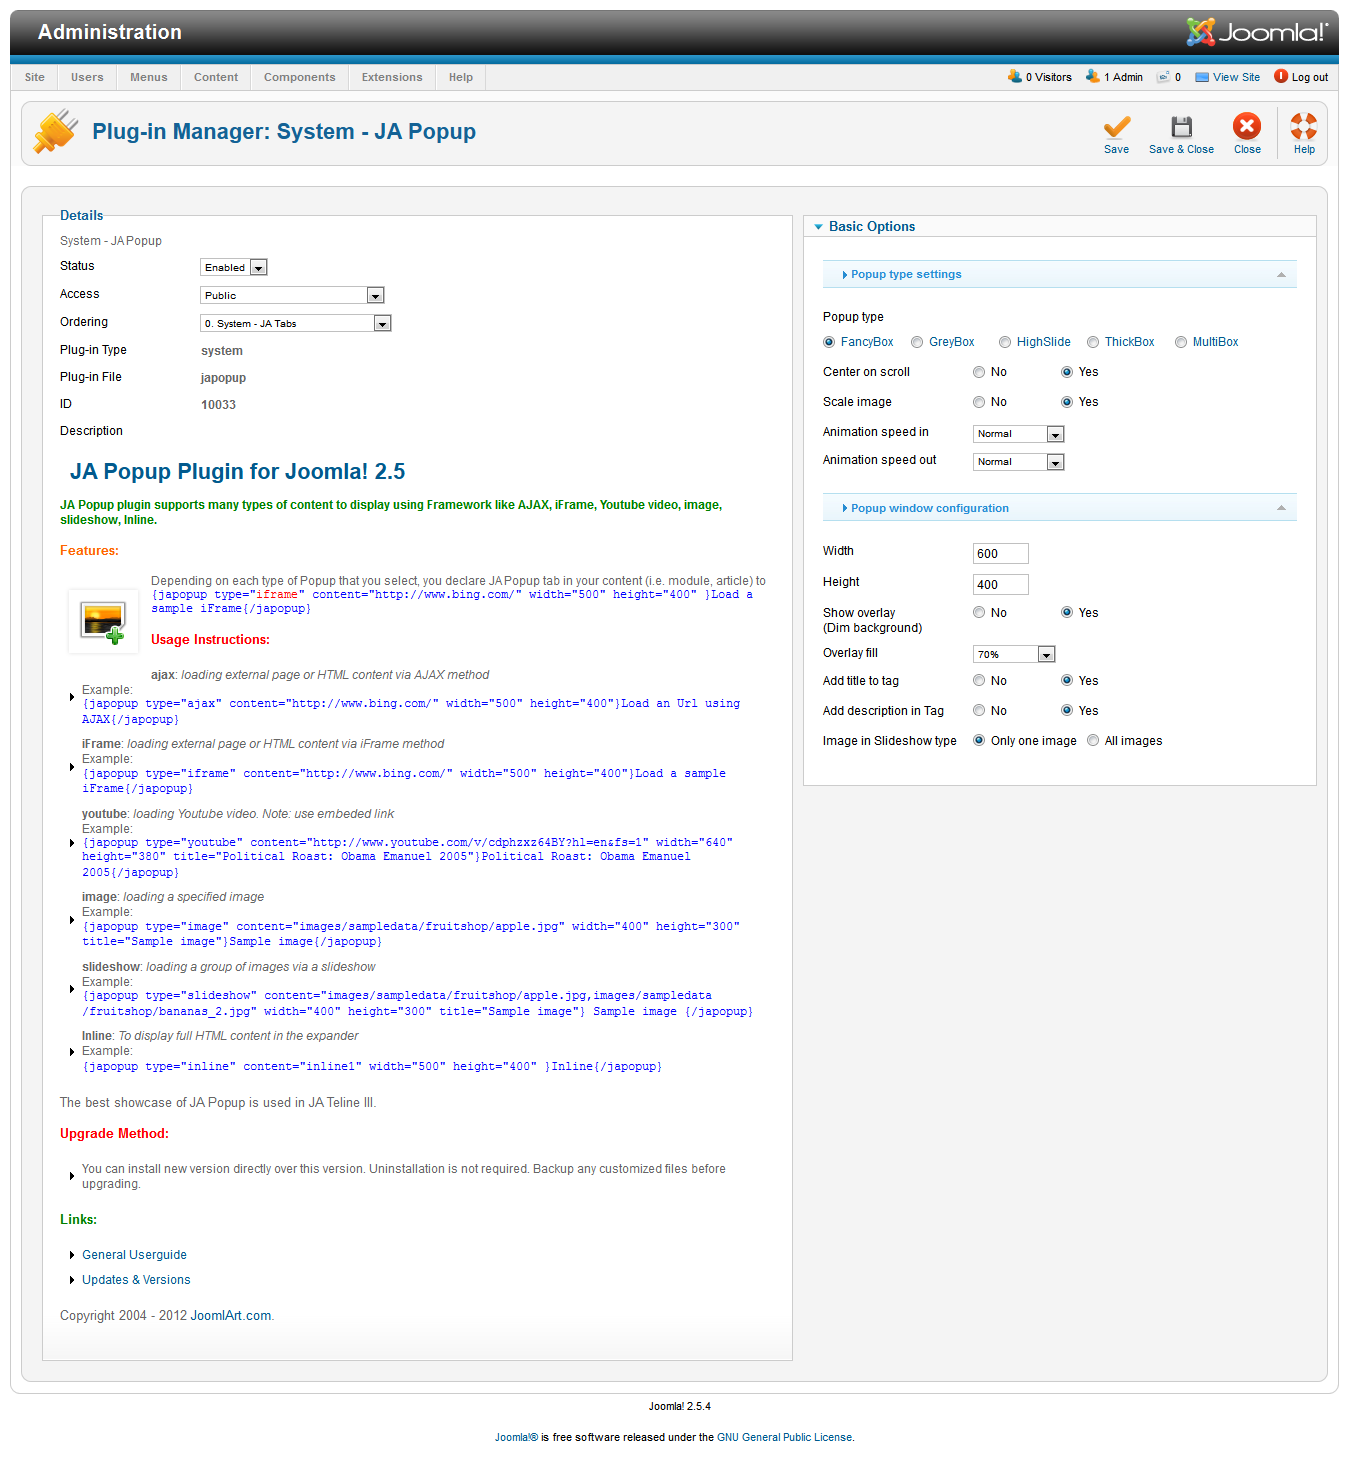
3. JA Popup Plugin
- Back-end Settings
- Front-end Appearance
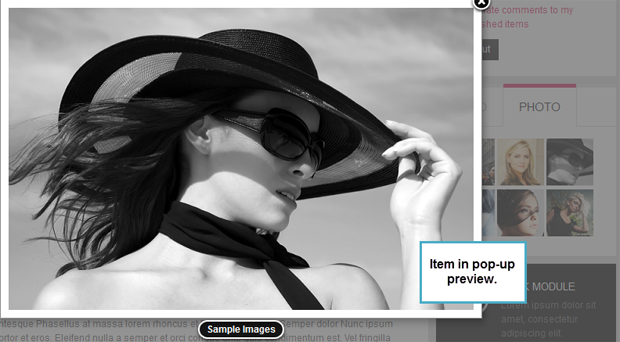
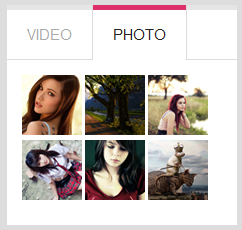
Custom module: Photo
This module is to display items that have ja-popup plugin enabled. The detail configuration of the module is in the above section: 2. JA Tabs Plugin --> 2.1 Custom module: Photo.
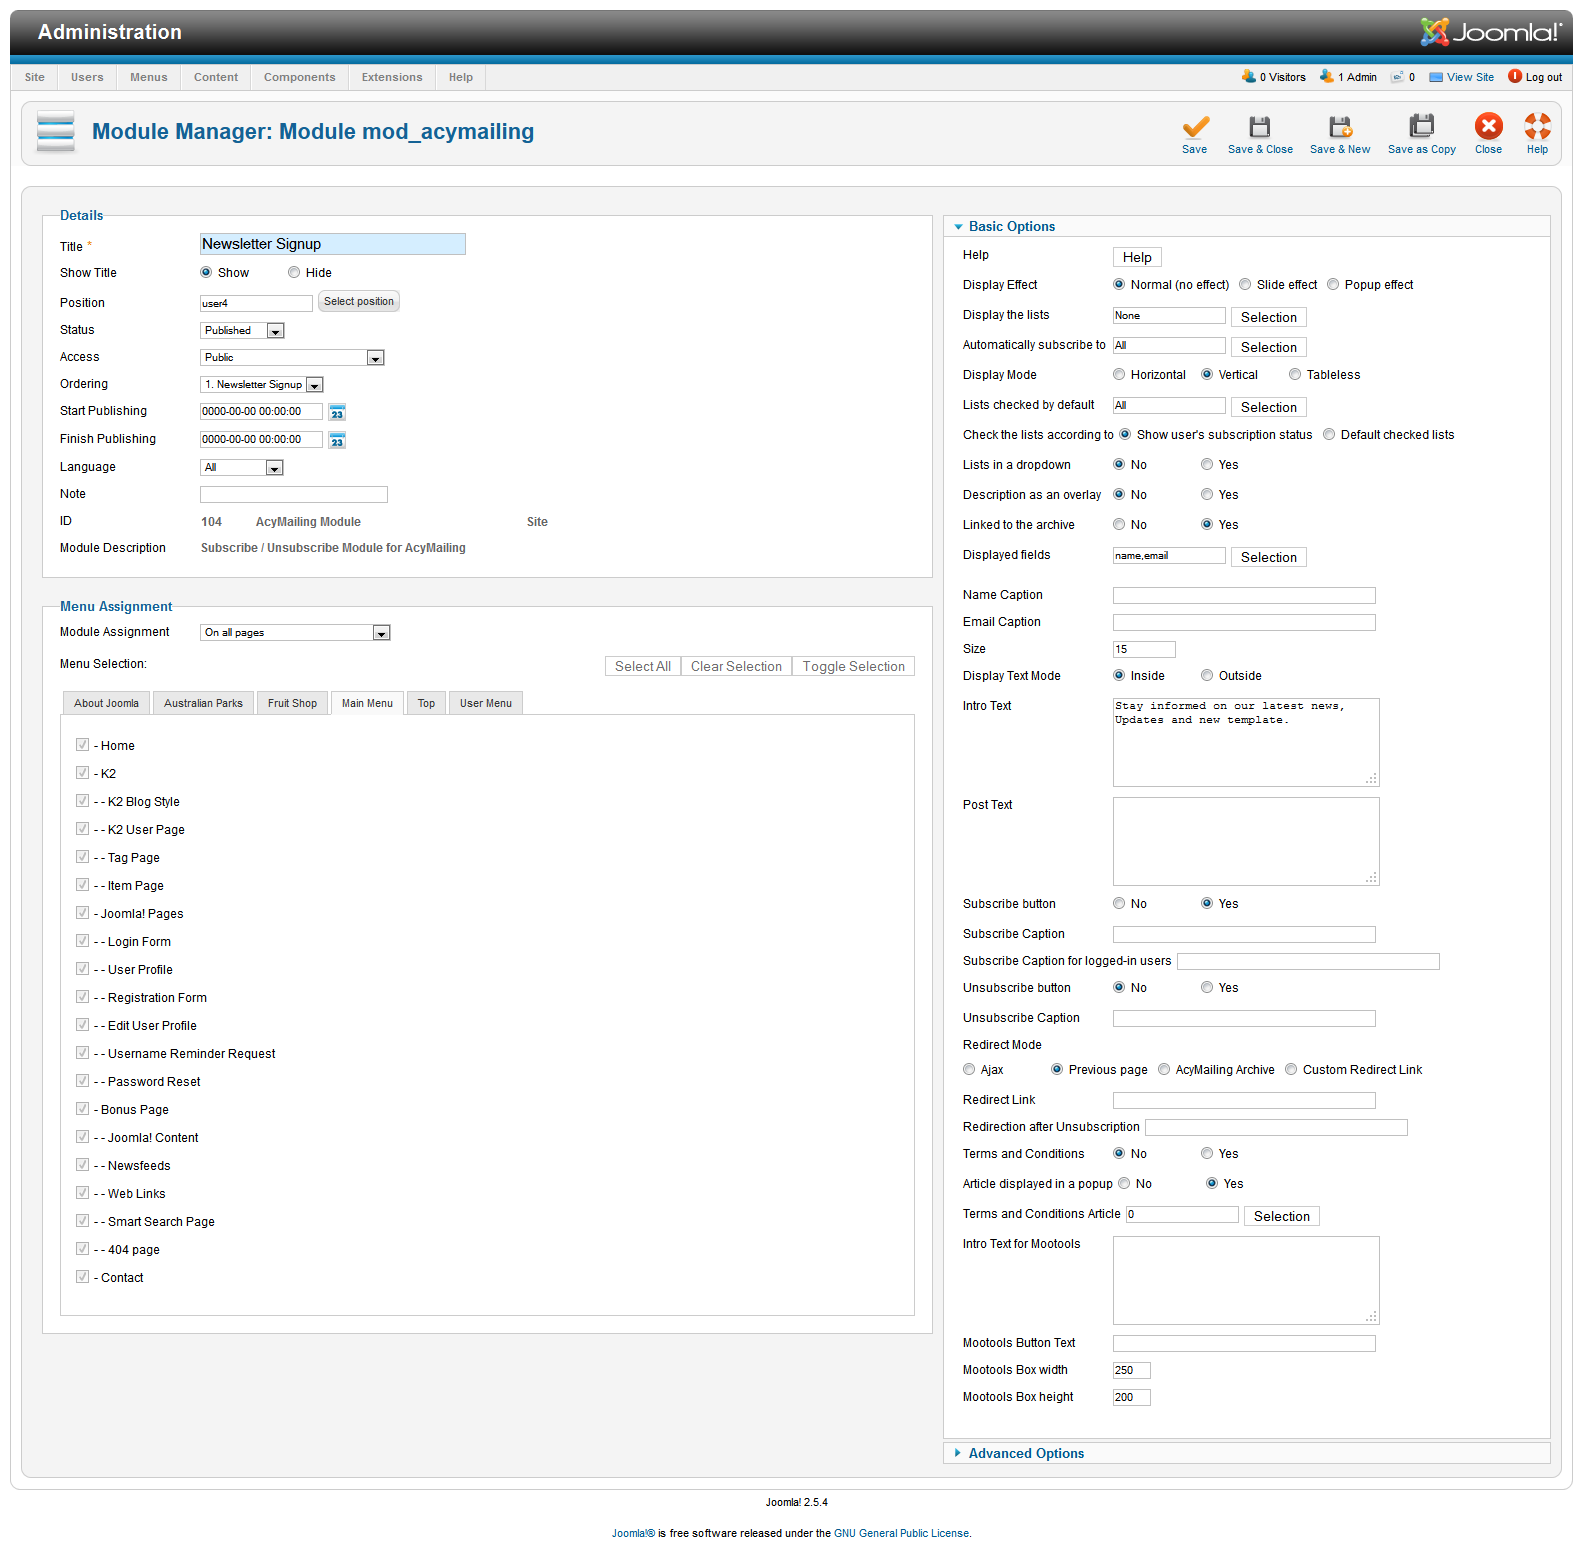
4. AcyMailing Module
Code:
Module Position : user4
Module Suffix : NOT USED
- Back-end Settings
- Front-end Appearance
V. Custom HTML Modules
If you are not sure how to use Custom HTML Modules or how to access the HTML Editor please Read this Guide.
We will provide you with the HTML Code (markup) for reference below, you will need to replicate it exactly and then change your content. Remember, HTML code has special div classes, which are required for demo alike display.
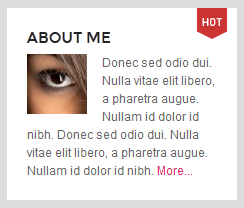
1. About me
Code
Module Position : right
Module Suffix : badge-hot
HTML Code
<div><img class="about" src="/images/demo/sam-2.jpg" border="0" alt="Sample Image" /> Donec sed odio dui. Nulla vitae elit libero, a pharetra augue. Nullam id dolor id nibh. Donec sed odio dui. Nulla vitae elit libero, a pharetra augue. Nullam id dolor id nibh. <a href="#">More...</a></div>
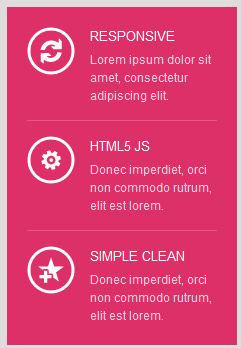
2. Template features
Code
Module Position : right
Module Suffix : pink
HTML Code
<div class="ja-innerdiv clearfix"><span class="bigicon ic-refresh"> </span><span class="txt-header">Responsive</span> Lorem ipsum dolor sit amet, consectetur adipiscing elit.</div>
<div class="ja-innerdiv clearfix"><span class="bigicon ic-setting"> </span><span class="txt-header">HTML5 JS</span> Donec imperdiet, orci non commodo rutrum, elit est lorem.</div>
<div class="ja-innerdiv last clearfix"><span class="bigicon ic-star"> </span><span class="txt-header">Simple Clean</span> Donec imperdiet, orci non commodo rutrum, elit est lorem.</div>
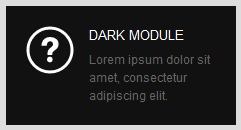
3. Dark Module
Code
Module Position : right
Module Suffix : dark
HTML Code
<div class="ja-innerdiv last clearfix"><span class="bigicon ic-question"> </span><span class="txt-header">Dark Module</span> Lorem ipsum dolor sit amet, consectetur adipiscing elit.</div>
4. Badge new
Code
Module Position : right
Module Suffix : badge-new
HTML Code
<div>Lacinia mollis leo wisi ridiculus <a href="#" title="Sample title">sed pellentesque</a> condimentum condimentum nunc tincidunt.</div>
5. Badge hot
Code
Module Position : right
Module Suffix : badge-hot
HTML Code
<div>Lacinia mollis leo wisi ridiculus <a href="#" title="Sample title">sed pellentesque</a> condimentum condimentum nunc tincidunt.</div>
6. Badge top
Code
Module Position : right
Module Suffix : badge-top
HTML Code
<div>Lacinia mollis leo wisi ridiculus <a href="#" title="Sample title">sed pellentesque</a> condimentum condimentum nunc tincidunt.</div>
7. Header Social
Code
Module Position : social
Module Suffix : NOT USED
HTML Code
<p class="line-through"><span>Not Enough. Want to stay informed? Follow me now... </span></p>
8. Header Social
Code
Module Position : social
Module Suffix : NOT USED
HTML Code
<div class="social"><a class="ico-social ico-rss" href="#" title="RSS"><span>RSS</span></a> <a class="ico-social ico-facebooks" href="#" title="Facebook"><span>Facebook</span></a> <a class="ico-social ico-twitters" href="#" title="Twitter"><span>Twitter</span></a> <a class="ico-social ico-chorme" href="#" title="chorme"><span>Chorme</span></a> <a class="ico-social ico-vimeo" href="#" title="Feed"><span>Porfolio Vimeo</span></a></div>

9. A little about me
Code
Module Position : user1
Module Suffix : NOT USED
HTML Code
<div class="about"><img src="/images/demo/sam-1.jpg" border="0" alt="Sample Image" /> Donec sed odio dui. Nulla vitae elit libero, a pharetra augue. Nullam id dolor id nibh ultricies. Etiam justo lectus, placerat vel aliquet et, varius quis mauris. Quisque mollis mauris sit amet ipsum.<a href="#">Read more About me</a></div>
10. A little about me
Code
Module Position : user2
Module Suffix : NOT USED
HTML Code
<p>Suspendisse in ipsum ut magna pharetra aliquet non sodales.</p>
<ul class="contact">
<li><span>Mail Us</span> <a href="#" title="Email">contact@joom.com</a></li>
<li><span>Phone</span> +123 456 7890</li>
<li><span>Location</span> 2411 Any Street - Any Town - United Kingdom.</li>
</ul>
11. Timeline Features
Code
Module Position : user3
Module Suffix : NOT USED
HTML Code
<p>Learn more about the Timeline Template features</p>
<ul class="userlinks">
<li><a href="#">Responsive Layout</a></li>
<li><a href="#">Porfolio Section</a></li>
<li><a href="#">Grid system</a></li>
<li><a href="#">Rich Typography</a></li>
<li><a href="#">And much more...</a></li>
</ul>
12. Hello... I Am JA Lens
Code
Module Position : content-mass-bottom
Module Suffix : NOT USED
HTML Code
<p class="line-through"><span>A web Desiginer & Photographer from London</span></p>

K2 Component Configuration
K2 Installation
If you are new to this Joomla component, please read this guide.
K2 installation documentation2. Configure K2 component
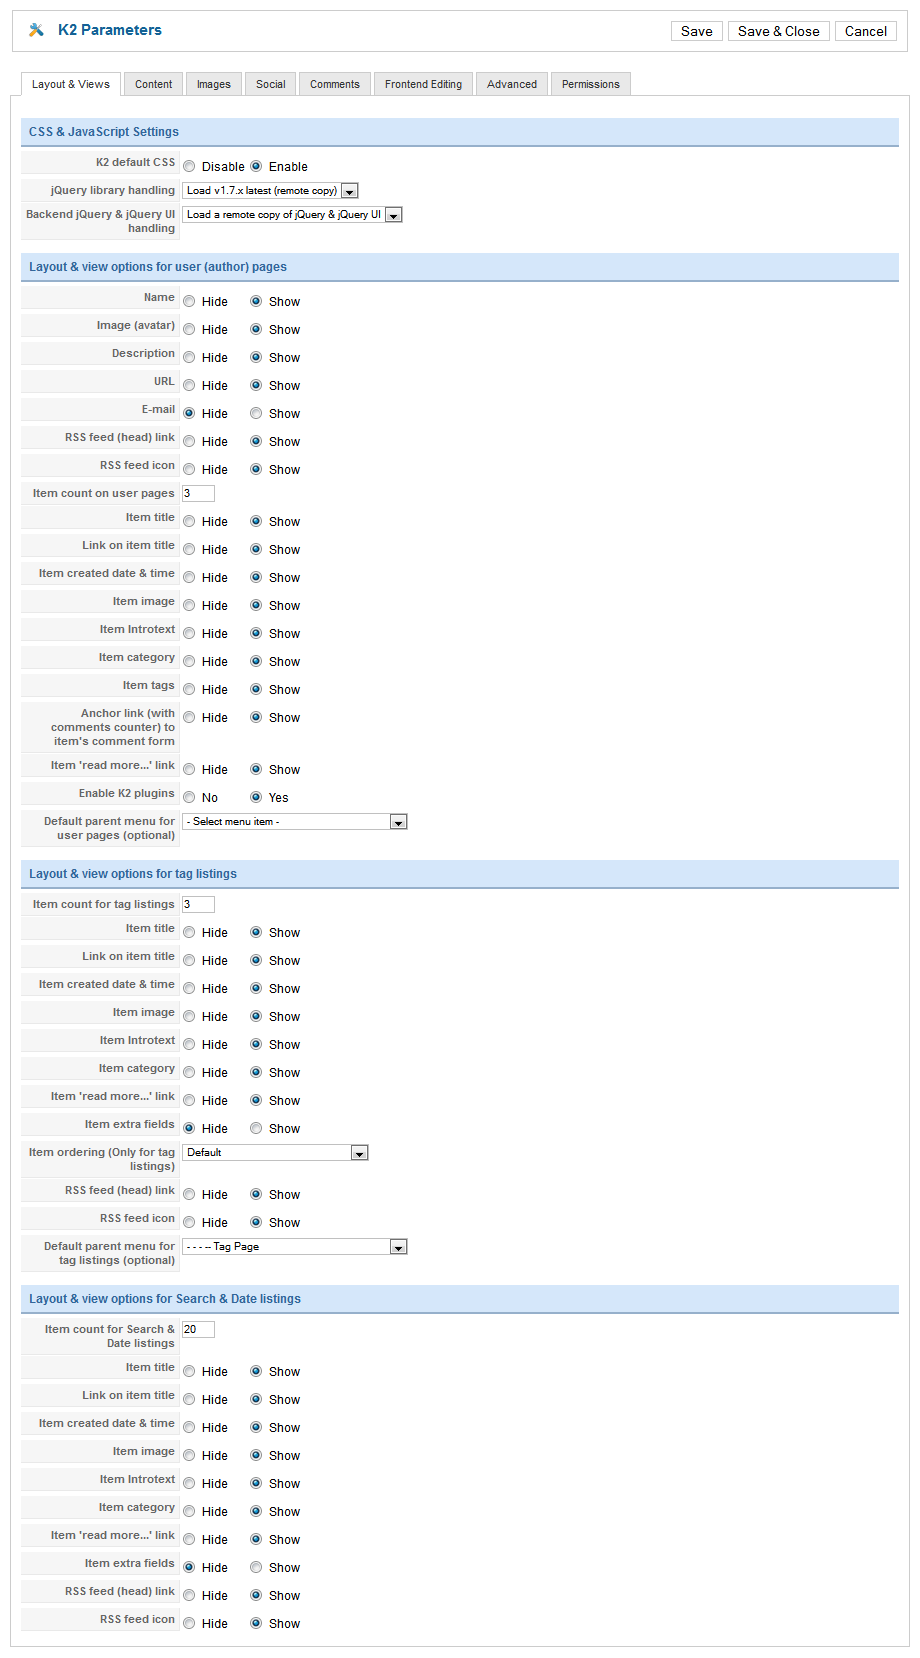
2.1 Global Configuration: click on Parameter button
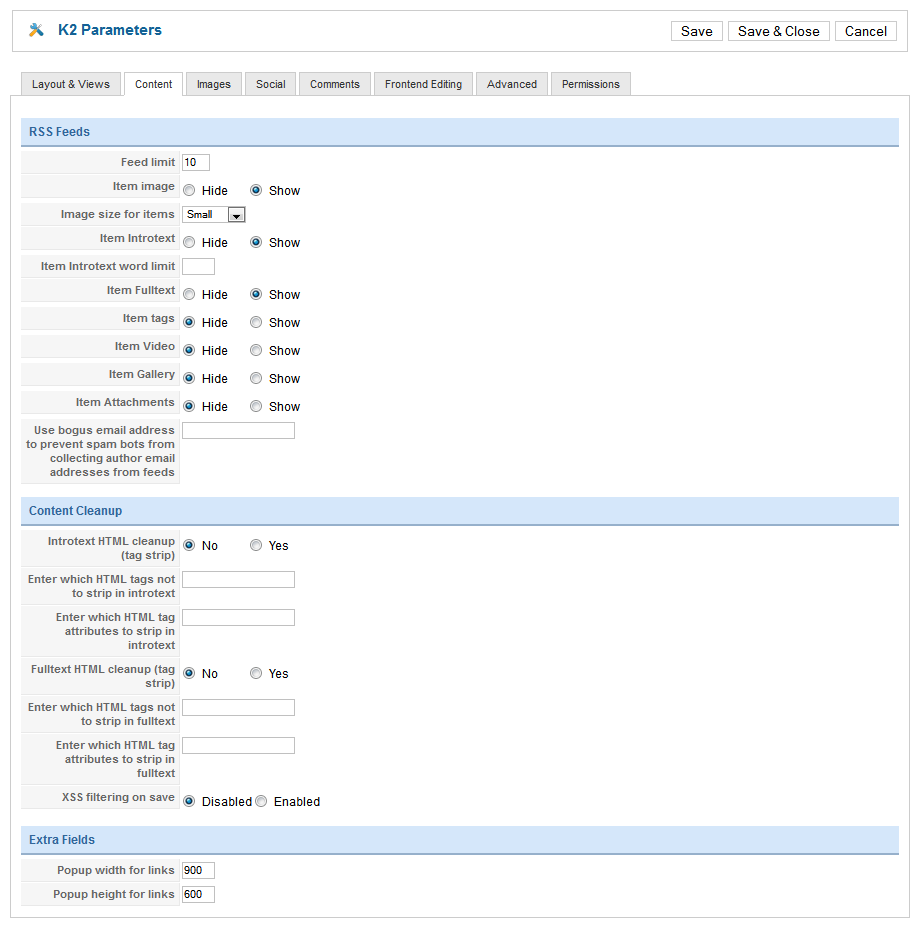
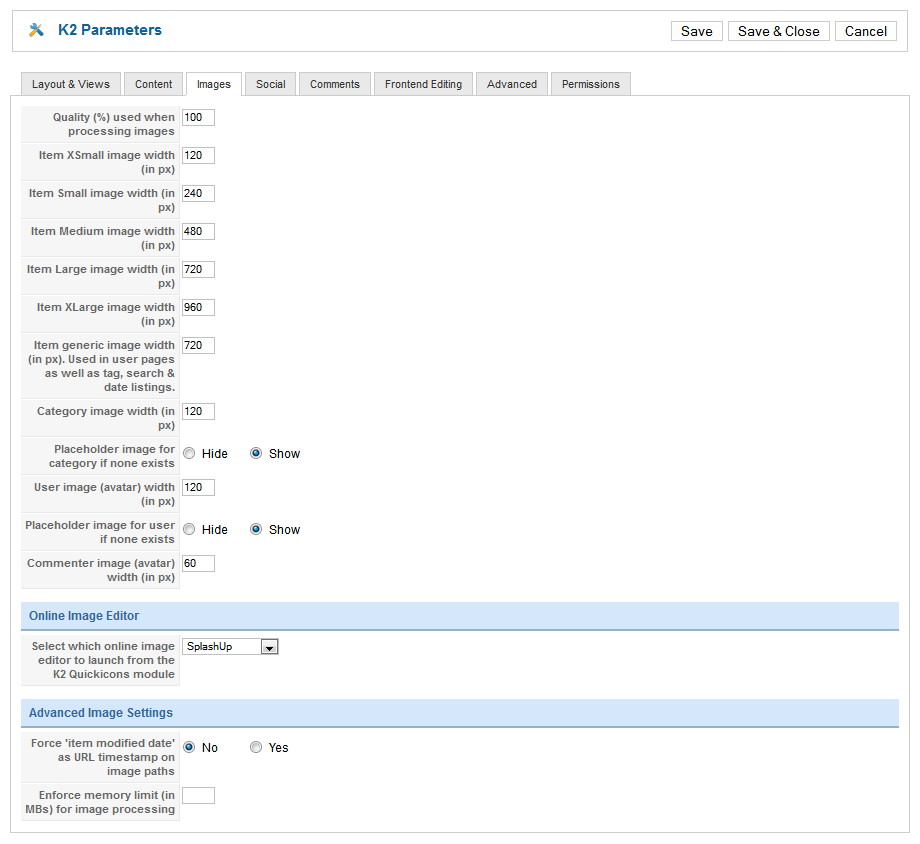
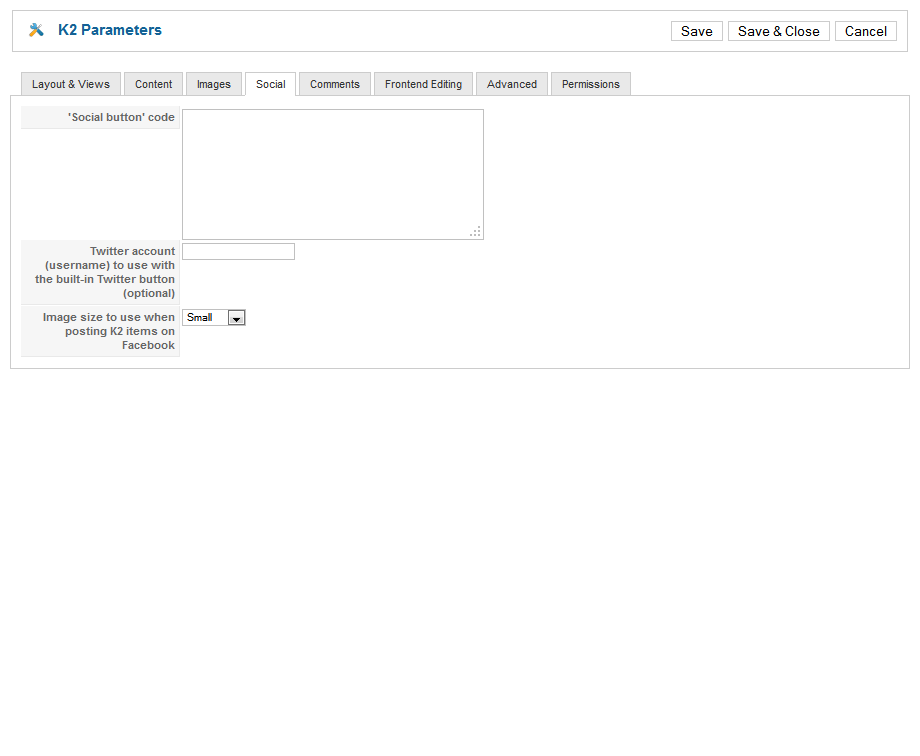
Back-end settings
- Layout & Views Settings
- Content Settings
- Images Settings
- Social Settings
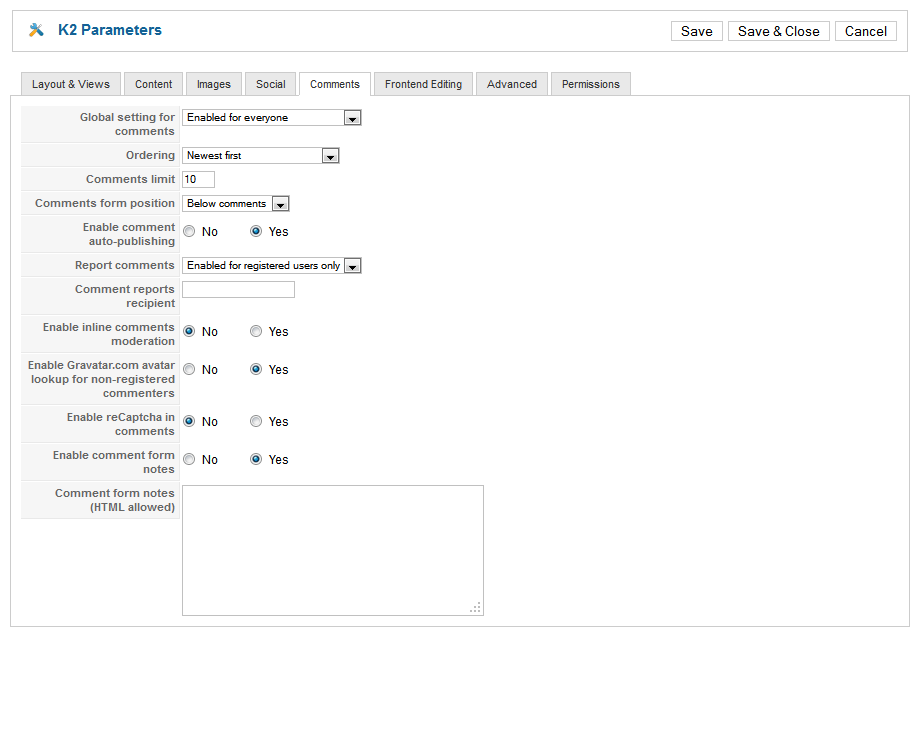
- Comments Settings
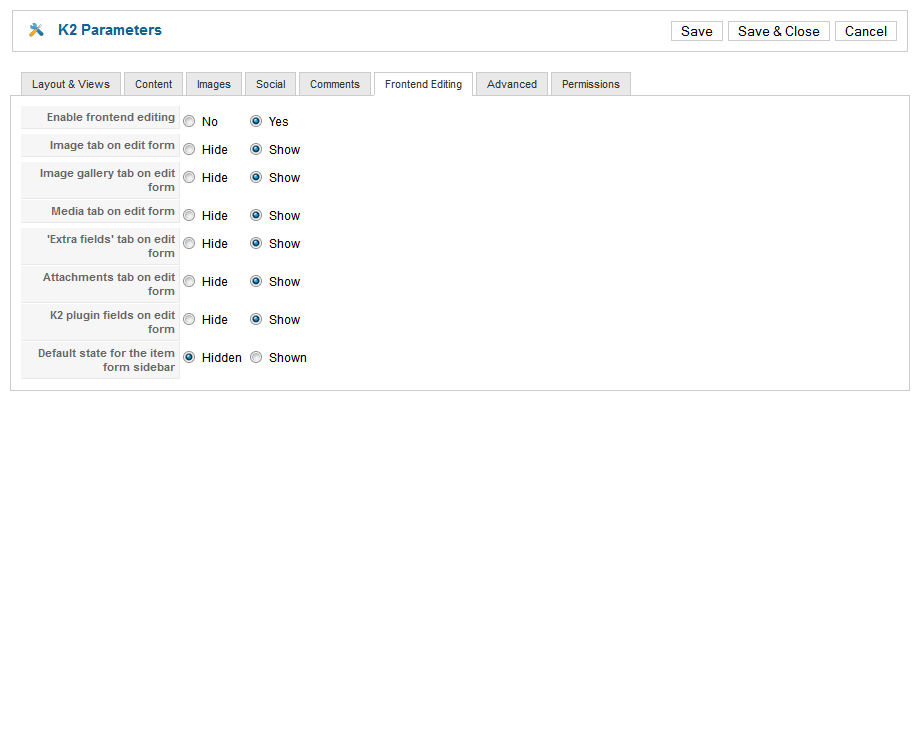
- Front-end and Editing Settings
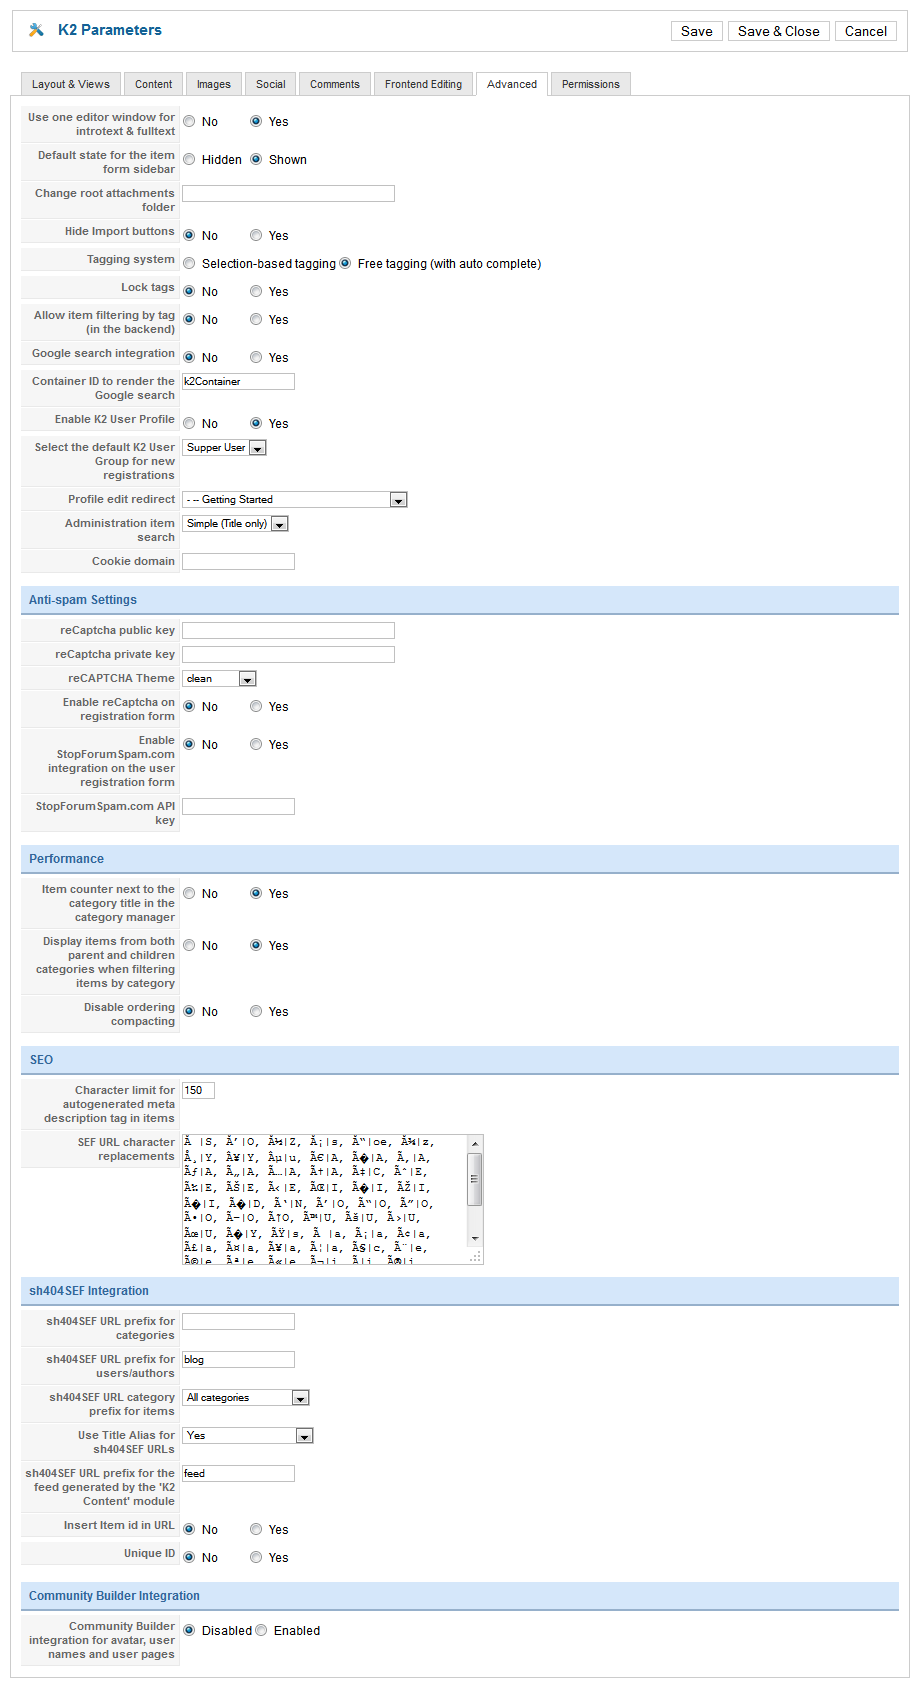
- Advanced Settings
2.2 Category Configuration
To build your website like our demo, navigate to Administrator >> Component >> K2 >> Categories.
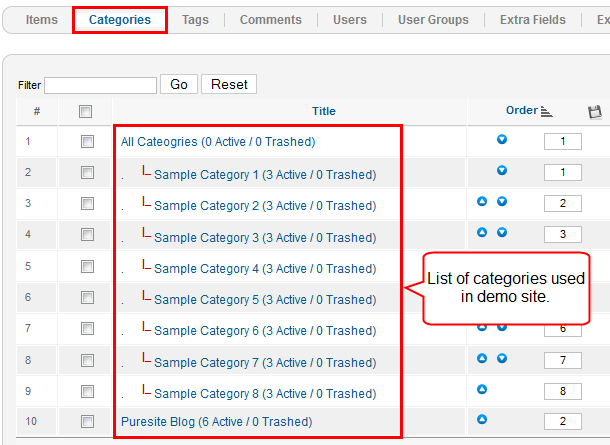
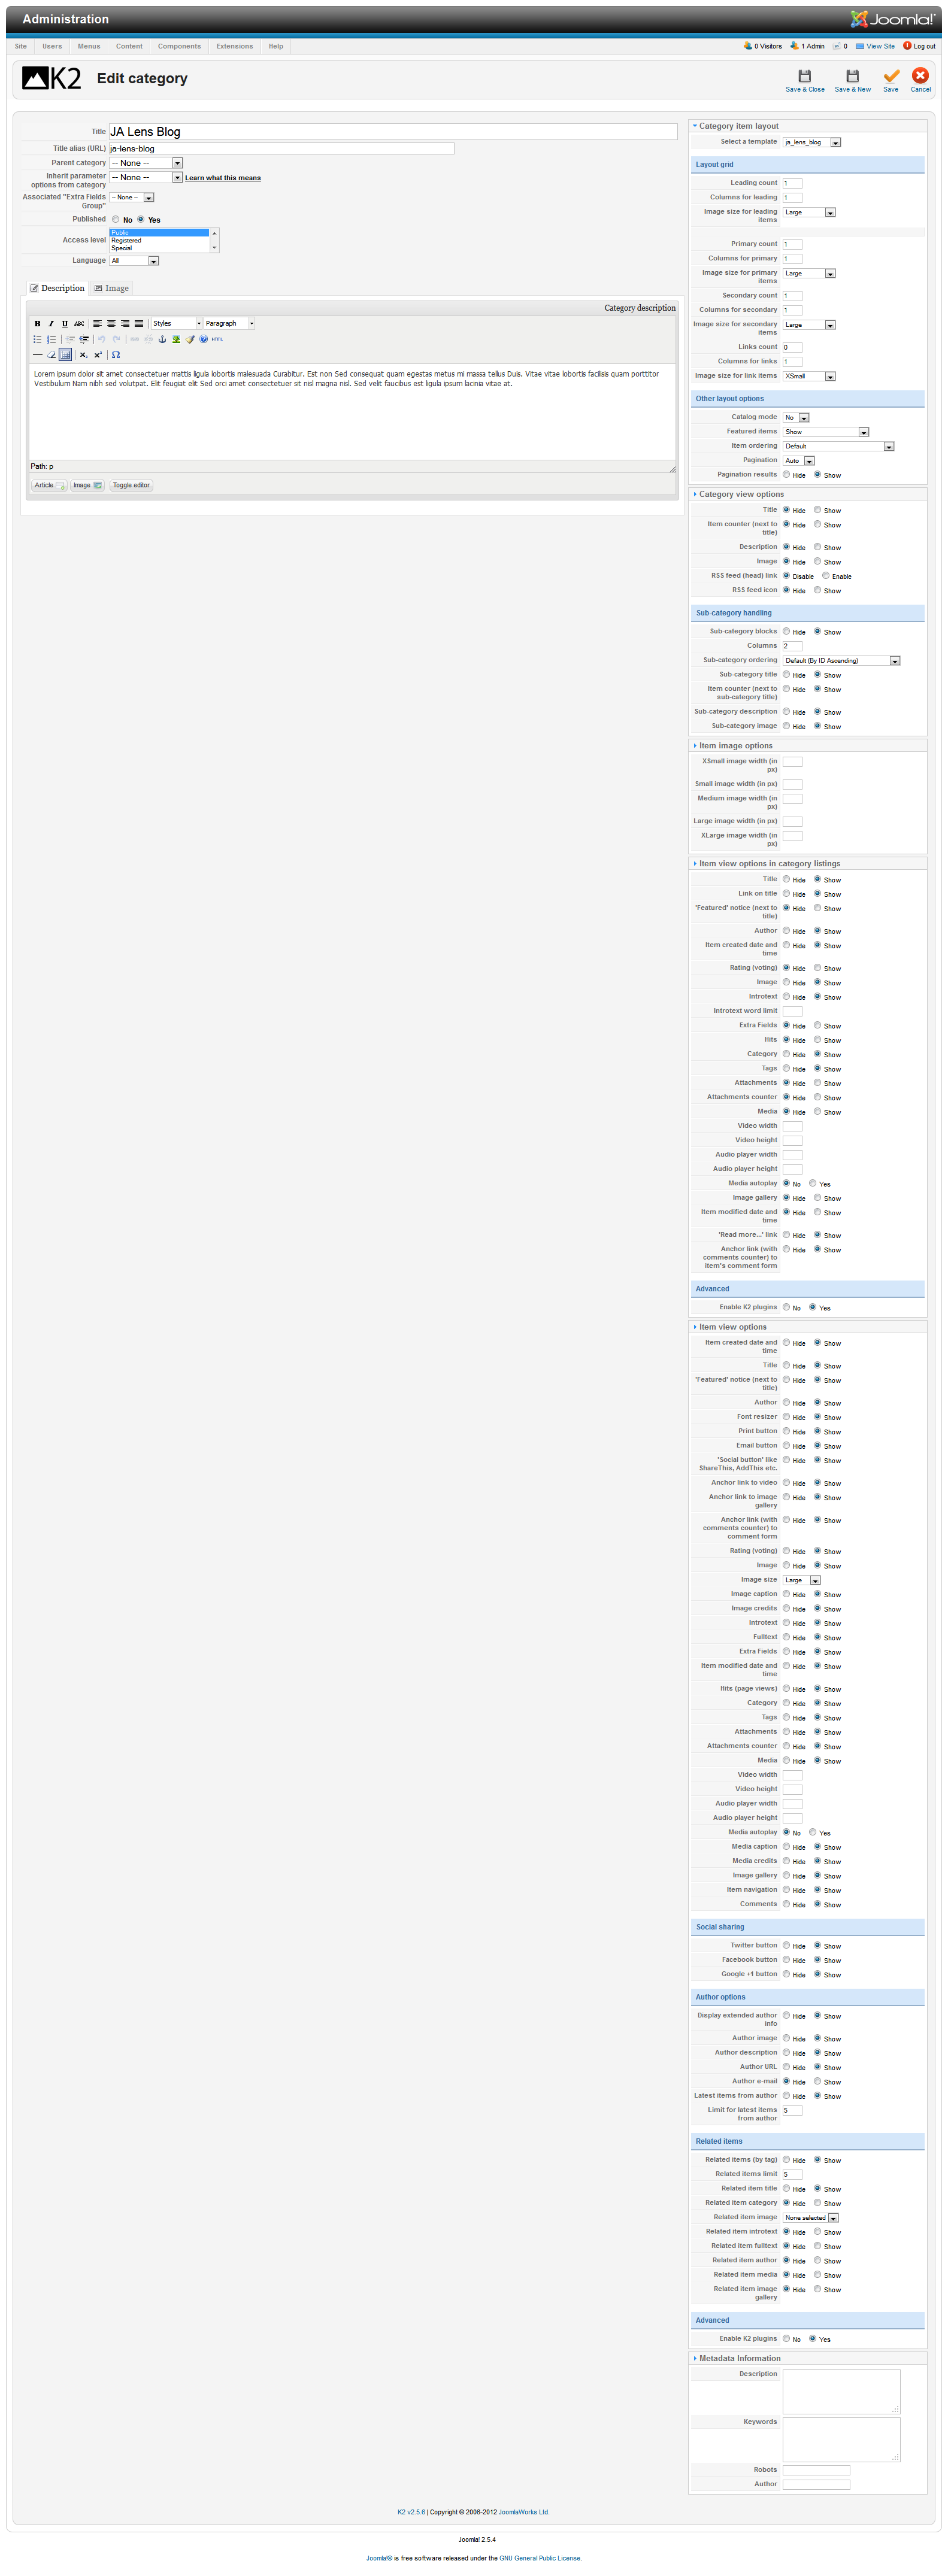
In the template, the Demo Categories category uses ja_lens template. This template divides layout into number of columns to display content due to screen size. The JA Lens Blog category uses ja_lens_blog template. The template has content block and right side to display modules. The content block is 720 pixel in wide.
Demo category
JA Lens Blog categories
3. Configurations for K2 Modules
This instruction is a reference for developers using manual installation, a guide on how to setup K2 Component like on the demo website and the Quickstart package.
Please refer to the official documentation on how to install and setup K2.
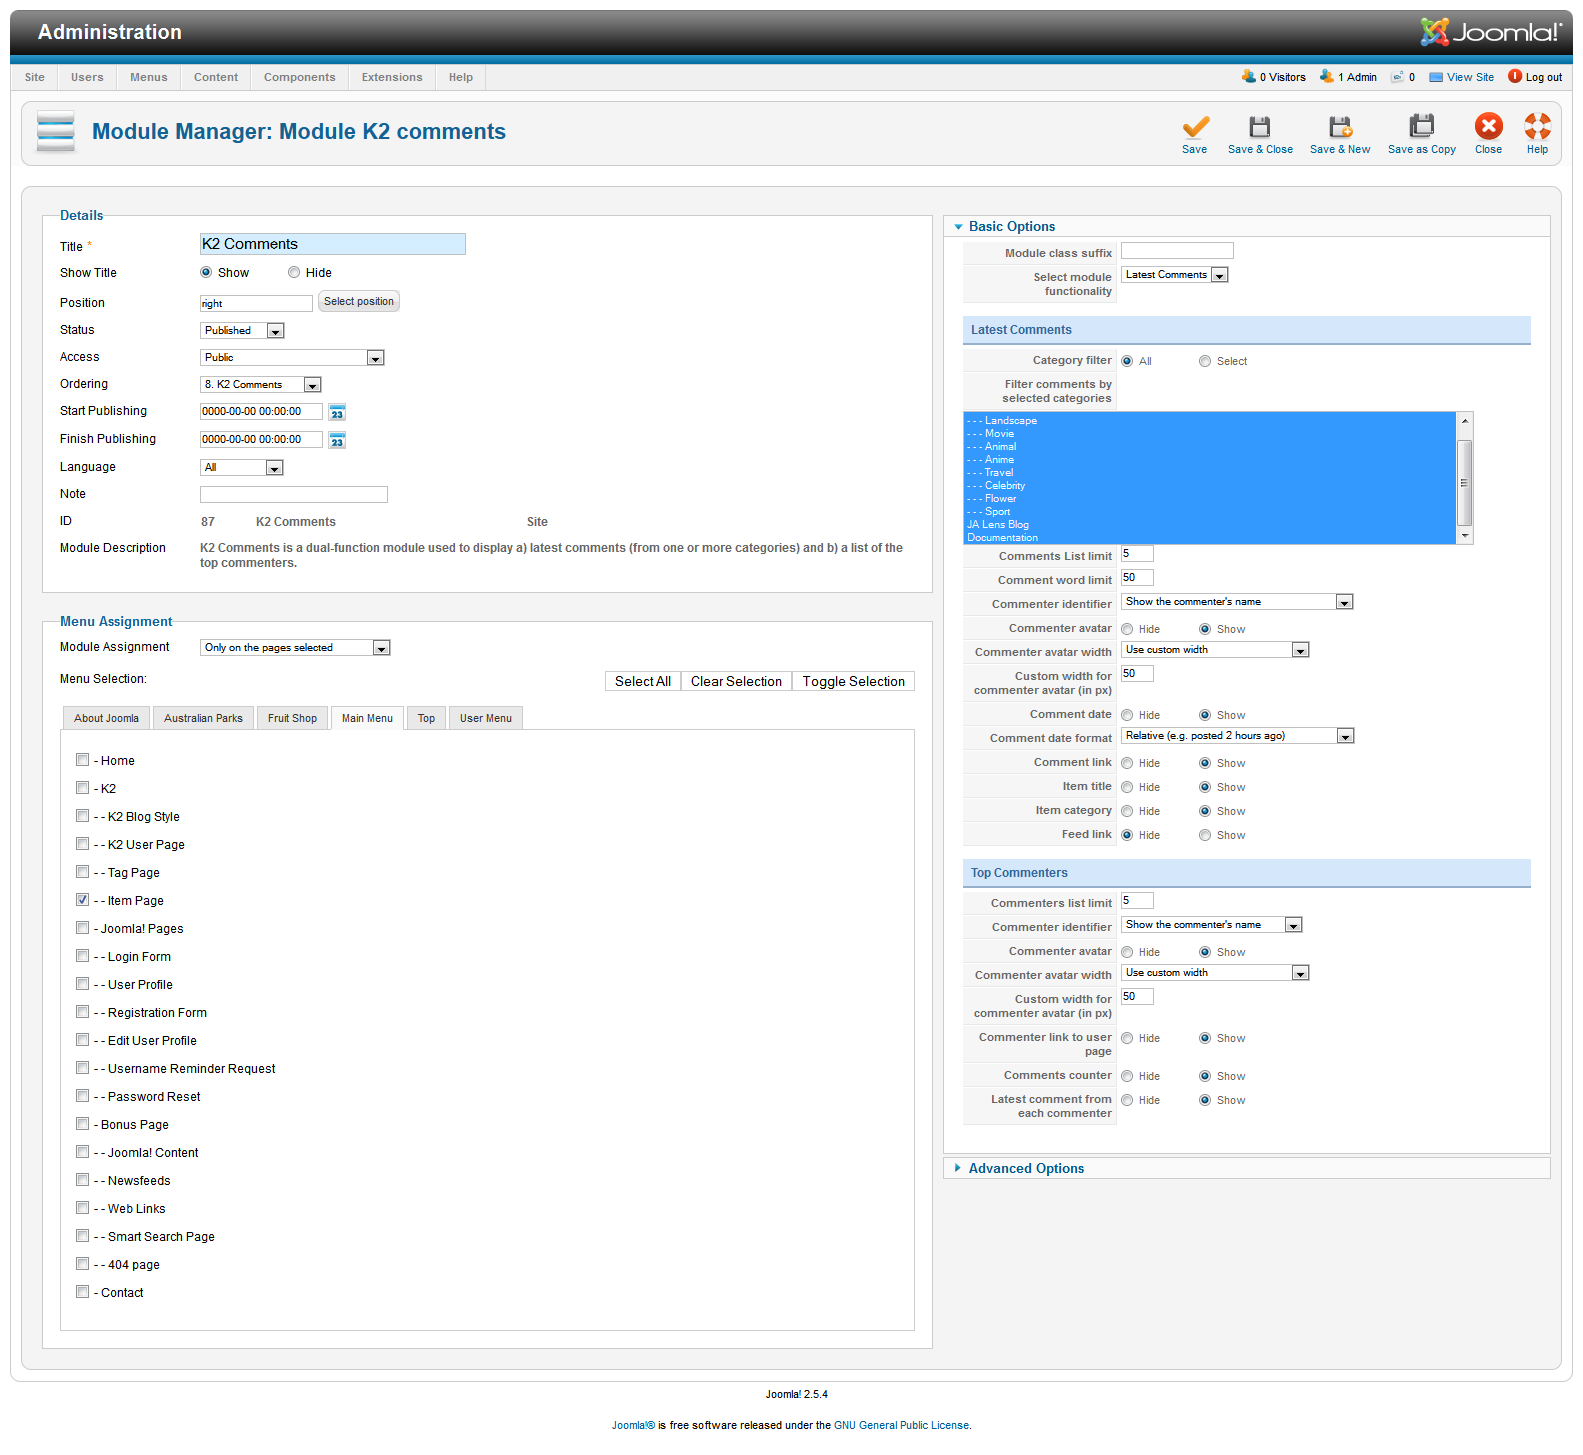
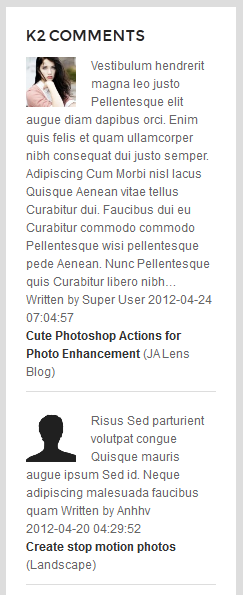
3.1 K2 Comment Module
Module Position :  right
Module suffix : NOT USED
- Back-end Settings
- Front-end Appearance
3.2 K2 Content Module
Module Position : right
Module suffix : NOT USED
- Back-end Settings
- Front-end Appearance

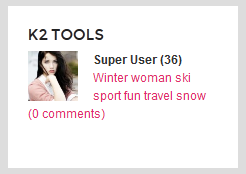
3.3 K2 Tools Module
3.3.1 K2 Tools to display Author list
Module Position : right
Module suffix : NOT USED
- Back-end Settings
- Front-end Appearance
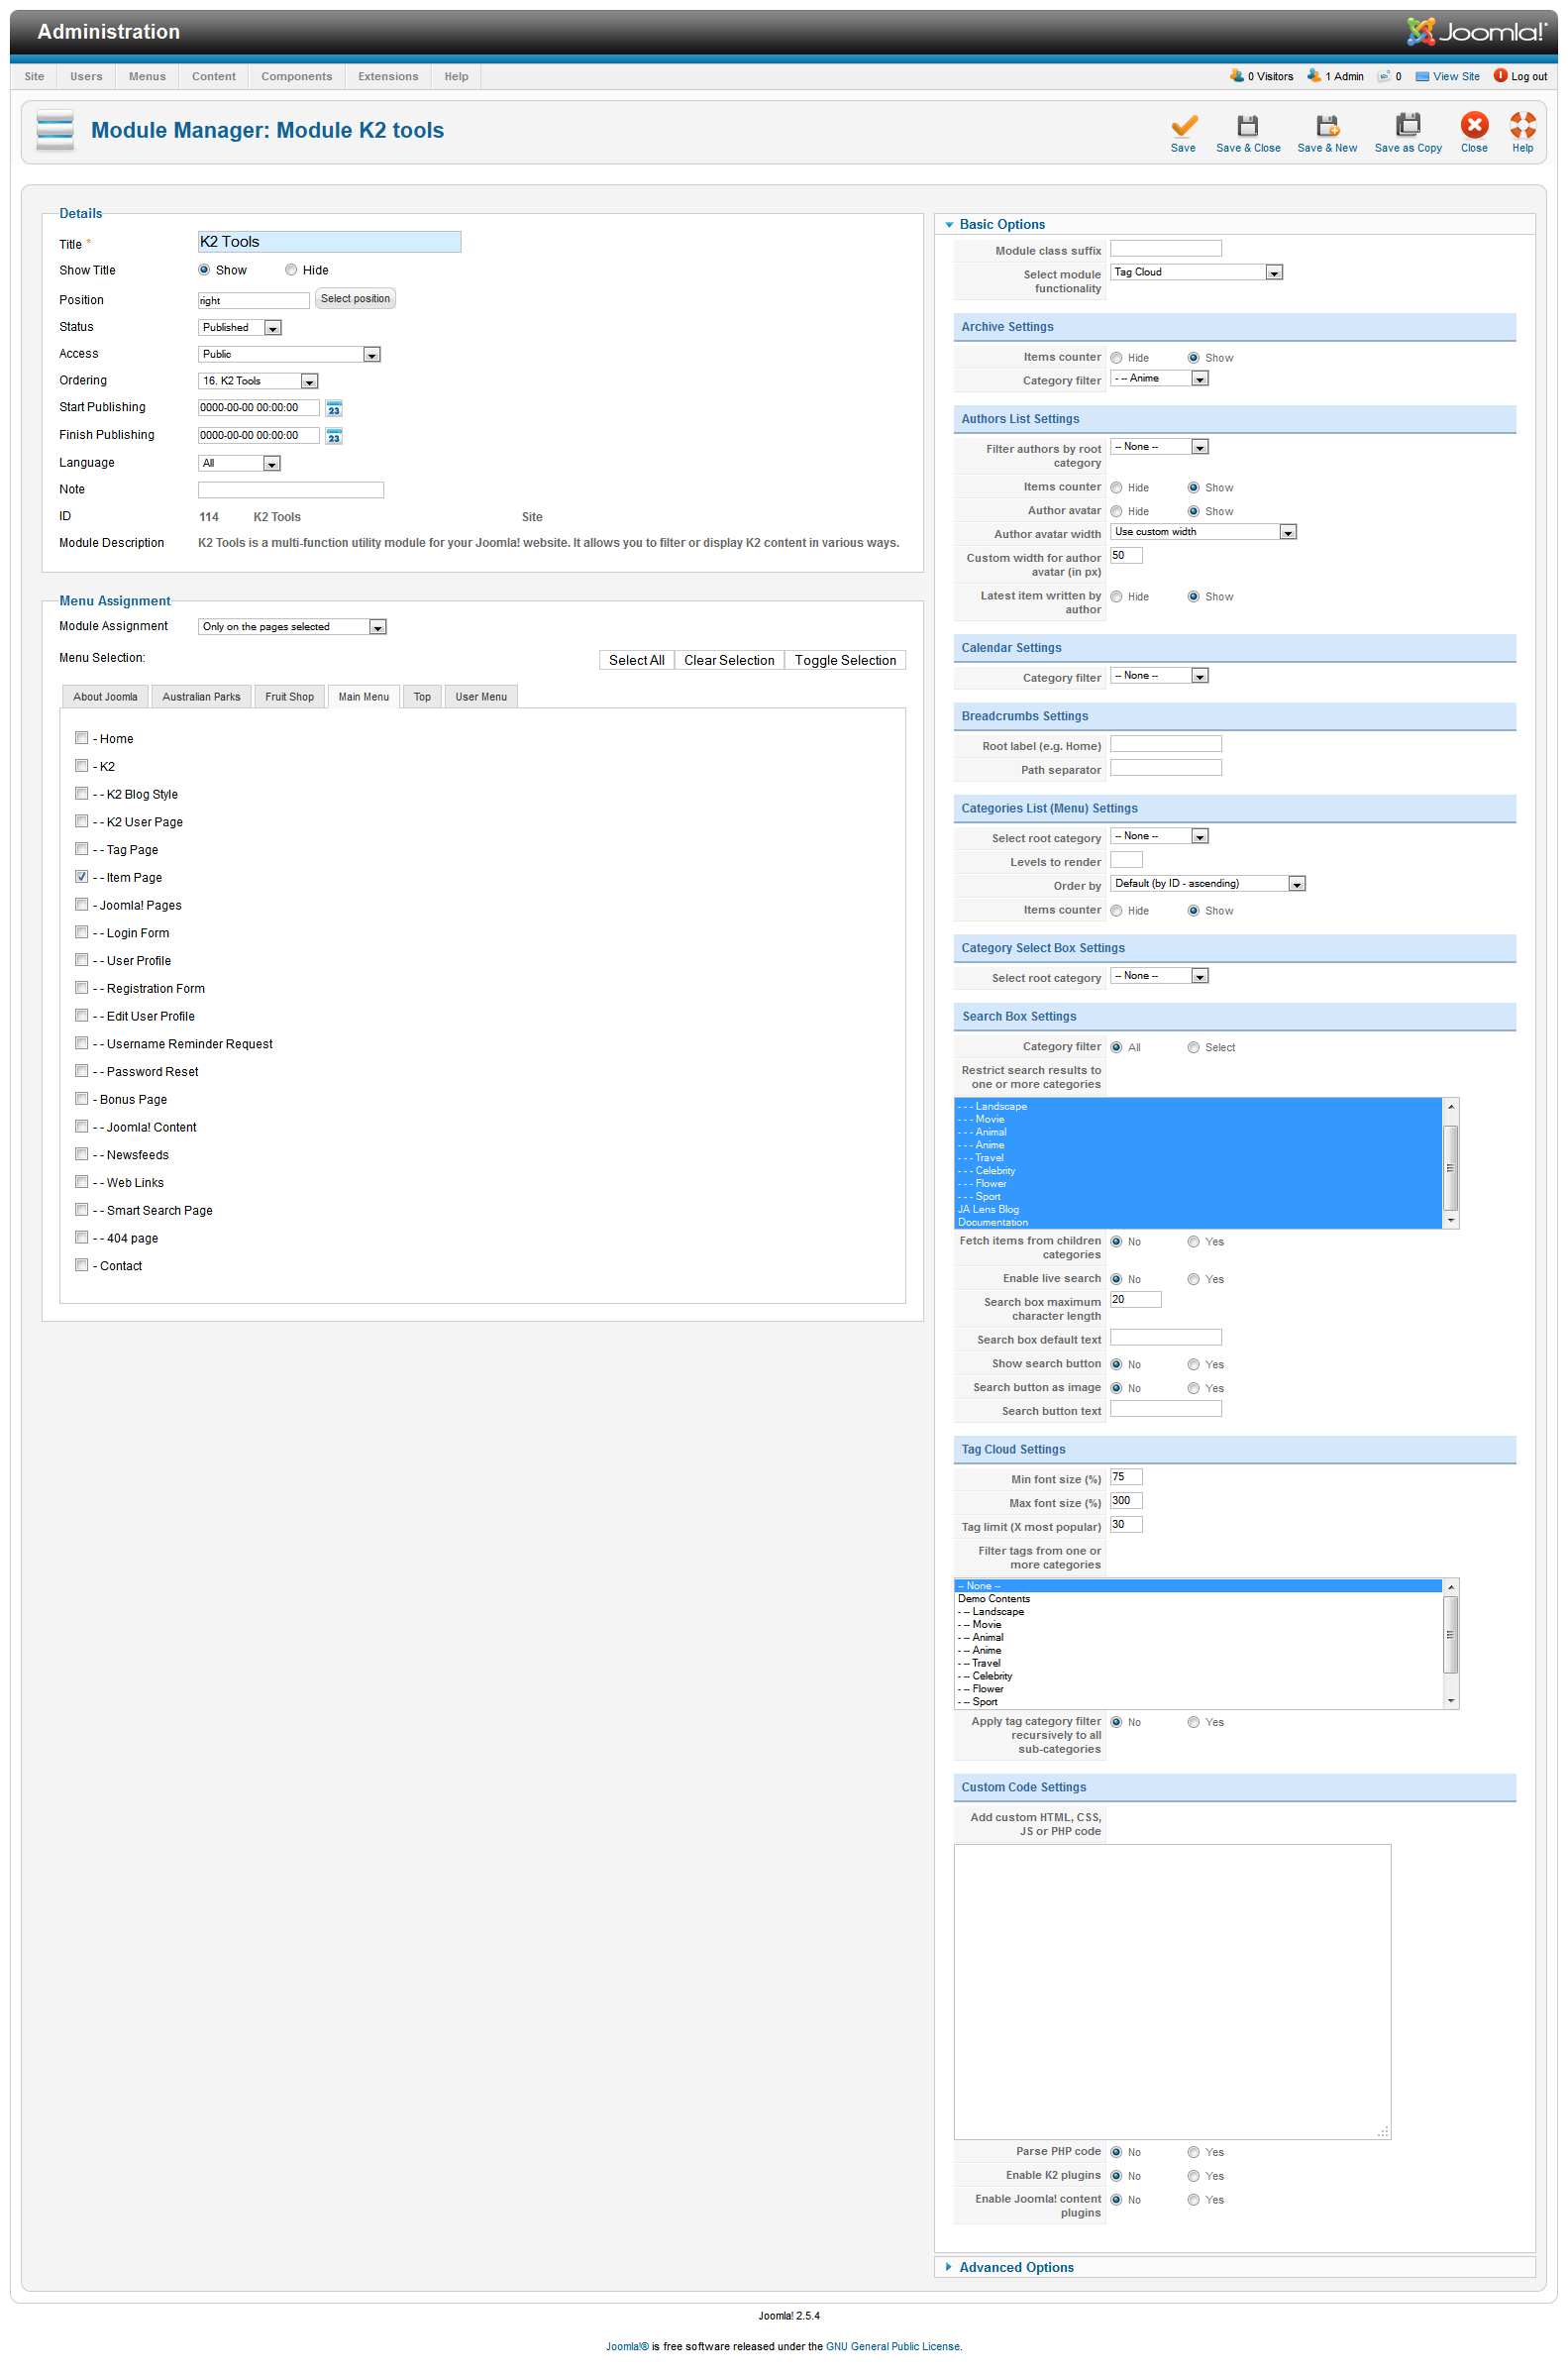
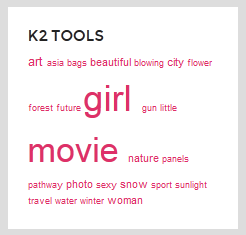
3.3.2 K2 Tools to display Tag Cloud
Module Position : right
Module suffix : NOT USED
- Back-end Settings
- Front-end Appearance
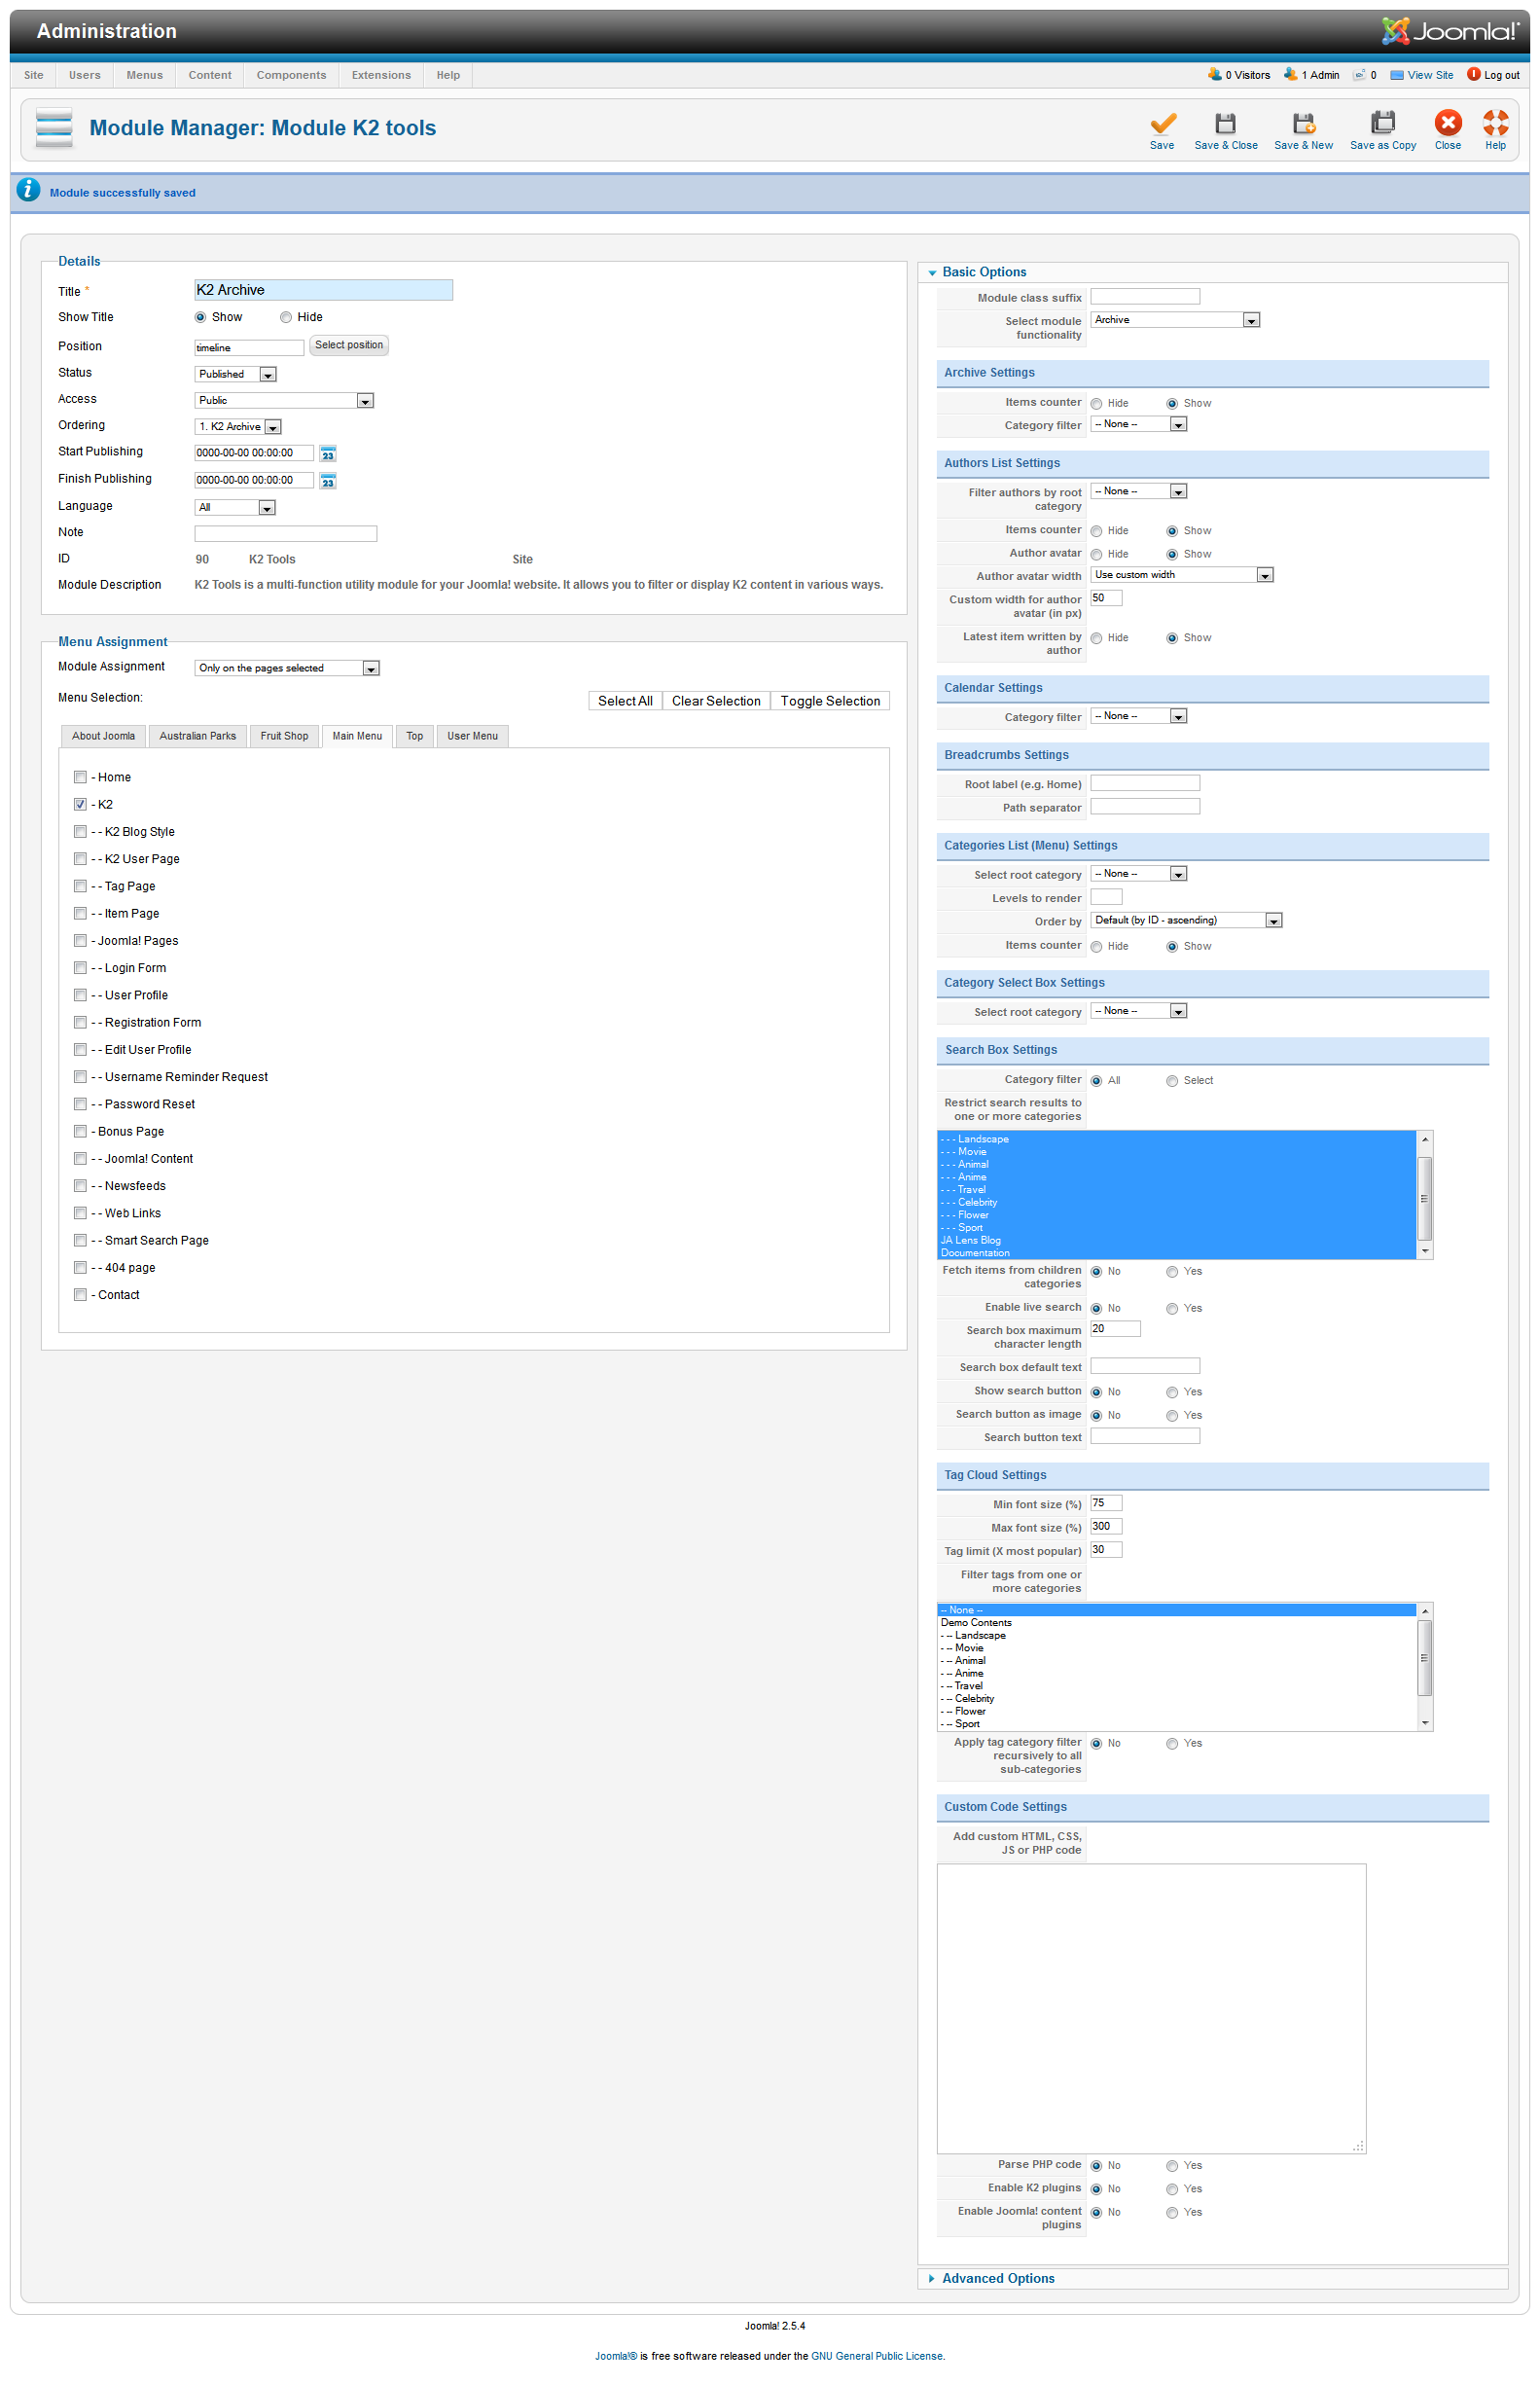
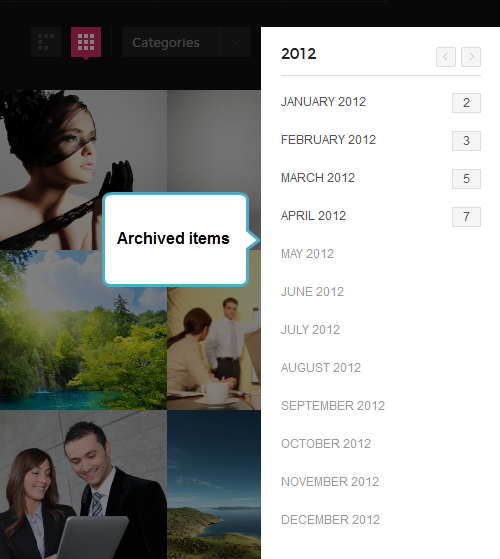
3.3.3 K2 Tools to display Archived items
Module Position : right
Module suffix : NOT USED
- Back-end Settings
- Front-end Appearance
Userful Tips
If you have problems when installing the template, please check the following tips.
- Recommended PHP requirement for Joomla 2.5 is from 5.3.x and higher.
- Make sure the order of the JA Lazy load plugin is loaded after most of other plugins. Recommended just above the core Joomla Cache plugin.
Recommendation
The above userguide should help one in replicating the Demo site settings for the template and extensions on their site.
Recommended :
If you are new or are confused, we recommend installing Quickstart on your localhost and use it as reference for configs. This is the best way to work with any template. Links to all the resources are provided above, you should carefully read them to take the maximum advantage of our products.
Support :
Please raise your support queries in the support forum. We spend more time in getting the information from user in case the support guidelines are not followed.