JA Bookshop Introduction
JA Bookshop is fully compatible with Joomla 2.5 and Joomla 3, the documentation is based on Joomla 3, for Joomla 2.5, it's almost the same with Joomla 3.
Ecommerce or Showcase, Portfolio site
JA Bookshop can be used as ecommerce site or showcase, portfolio site.
- Ecommerce: based on Mijoshop component
- Showcase or Portfolio: based on Joomla com_content with styles included in template package.
Ecommerce Demo Showcase & Portfolio Demo
Main Features
- Ecommerce Template with Mijosho
- Fully Responsive Template
- Joomla 2.5 and Joomla 3 native
- Bootstrap 3 integration
JA Extensions Supported
- JA Slideshow Lite module
- JA Side News module
- JA Content Slider module
- JA Extension Manager
- JA Google Map plugin
- JA Tabs plugin
- T3 Framework
Supported Third party extensions
- Mijoshop
- Acymailing
- Easyblog
Supported Joomla pages (by default)
- Login
- Registration Page
- Edit User Profile
- Web Links
- News Feeds
- Contact Us
- Smart Search
- Offline Page
- 404 Page
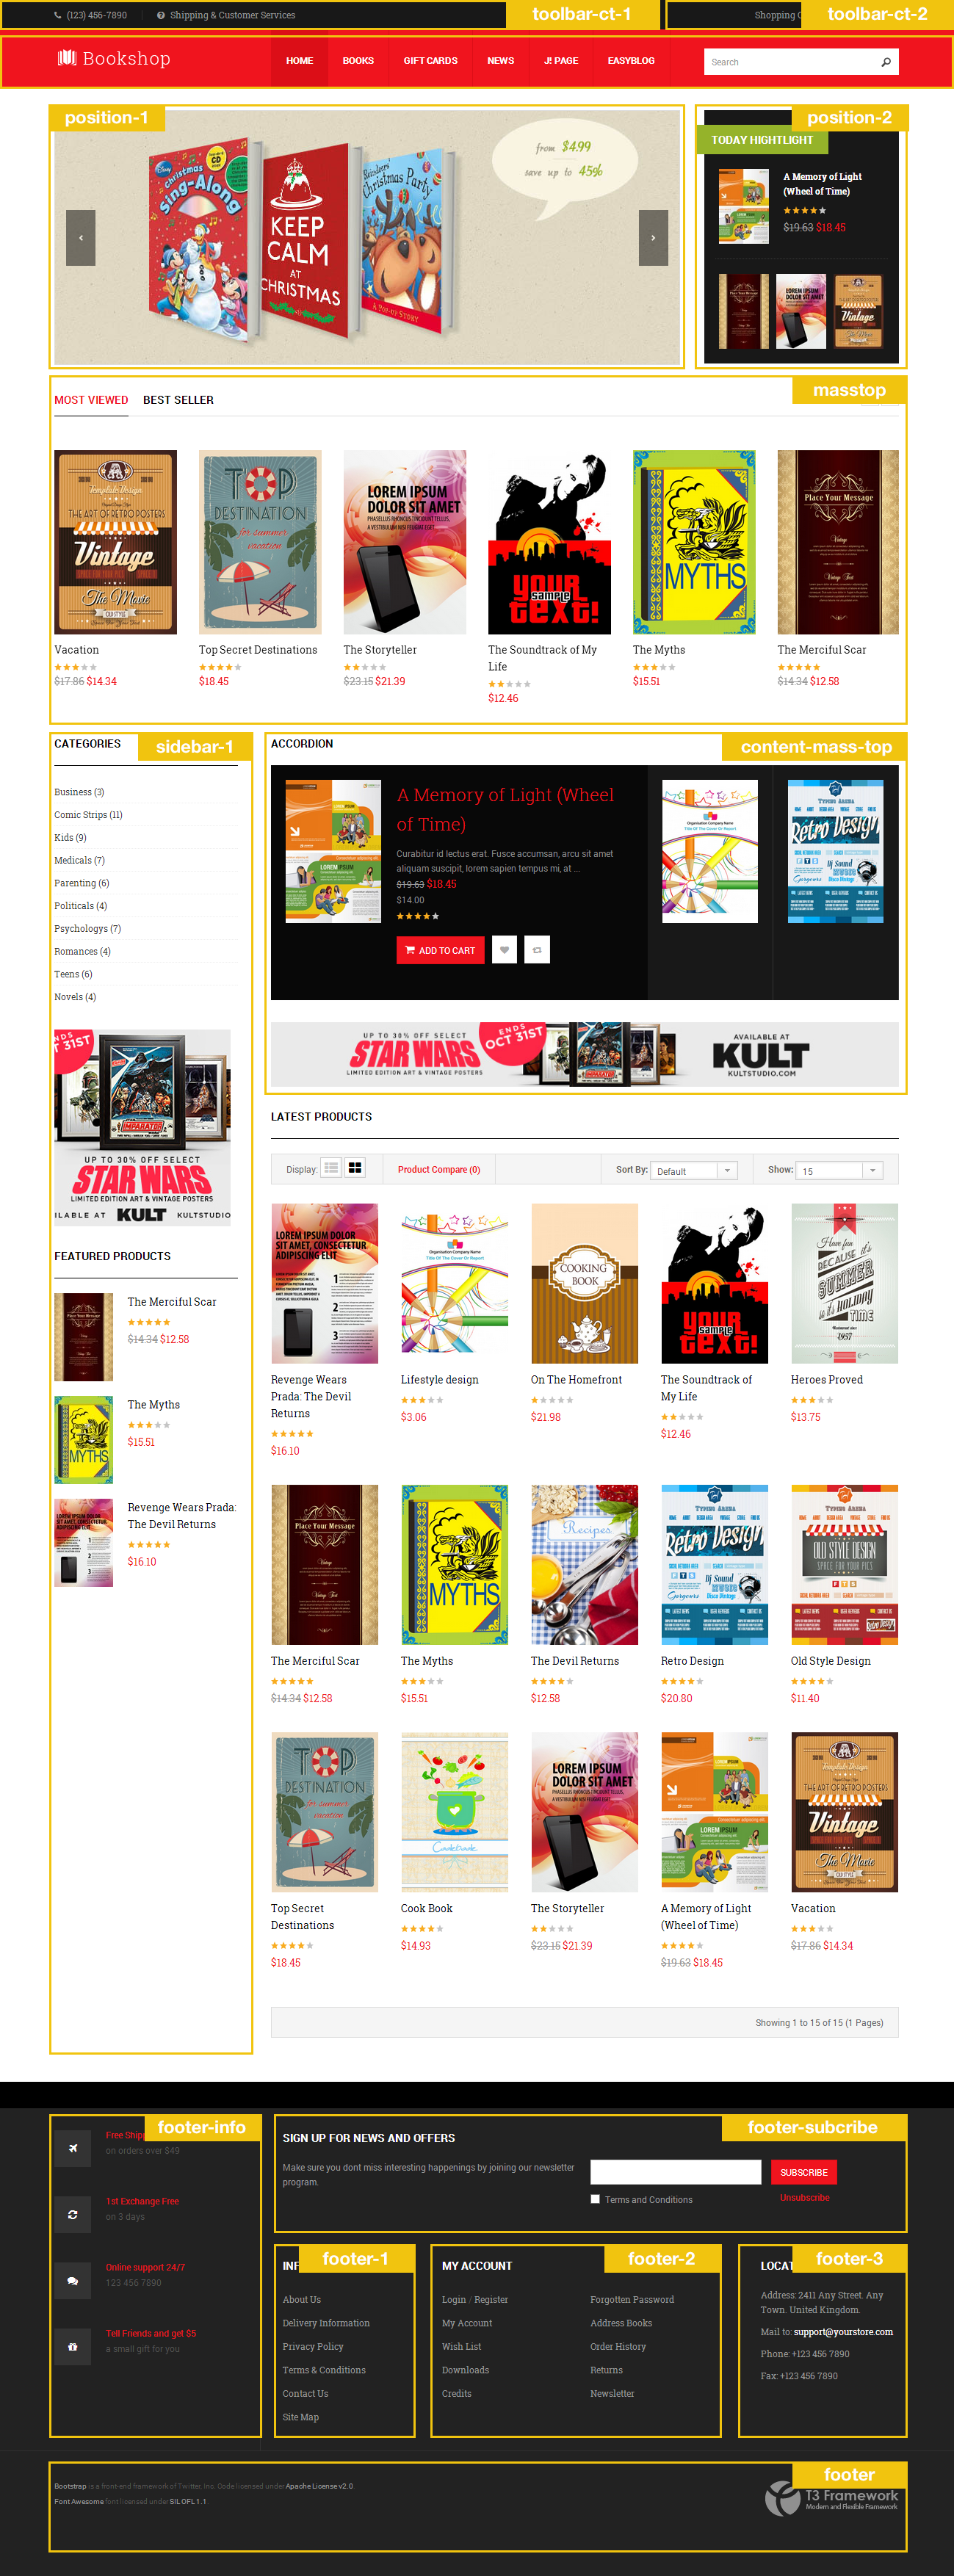
Site structure and Module position
System requirement
JA Bookshop is compatible with Joomla 3 and Joomla 2.5. Please make sure your system meets the following requirements:
Joomla 3 System requirement
Software
- Software: PHP (Magic Quotes GPC off): 5.3.1 + (5.4+ recommended)
Databases
- MySQL(InnoDB support required): 5.1+
- MSSQL 10.50.1600.1+
- PostgreSQL 8.3.18+
Web Severs
- Apache 2.x+
- Microsoft IIS 7
- Nginx 1.0 (1.1 recommended)
Joomla 2.5+ system requirement
Software
- Software: PHP 5.2.4+ (5.4+ recommended)
- MySQL: 5.0.4+
Web Sever
- Apache: 2.x+
- Microsoft: IIS 7
- Nginx: 1.0 (1.1 recommended)
Browser requirement
The requirements are the same with both Joomla 2.5 and Joomla 3
- Firefox 4+
- IE (Internet Explorer) 8+
- Google Chrome 10+
- Opera 10+
- Safari 5+
Development Environment
The requirements are the same with both Joomla 2.5 and Joomla 3
During development process, Localhost is preferred. You can use the following servers on your PC to develop your site.
Windows
- WAMPSEVER
- XAMPP for Windows
Linux
- LAMP Bubdle
- XAMPP for Linux
Mac OS
- MAMP & MAMP Pro
- XAMPP for Mac OS
Download and Installation
1. Plan your site Development
- Making a New Site ? - If you are planning to make a new site, then use our Quickstart package to clone the demo site and replace the demo content with yours. Check How to install Quickstart Package.
- Installing on your live site ? - If you are planning to use this template on your already live site. Then you should follow How to make your site look like demo site guide first to know about the steps involved.
2. Download Template and Extensions
Browse and Download: Go to the Download page of JA Bookshop and download the Template zip file.
3. Install Template and Extensions
- Install the template that you download in your Joomla system.
- JA Bookshop template will install with Settings used on the demo website, so you can postpone the configuration until you complete the setup (install other modules / plugins used in the demo website).
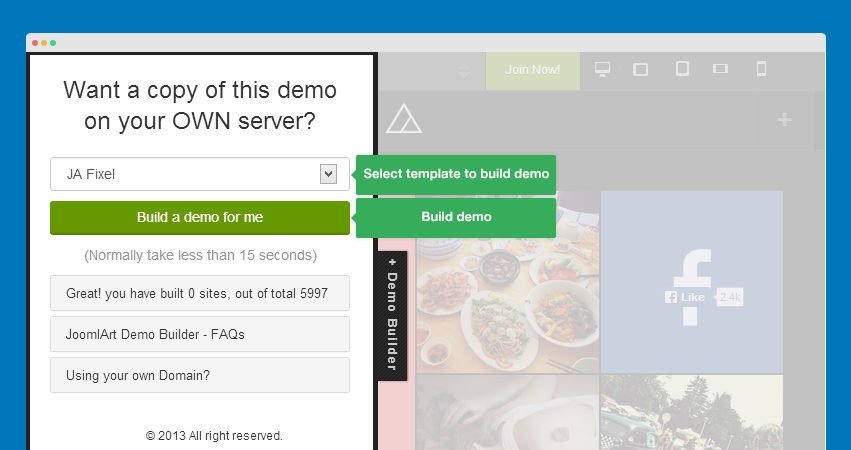
4. Build demo with our Demo Builder
The demo builder service allows you to build demo for any Joomla template. All infomation of the demo will be sent to your email. You will have one day to explore our template before it's deleted.
Note:
Custom HTML Module: To match the design of the template, we also style (CSS) for Custom HTML modules using different div classes. You will need to check the HTML codes and make sure to use the recommended HTML markup to get correct display. We provide the HTML code in this user-guide.
Mijoshop 3 Configuration
If you are using Mijoshop 2 and want to migrate to Mijoshop 3, please check out: Mijoshop 2 to Mijoshop 3 migration document - Video tutorials
1. Mijoshop installation
Step 1 - Download then install Mijoshop component to your site
Step 2 - Download extensions and mijoshp 3 themes for the Bookshop template. In the download page of JA Bookshop, download:
- JA Bookshop Theme for Mijoshop V3
- Mijoshop V3 Modules Accordion
- Mijoshop V3 Modules Slider.
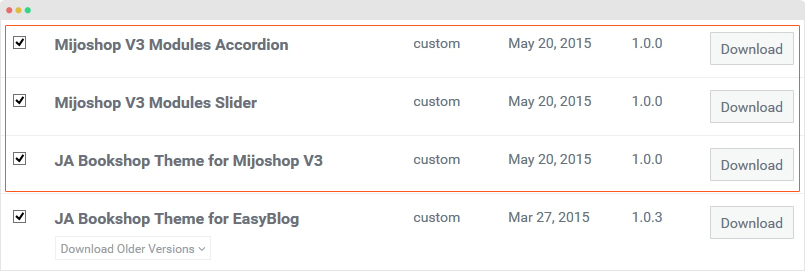
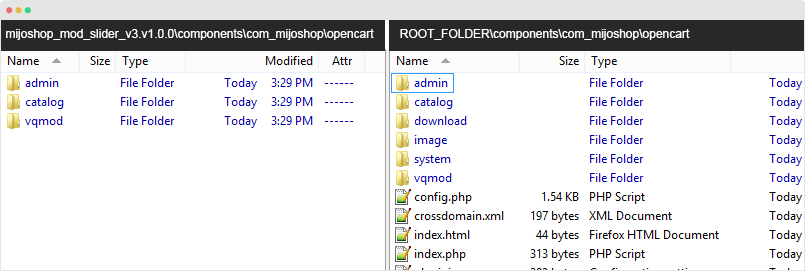
Step 3 - Extract the package one by one, open it and upload the folder components/com_mijoshop/opencart to your site root folder.
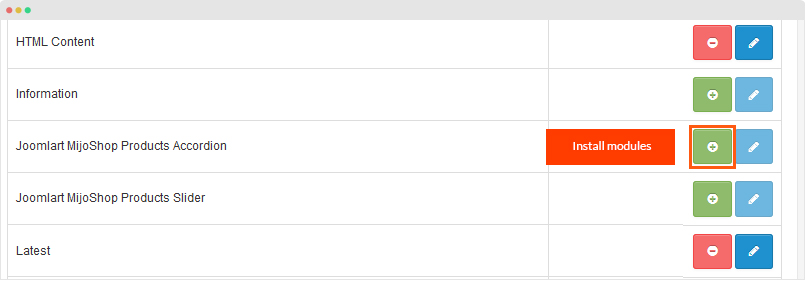
Step 4 - Once the upload is done, please go to Mijoshop working panel > Extensions > Modules then install modules: Joomlart MijoShop Products Accordion and Joomlart MijoShop Products Slider.
Next, we need to set default theme for Mijoshop 3. Go to "System > Settings > Edit default store > Store" and select "bookshop_v3" template.
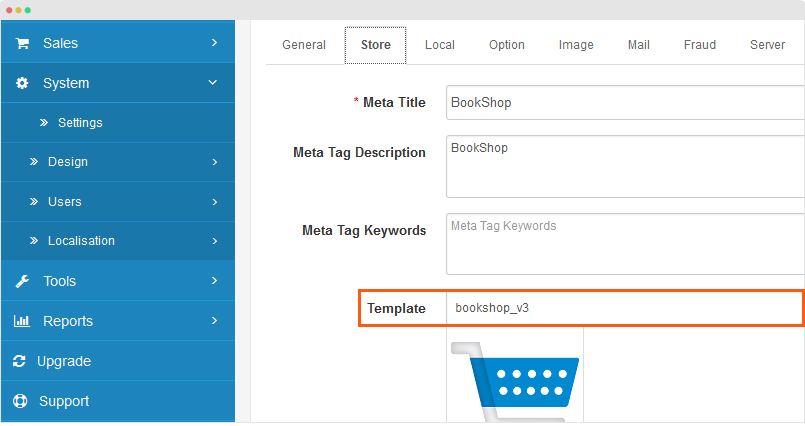
To have style like our demo, please make sure you have same settings as the image below.
Other settings are default settings.
2. Mijoshop Menu Configuration
If you want to make Mijoshop in your site same as JA Bookshop demo site, this would be helpful. We only show the important, customized settings, default settings are not shown.
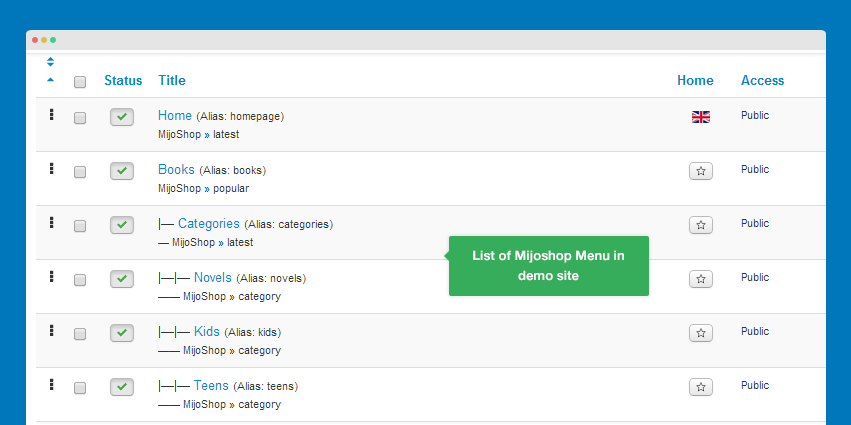
Shop Menu
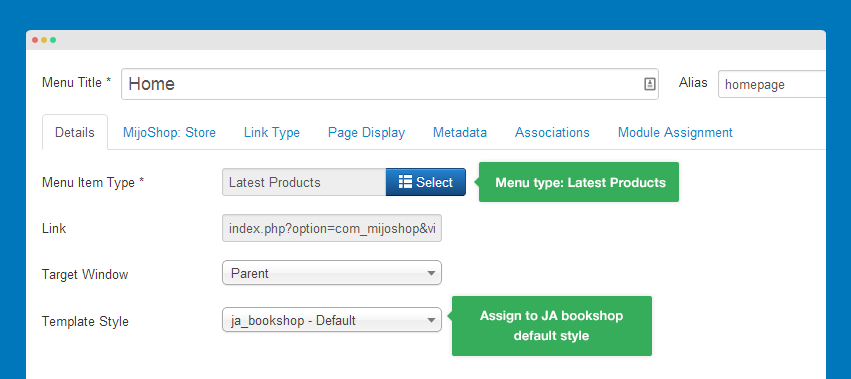
Menu setting
Menu type: Latest Products
MijoShop Store: Default
Menu Detail Settings
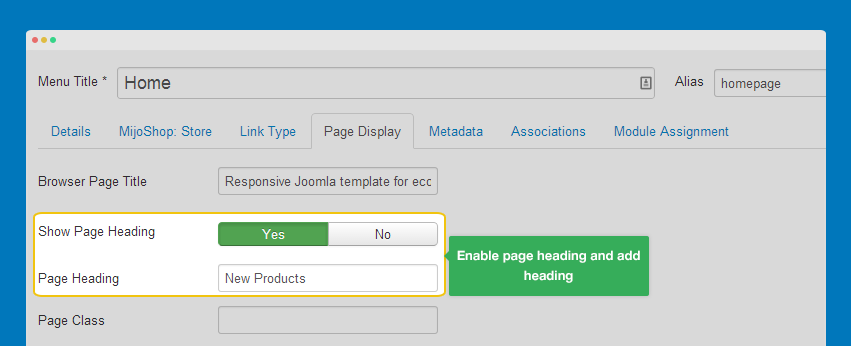
Menu Page Display Settings
Assign modules to be displayed in the home menu
To have the Home menu as JA Bookshop demo, you need to assign modules to the Home menu item: Mijoshop Slideshow Module, Mijoshop Specials Module, JA Mijo Slider Module, Mijoshop Best Seller module, Mijoshop Categories, Mijoshop Feteatured module, JA Mijo Accordion module. The settings of those module are shown in the MijoShop Configuration section.
Books Menu
Menu type: Popular Products
MijoShop Store: Default
Menu Detail Settings

Categories Menu
Menu type: latest products
MijoShop Store: Default
Menu Detail Settings

Novel Menu
Menu type: Category
MijoShop Store: Default
Menu Detail Settings
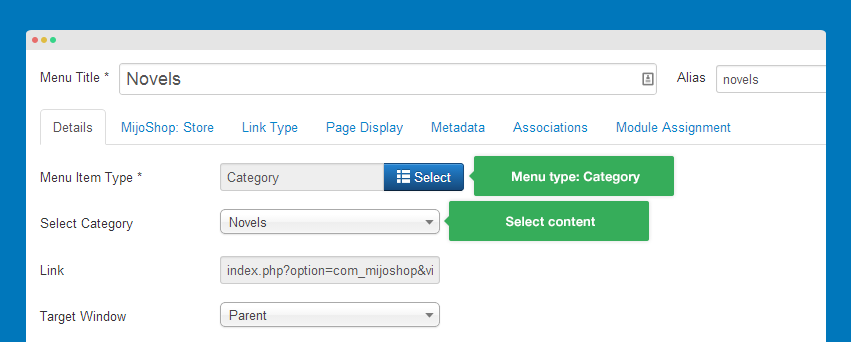
Note:
Other menu items under Categories menu has same setting with the Novel menu.
3. Mijoshop Module Configuration
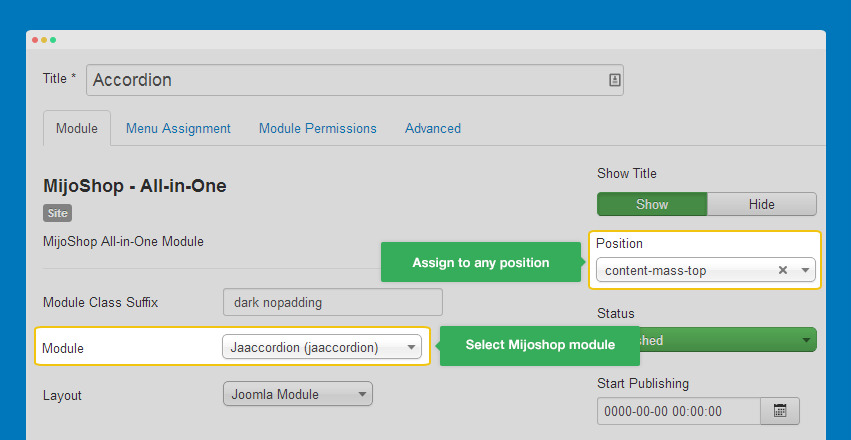
When you install Mijoshop component, all extensions are installed as well. But the modules are not managed in Extensions >> Module Manager. In Extensions > Modules, you will find only one module: Mijoshop - All-in-One. The module will load any module and assign to any position in your site. To display different modules in different positions, duplicate the Mijoshop - All-in-One module, assign Mijoshop module you want to the duplicated Mijoshop - All-in-one module.
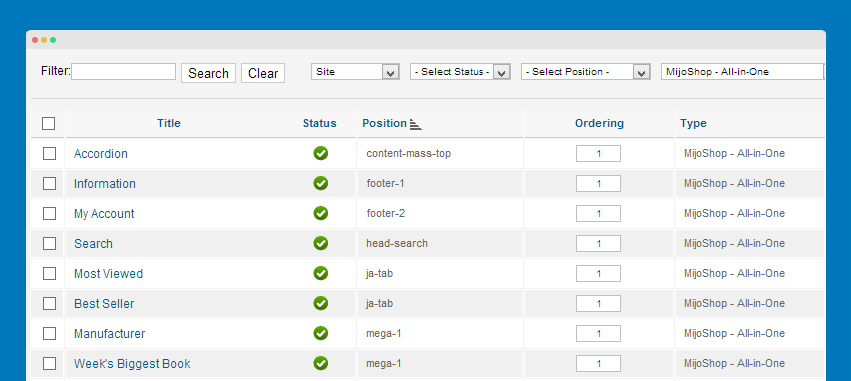
Load any module and assign to any position
To manage Mijoshop modules, from Dasboard of Mijoshop, go to: Extensions > Modules, you can install, add new module or delete any module.
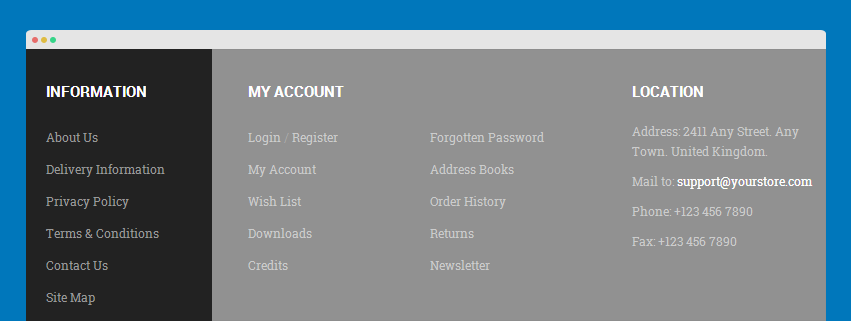
1. Information module
2. Accordion module
We specific developed this module for JA Bookshop, it's an addon for Mijoshop component.
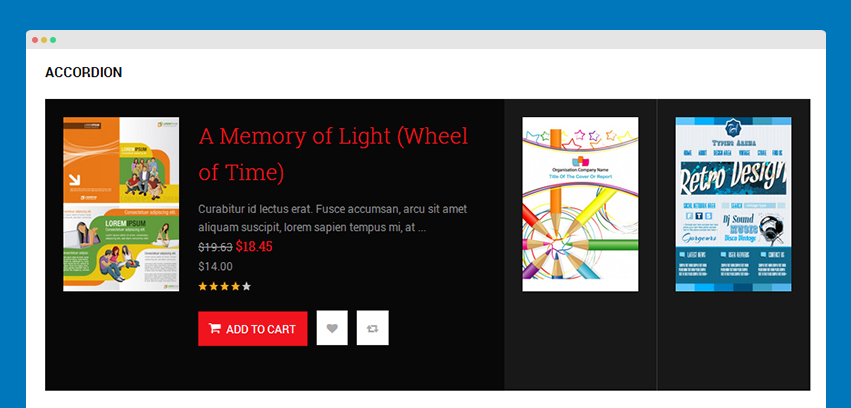
Joomlart MijoShop Products Accordion
Mijoshop All-in-one module configuration
Module Position: content-mass-top
Module Suffix: dark nopadding
3. Account module
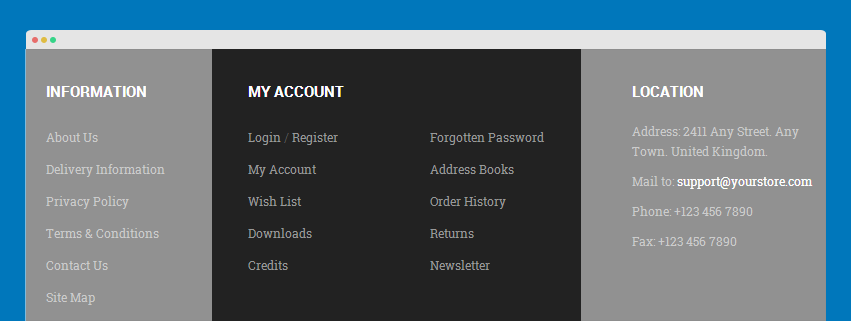
Mijoshop Account module configuration
Mijoshop All-in-one module configuration
Module Position: footer-2
Module Suffix: NOT USED
4. Mijoshop Best seller module
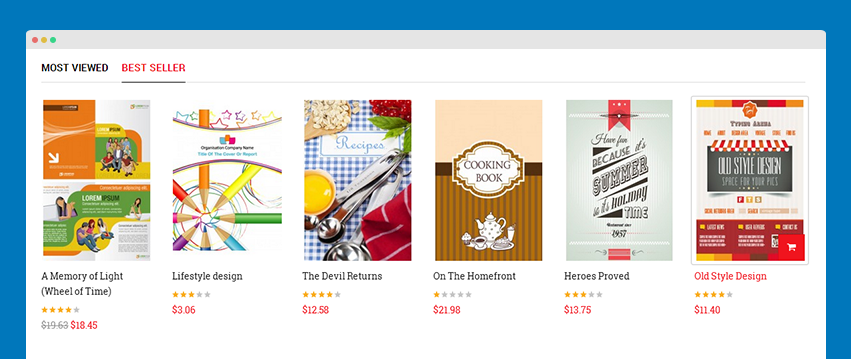
MijoShop Bestsellers module configuration
Mijoshop All-in-one module configuration
Module Position: ja-tab
Module Suffix: NOT USED
5. Mijoshop Manufacturer module
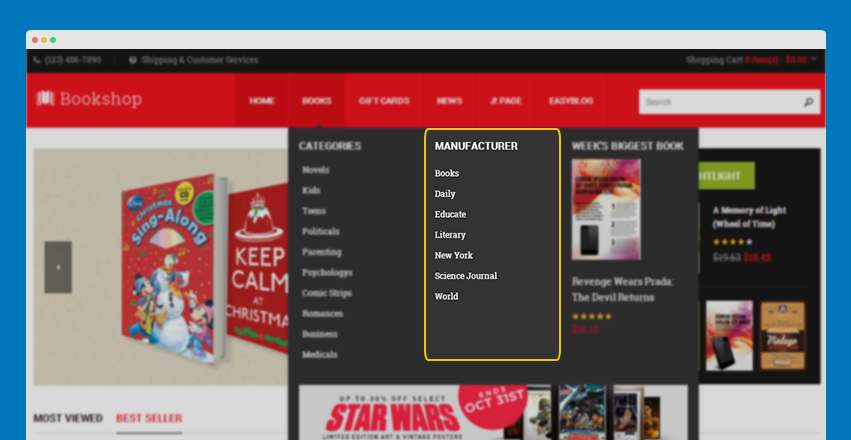
Mijoshop Manufacturer module configuration
Mijoshop All-in-one module configuration
Module Position: mega-1
Module Suffix: NOT USED
6. Mijoshop Latest module
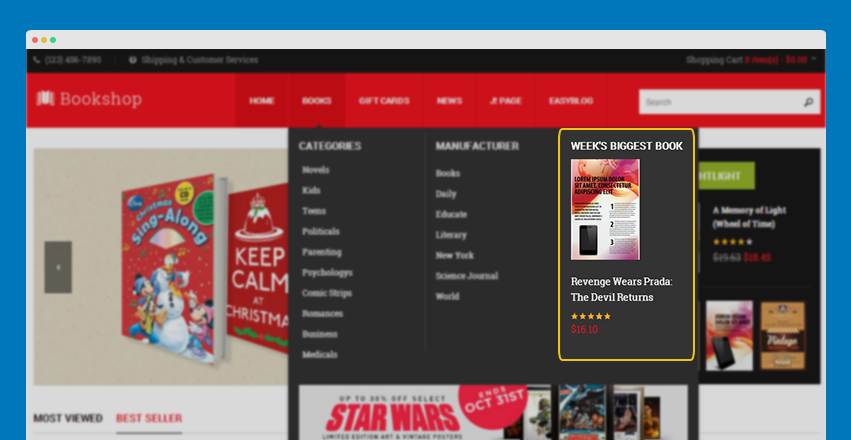
Mijoshop Latest module configuration
Mijoshop All-in-one module configuration
Module Position: mega-1
Module Suffix: NOT USED
7. Mijoshop Slideshow module
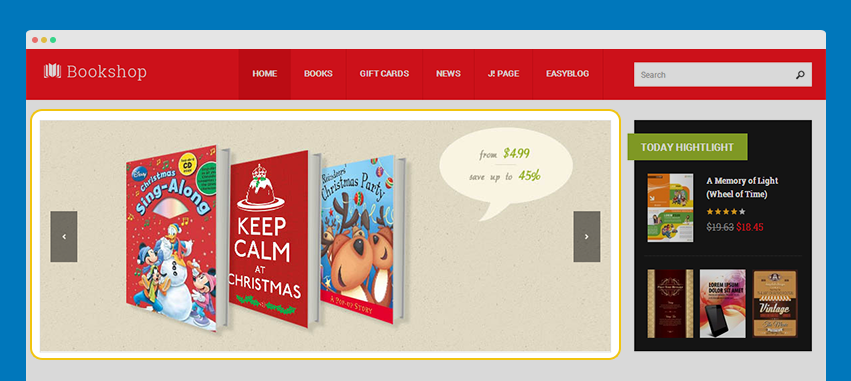
Mijoshop Slideshow module configuration
Mijoshop All-in-one module configuration
Module Position: position-1
Module Suffix: NOT USED
8. Mijoshop Specials module
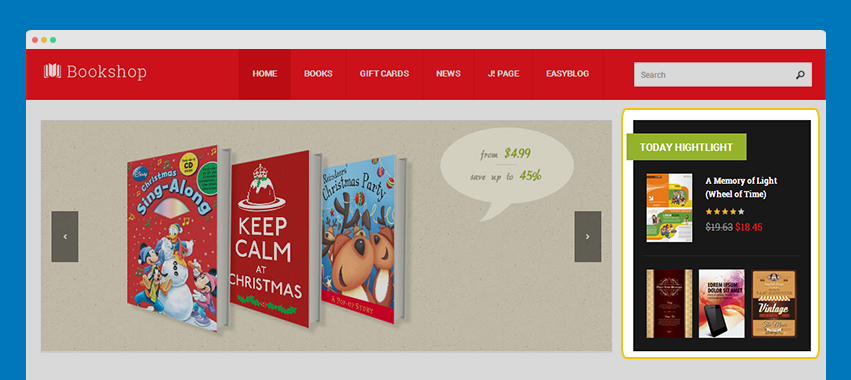
Mijoshop Specials module configuration
Mijoshop All-in-one module configuration
Module Position: position-2
Module Suffix:  highlight
9. Mijoshop Categories module
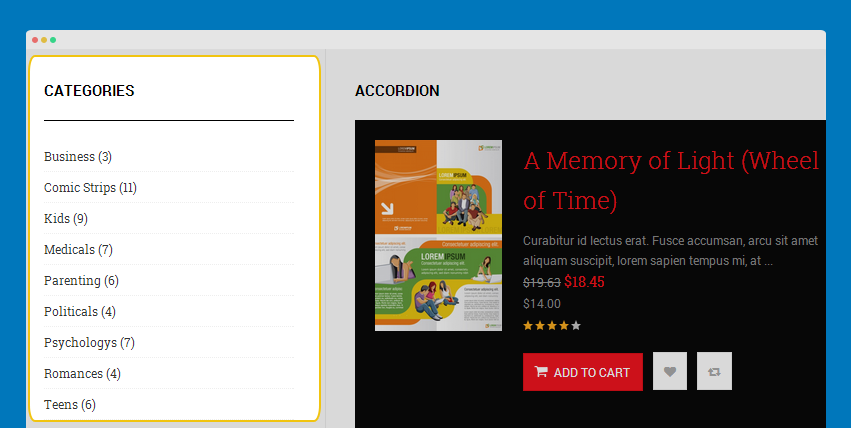
Mijoshop Categories module configuration
Mijoshop All-in-one module configuration
Module Position: sidebar-1
Module Suffix:  highlight
10. Mijoshop Featured module
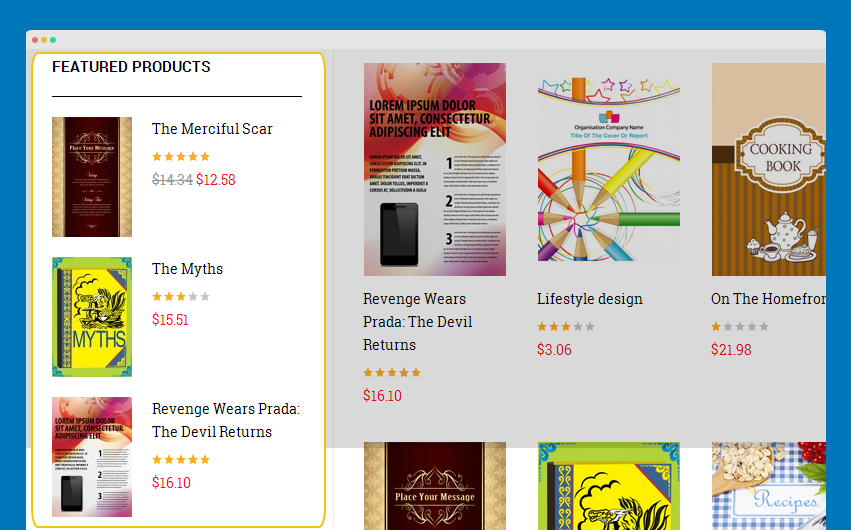
Mijoshop Slideshow module configuration
Mijoshop All-in-one module configuration
Module Position: sidebar-1
Module Suffix: NOT USED
11. Mijoshop Minicart module
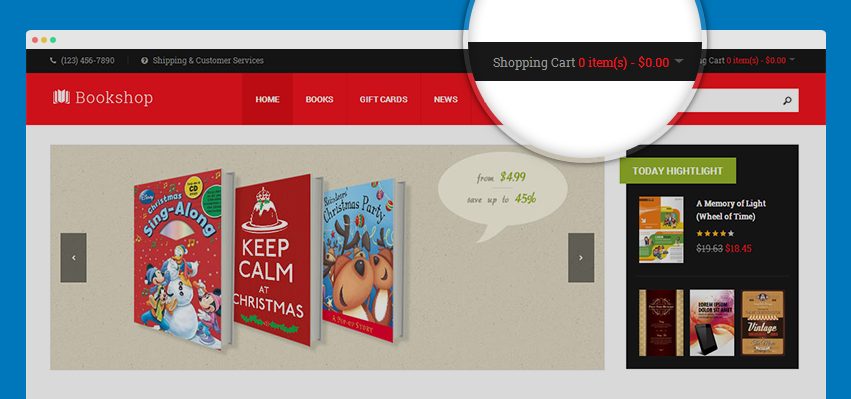
Mijoshop Minicart module configuration
Mijoshop All-in-one module configuration
Module Position: toolbar-ct-2
Module Suffix: NOT USED
Back-end setting
Mijoshop Configuration
Mijoshop Component is a commercial extension then it's not included in the Quickstart package. The following instruction will help you to install and add style of Mijoshop to your site.
Add style for Mijoshop
- Download then install Mijoshop component to your site
- Download style package for Mijoshop from Download page of JA Bookshop template
- Extract the downloaded Mijoshop style package then add to your site

Mijoshop Configuration
Go to: Components >> Mijoshop >> Settings.

To have style like our demo, please make sure you have same settings as the image below.
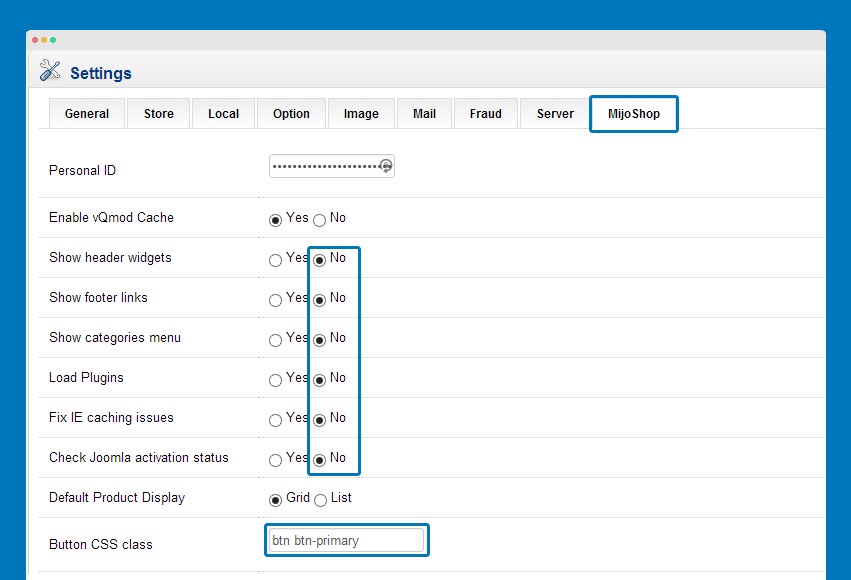
Other settings are default settings.
Mijoshop Module Configuration
When you install Mijoshop component, all extensions are installed as well. But the modules are not managed in Extensions >> Module Manager. In Extensions >> Modules, you will find only one module: Mijoshop - All-in-One. The module will load any module and assign to any position in your site. To display different modules in different positions, duplicate the Mijoshop - All-in-One module, assign Mijoshop module you want to the duplicated Mijoshop - All-in-one module.

Load any module and assign to any position

To manage Mijoshop modules, from Dasboard of Mijoshop, go to: Extensions >> Modules to configure modules.

In the list of Mijoshop module, click on Edit button to configure the module.
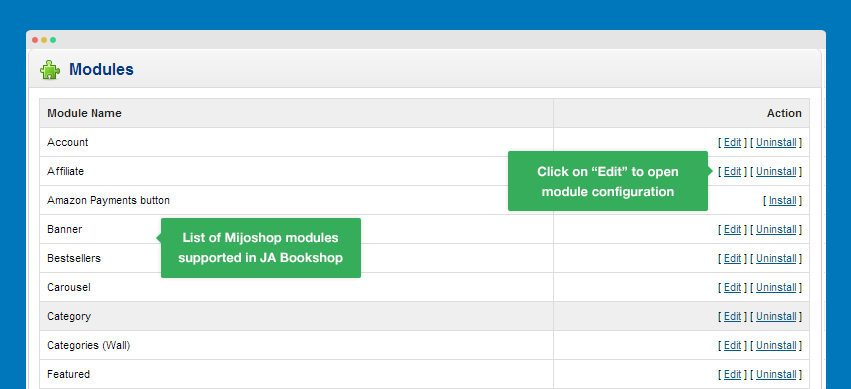
1. Information module
Mijoshop All-in-one module configuration
Module Position: footer-1
Module Suffix: NOT USED
Back-end setting
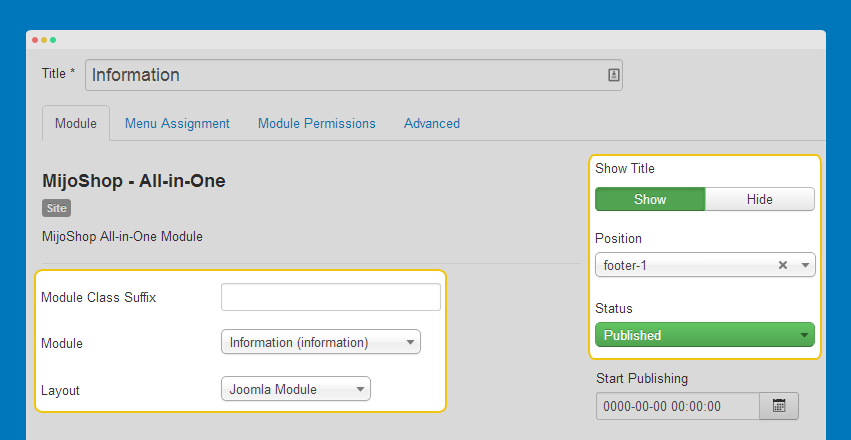
Mijoshop information module configuration

Front-end Appearance

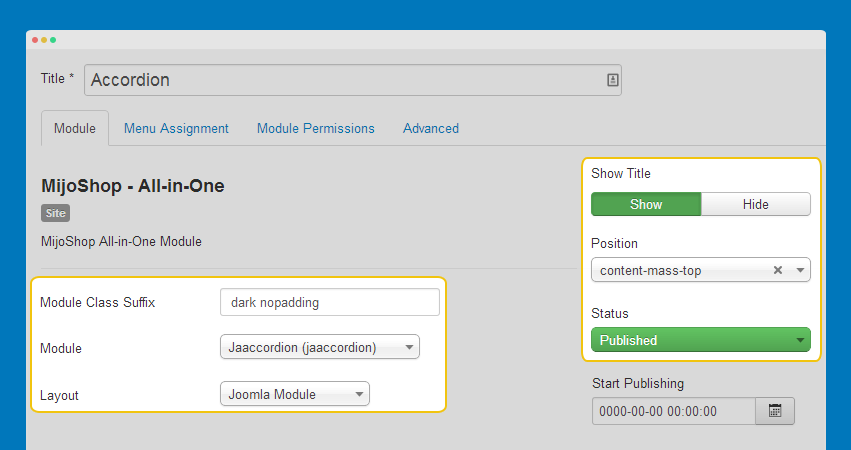
2. Accordion module
We specific developed this module for JA Bookshop, it's an addon for Mijoshop component.
Mijoshop All-in-one module configuration
Module Position: content-mass-top
Module Suffix: NOT USED
Back-end setting
Front-end Appearance

3. Account module
Mijoshop All-in-one module configuration
Module Position: footer-2
Module Suffix:  menu-2col
Back-end setting
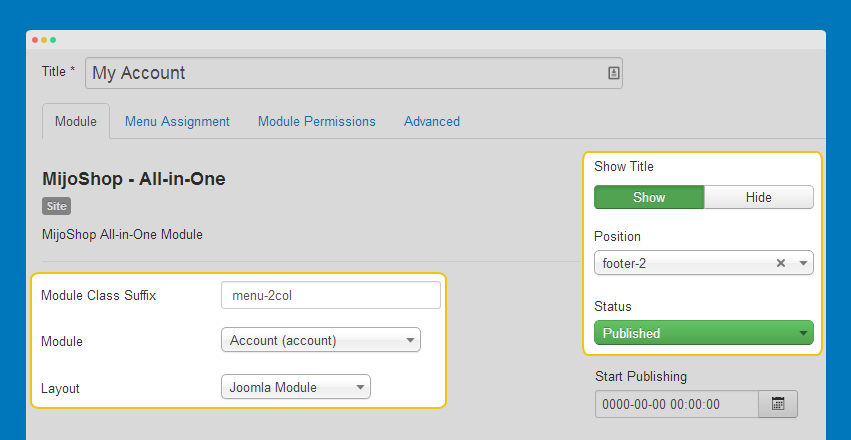
Mijoshop Account module configuration

Front-end Appearance

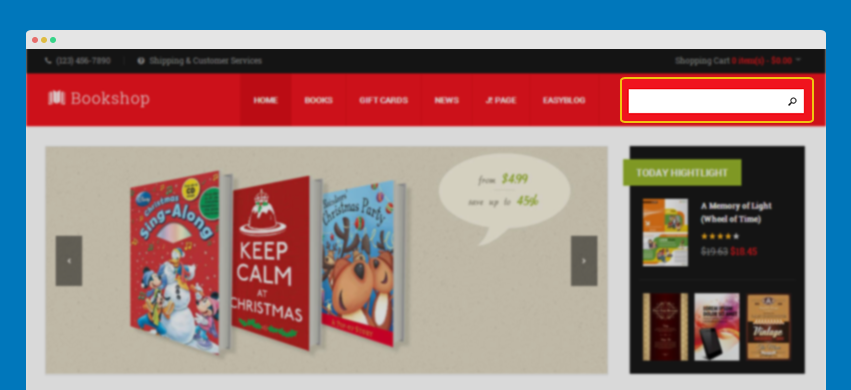
4. Search module
Mijoshop All-in-one module configuration
Module Position: head-search
Module Suffix: NOT USED
Back-end setting
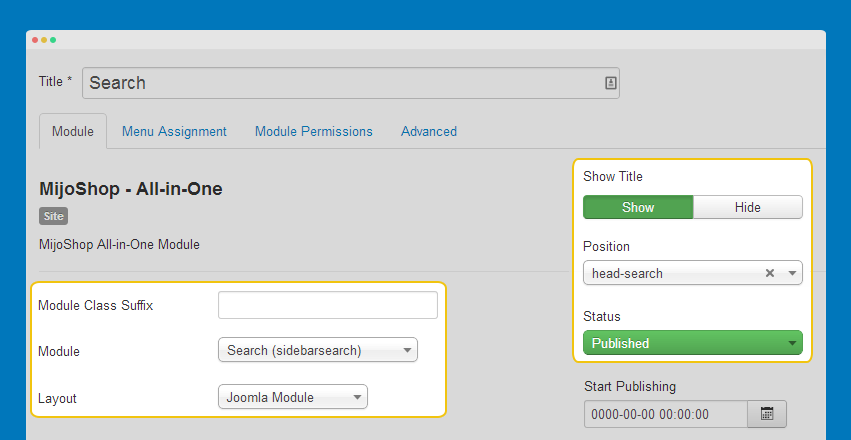
Mijoshop Search module configuration

Front-end Appearance
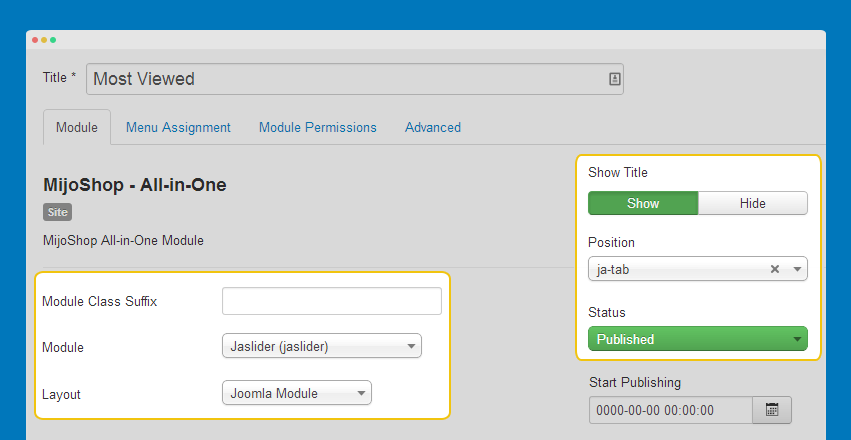
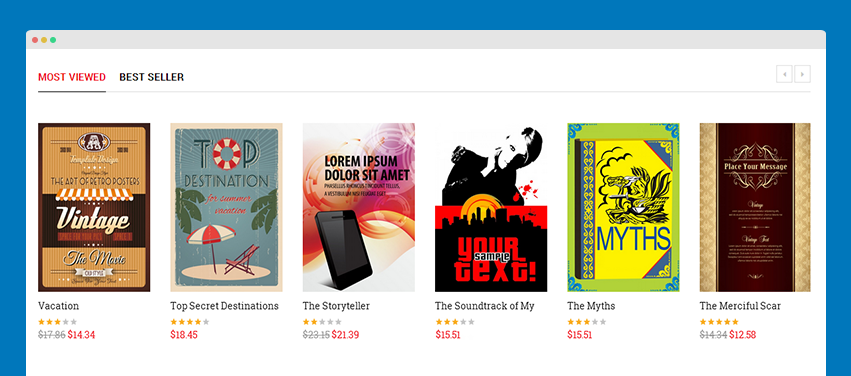
5. JA Mijoshop Product Slider module
Mijoshop All-in-one module configuration
Module Position: ja-tab
Module Suffix: NOT USED
Back-end setting
Front-end Appearance
6. Mijoshop Best seller module
Mijoshop All-in-one module configuration
Module Position: ja-tab
Module Suffix: NOT USED
Back-end setting
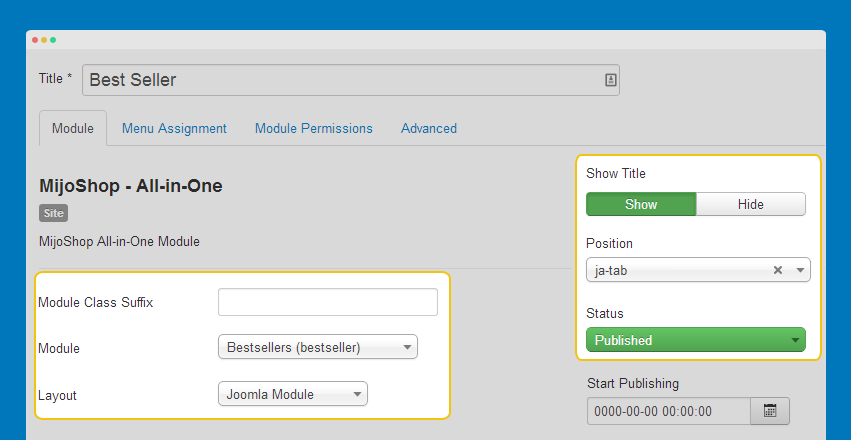
Mijoshop Best seller module configuration

Front-end Appearance

7. Mijoshop Manufacturer module
Mijoshop All-in-one module configuration
Module Position: mega-1
Module Suffix: NOT USED
Back-end setting
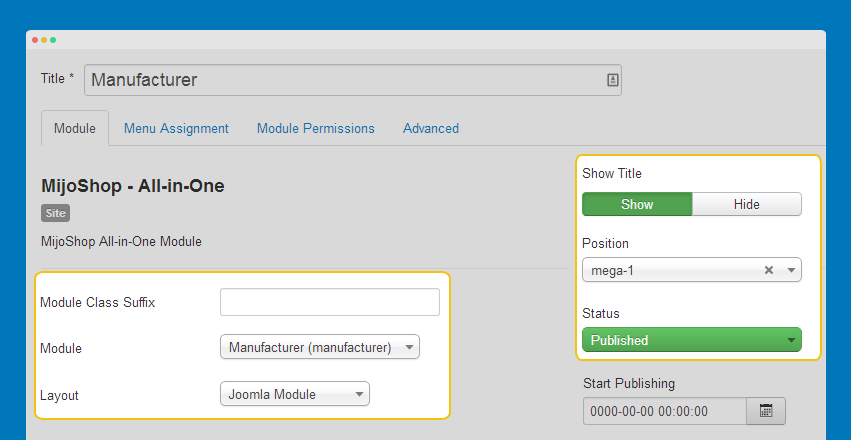
Mijoshop Manufacturer module configuration

Front-end Appearance

8. Mijoshop Latest module
Mijoshop All-in-one module configuration
Module Position: mega-1
Module Suffix: NOT USED
Back-end setting
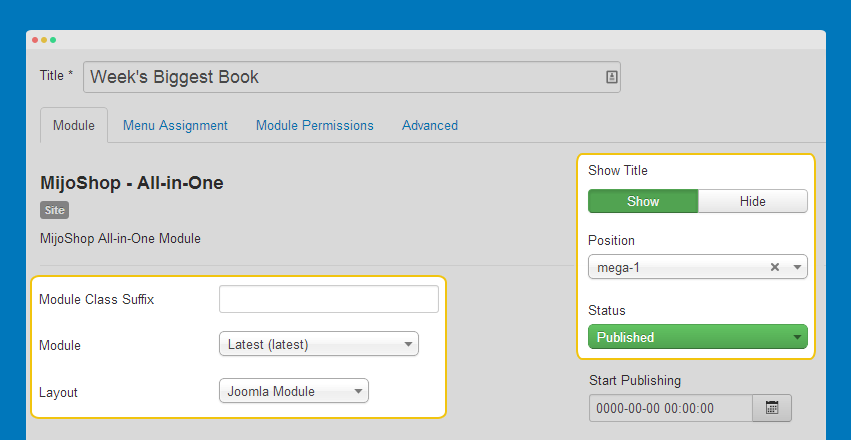
Mijoshop Latest module configuration

Front-end Appearance

9. Mijoshop Slideshow module
Mijoshop All-in-one module configuration
Module Position: position-1
Module Suffix: NOT USED
Back-end setting
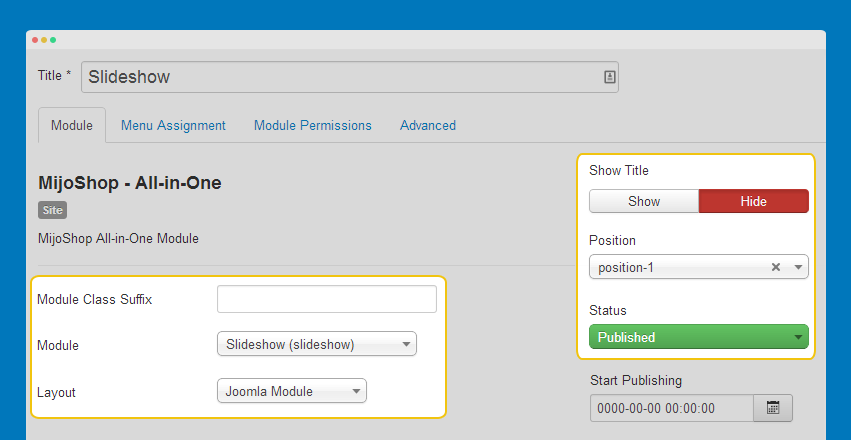
Mijoshop Slideshow module configuration

Front-end Appearance

10. Mijoshop Specials module
Mijoshop All-in-one module configuration
Module Position: position-2
Module Suffix:  highlight
Back-end setting
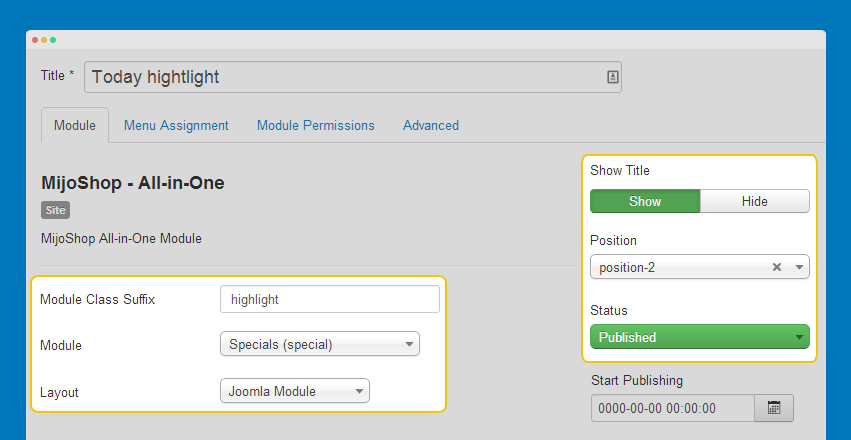
Mijoshop Specials module configuration

Front-end Appearance

11. Mijoshop Categories module
Mijoshop All-in-one module configuration
Module Position: sidebar-1
Module Suffix:  highlight
Back-end setting
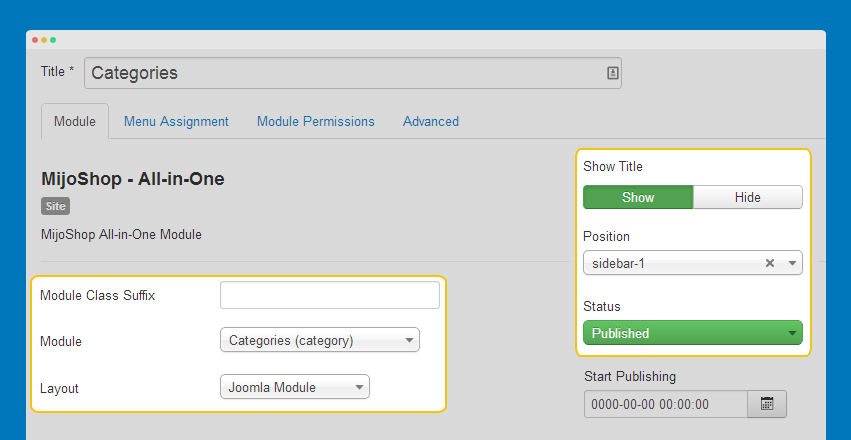
Mijoshop Categories module configuration

Front-end Appearance

12. Mijoshop Featured module
Mijoshop All-in-one module configuration
Module Position: sidebar-1
Module Suffix: NOT USED
Back-end setting
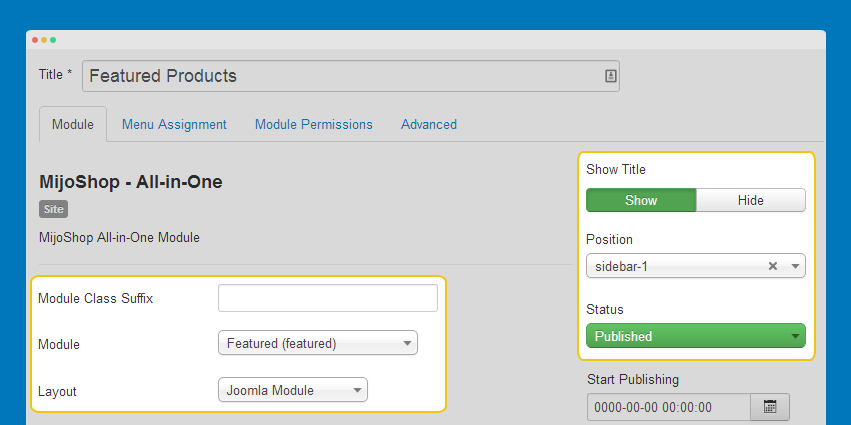
Mijoshop Slideshow module configuration
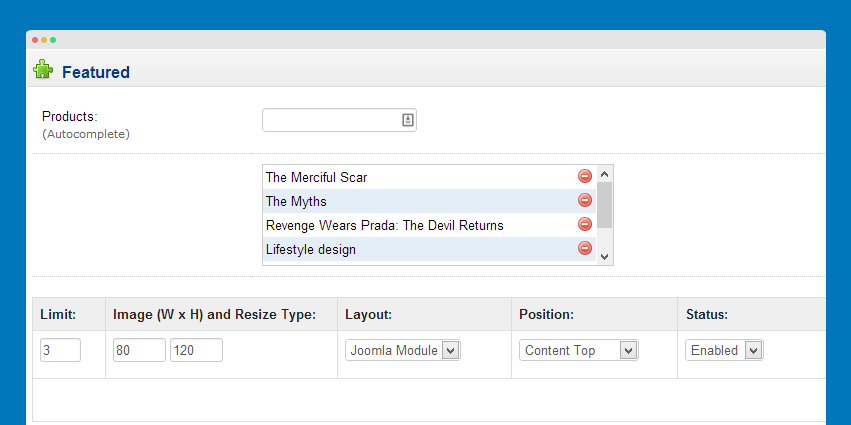
Front-end Appearance

13. Mijoshop Minicart module
Mijoshop All-in-one module configuration
Module Position: sidebar-1
Module Suffix: NOT USED
Back-end setting
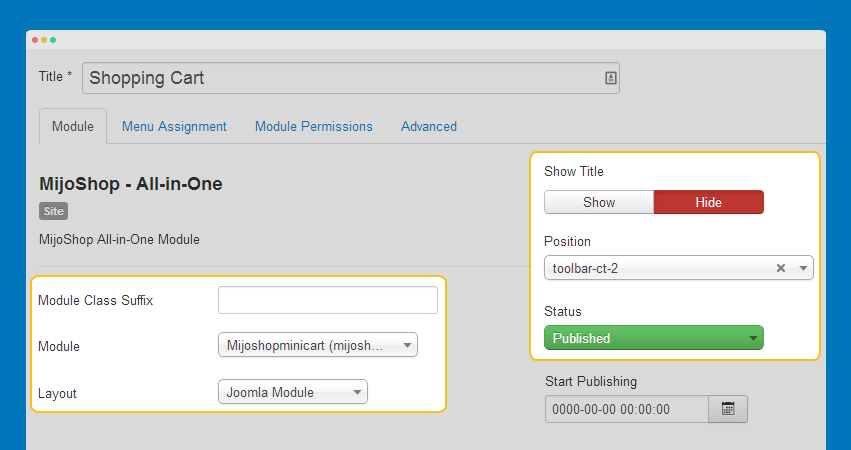
Mijoshop Minicart module configuration

Front-end Appearance

Mijoshop Menu Configuration
If you want to make Mijoshop in your site same as JA Bookshop demo site, this would be helpful. We only show the important, customized settings, default settings are not shown.

Home Menu
Menu setting
Menu type: Latest Products
MijoShop Store: Default
Menu Detail Settings

Menu Page Display Settings

Assign modules to be displayed in the home menu
To have the Home menu as JA Bookshop demo, you need to assign modules to the Home menu item: Mijoshop Slideshow Module, Mijoshop Specials Module, JA Mijo Slider Module, Mijoshop Best Seller module, Mijoshop Categories, Mijoshop Feteatured module, JA Mijo Accordion module. The settings of those module are shown in the MijoShop Configuration section.
Books Menu
Menu type: Popular Products
MijoShop Store: Default
Menu Detail Settings

Categories Menu
Menu type: latest products
MijoShop Store: Default
Menu Detail Settings

Novel Menu
Menu type: Category
MijoShop Store: Default
Menu Detail Settings

Note:
Other menu items under Categories menu has same setting with the Novel menu.
Extensions Configuration
JA Extension Configuration
1. JA Slideshow Lite module
Module Position: position-1
Module Suffix:  NOT USED
- Module Back-end Settings
- Front-end Appearance
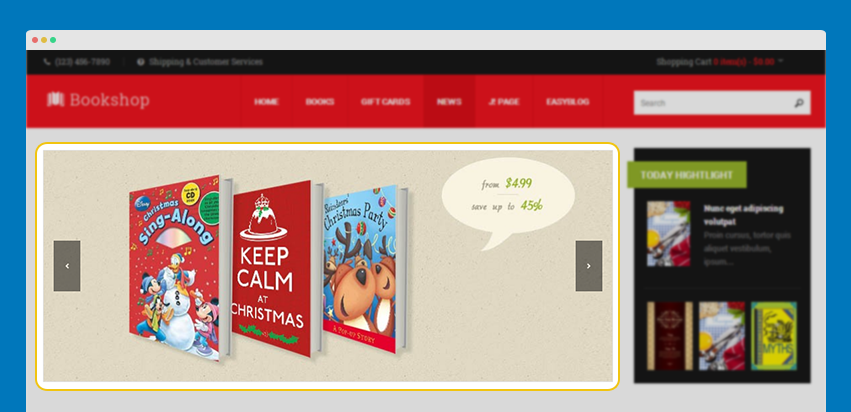
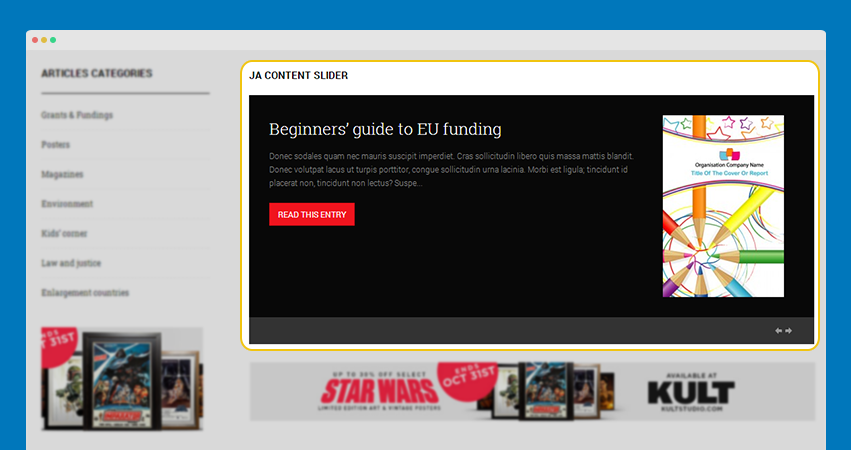
2. JA Content Slider module
Module Position: content-mass-top
Module Suffix:  dark
- Module Back-end Settings
- Front-end Appearance
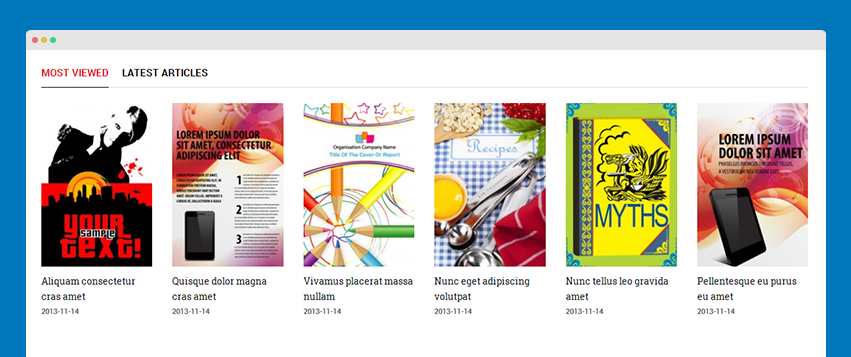
3. JA Side News module
3.1 Most Viewed
Module Position: ja-tab-2
Module Suffix:  col-6
Back-end settings
Front-end Appearance
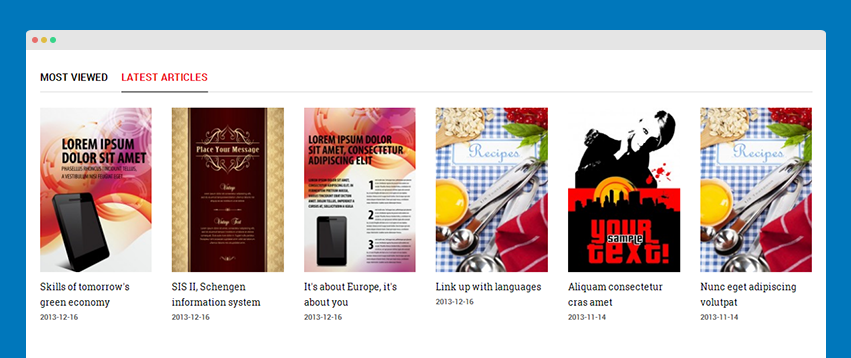
3.2 Latest Articles
Module Position: ja-tab-2
Module Suffix:  col-6
Back-end settings
Front-end Appearance
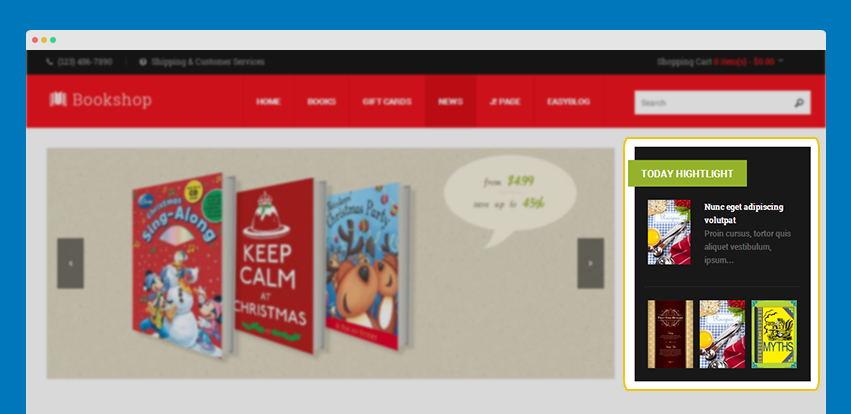
3.3 Today hightlight
Module Position: position-2
Module Suffix:  highlight
Back-end settings
Front-end Appearance
4. JA Tabs Plugin
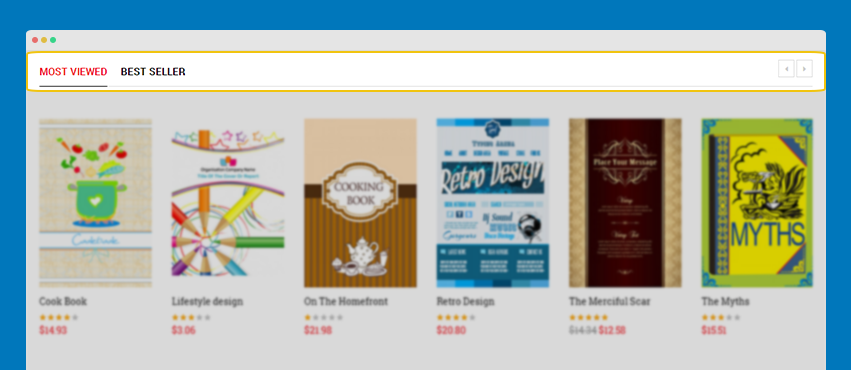
JA Tabs allow you to load any module to display in tabs. To do that, please follow the steps below.
Step 1: Install, enable and configure JA Tabs Plugin
Step 2: Create content to display in tabs
Create modules with content you want to display in tab then assign to a position (example: ja-tab, ja-tab-1).
Step 3: Define content in tabs
We will create a custom html module to define content to display in tabs.
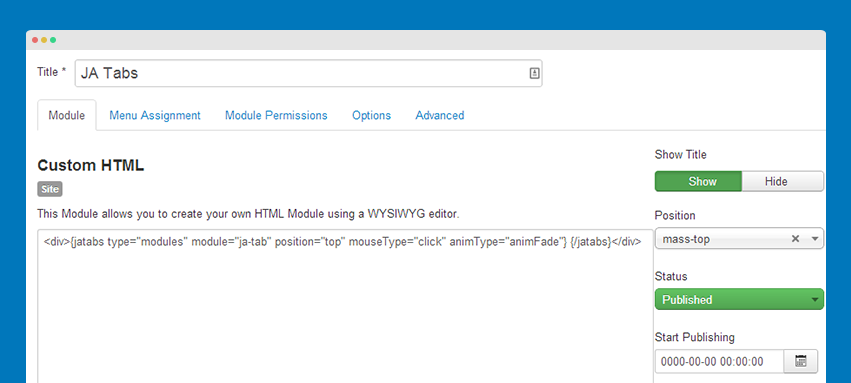
<div>{jatabs type="modules" module="ja-tab" position="top" mouseType="click" animType="animFade"} {/jatabs}</div>
Note:
The tabs settings in the Custom HTML will override the settings in JA Tabs setting panel.
5. JA Google Map Plugin
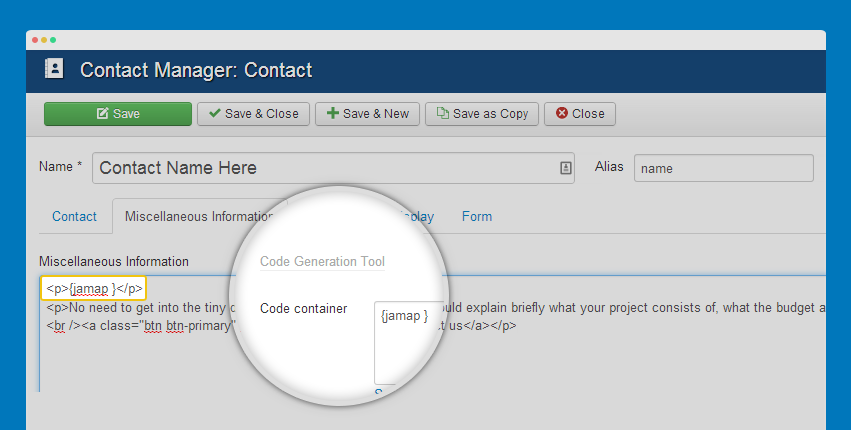
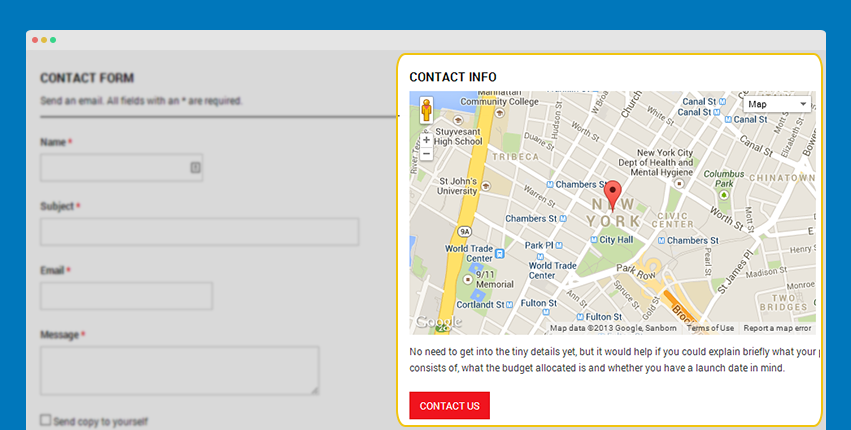
You can define Code container that will be inserted to content to embed Google map, the default is (jamap}. You can insert the Code container to any place in article, custom HTML ... that you want to embed google map.
- Front-end Appearance
Default Joomla Extension
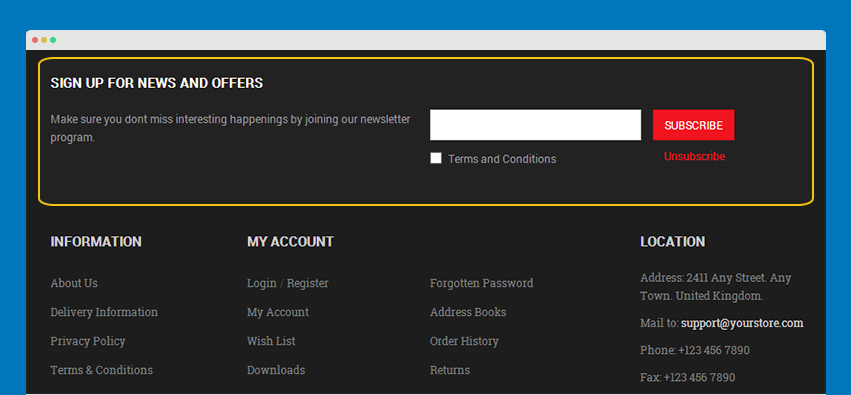
1. Acymailing Module
Module Position: footer-subcribe
Module Suffix:  subcribe-frm
- Module Back-end Settings
- Front-end Appearance
Custom HTML Module
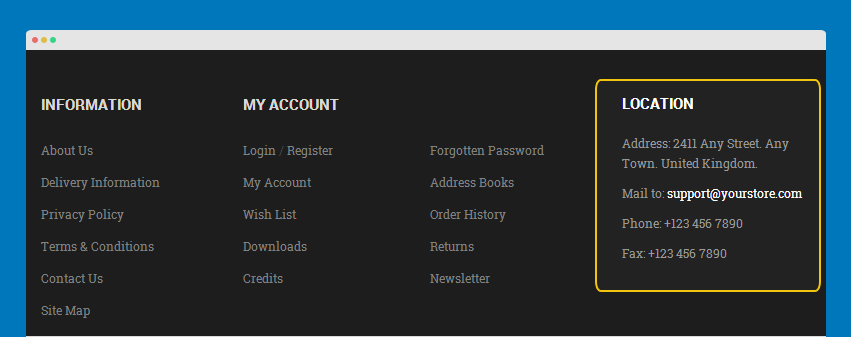
1. Location
Module Position: footer-3
Module Suffix: NOT USED
HTML code:
<p>Address: 2411 Any Street. Any Town. United Kingdom.</p>
<p>Mail to: <a href="mailto:support@yourstore.com">support@yourstore.com</a></p>
<p>Phone: +123 456 7890</p>
<p>Fax: +123 456 7890</p>
- Module Back-end Settings
- Front-end Appearance
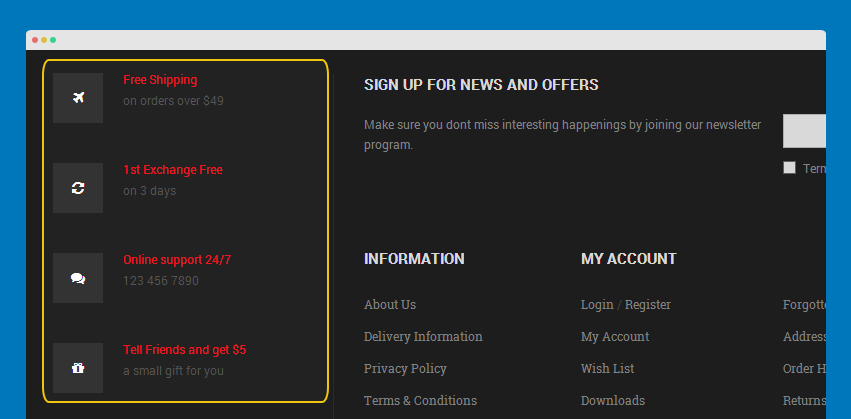
2. Footer Info
Module Position: footer-info
Module Suffix: NOT USED
HTML code:
<ul class="list-shipping">
<li class="shipping-item"><i class="fa fa-plane"></i><span class="title">Free Shipping</span> <span class="desc">on orders over $49</span></li>
<li class="exchange-item"><i class="fa fa-refresh"></i><span class="title">1st Exchange Free</span> <span class="desc">on 3 days</span></li>
<li class="support-item"><i class="fa fa-comments"></i><span class="title">Online support 24/7</span> <span class="desc">123 456 7890</span></li>
<li class="friends-item"><i class="fa fa-gift"></i><span class="title">Tell Friends and get $5</span> <span class="desc">a small gift for you</span></li>
</ul>
- Module Back-end Settings
- Front-end Appearance
3. Toolbar Links
Module Position: toolbar-ct-1
Module Suffix:  hidden-xs hidden-sm
HTML code:
<p><a href="#"><i class="fa fa-question-circle"></i> Shipping & Customer Services</a></p>
- Front-end Appearance
4. Header Phone
Module Position: toolbar-ct-1
Module Suffix:  hidden-xs hidden-sm
HTML code:
<p><i class="fa fa-phone"></i> <span>(123) 456-7890</span></p>
- Front-end Appearance
EasyBlog Configuration
JA Bookshop supports Easyblog component by default. In order to have the EasyBlog design, you should download the EasyBlok theme for JA Appolio, extract the files and add them to your site.
Install EasyBlog component
If you are new to this Joomla component, please read this guide.
Quick Guide:
- Step 1: Install Easyblog component
- Step 2: Download JA Bookshop theme for Easyblog
- Step 3: Extract zip file and upload to your your_site_folder. You should see folder ja_bookshop in
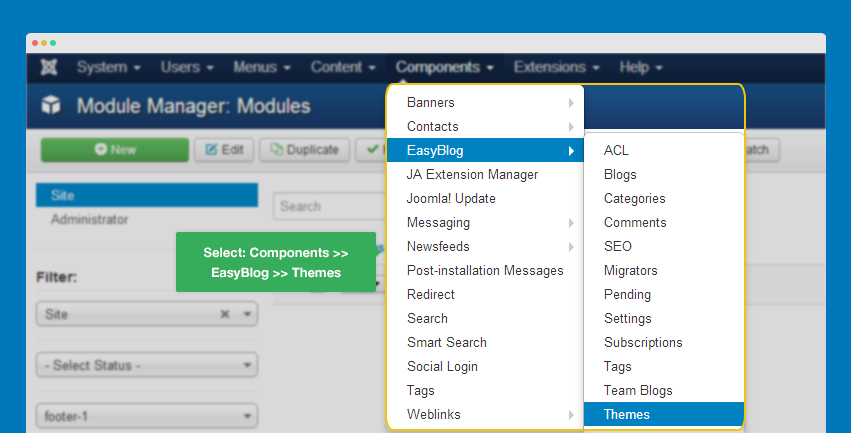
/components/com_easyblog/themes. - Step 4: Go to back-end panel >> Components >> Easyblog >> Themes >> select ja_bookshop.
The following screenshots are for the Step 4.
- Access: Components >> Easyblog >> Themes
- Change the default theme toja_bookshop

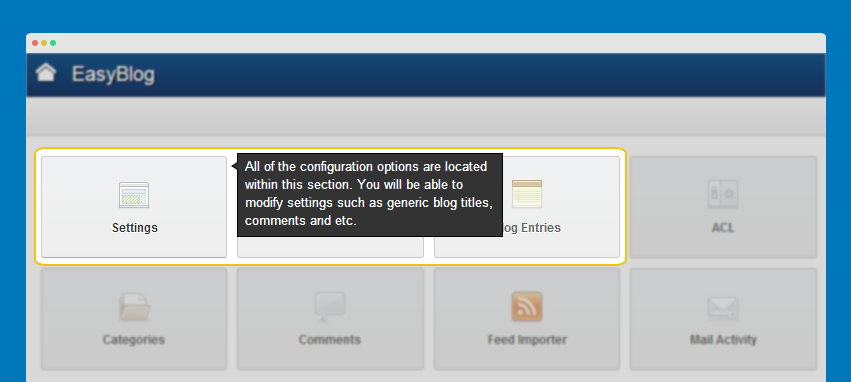
Configure EasyBlog Component
Recommendation:
Most of settings are default settings, when you select ja-bookshop theme, you will get the almost same style as our demo.
Configure Easyblog Slide
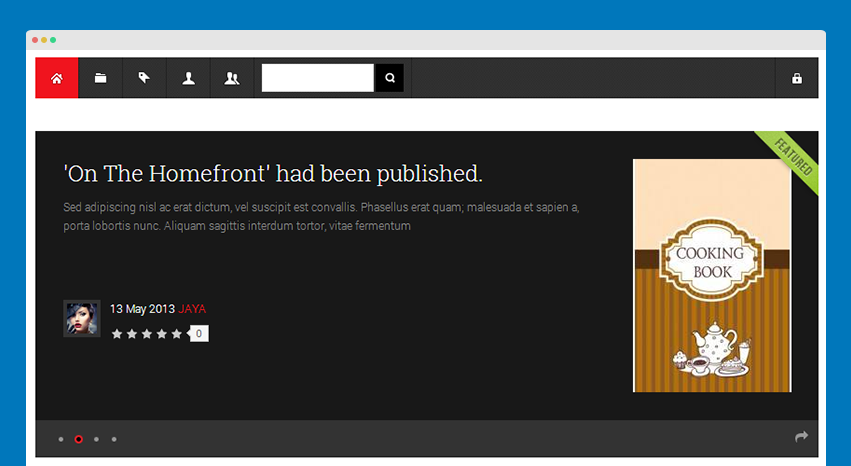
The EasyBlog slide displays featured EasyBlog items. So to display items in EasyBlog slide, just set the items to "Featured".
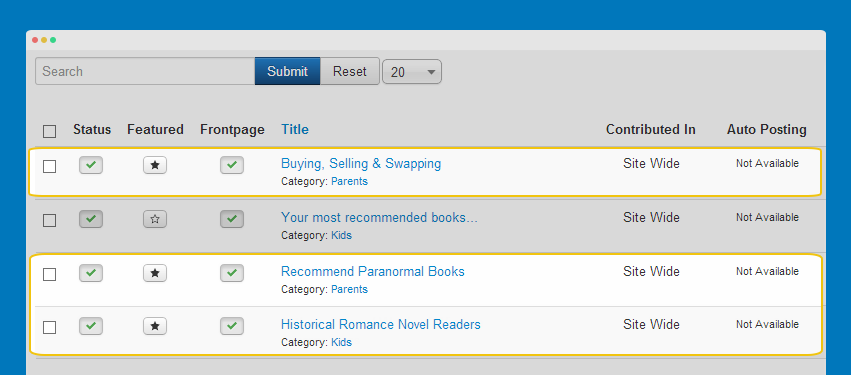
EasyBlog Module Configuration
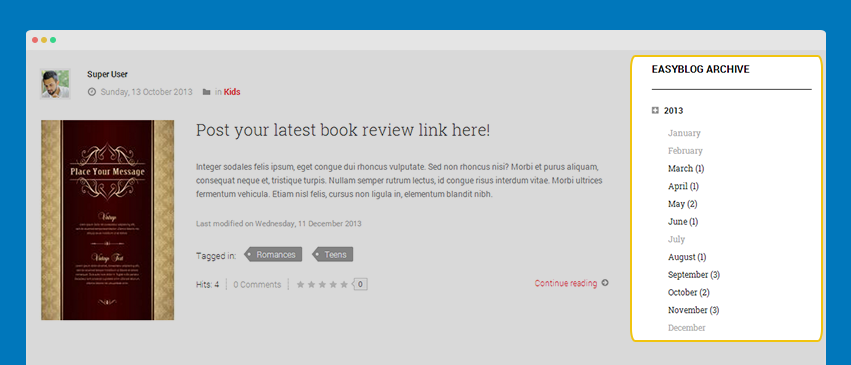
1. EasyBlog Archive Module
Module Position : sidebar-2
Module Suffix : NOT USED
- Back-end Settings
- Front-end Appearance
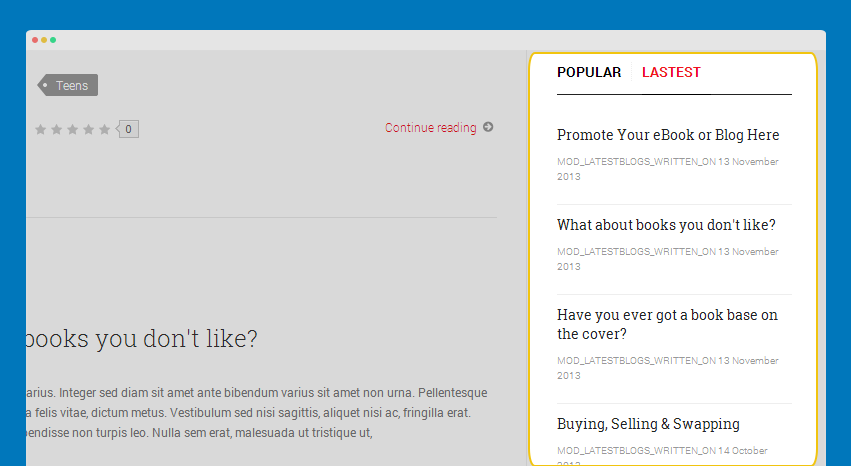
2. EasyBlog Latest Module
Module Position : easyblog-sidebar-2
Module Suffix : NOT USED
- Back-end Settings
- Front-end Appearance
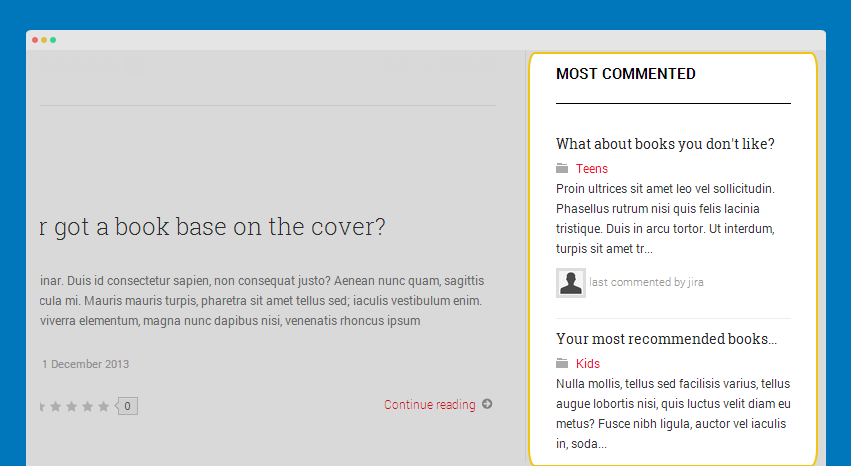
3. EasyBlog Most Commented Module
Module Position : sidebar-2
Module Suffix : NOT USED
- Back-end Settings
- Front-end Appearance
4. EasyBlog Most Popular Module
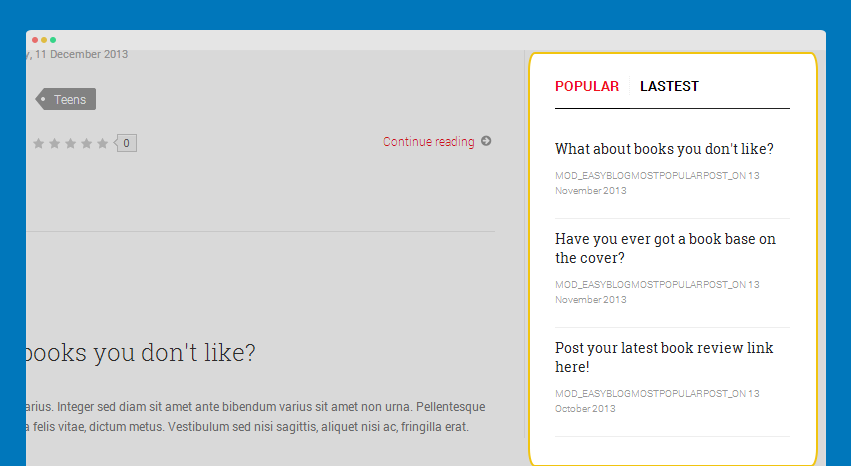
4.1 Popular
Module Position : easyblog-sidebar-2
Module Suffix : NOT USED
- Back-end Settings
- Front-end Appearance
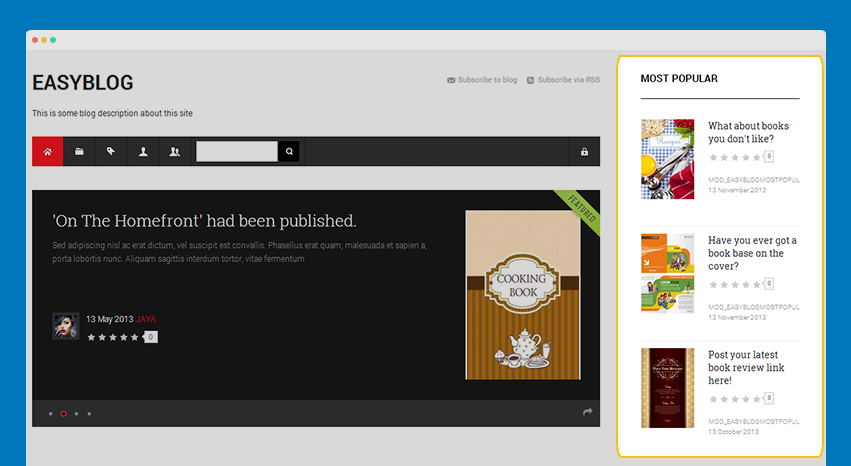
4.2 Most Popular
Module Position : sidebar-2
Module Suffix : NOT USED
- Back-end Settings
- Front-end Appearance
Template Configuration
Theme Settings
JA Bookshop supports 5 themes by default: default, blue, green, violet and yellow.
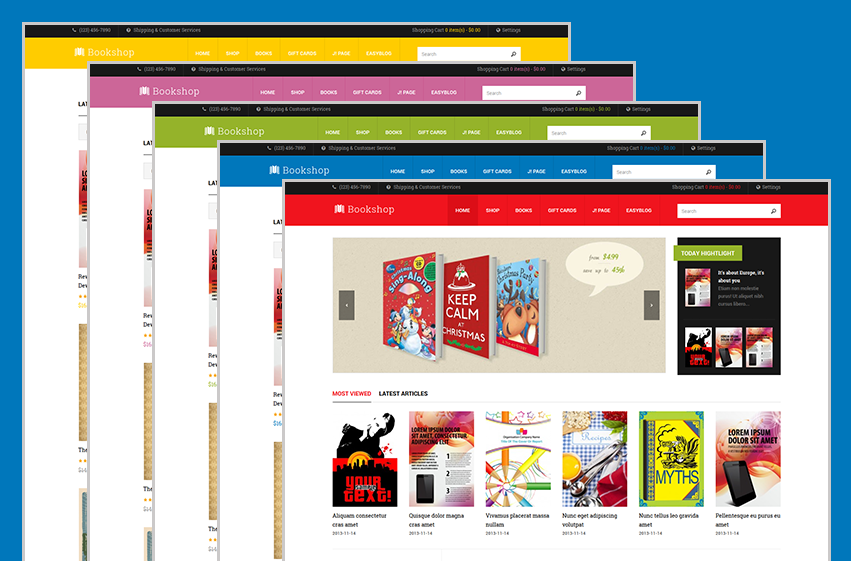
You can switch to any theme you want. To change theme, open Theme tab.
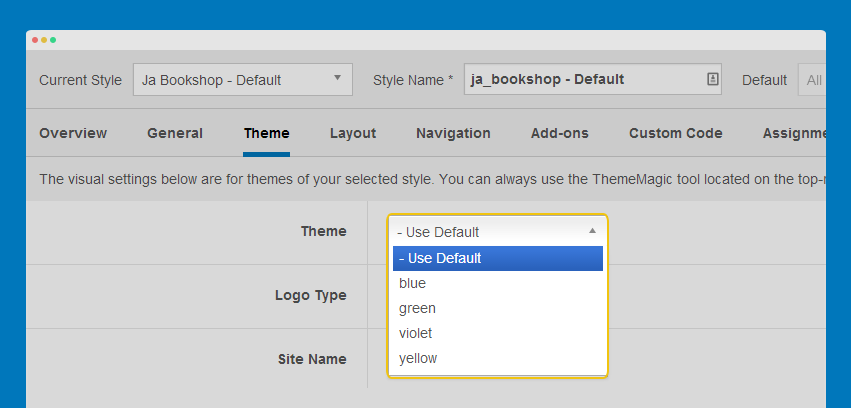
The Theme tab allows you to change logo, select text logo if you want.
ThemeMagic Settings
ThemeMagic is a real time theme customization tool supported by T3 Framework. It allows you to customize any theme without touching code.
Step 1: Enable ThemeMagic
In the General tab, enable ThemeMagic then access working panel of ThemeMagic by clicking on ThemeMagic.
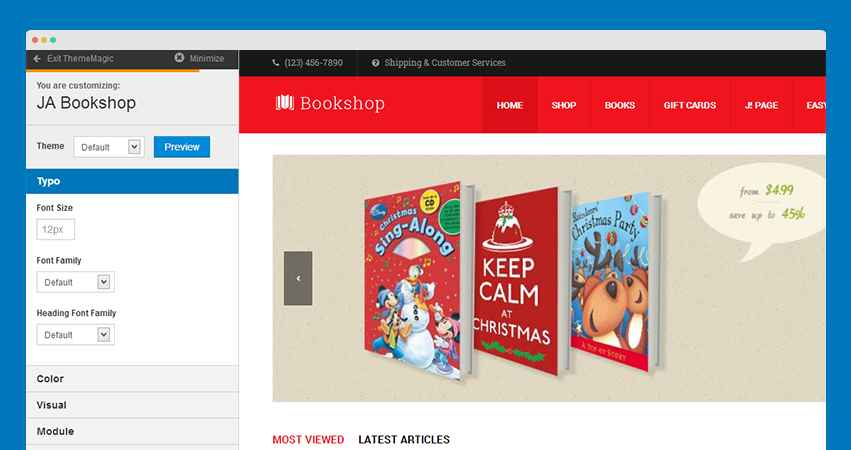
Step 2: Select theme then customize
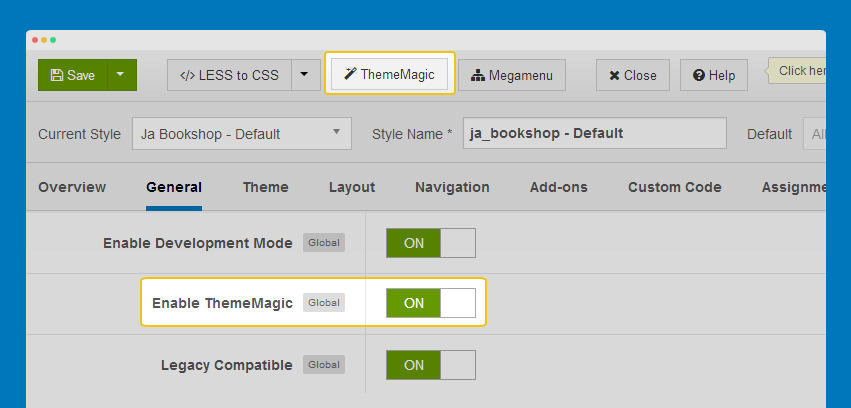
When ThemeMagic is enabled, you can access ThemeMagic from your front-page by adding "?tm=1" after your site url (example: http://joomla-templates.joomlart.com/ja_bookshop/?tp=1)
Layout Settings
JA Bookshop used 1 layout (default layout) only. However you can add new layouts.
Layout Structure
You can change the structure of layout, changing module positions of the layout ...
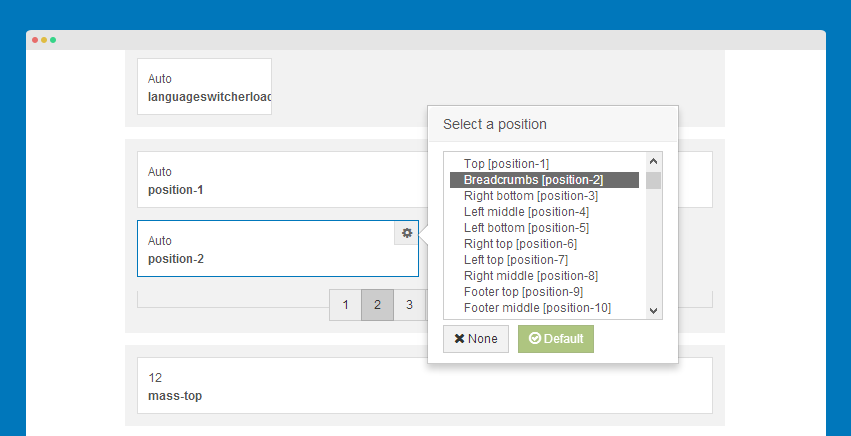
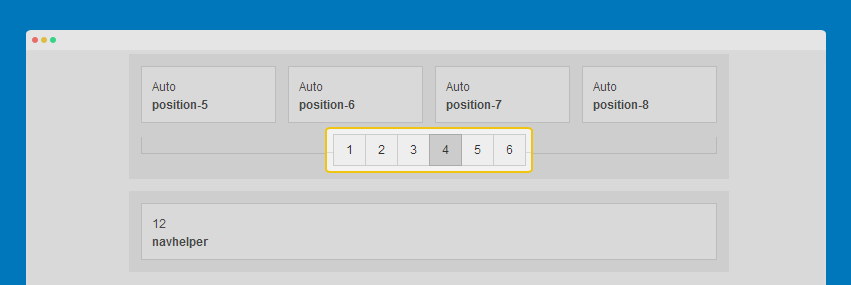
For spotlight block, you can se number of positions.
Responsive Layouts
JA Bookshop is a responsive template based on multiple supported responsive layouts. In the Responsive layout, select the layout you want to configure.

In each responsive layout, you can disable any module position.
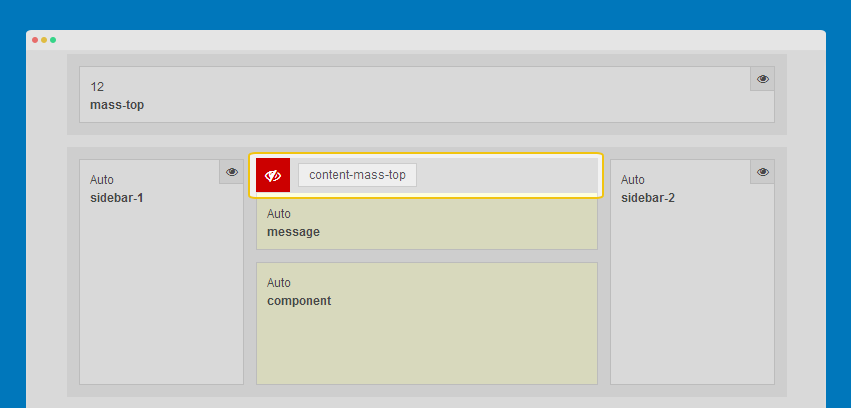
For module positions in spotlight block, you can drag to resize.

Documentation Layout configuration video Layout customization video
Recommendation
The above userguide should help one in replicating the Demo site settings for the template and extension on their site.
Recommended :
If you are new or are confused. We recommend installing Quickstart on your localhost and use it as reference for configs. This is the best way to work with any template. Links to all the resources are provided above, you should carefully read them to take the maximum advantage of our products.
Support :
Please raise your support queries in the forum and make sure you follow the support guidelines. We spend more time in getting the information from user incase the support guidelines are not followed.

