Introduction
JA Beranis is your key to quickly rebrand your business website: clean and fresh! Simplicity and minimalistic design assure JA Beranis fit well into any business, portfolio and corporate website without being too over the top.
JA Beranis also features EasyBlog component style from Stackideas, 2 layouts for Mega menu. Especially, it supports RTL (right to left) at core.
- JA Beranis support RTL language
- Support EasyBlog component
- Fully compatible with Joomla 2.5 & Joomla 3.x
1. Main Features
- T3 Framework latest version
- Integrated Bootstrap
- Fully responsive
- Megamenu support
- Off-Canvas navigation for your mobile and tablet
- Will support at least 6 colors (including the default one).
- Joomla! 2.5 (Joomla 3.x version)
- Support multiple themes
- Support RTL lanaguage
2. JA Extensions Supported
- JA Slideshow Lite module
- JA Masshead module
- JA Contentslider module
- JA Image Hotspot module (new module)
- JA Disqus Debate Echo plugin
- T3 Framework plugin
- JA Extensions Manager Component
3. Thirdparty Extensions
- K2 Component
- EasyBlog Component
- Acymailing Component
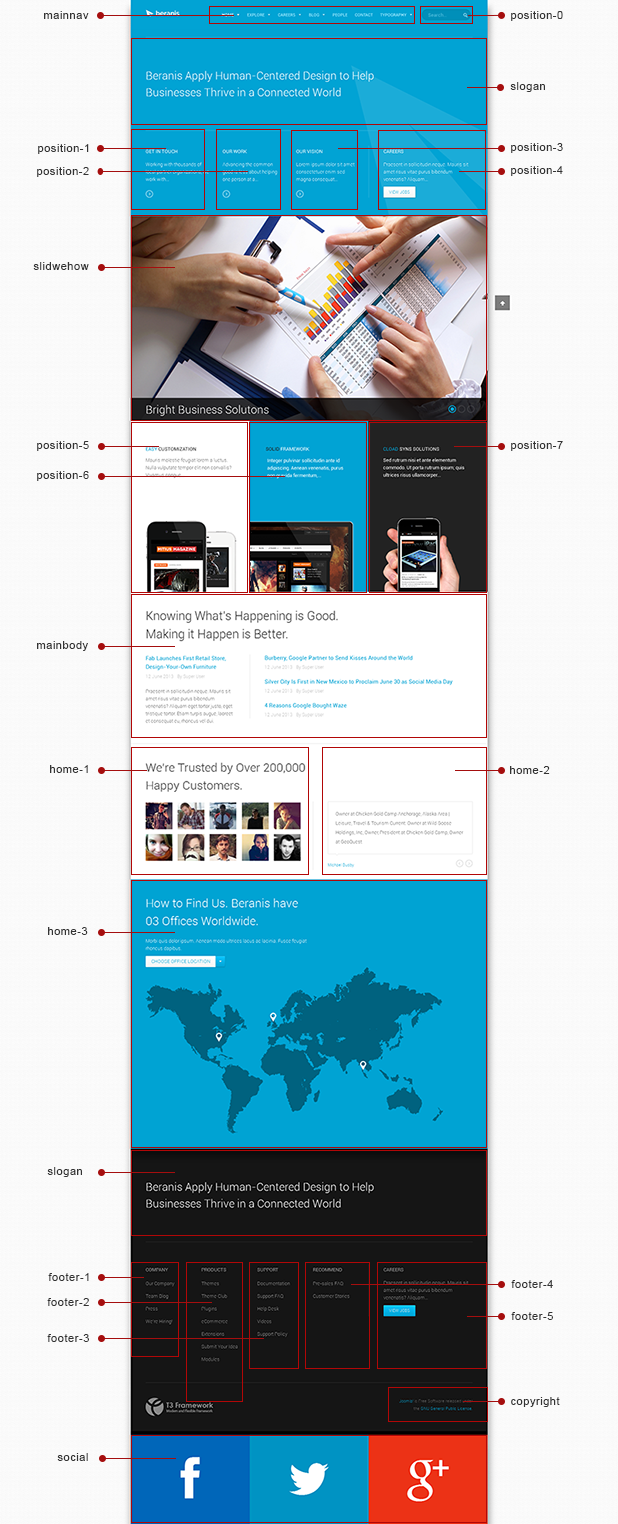
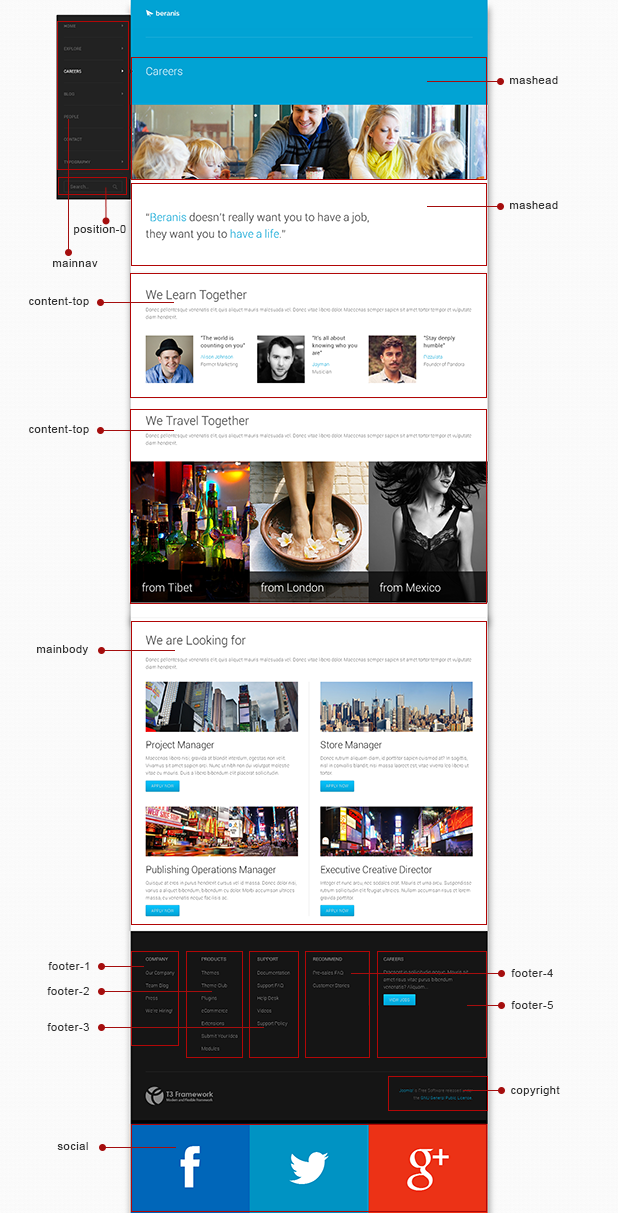
4. Layout and Module Positions
Please check the image below to know the structure, layout, module positions of JA Beranis.
System requirement
JA Beranis is compatible with Joomla 3 and Joomla 2.5. Please make sure your system meets the following requirements:
Joomla 3 System requirement
Software
- Software: PHP (Magic Quotes GPC off): 5.3.1 + (5.4+ recommended)
Databases
- MySQL(InnoDB support required): 5.1+
- MSSQL 10.50.1600.1+
- PostgreSQL 8.3.18+
Web Severs
- Apache 2.x+
- Microsoft IIS 7
- Nginx 1.0 (1.1 recommended)
Joomla 2.5+ system requirement
Software
- Software: PHP 5.2.4+ (5.4+ recommended)
- MySQL: 5.0.4+
Web Sever
- Apache: 2.x+
- Microsoft: IIS 7
- Nginx: 1.0 (1.1 recommended)
Browser requirement
The requirements are the same with both Joomla 2.5 and Joomla 3
- Firefox 4+
- IE (Internet Explorer) 8+
- Google Chrome 10+
- Opera 10+
- Safari 5+
Development Environment
The requirements are the same with both Joomla 2.5 and Joomla 3
During development process, Localhost is preferred. You can use the following servers on your PC to develop your site.
Windows
- WAMPSEVER
- XAMPP for Windows
Linux
- LAMP Bubdle
- XAMPP for Linux
Mac OS
- MAMP & MAMP Pro
- XAMPP for Mac OS
Download & installation
1. Plan your site Development
- Making a New Site ? - If you are planning to make a new site, then use our Quickstart package to clone the demo site and replace the demo content with yours. Check How to install Quickstart Package.
- Installing on your live site ? - If you are planning to use this template on your already live site. Then you should follow How to make your site look like demo site guide first to know about the steps involved.
2. Download Template and Extensions
Browse and Download: Go to the Download page of JA Beranis and download the Template zip file.
3. Install Template and Extensions
- Install the template that you download in your Joomla 2.5 system.
- JA Beranis template will install with Settings used on the demo website, so you can postpone the configuration until you complete the setup (install other modules / plugins used in the demo website).
If you are new to Joomla installation procedure, please check the following documentation. This guide will show you step by step instructions to install Template and Extensions to your Joomla 2.5 and Joomla 3 system.
View Detail DocutationNote:
Custom HTML Module: To match the design of the template, we also style (CSS) for Custom HTML modules using different div classes. You will need to check the HTML codes and make sure to use the recommended HTML markup to get correct display. We provide the HTML code in this user-guide.
Extensions Configuration
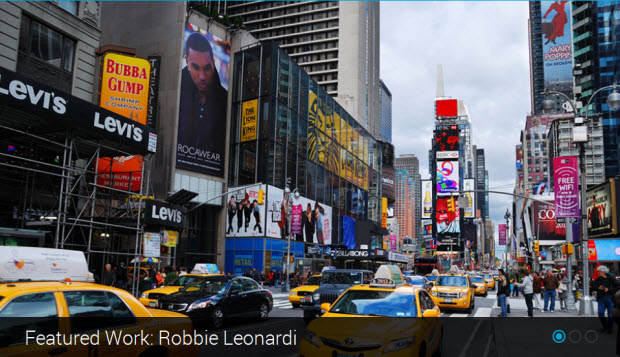
1. JA Slidesow Lite Module
1.1 Slideshow
Module position : slideshow
Module Suffix : NOT USED
- Full Back-end Settings
- Front-end Appearance

1.2 Our Work Slideshow
Module position : slideshow
Module Suffix : NOT USED
- Full Back-end Settings
- Front-end Appearance
For more detail, please check the documentation of the module.
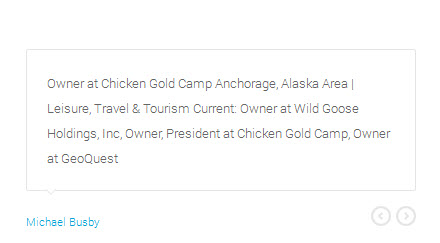
View Detail Documentation2. JA Contentslider Module
Module position: home-2
Module Suffix: NOT USED
- Back-end Settings
- Front-end Appearance
For more detail, please check the documentation of the module.
View Detail Docutation3. JA Content Popup Module
Module position: home-1
Module Suffix: NOT USED
- Back-end Settings
- Front-end Appearance
For more detail, please check the documentation of the module.
View Detail Docutation4. JA Masshead Module
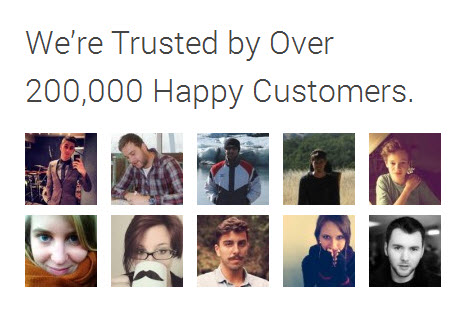
4.1 Masshead
Module position: masshead
Module Suffix: NOT USED
Masshead's configuration conditions: Add conditions for each masshead item, the following is the sample code used in demo site
[Masshead Itemid="473" title="Customers" background="images/joomlart/masshead/mh-2.jpg"]We’re Trusted by Over 200,000 Happy Customers[/Masshead]
[Masshead Itemid="495" title="Bonus Page" background="images/joomlart/masshead/mh-2.jpg"][/Masshead]
[Masshead Itemid="501" title="Weblinks" background="images/joomlart/masshead/mh-3.jpg"][/Masshead]
[Masshead Itemid="502" title="News Feed" background="images/joomlart/masshead/mh-3.jpg"][/Masshead]
[Masshead Itemid="503" title="Smart Search" background="images/joomlart/masshead/mh-2.jpg"][/Masshead]
- Back-end Settings
- Front-end Appearance

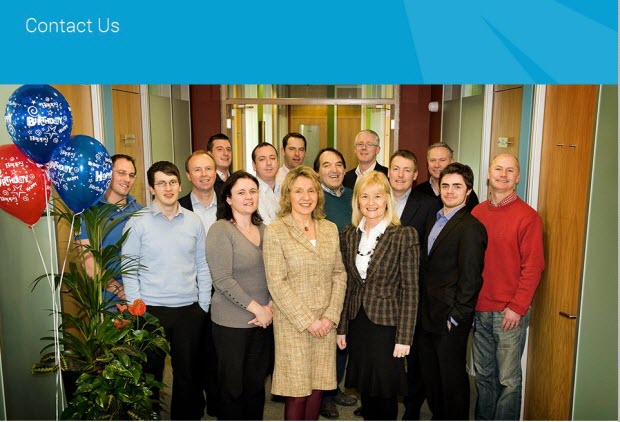
4.2 Contact Masshead
Module position: masshead
Module Suffix: NOT USED
Masshead's configuration conditions: Add conditions for each masshead item, the following is the sample code used in demo site
[Masshead Itemid="474" title="Contact Us" background="images/joomlart/masshead/mh-1.jpg"][/Masshead]
- Back-end Settings
- Front-end Appearance
4.3 JA Masshead - No Image
Module position: masshead
Module Suffix: NOT USED
Masshead's configuration conditions: Add conditions for each masshead item, the following is the sample code used in demo site
[Masshead Itemid="472" title="All Items" ][/Masshead]
[Masshead Itemid="494" title="Item Page" ][/Masshead]
- Back-end Settings
- Front-end Appearance

For more detail, please check the documentation of the module.
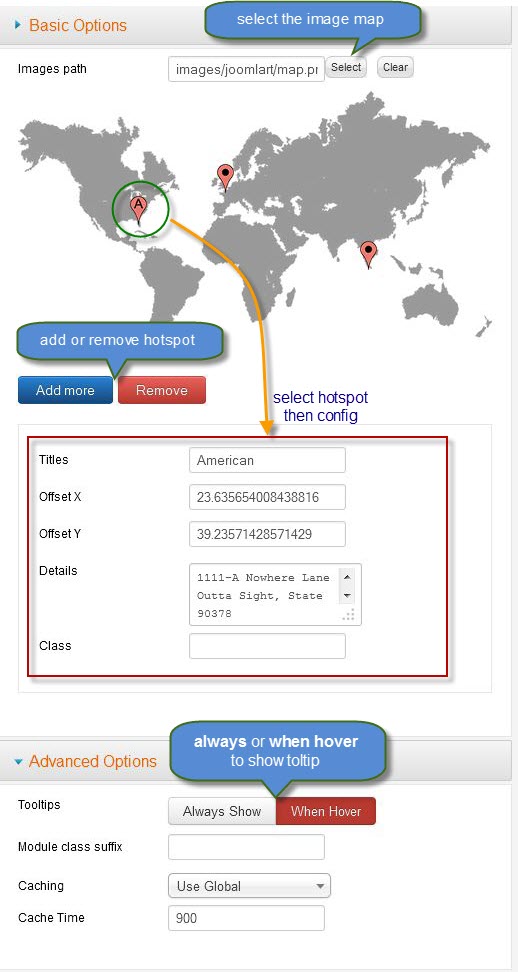
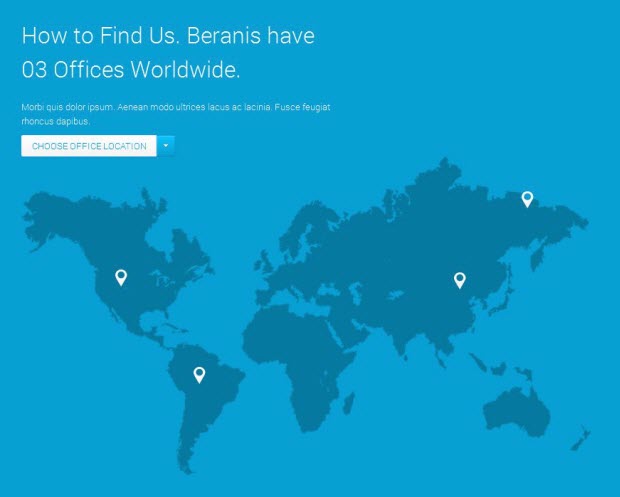
View Detail Docutation5. JA Image Hotspot Module
Module position: home-3
Module Suffix: NOT USED
- Back-end Settings
- Front-end Appearance
6. Articles Category Module
Step 1: Enable "Images and links" option in edit article form: Go to Content >> Article Manager >> Options button >> Editing Layout tab:
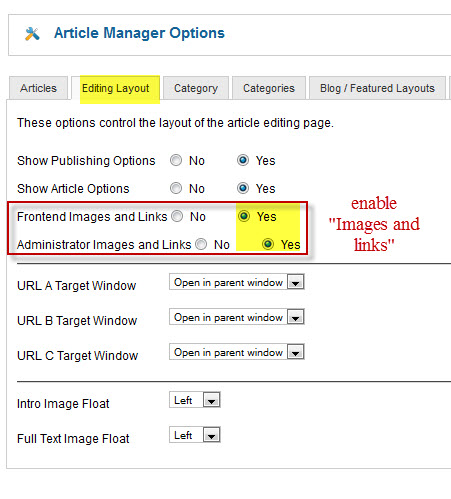
-
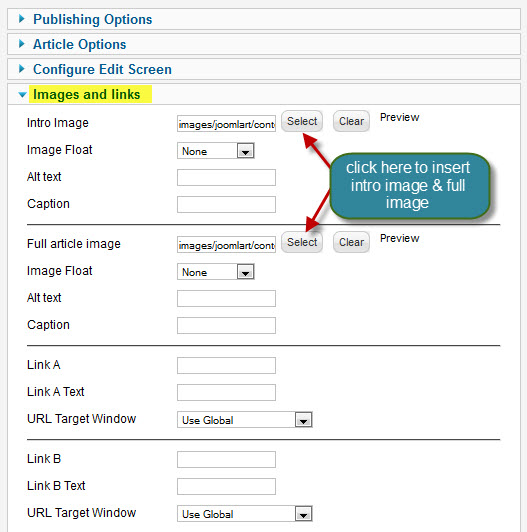
Step 2: Insert Intro image & Full image : Open any article >> click "Images and links" tab then insert image :


6.1 Get in Touch
Module position: position-1
Module Suffix: NOT USED
- Back-end Settings
- Front-end Appearance

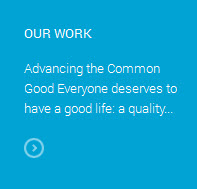
6.2 Our Work
Module position: position-2
Module Suffix: NOT USED
- Back-end Settings
- Front-end Appearance
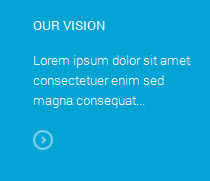
6.3 Our Virsion
Module position: position-3
Module Suffix: NOT USED
- Back-end Settings
- Front-end Appearance
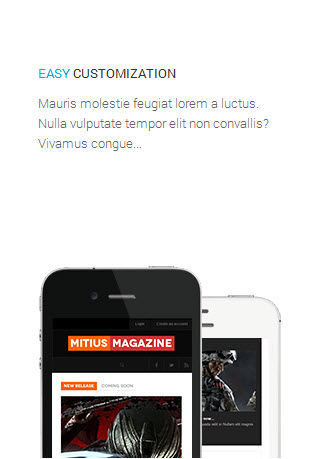
6.4 Easy Customization
Module position: position-5
Module Suffix: white
- Back-end Settings
- Front-end Appearance
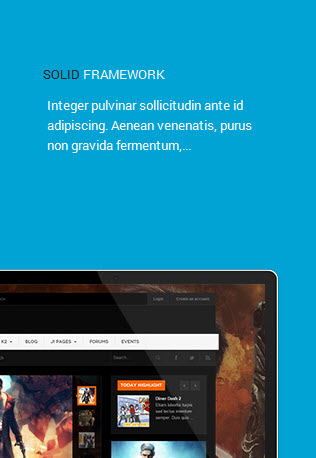
6.5 Solid Framework
Module position: position-6
Module Suffix: highlight
- Back-end Settings
- Front-end Appearance
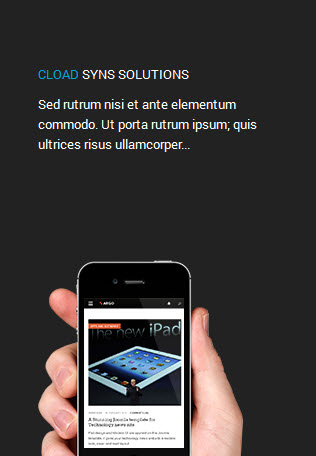
6.6 Cload Syns Solutions
Module position: position-7
Module Suffix: dark
- Back-end Settings
- Front-end Appearance
6.7 J! Content
Module position: sidebar-2
Module Suffix: white
- Back-end Settings
- Front-end Appearance

6.8 Latest blog posts
Module position: sidebar-2
Module Suffix: white
- Back-end Settings
- Front-end Appearance

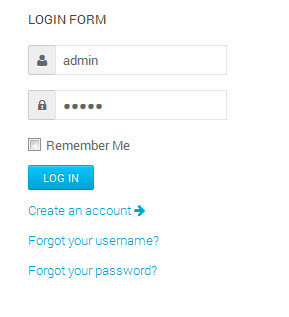
7. Login Module
Module position: sidebar-2
Module Suffix: NOT USED
- Back-end Settings
- Front-end Appearance
8. Search Module
Module position: position-0
Module Suffix: NOT USED
- Back-end Settings
- Front-end Appearance

9. Footer Module
Module position: footer
Module Suffix: NOT USED
- Back-end Settings
- Front-end Appearance

10. Menu Module
10.1 Company
To display as Demo site, please follow step by step as below:
Step 1: Create Company menu then add some menu item as image below
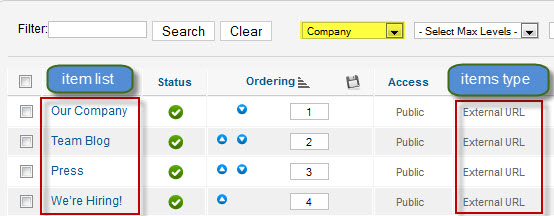 Note : All menu items have the same config
Step 2: Create new Menu module
Go to Administrator >> Module Manager >> Add new Menu Module
Module position: footer-1
Module Suffix: NOT USED
- Back-end Settings
Front-end Appearance


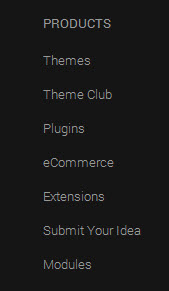
10.2 Products
Module position: footer-2
Module Suffix: NOT USED
- Back-end Settings
- Front-end Appearance
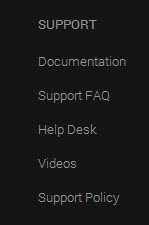
10.3 Support
Module position: footer-3
Module Suffix: NOT USED
- Back-end Settings
- Front-end Appearance
10.4 Recommend
Module position: footer-4
Module Suffix: NOT USED
- Back-end Settings
- Front-end Appearance

Custom HTML Modules
If you are not sure how to use Custom HTML Modules or how to access the HTML Editor please Read this Guide.
We will provide you with the HTML Code (markup) for reference below, you will need to replicate it exactly and then change your content. Remember, HTML code has special div classes, which are required for demo alike display.
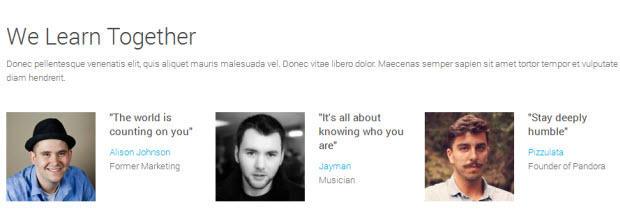
1. We Learn Together
Module Position: content-top
Module Suffix: NOT USED
<p>Donec pellentesque venenatis elit, quis aliquet mauris malesuada vel. Donec vitae libero dolor. Maecenas semper sapien sit amet tortor tempor et vulputate diam hendrerit.</p>
<div class="row people-list">
<div class="span4">
<div class="pull-left"><img src="/images/joomlart/customer/VinThomas.jpg" border="0" alt="" /></div>
<h4>"The world is counting on you"</h4>
<a class="people-name" href="#">Alison Johnson</a>
<p>Former Marketing</p>
</div>
<div class="span4">
<div class="pull-left"><img src="/images/joomlart/customer/jayman.jpg" border="0" alt="" /></div>
<h4>"It's all about knowing who you are"</h4>
<a class="people-name" href="#">Jayman</a>
<p>Musician</p>
</div>
<div class="span4">
<div class="pull-left"><img src="/images/joomlart/customer/pizzulata.jpg" border="0" alt="" /></div>
<h4>"Stay deeply humble"</h4>
<a class="people-name" href="#">Pizzulata</a>
<p>Founder of Pandora</p>
</div>
</div>
- Back-end Settings
- Front-end Appearance
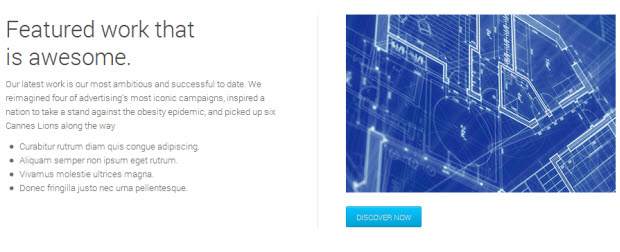
2. Featured work that is awesome
Module position : content-top
Module Suffix :  NOT USED
<div class="featured-work">
<div class="row">
<div class="col-xs-12 col-sm-6 col-md-6 featured-work-item first">
<div class="featured-work-inner">
<div class="row">
<h3 class="module-title span4">Featured work that is awesome.</h3>
</div>
<p>Our latest work is our most ambitious and successful to date. We reimagined four of advertising’s most iconic campaigns, inspired a nation to take a stand against the obesity epidemic, and picked up six Cannes Lions along the way</p>
<ul>
<li>Curabitur rutrum diam quis congue adipiscing.</li>
<li>Aliquam semper non ipsum eget rutrum.</li>
<li>Vivamus molestie ultrices magna.</li>
<li>Donec fringilla justo nec urna pellentesque.</li>
</ul>
</div>
</div>
<div class="col-xs-12 col-sm-6 col-md-6 featured-work-item last">
<div class="featured-work-inner"><img src="/images/joomlart/featured-work.jpg" border="0" alt="" /> <a class="btn btn-primary" href="#">Discover Now</a></div>
</div>
</div>
</div>
- Back-end Settings
- Front-end Appearance
3. We Travel Together
Module position : content-top
Module Suffix :  NOT USED
<p>Donec pellentesque venenatis elit, quis aliquet mauris malesuada vel. Donec vitae libero dolor. Maecenas semper sapien sit amet tortor tempor et vulputate diam hendrerit.</p>
<div class="our-travel-photos"><img src="/images/joomlart/ourtravel/tr-1.jpg" border="0" alt="" /> <img src="/images/joomlart/ourtravel/tr-2.jpg" border="0" alt="" /> <img src="/images/joomlart/ourtravel/tr-3.jpg" border="0" alt="" /></div>
- Back-end Settings
- Front-end Appearance

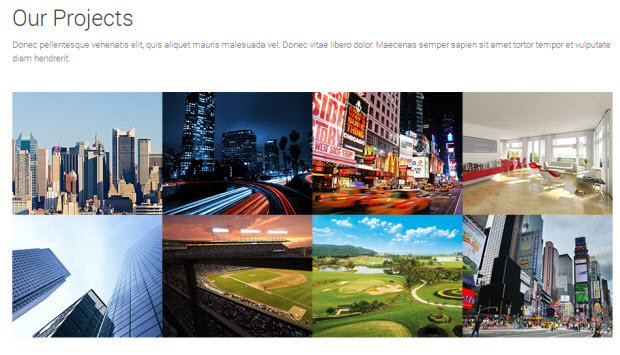
4. Our Projects
Module position : content-top
Module Suffix :  NOT USED
<p>Donec pellentesque venenatis elit, quis aliquet mauris malesuada vel. Donec vitae libero dolor. Maecenas semper sapien sit amet tortor tempor et vulputate diam hendrerit.</p>

<div class="photo-list clearfix">

<span class="photo-item">

 <img src="/images/joomlart/ourprojects/op-1.jpg" alt="" class="photo-img"/>

 <span class="photo-name"><span>Maecenas Building</span></span>

</span>

<span class="photo-item">

 <img src="/images/joomlart/ourprojects/op-2.jpg" alt="" class="photo-img"/>

 <span class="photo-name"><span>Maecenas Building</span></span>

</span>

<span class="photo-item">

 <img src="/images/joomlart/ourprojects/op-3.jpg" alt="" class="photo-img"/>

 <span class="photo-name"><span>Maecenas Building</span></span>

</span>

<span class="photo-item">

 <img src="/images/joomlart/ourprojects/op-4.jpg" alt="" class="photo-img"/>

 <span class="photo-name"><span>Maecenas Building</span></span>

</span>

<span class="photo-item">

 <img src="/images/joomlart/ourprojects/op-5.jpg" alt="" class="photo-img"/>

 <span class="photo-name"><span>Maecenas Building</span></span>

</span>

<span class="photo-item">

 <img src="/images/joomlart/ourprojects/op-6.jpg" alt="" class="photo-img"/>

 <span class="photo-name"><span>Maecenas Building</span></span>

</span>

<span class="photo-item">

 <img src="/images/joomlart/ourprojects/op-7.jpg" alt="" class="photo-img"/>

 <span class="photo-name"><span>Maecenas Building</span></span>

</span>

<span class="photo-item">

 <img src="/images/joomlart/ourprojects/op-8.jpg" alt="" class="photo-img"/>

 <span class="photo-name"><span>Maecenas Building</span></span>

</span>

</div>
- Back-end Settings
- Front-end Appearance
5. Careers
Module position : footer-5
Module Suffix :  NOT USED
<p>Praesent in sollicitudin neque. Mauris sit amet risus vitae purus bibendum venenatis? Aliquam...</p>
<p><a class="btn btn-primary" href="/index.php?option=com_content&Itemid=709&id=79&lang=en&layout=blog&limit=9&view=category">View Jobs</a></p>
- Back-end Settings
- Front-end Appearance

6. Careers Slogan
Module position : masshead
Module Suffix :  NOT USED
<div class="site-slogan hidden-phone animate-text">
<p>“<span class="highlight">Beranis</span> doesn’t really want you to have a job,</p>
<p>they want you to <span class="highlight">have a life</span>.”</p>
</div>
- Back-end Settings
- Front-end Appearance
7. Careers
Module position : position-4
Module Suffix :  NOT USED
<p>Praesent in sollicitudin neque. Mauris sit amet risus vitae purus bibendum venenatis? Aliquam...</p>
<p><a class="btn" href="/index.php?option=com_content&Itemid=709&id=79&lang=en&layout=blog&limit=9&view=category">View Jobs</a></p>
- Back-end Settings
- Front-end Appearance
8. Slogan
Module position : slogan
Module Suffix :  NOT USED
<div class="site-slogan hidden-phone animate-text">
<p>Beranis Apply Human-Centered Design to Help</p>
<p>Businesses Thrive in a Connected World</p>
</div>
- Back-end Settings
- Front-end Appearance

9. Social
Module position : social
Module Suffix :  NOT USED
<div class="site-slogan hidden-phone animate-text">
<p>Beranis Apply Human-Centered Design to Help</p>
<p>Businesses Thrive in a Connected World</p>
</div>
- Back-end Settings
- Front-end Appearance

EasyBlog Configuration
1. Installation
If you are new to this Joomla! component, please read THIS GUIDE.
2. Configuring EasyBlog component
2.1 Workflow Configuration.
Go to: Administration >> Components >> EasyBlog >> Setting >> Workflow
Backend Setting
2.2 Themes Configuration
Go to: Administration >> Components >> EasyBlog >> Themes
Back-end Settings
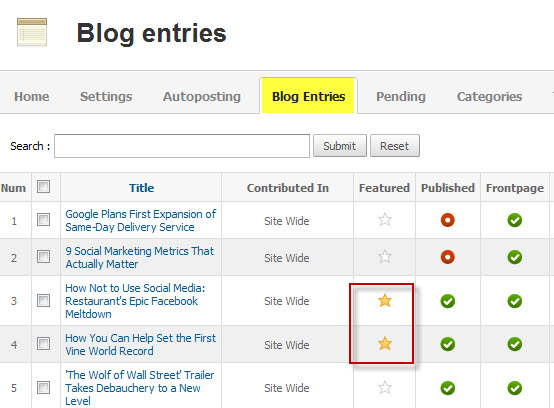
2.3 How to create slide on EasyBlog
To create slide on EasyBlog as Demo site , you must set some blog article are Featured :
Template Customization
3. Template Override
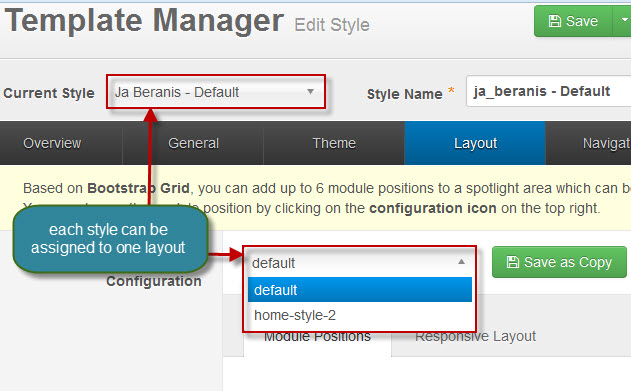
In summary, to override template, you clone a style then edit as you wish. After all, assign the cloned style to specific menus. The assigned menus will override the same menus in the default style.
Each style can be configured to use a theme, layout so in one website, you can have menus with different themes, layous.
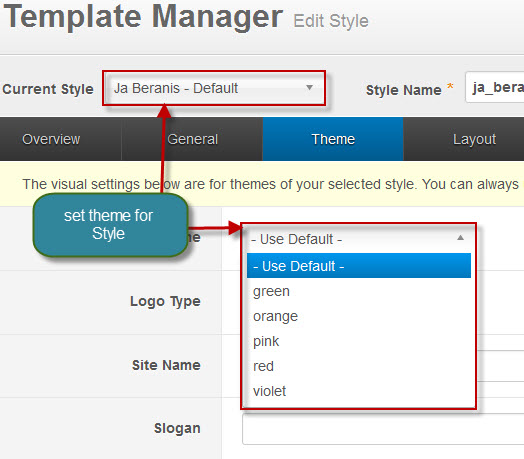
3. Themes Setting
In JA Beranis template, we support multiple themes: default, pink, green, red, violet, orange. Different styles can use different themes.
4. Layout Setting
The supported Layouts in the JA Beranis:
In each layout, you can customize to satisfy your website's need.
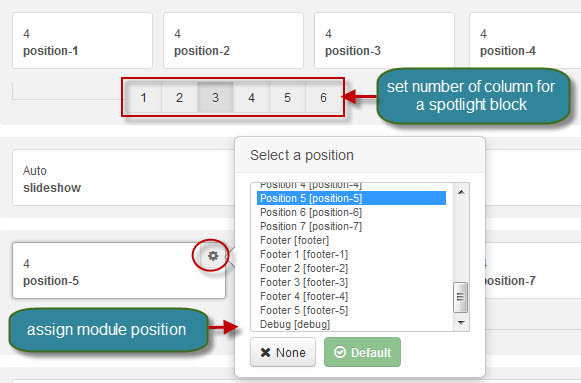
4.1 Configure layout structure
In the setting panel, you can customize the structure of a layout, you can change any module position, set number of module positions in a spotlight block.
4.2 Configure Responsive Layouts
In the setting panel, customize layout in any supported responsive layouts. Select a responsive layout, then enable, disable any module position in the layout, you can also resize module positions in spotlight block.
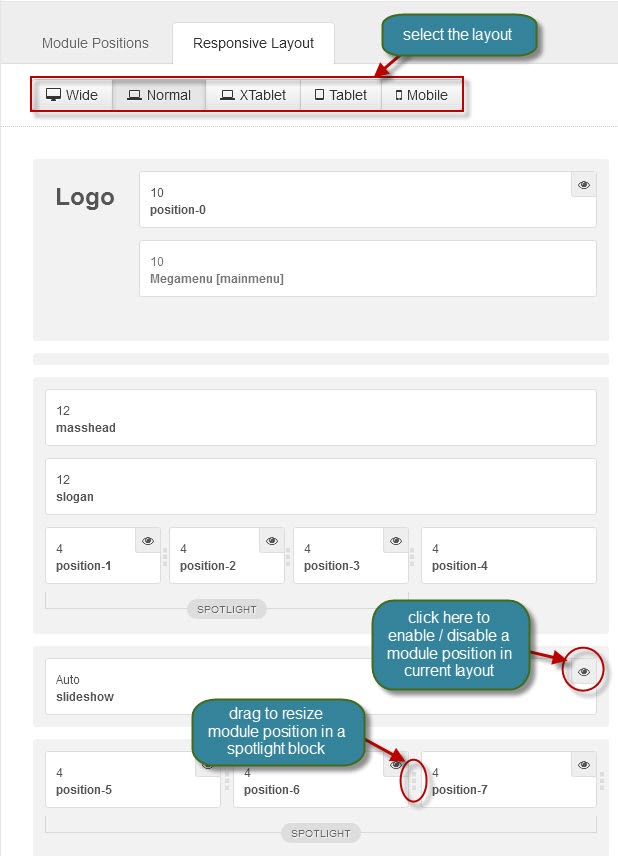
The following video tutorials will show you how to work with Layouts: Configure and Customize
Layout Configuration
T3 comes with ease of layout customization. The visual layout configuration is easier than ever before.
Layout Customization
The video tutorial guides you on how to customize the layouts, add new layout, and customize blocks in a layout.
5. ThemeMagic Setting
JA Argo is developed with T3 so you can customize themes with ThemeMagic
To customize theme with the feature, firstly, you have to enable the option.

In the setting panel, you can customize all the themes. The left panel is the setting area while the right panel is your site front-end. Each time you change setting, click on "Preview" button to view the change in front-end on the right panel.
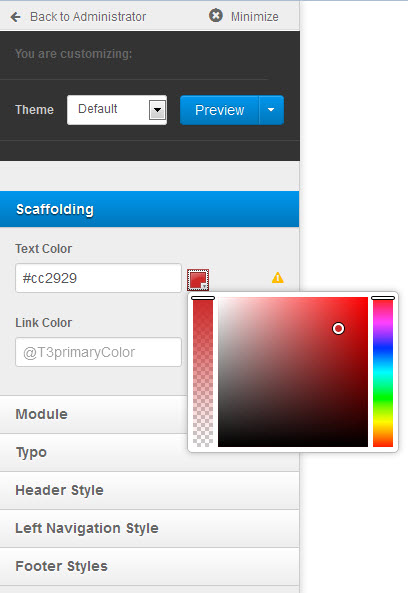
The following video tutorials will show you how to customize theme and customize ThemeMagic
ThemeMagic Customization
After watching the tutorial, you can be able to customize your theme quickly using ThemeMagic as well as know how to add new group and parameters to ThemeMagic.
Recommendation
The above userguide should help one in replicating the Demo site settings for the template and extension on their site.
Recommended :
If you are new or are confused. We recommend installing Quickstart on your localhost and use it as reference for configs. This is the best way to work with any template. Links to all the resources are provided above, you should carefully read them to take the maximum advantage of our products.
Support :
Please raise your support queries in the forum and make sure you follow the support guidelines. We spend more time in getting the information from user incase the support guidelines are not followed.