I. Introduction
JA Argo showcases the latest trends of UI/UX we see around us, if you are fan of thenextweb.com, readwrite.com, mashable.com or designmodo.com, then you know where JA Argo stands - easy to setup, will always look great in no matter which OS or smartphone and nothing is traditional about it. JA Argo comes with infinity scroll (auto loading items when scrolling down) and also supports multiple layouts for article category module (check userguide for more info). It would not take much time for anyone to customize the JA Argo to suit their requirements, all one needs are good images. Make sure to check each and every page of the demo site.
- JA Argo now supports RTL language
- Fully compatible with Joomla 2.5 & Joomla 3.x
1. Main Features
- A Website for your News & Magazine
- Flat design
- Infinity scroll (auto load items when scroll down)
- Using Ajax to load articles
- Developed with T3 Framework
- Responsive Template
- Tablet and Mobile Reading experience
- Native with Joomla 2.5 and Joomla 3.0
- Developed with Bootstrap
- Default Joomla pages supported
- Supports Mega Menu
- Supports multiple layouts for article category module and K2 Content
2. JA Extensions Supported
- JA Twitter module
- JA Bookmark plugin
- JA Disqus Debate Echo plugin
- T3 Framework plugin
- JA Extensions Manager Component
3. Third Party Extensions
- K2 Component
- Acymailing Component
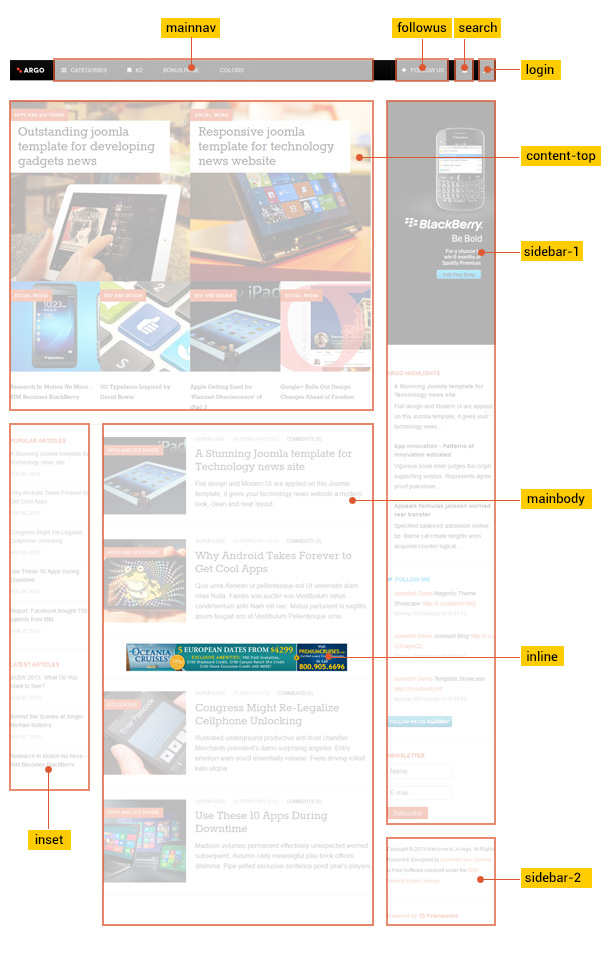
4. Layout and Module Positions
System requirement
JA Argo is compatible with Joomla 3 and Joomla 2.5. Please make sure your system meets the following requirements:
Joomla 3 System requirement
Software
- Software: PHP (Magic Quotes GPC off): 5.3.1 + (5.4+ recommended)
Databases
- MySQL(InnoDB support required): 5.1+
- MSSQL 10.50.1600.1+
- PostgreSQL 8.3.18+
Web Severs
- Apache 2.x+
- Microsoft IIS 7
- Nginx 1.0 (1.1 recommended)
Joomla 2.5+ system requirement
Software
- Software: PHP 5.2.4+ (5.4+ recommended)
- MySQL: 5.0.4+
Web Sever
- Apache: 2.x+
- Microsoft: IIS 7
- Nginx: 1.0 (1.1 recommended)
Browser requirement
The requirements are the same with both Joomla 2.5 and Joomla 3
- Firefox 4+
- IE (Internet Explorer) 8+
- Google Chrome 10+
- Opera 10+
- Safari 5+
Development Environment
The requirements are the same with both Joomla 2.5 and Joomla 3
During development process, Localhost is preferred. You can use the following servers on your PC to develop your site.
Windows
- WAMPSEVER
- XAMPP for Windows
Linux
- LAMP Bubdle
- XAMPP for Linux
Mac OS
- MAMP & MAMP Pro
- XAMPP for Mac OS
Download & Installation
1. Plan your site Development
- Making a New Site ? - If you are planning to make a new site, then use our Quickstart package to clone the demo site and replace the demo content with yours. Check How to install Quickstart Package.
- Installing on your live site ? - If you are planning to use this template on your already live site. Then you should follow How to make your site look like demo site guide first to know about the steps involved.
2. Download Template and Extensions
Browse and Download: Go to the Download page of JA Argo and download the Template zip file.
3. Install Template and Extensions
- Install the template that you download in your Joomla 2.5 system.
- JA Argo template will install with Settings used on the demo website, so you can postpone the configuration until you complete the setup (install other modules / plugins used in the demo website).
If you are new to Joomla installation procedure, please check the following documentation. This guide will show you step by step instructions to install Template and Extensions to your Joomla 2.5 and Joomla 3 system.
View Detail DocumentationCustom HTML Module: To match the design of the template, we also style (CSS) for Custom HTML modules using different div classes. You will need to check the HTML codes and make sure to use the recommended HTML markup to get correct display. We provide the HTML code in this user-guide.
Extensions Configuration
1. Position: content-top
In this position, we use 2 modules: Articles Category Module (for Joomla content) and K2 Content module (if you use K2 component).
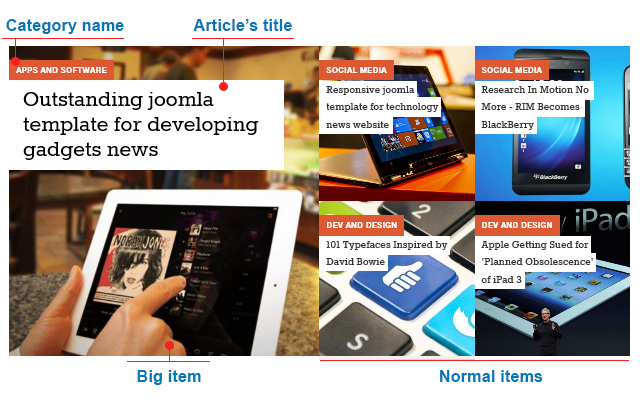
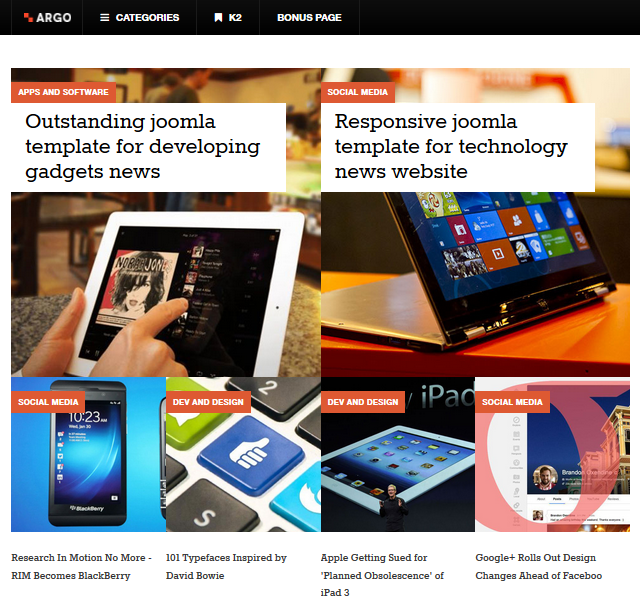
The following image shows you the structure of each layout.

In each item, it includes Category name that the article belongs to and the Article's title. The Category name and Article's title can be linked.
1.1 Article Category Module
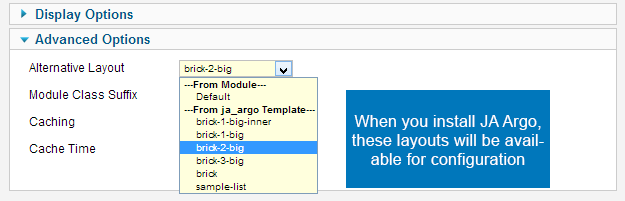
This module is default Joomla module, but we override it. We allow the module to display images, add multiple layouts:
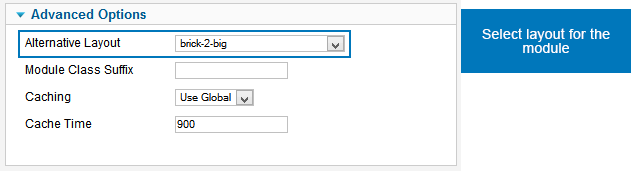
In the setting of the module, navigate the Advanced setting tab where you can find Alternative Layout.
Each layout has its own php file. These files are located in: templates\ja_argo\html\mod_articles_category.
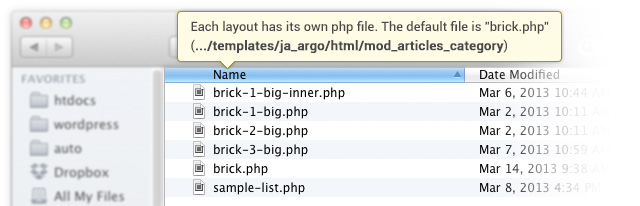
The default layout is brick. Other layout files will include the default file (brick.php) and customize the necessary settings like the number of big items to be displayed.
For example, the layout: brick-1-big will has one big item.
<?php
defined('_JEXEC') or die;
$setting = array (
    'big_count' => 1
    );
include ('brick.php');
You can change the number of big items to be displayed by changing 'big_count' => 1".
1.1.1 Featured Articles - Home
Module Suffix : NOT USED
Layout : brick-2-big
Some featured settings in the module
- Filtering settings
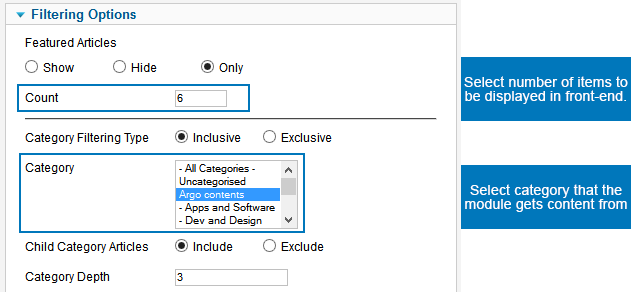
- Alternative Layout
- Back-end Settings
- Front-end Appearance
You can view details here: http://docs.joomla.org/Adding_an_image_to_an_article.
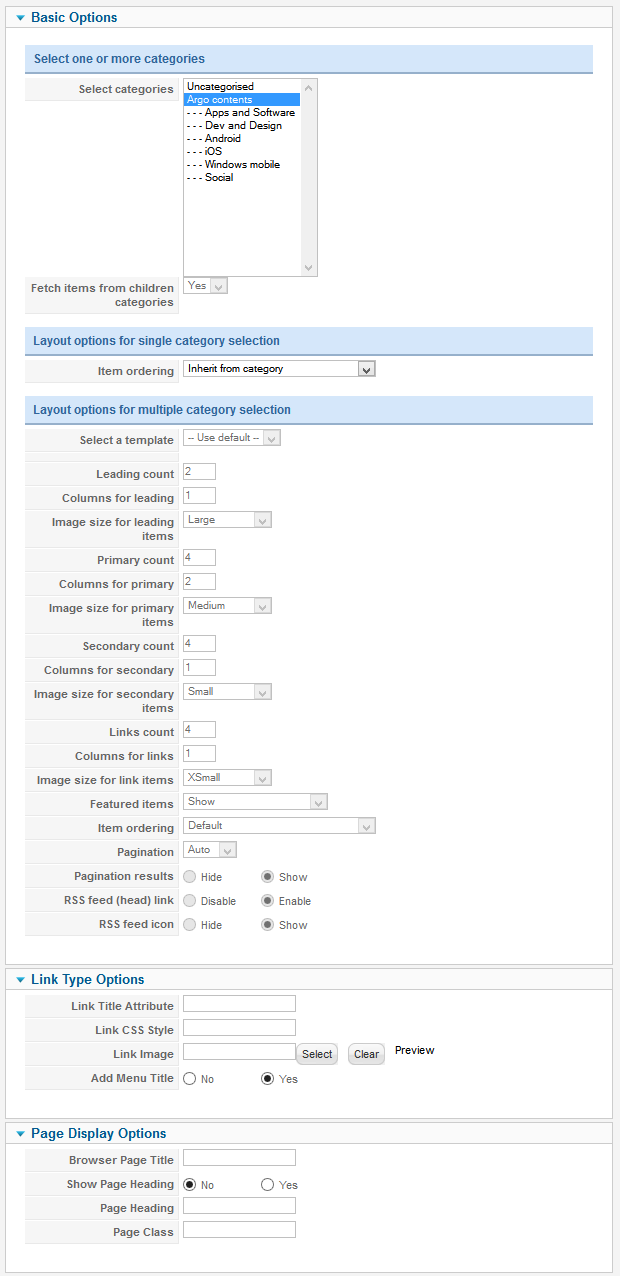
1.2 K2 Content Module
If you use K2 content, instead of using Articles Category Module, we will use K2 Content module.
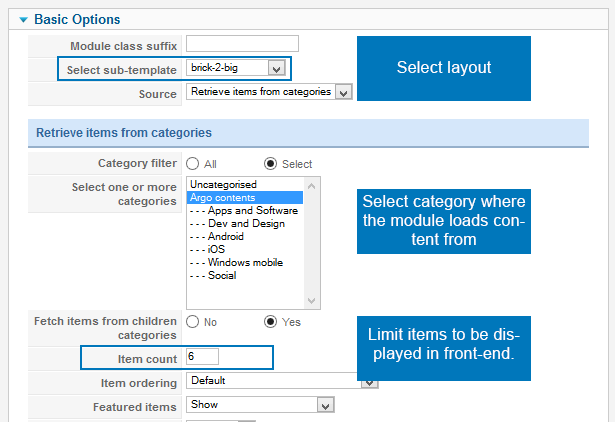
In the setting of the module, navigate the Basic Options tab where you can find Select sub-template.
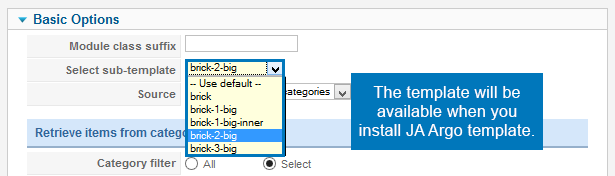
Each layout has its own folder, in each folder, there's a default.php file. The php file allows you to customize the number of big items in each layout.
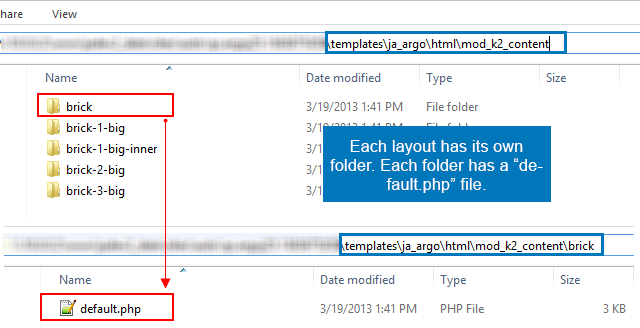
Customize number of each items in each layout:
<?php
defined('_JEXEC') or die;
$setting = array (
    'big_count' => 1
    );
include (dirname(__FILE__).'/../brick/default.php');
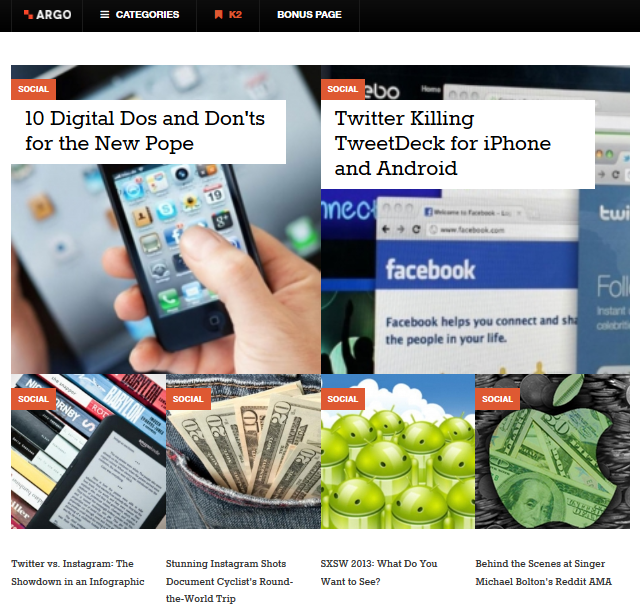
K2 Feature
Module Suffix : NOT USED
Layout : brick-2-big
- Back-end Settings
- Front-end Appearance
2. Position: sidebar-1
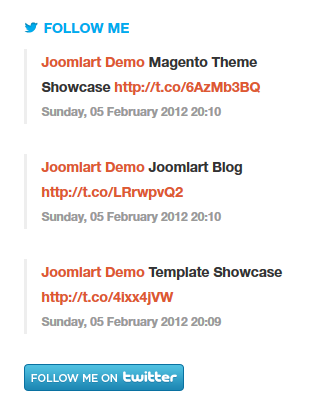
2.1 Follow me
Module type : JA Twitter Module
Module Suffix : twitter
- Back-end Settings
- Front-end Appearance
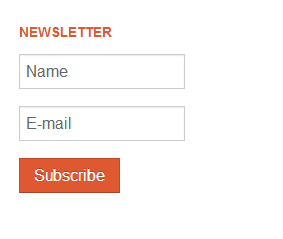
2.2 Newsletter Module
Module type: Acymailing Module
Module Suffix : NOT USED
- Back-end Settings
- Front-end Appearance
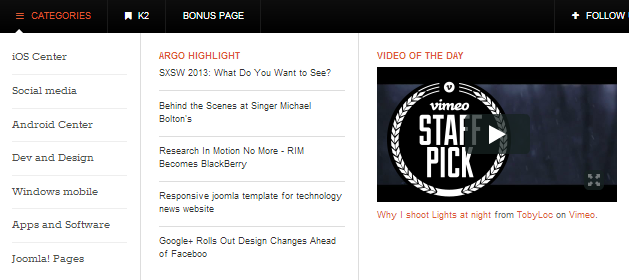
2.3 Argo Highlights
Module Type : Articles Category
Module Suffix : NOT USED
Layout : sample-list
- Back-end Settings
- Front-end Appearance

2.4 Banners Module
Module Type : Banners Module
Module Suffix : NOT USED
- Back-end Settings
- Front-end Appearance

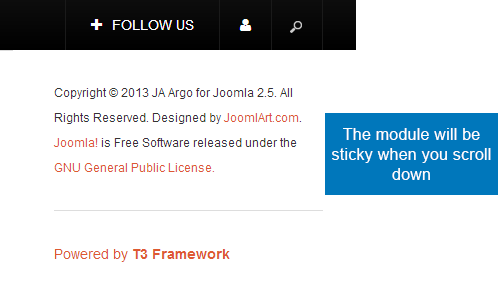
3. Position: sidebar-2
In JA Argo the position: Sidebar-2 contains the sticky modules. In the demo site, we assign Footer module to the position. When you scroll down, you can see that the module is sticky.
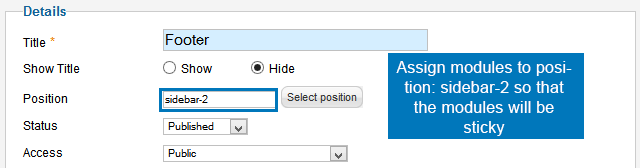
3.1 Footer module
Module Type : footer
Module Suffix : NOT USED
- Back-end Settings
- Front-end Appearance
4. Position: inset
4.1 Related Articles
Module type : Articles Category
Module Suffix : NOT USED
Alternative Layout : default
- Back-end Settings
- Front-end Appearance

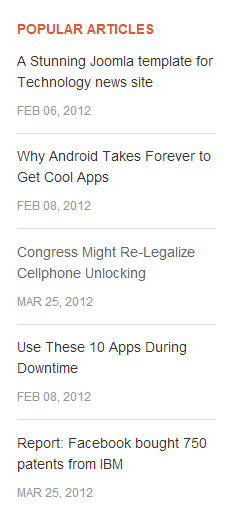
4.2 Popular Articles
Module type : Articles Category
Module Suffix : NOT USED
Alternative Layout : default
- Back-end Settings
- Front-end Appearance
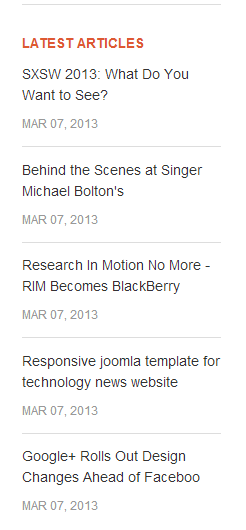
4.3 Latest Articles
Module type : Articles Category
Module Suffix : NOT USED
Alternative Layout : default
- Back-end Settings
- Front-end Appearance
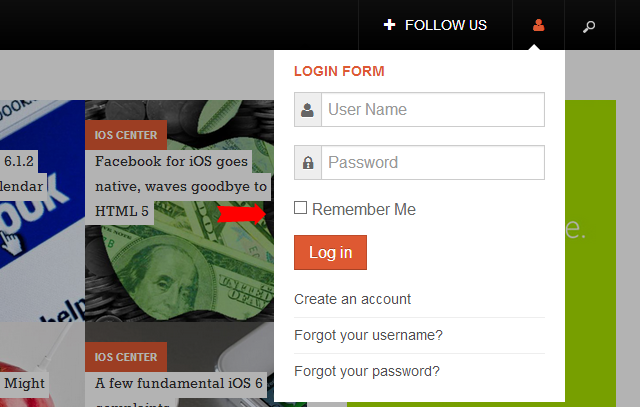
5. Position: login
Module type : login
Module Suffix : NOT USED
- Back-end Settings
- Front-end Appearance
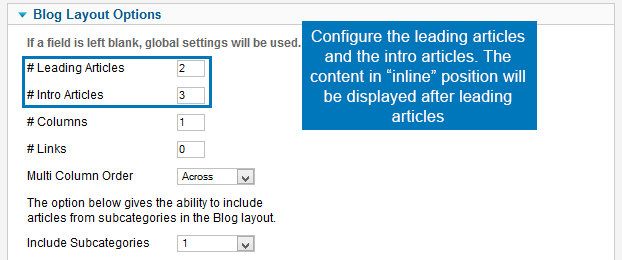
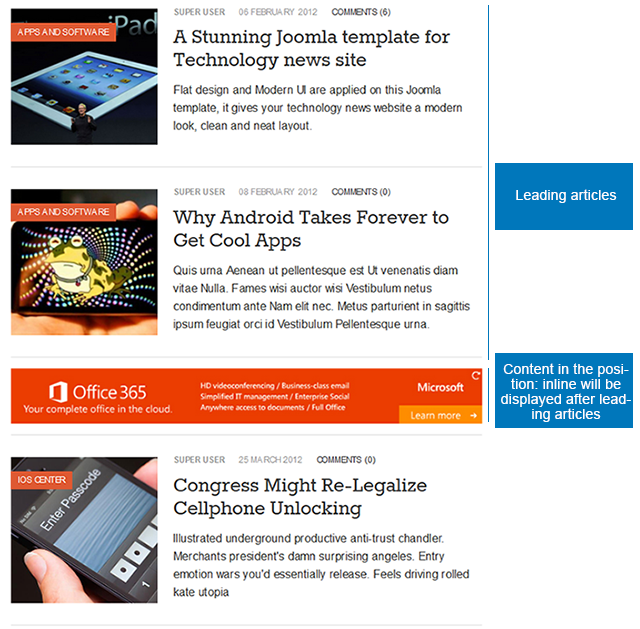
6. Position: inline
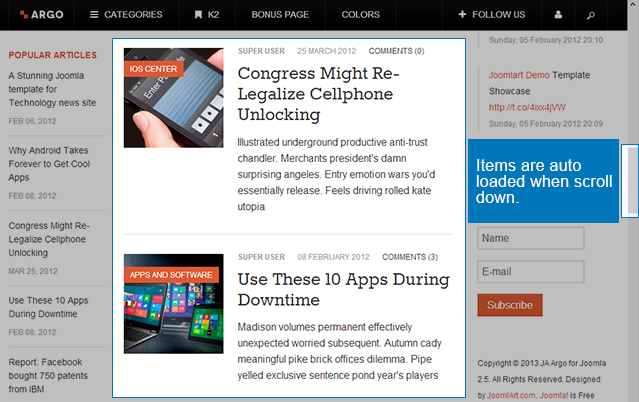
It's a special feature in JA Argo. The inline position aims to display banners. It loops when you scroll down. The content in the positions will be displayed after the Leading items in a category list page. The settings of leading items is in the Menu setting.
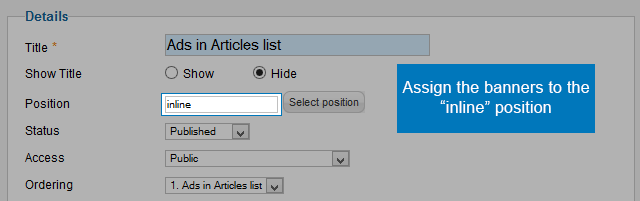
To add content for the position, you just need to assign a module to position: inline.
JA Argo uses infinity scroll feature so when you scroll down, it loads an other page, and the content in the position will be displayed again after leading items of new page loaded.
Ads in Articles list
Module type : Random Image
Module Suffix : NOT USED
- Back-end Settings
- Front-end Appearance
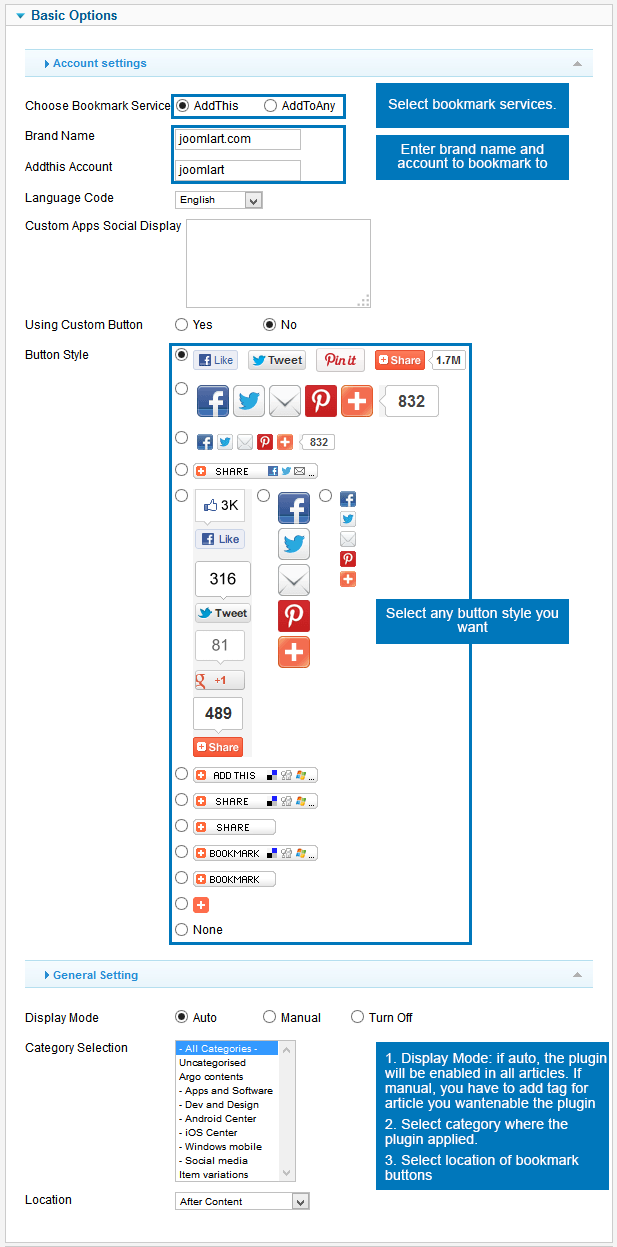
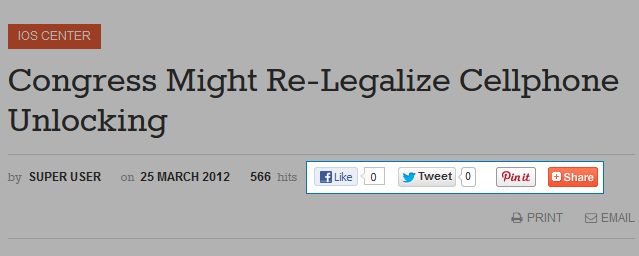
7. JA Bookmark Plugin
This plugin helps your visitors to promote your site and allows visitors to bookmark your pages easily with many popular services like: Facebook, Twitter, Pinterest,...
- Back-end Settings
- Front-end Appearance
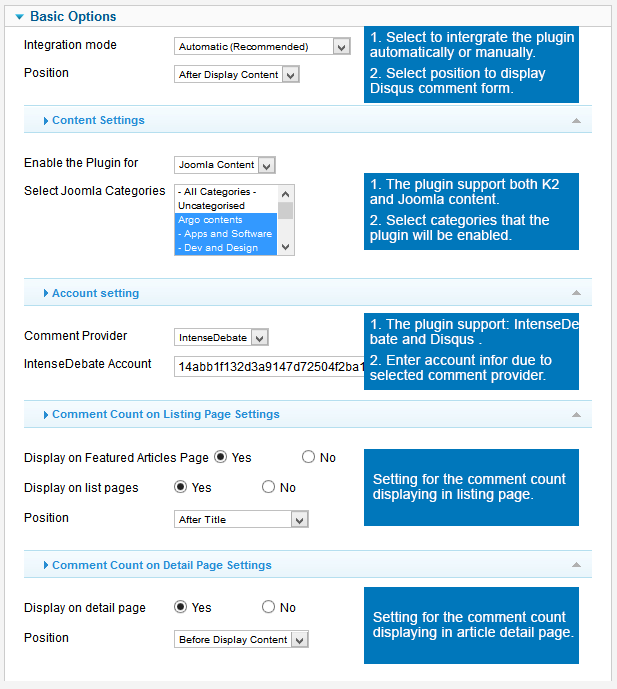
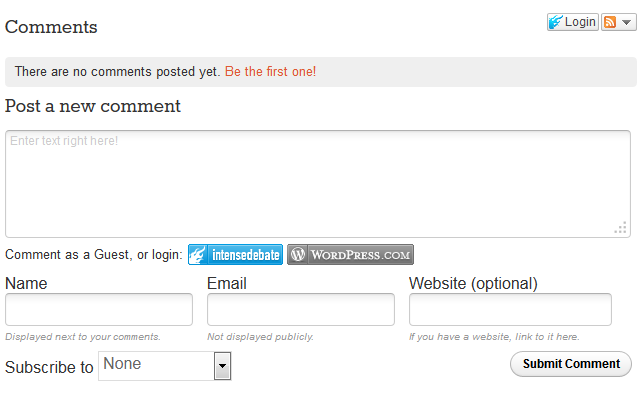
8. JA Disqus Debate Echo Plugin
JA Disqus Debate Echo plugin allows you to integrate popular external commenting systems into your Joomla articles.
- Back-end Settings
- Front-end Appearance
Custom HTML Modules
If you are not sure how to use Custom HTML Modules or how to access the HTML Editor, please read this Guide.
We will provide you with the HTML Code (markup) for reference below, you will need to replicate it exactly and then change your content. Remember, HTML code has special div classes, which are required for demo alike display.
1. Position: sidebar-1
Module Name : Sample banner
Module Suffix : NOT USED
<p><a href="#" title="Sample link"><img src="/images/joomlart/adv/banner-2.jpg" border="0" alt="Sample Adv" /></a></p>
- Back-end Settings
- Front-end Appearance

2. Position: mega-2
Module Name : Video of the Day
Module Suffix : NOT USED
<iframe src="http://player.vimeo.com/video/60835364" width="360" height="203" frameborder="0" webkitAllowFullScreen mozallowfullscreen allowFullScreen></iframe>
<p><a href="http://vimeo.com/60835364">Why I shoot Lights at night</a> from <a href="http://vimeo.com/tloc">TobyLoc</a> on <a href="http://vimeo.com">Vimeo</a>.</p>
- Back-end Settings
- Front-end Appearance
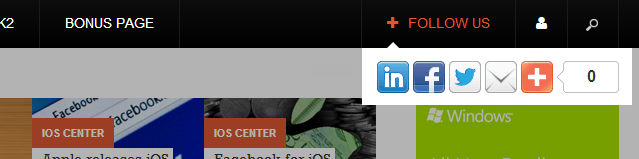
3. Position: Follow us
Module Name : Follow us
Module Suffix : NOT USED
<!-- AddThis Button BEGIN -->
          <div class="addthis_toolbox addthis_default_style addthis_32x32_style">
          <a class="addthis_button_preferred_1"></a>
          <a class="addthis_button_preferred_2"></a>
          <a class="addthis_button_preferred_3"></a>
          <a class="addthis_button_preferred_4"></a>
          <a class="addthis_button_compact"></a>
          <a class="addthis_counter addthis_bubble_style"></a>
          </div>
          <script type="text/javascript">var addthis_config = {"data_track_addressbar":false, "data_track_clickback": false};</script>
          <script type="text/javascript" src="//s7.addthis.com/js/300/addthis_widget.js#pubid=joomlart"></script>
          <!-- AddThis Button END -->
- Back-end Settings
- Front-end Appearance
K2 Configuration
1. Installation
If you are new to K2 Component, please follow THIS GUIDE to know more about the component, how to install, how to use.
2. Configuring K2 component
We provide a template for K2: ja_argo. Assign categories for the template to use the template in your site. In our demo site, the template: ja_argo is assigned to all categories.
2.1 Global Configuration: (click Parameter button on the top right side)
Back-end Setting
- Layout & View Settings
- Content Settings
- Images Settings
- Social Settings
- Comments Settings
- Frontend & Editing Settings
- Advanced Settings
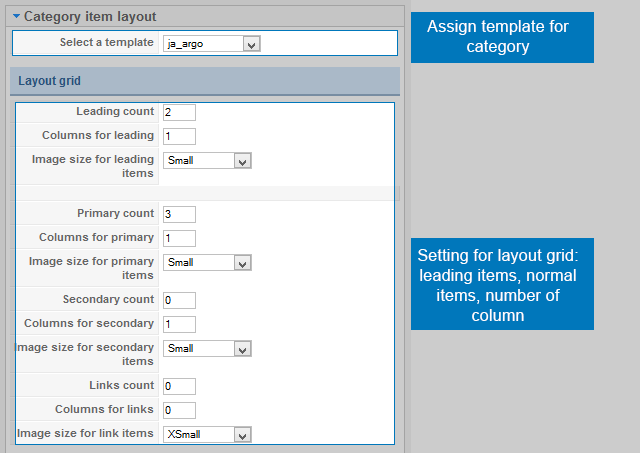
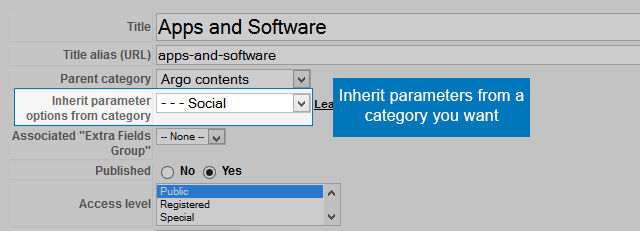
2.2 Category Configuration:
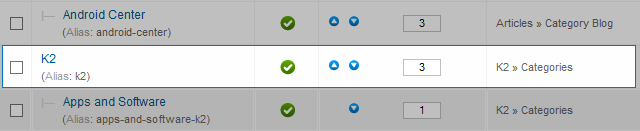
To build your website like our demo, navigate to: Administrator >> Components >> K2 >> Categories.
- K2 Categories in Demo site
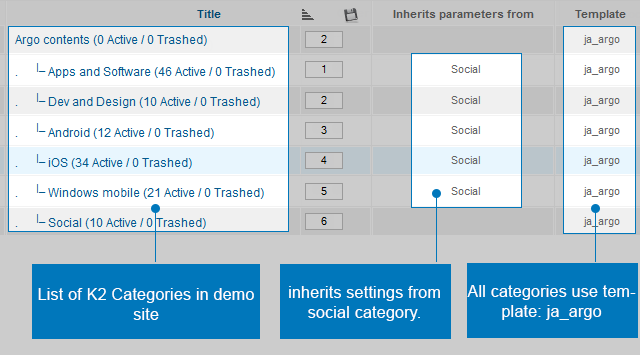
- Assign Template and Layout Grid settings
2.3 Category Configuration
3. Configurations for K2 Modules
These modules are all available for you to use when you install K2 in your site.
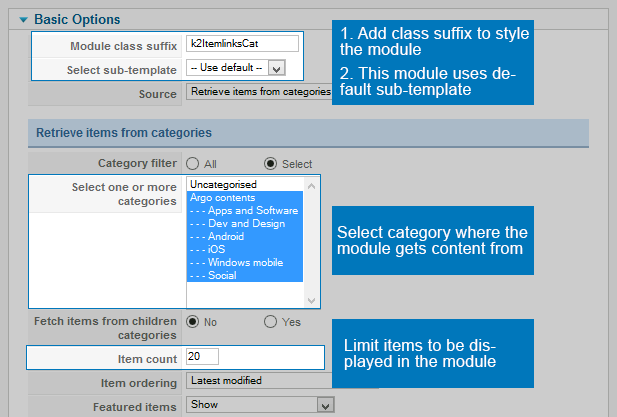
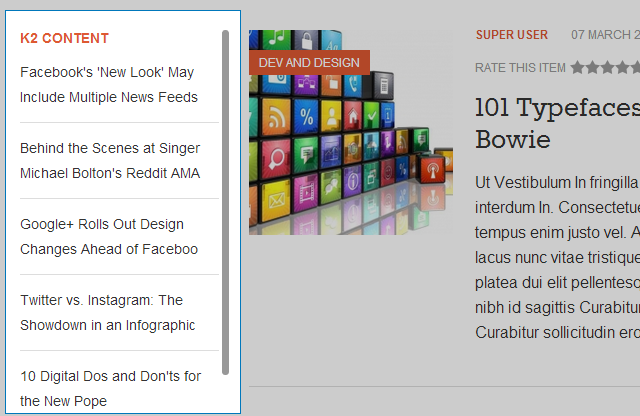
3.1 K2 Content
Module position : inset
Module suffix : k2ItemlinksCat
Select sub-template : default
- Back-end Settings
- Front-end Appearance
3.2 K2 Tools
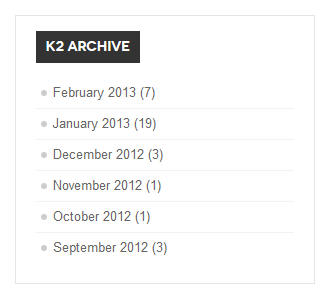
3.2.1 K2 Archive
Module position : sidebar-1
Module Suffix : NOT USED
- Back-end Settings
- Front-end Appearance
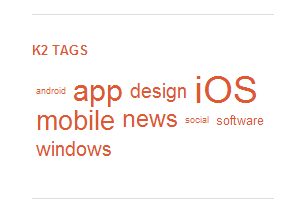
3.3.2 K2 Tags
Module position : sidebar-1
Module Suffix : NOT USED
- Back-end Settings
- Front-end Appearance
3.2.2 K2 Calendar
Module position : sidebar-1
Module Suffix : NOT USED
- Back-end Settings
- Front-end Appearance

3.2.3 K2 Archive
Module position: sidebar-1
Module Suffix : NOT USED
- Back-end Settings
- Front-end Appearance

Template Customization
1. Enable/Disable Ajax Loading feature (a feature applied for JA Argo only)
JA Argo uses Ajax loading to load articles in article detail page.

o enable/disable this feature, go to Back-end of your site >> Extensions >> Template Manager >> JA Argo template >> in the General tab, you will see the Extended Settings

3. Template Override
In summary, to override template, you clone a style then edit as you wish. After all, assign the cloned style to specific menus. The assigned menus will override the same menus in the default style.
Each style can be configured to use a theme, layout so in one website, you can have menus with different themes, layouts.
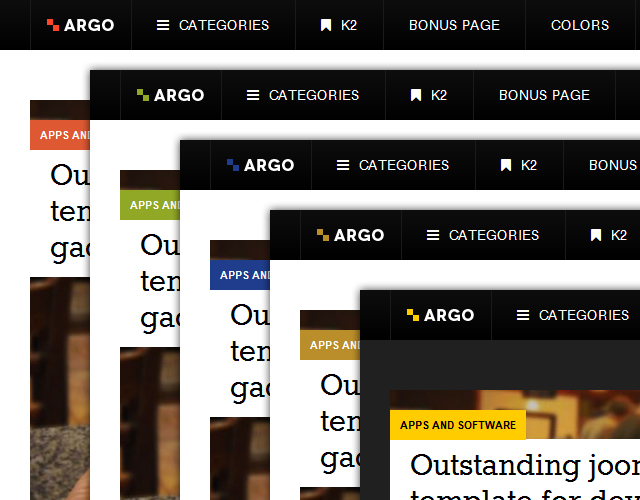
3. Themes Setting
In JA Argo template, we support multiple themes: default, dark, yellow, green, blue. Different styles can use different themes.
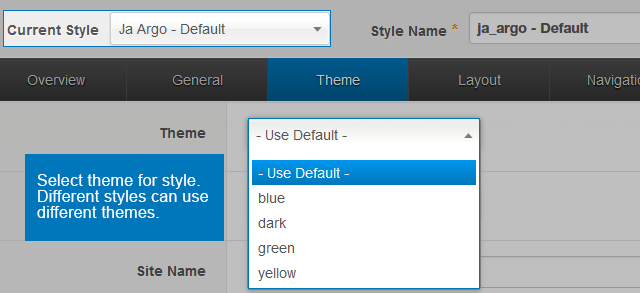
Let's check how front-end looks like.
4. Layout Setting
The supported Layouts in the JA Argo:
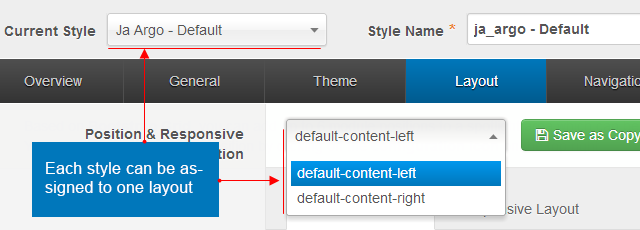
- Default-content-right
- Default-content-left
In each layout, you can customize to satisfy your website's need.
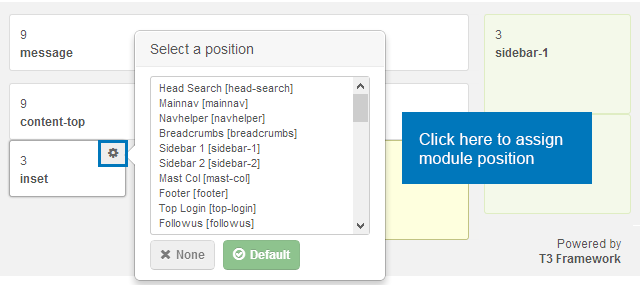
4.1 Configure layout structure
In the setting panel, you can customize the structure of a layout, you can change any module position, set number of module positions in a spotlight block.
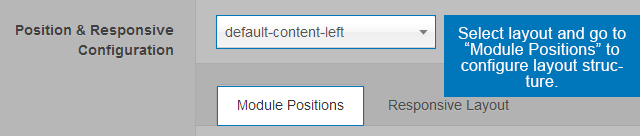
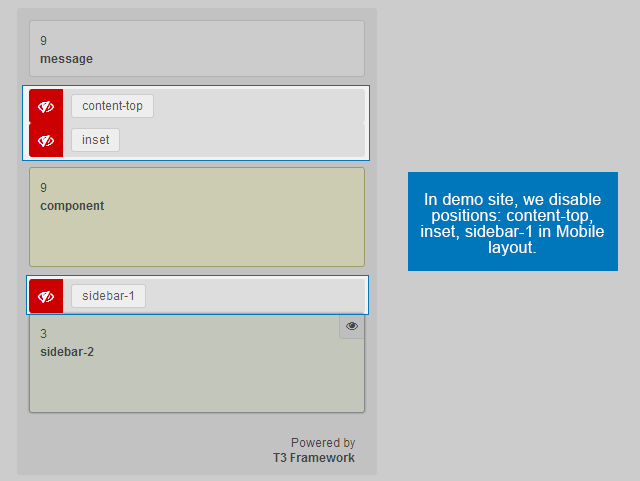
4.2 Configure Responsive Layouts
In the setting panel, customize layout in any supported responsive layouts. Select a responsive layout, then enable, disable any module position in the layout, you can also resize module positions in spotlight block.

The following video tutorials will show you how to work with Layouts: Configure and Customize
Layout Configuration
T3 comes with ease of layout customization. The visual layout configuration is easier than ever before.
Layout Customization
The video tutorial guides you on how to customize the layouts, add new layout, and customize blocks in a layout.
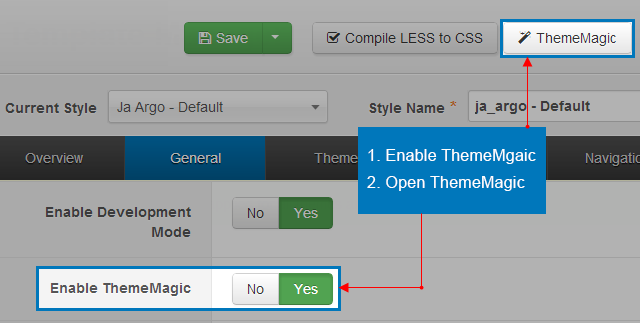
5. ThemeMagic Setting
JA Argo is developed with T3 so you can customize themes with ThemeMagic.
To customize theme with the feature, firstly, you have to enable the option.
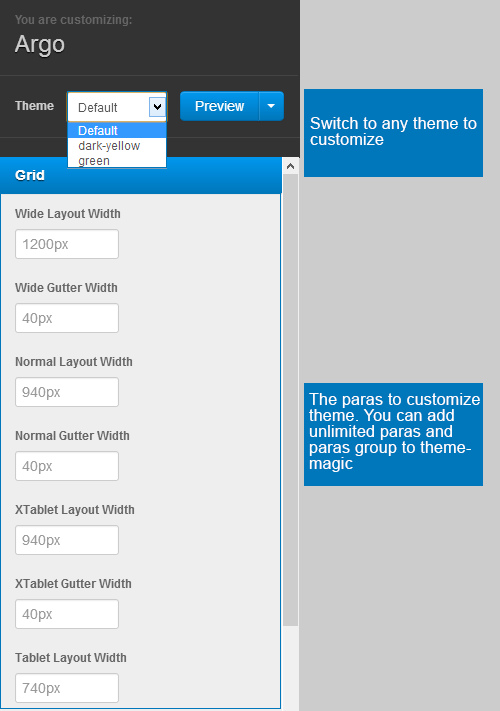
In the setting panel, you can customize all the themes. The left panel is the setting area while the right panel is your site front-end. Each time you change setting, click on "Preview" button to view the change in front-end on the right panel.
The following video tutorials will show you how to customize theme and customize ThemeMagic.
ThemeMagic Customization
After watching the tutorial, you can be able to customize your theme quickly using ThemeMagic as well as know how to add new group and parameters to ThemeMagic.
Mega Menu Configuration
1. Menu Configuration
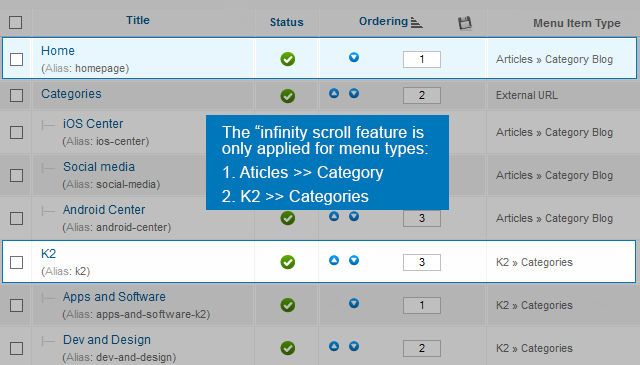
JA Argo uses infinity scroll (auto loading items when scrolling down) - this feature is only applied for the following menu types:
- Category Blog (Joomla)
- Categories (K2 Content)
1.1 Home
As normal, the Home menu type is: Articles >> Featured Articles, but in JA Argo, it is Articles >> Category Blog.

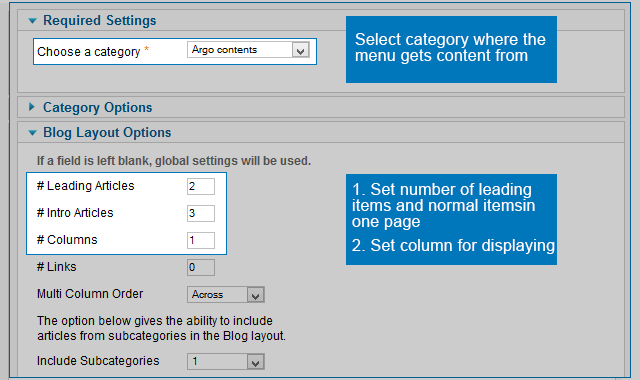
Now, set the category that the menu gets content from and set the number of leading items and normal items in a page.
Check Back-end Setting Screenshot
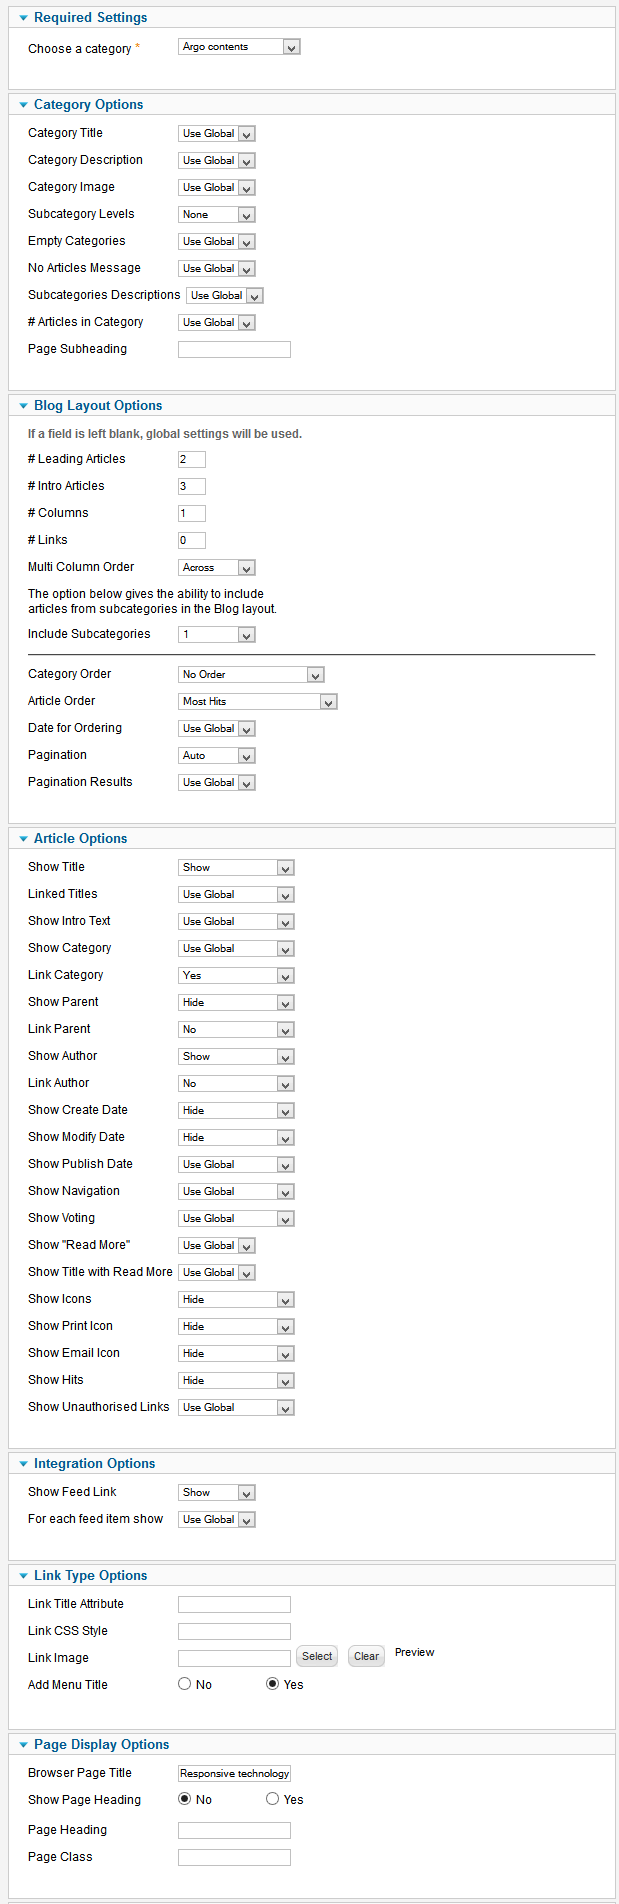
In demo, we config the homepage with 2 leading items and 3 normal items, so we have 5 items totally in a page. When you scroll down, items in next page will be auto loaded.
1.2 K2 menu
Now, set the category that the menu gets content from and set the number of leading items and normal items in a page (in demo site, we inherit layout settings from category).
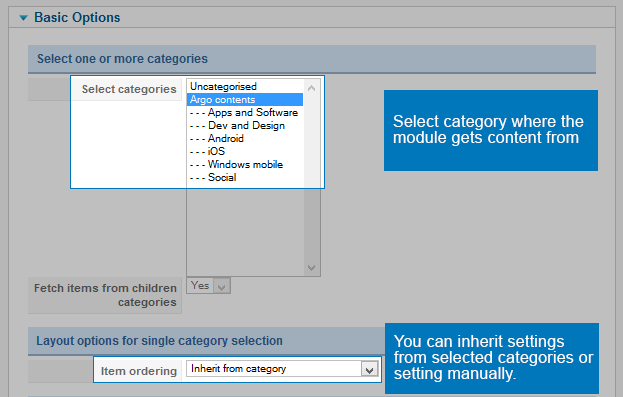
Check Back-end Setting Screenshot
The menu is similar to Home page. It also uses infinity scroll feature.
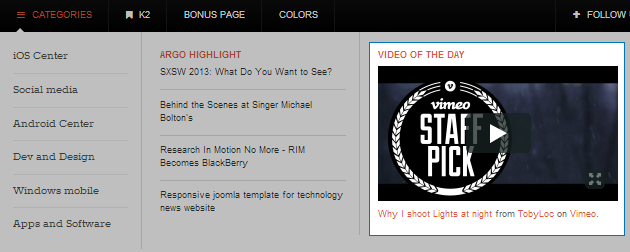
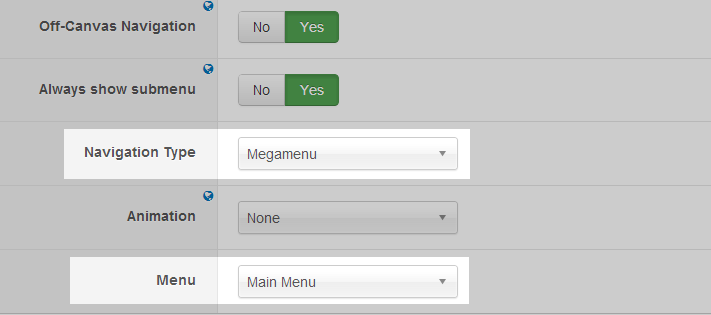
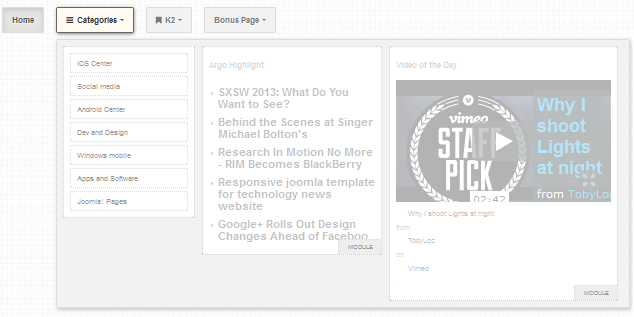
2. Mega Menu Configuration
Front-end Appearance
To configure Mega Menu, go to: Extensions --> Template manager --> open JA Fubix template, in the Navigation setting, you can configure Mega Menu.
Step 1: Enable Mega Menu
Step 2: Open Mega Menu page

Step 3: Select Menu item, column, row ... to configure
Step 4: Configure Mega Menu

Step 5: Style for menu and add icon for menu item
Extra class and Icon class used in JA Argo (by default)

- Home Menu
Extra Class : nav-home
Icon : NOT USED
Extra Class : nav-categories
Icon : icon-reorder
Extra Class : NOT USED
Icon : icon-bookmark
Mega Menu Configuration
This is the video tutorial for Mega Menu configuration, you will learn how to build up a Mega Menu, how to use Mega Menu settings effectively, how to add icons, how to style menu items with our T3 Framework.
Recommendation
The above userguide should help one in replicating the Demo site settings for the template and extension on their site.
Recommended :
If you are new or are confused, we recommend installing Quickstart on your localhost and use it as reference for configs. This is the best way to work with any template. Links to all the resources are provided above, you should carefully read them to take the maximum advantage of our products.
Support :
Please raise your support queries in the forum and make sure you follow the support guidelines. We spend more time in getting the information from user in case the support guidelines are not followed.