Template Installation
The section will help you with steps to install JA Resume template - Quickstart and Manual installation.
System requirement
JA Resume template is native with Joomla 3. Please make sure your system meets the following requirements:
Software
- Software: PHP (Magic Quotes GPC off): 5.3.1 + (5.4+ recommended)
Databases
- MySQL(InnoDB support required): 5.1+
- MSSQL 10.50.1600.1+
- PostgreSQL 8.3.18+
Web Severs
- Apache 2.x+
- Microsoft IIS 7
- Nginx 1.0 (1.1 recommended)
Browser requirement
- Firefox 4+
- IE (Internet Explorer) 8+
- Google Chrome 10+
- Opera 10+
- Safari 5+
Development Environment
During development process, Localhost is preferred. You can use the following servers on your PC to develop your site.
Windows
- WAMPSEVER
- XAMPP for Windows
Linux
- LAMP Bubdle
- XAMPP for Linux
Mac OS
- MAMP & MAMP Pro
- XAMPP for Mac OS
Download packages
Important notes:
1. JA Resume template is built on T3 Framework so it requires T3 Framework to be installed and enabled in your system.
2. We highly recommend you to use stable version of Joomla 3.
Download Packages
The download package includes:
- Quickstart package
- JA Resume template
- T3 Framework plugin
- JA K2 Filter component
- JA ACM Module
- JA Quick Contact Module
- JA Google Chart v2 Module
- JA Social Feed Plugin
- Source file
Quickstart installation
Why Quickstart
The quickstart allows you to replicate JA Resume demo to your server. It means, after install the quickstart, you will have a site exactly the same as the demo site, including images.
Download JA Resume quickstart package →, upload to your server and extract it.
Step 1 - Configuration: add Site name, Admin email, Admin username and password
Step 2 - Database: select database type, host name, database username, password, database name & table prefix
Step 3 - Overview: select sample data to install, we suggest to use Default English (GB) Sample Data. You can install multilingual in the step.
Step 4 - Remove/Rename "installation" folder: for security purpose, you need to rename or remove the "installation" folder
Detail documentation with screenshots
Manual Installation
Install T3 Framework
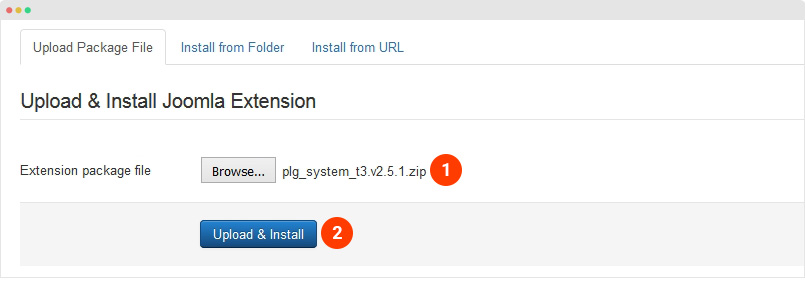
From your back-end setting panel, go to: "Extensions → Extension Manager", browse T3 plugin installation package then hit the "Upload and Install"
Enable T3 Framework: When you install T3 Framework, it's auto enabled by default. You can check this by going to: "Extensions → Plugin Manager" then find T3 Plugin.
Install JA Resume template
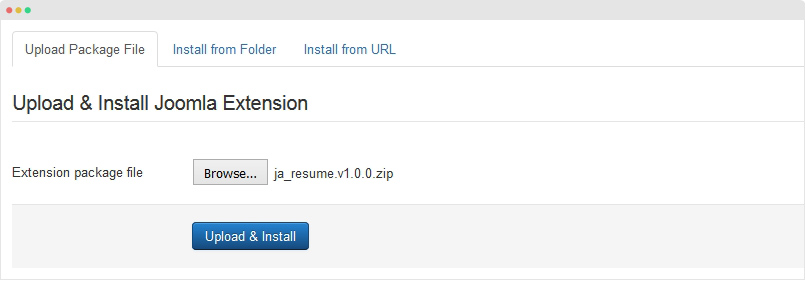
From your back-end setting panel, go to: "Extensions → Manage", browse JA Resume template installation package then hit the "Upload and Install"
Set default template style: Go to "Extensions → Template", set JA Resume template style as your default template style.

Install all supported extensions
- EasyBlog component
- JA ACM Module
- JA Google Chart v2 Module
- JA Quick Contact Module
- JA Social Feed Plugin
Template folder structure
This section is to help you understand the folder structure of JA Resume template, where to find the files you want.
JA Resume template
JA Resume template is built on T3 Framework so its folder structure is almost the same with any other JA Templates that are developed with T3 Framework.
templates/ja_resume/
+-- less/                 /*  all LESS files */
¦    +-- template.less
¦    +-- style.less
¦    +-- home.less
¦    +-- joomla.less
¦    +-- themes/
¦    +-- layouts/
¦    +-- extras/
¦    +-- rtl/
+-- css/                     /*compiled files from less*/
¦    +-- template.css
¦    +-- style.css
¦    +-- home.css
¦    +-- joomla.css
¦    +-- themes/            /*Compiled themes */
¦    +-- rtl/
+-- tpls/             /* all layout files and block files*/
¦    +-- default.php
¦    +-- default-content-left.php
¦    +-- frontend-features-intro.php
¦    +-- features-intro.php
¦    +-- blogger-features-intro.php
¦    +-- photographer-features-intro.php
¦    +-- blocks/       /*block files*/
¦    ¦    +-- header.php
¦    ¦    +-- mainbody.php
¦    ¦    +-- spotlight-1.php
¦    ¦    +-- off-canvas.php
¦    ¦    +-- masthead.php
¦    ¦    +-- features-intro.php
¦    ¦    +-- mainbody-content-right.php
¦    ¦    +-- mainbody-content-left.php
¦    ¦    +-- footer.php
¦    ¦    +-- mainbody/
+-- html/               /*override modules and Joomla com_content*/
¦    +-- com_content/
¦    ¦    +-- article/
¦    ¦    +-- category/
¦    ¦    +-- categories/
¦    ¦    +-- featured/
¦    +-- com_contact/
¦    +-- mod_jamasthead/
¦    +-- mod_articles_category/
¦    +-- mod_jaquickcontact/
¦    +-- layouts/
¦    +-- ...
+-- acm/               /*JA Advanced Custom Module content type*/
¦    +-- features-intro/
¦    ¦    +-- css/
¦    ¦    +-- less/
¦    ¦    +-- tmpl/
¦    ¦    +-- js/
¦    +-- contact-info/
¦    +-- clients/
¦    +-- testimonials/
¦    +-- gallery/
¦    +-- spotlight/
¦    +-- timetable/
¦    +-- statistics/
+-- fonts/
¦    +-- font-awesome/
+-- js/
¦    +-- script.js
¦    +-- infinitive-paging.js
¦    +-- jquery.infinitescroll.min.js
¦    +-- jquery.infinitescroll.js
¦    +-- jquery.inview.js
¦    +-- jquery.easing.1.3.js
¦    +-- owl-carousel/
¦    +-- isotope/
+-- images/
+-- language/
+-- templateDetails.xml
+-- templateInfo.php
+-- thememagic.xml
+-- templateHook.php
T3 Framework
You can find the folder structure of T3 Framewotk at: http://t3-framework.org/documentation/installation#folder-structure.
Recommendation
Any customization in the T3 plugin is not recommended. To customize your template, please do it in the "local" folder: templates/ja-resume/local. Check out detail documentation →
Build Demo Pages
This section will help you build demo pages as JA Resume demo pages: Photographer Page, Model Page, Singer Page ...
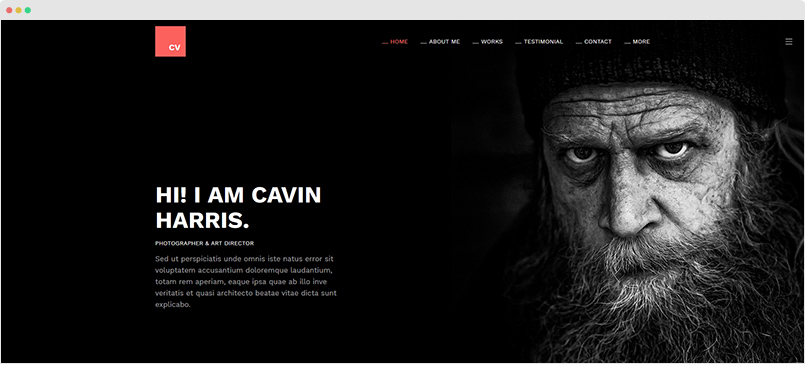
Photographer Page - Demo page
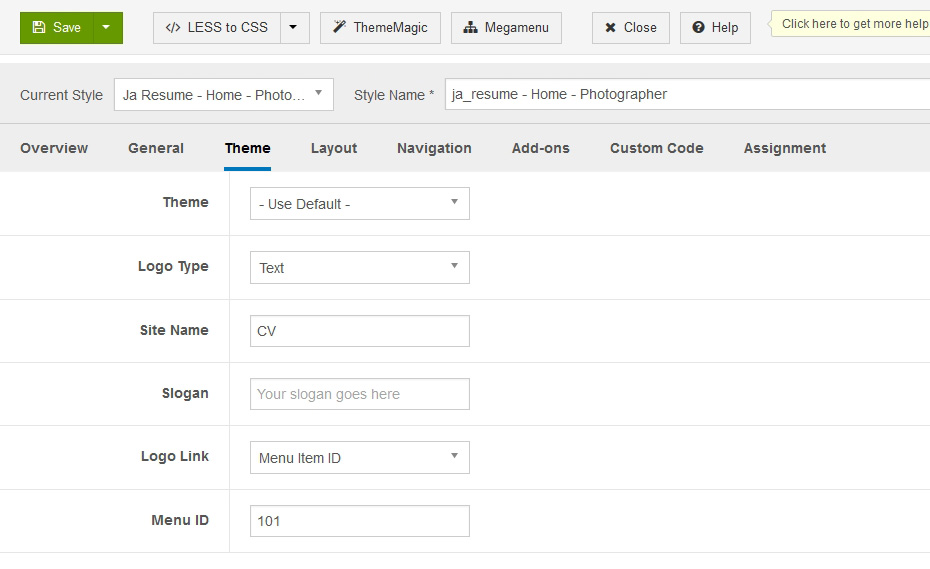
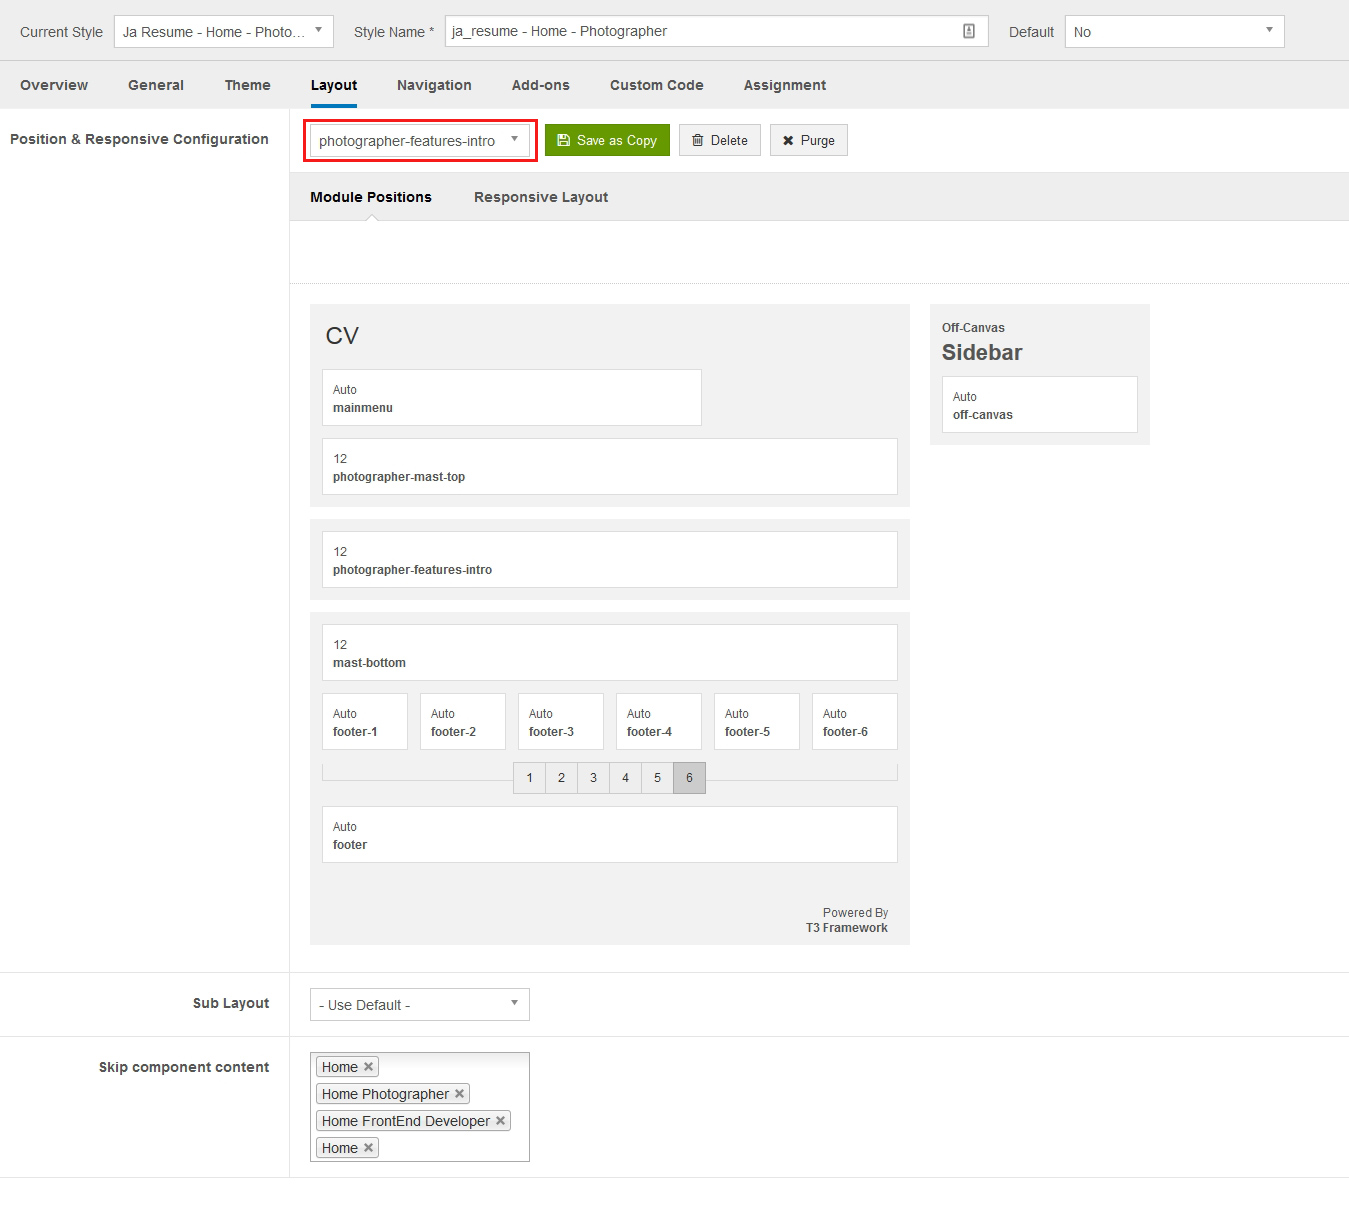
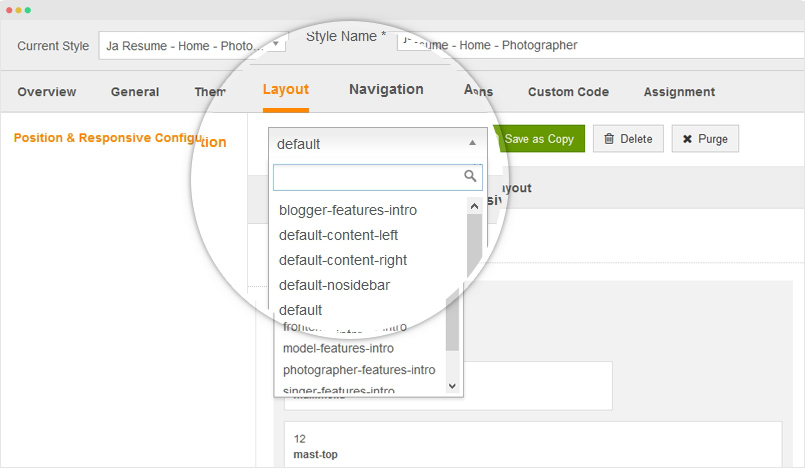
Step 1 - Create template style for the landing page
Go to Extensions » Templates and duplicate the ja_resume - Default template style, rename it and configure theme, layout for the template style. For layout, please make sure you assign the template style to photographer-features-intro. Check out the setting screenshots below:
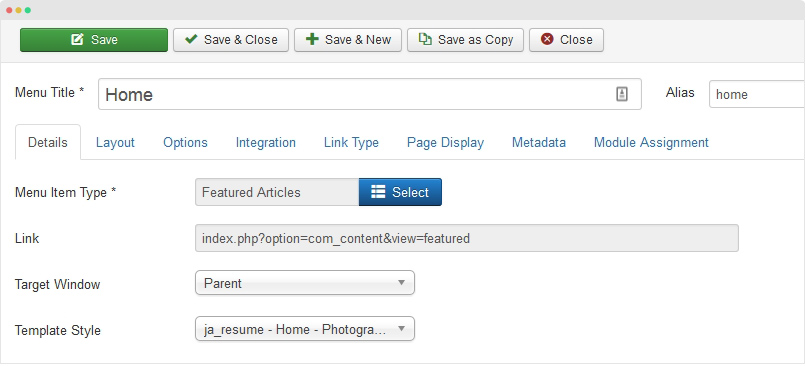
Step 2 - Create Home menu item
Go to Menu » Main menu, add new menu item, select Articles » Featured Articles menu type and assign "ja_healthcare - Default" template style.
Step 3 - Assign content to the Photographer Page
Content of page is loaded from modules. Here is the detail configuration of each module.
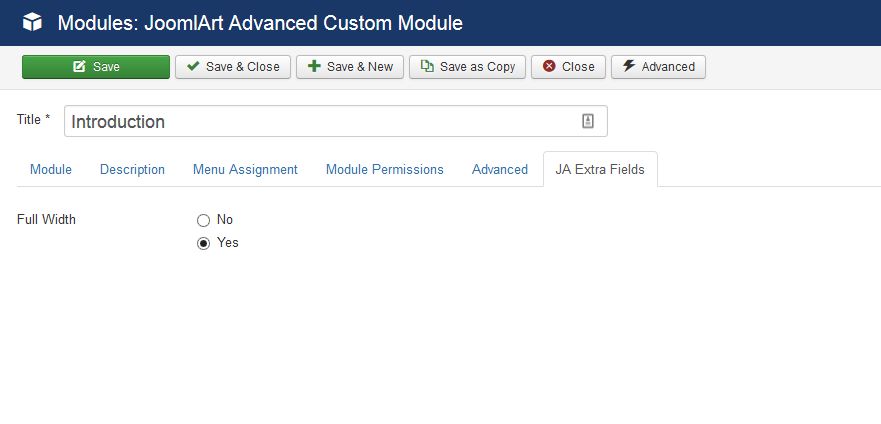
1. Introduction - JA ACM Module
Module position: photographer-mast-top
Module Suffix: NOT USED
{":type":"ja_resume:features-intro","features-intro":{"jatools-layout-features-intro":"style-1","FEATURES[animation]":["1"],"FEATURES[effect-blur]":["1"],"FEATURES[acm-style]":["style-dark"],"FEATURES[position-title]":["text-left"],"FEATURES[title]":["Hi! I am cavin harris."],"FEATURES[title-time]":["0"],"FEATURES[title-speed]":["30"],"FEATURES[position]":["Photographer & Art Director"],"FEATURES[position-time]":["1000"],"FEATURES[position-speed]":["30"],"FEATURES[des]":["Sed ut perspiciatis unde omnis iste natus error sit voluptatem accusantium doloremque laudantium, totam rem aperiam, eaque ipsa quae ab illo inve veritatis et quasi architecto beatae vitae dicta sunt explicabo. "],"FEATURES[des-time]":["2000"],"FEATURES[des-speed]":["80"],"FEATURES[horizontal-position]":["center"],"FEATURES[vertical-position]":["center"],"FEATURES[image]":["images/joomlart/introduction/photographer.jpg"]}}
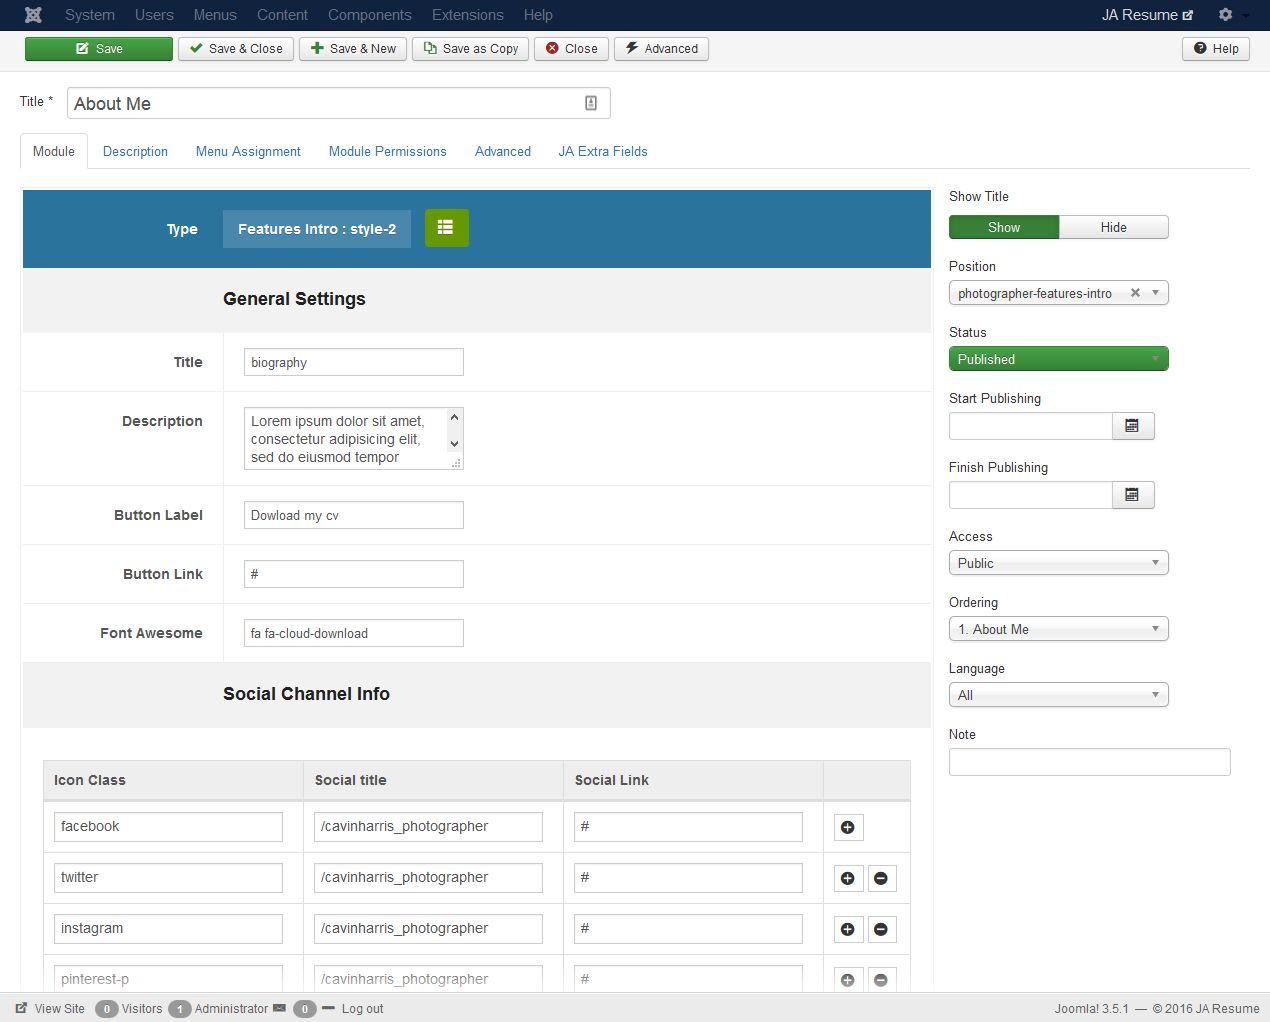
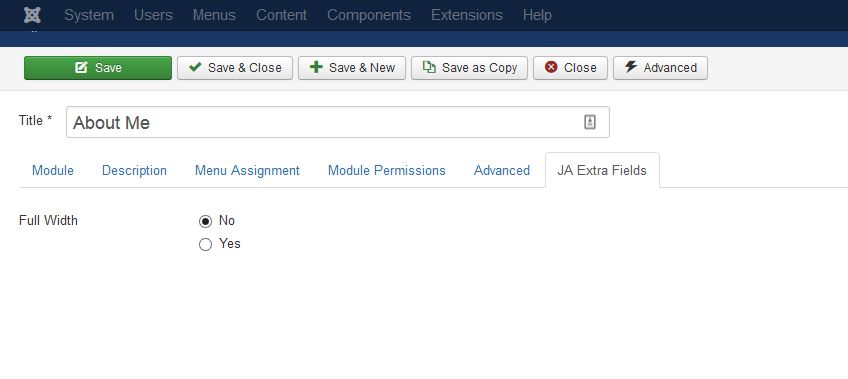
2. About Me - JA ACM Module

Module position: photographer-features-intro
Module Suffix: NOT USED
{":type":"ja_resume:features-intro","features-intro":{"jatools-layout-features-intro":"style-2","features[title]":["biography"],"features[des]":["Lorem ipsum dolor sit amet, consectetur adipisicing elit, sed do eiusmod tempor incididunt ut labore et dolore magna aliqua.((/p))\n((p)) Ut enim ad minim veniam, quis nostrud exercitation ullamco laboris nisi ut aliquip ex ea commodo consequat. Duis aute irure dolor in reprehenderit in voluptate velit esse cillum dolore eu fugiat nulla pariatur. Excepteur sint occaecat cupidatat non proident, sunt in culpa qui officia deserunt mollit anim id est laborum."],"features[button-title]":["Dowload my cv"],"features[button-link]":["#"],"features[button-icon]":["fa fa-cloud-download"],"features[data]":{"features[data][icon-social]":["facebook","twitter","instagram","pinterest-p"],"features[data][title-social]":["/cavinharris_photographer","/cavinharris_photographer","/cavinharris_photographer","/cavinharris_photographer"],"features[data][link-social]":["#","#","#","#"],"rows":4,"cols":4,"type":"list"}}}
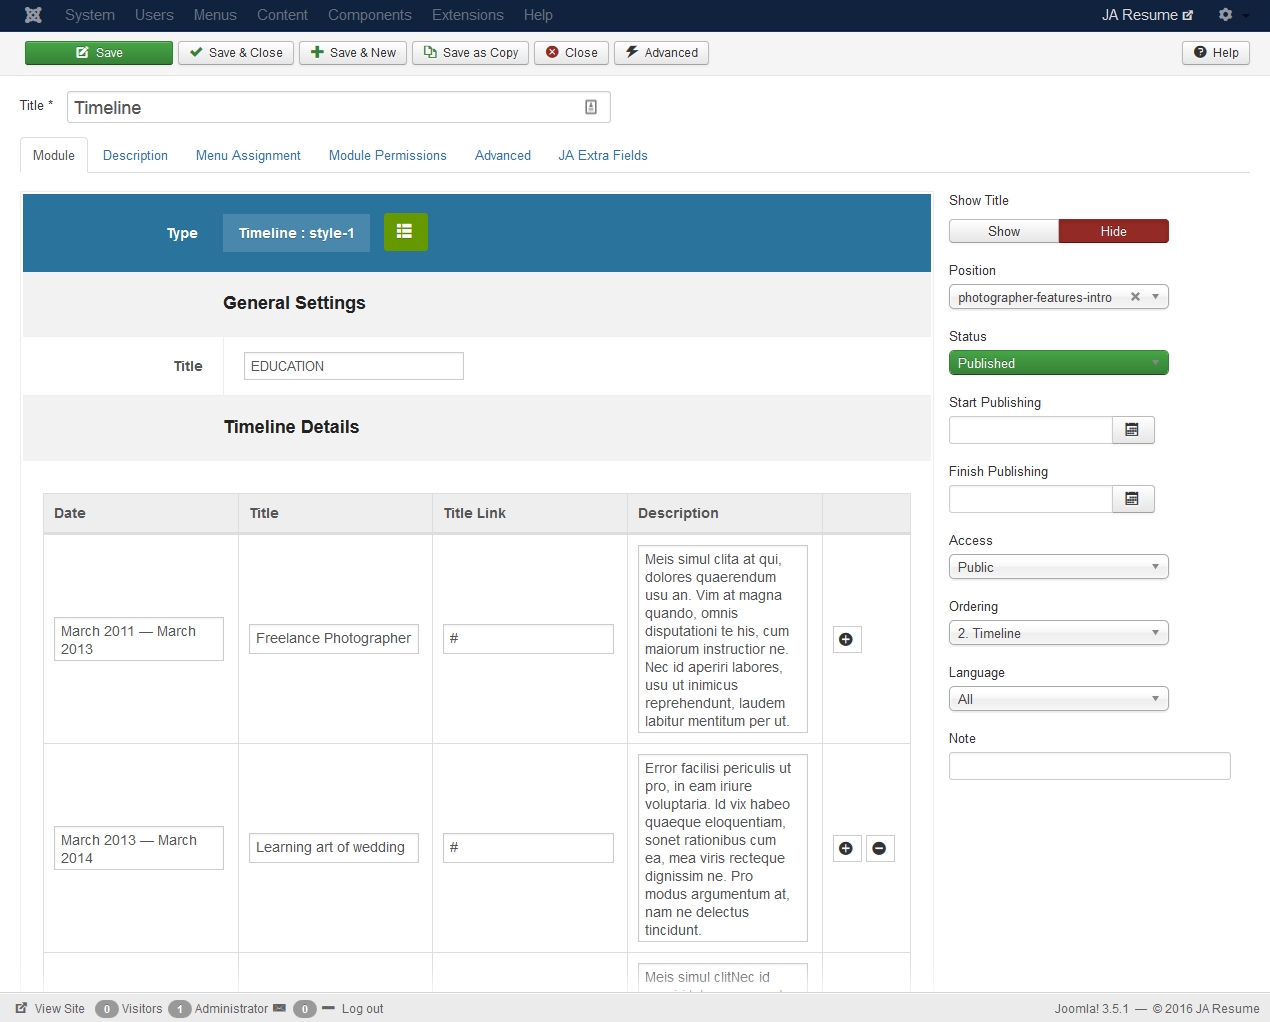
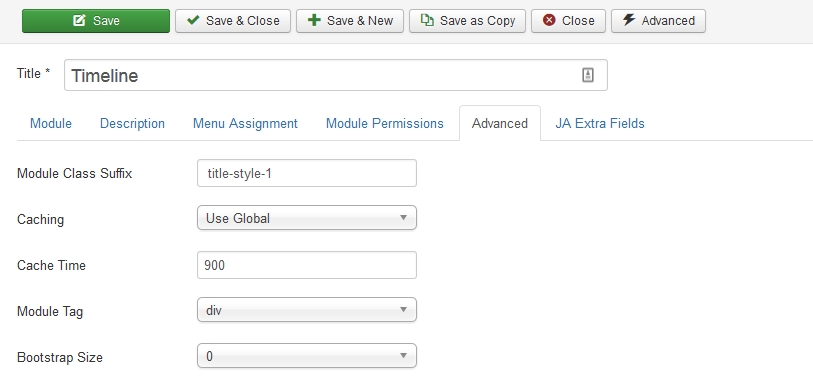
3. Timeline - JA ACM Module
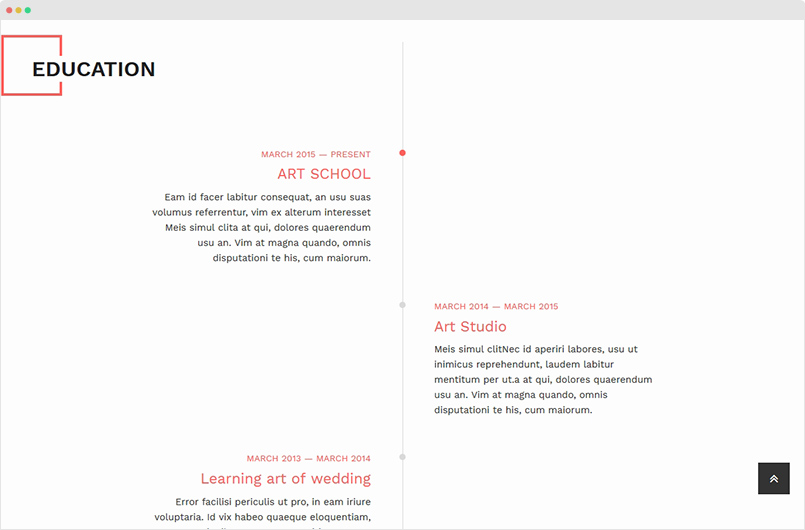
Module position: photographer-features-intro
Module Suffix: title-style-1
{":type":"ja_resume:timeline","timeline":{"jatools-layout-timeline":"style-1","timeline[acm-title]":["EDUCATION"],"timeline[data]":{"timeline[data][timeline-date]":["March 2011 — March 2013 ","March 2013 — March 2014 ","March 2014 — March 2015","March 2015 — Present "],"timeline[data][title]":["Freelance Photographer","Learning art of wedding","Art Studio","ART SCHOOL"],"timeline[data][title-link]":["#","#","#","#"],"timeline[data][description]":["Meis simul clita at qui, dolores quaerendum usu an. Vim at magna quando, omnis disputationi te his, cum maiorum instructior ne. Nec id aperiri labores, usu ut inimicus reprehendunt, laudem labitur mentitum per ut.","Error facilisi periculis ut pro, in eam iriure voluptaria. Id vix habeo quaeque eloquentiam, sonet rationibus cum ea, mea viris recteque dignissim ne. Pro modus argumentum at, nam ne delectus tincidunt.","Meis simul clitNec id aperiri labores, usu ut inimicus reprehendunt, laudem labitur mentitum per ut.a at qui, dolores quaerendum usu an. Vim at magna quando, omnis disputationi te his, cum maiorum.","Eam id facer labitur consequat, an usu suas volumus referrentur, vim ex alterum interesset Meis simul clita at qui, dolores quaerendum usu an. Vim at magna quando, omnis disputationi te his, cum maiorum."],"rows":4,"cols":5,"type":"list"}}}
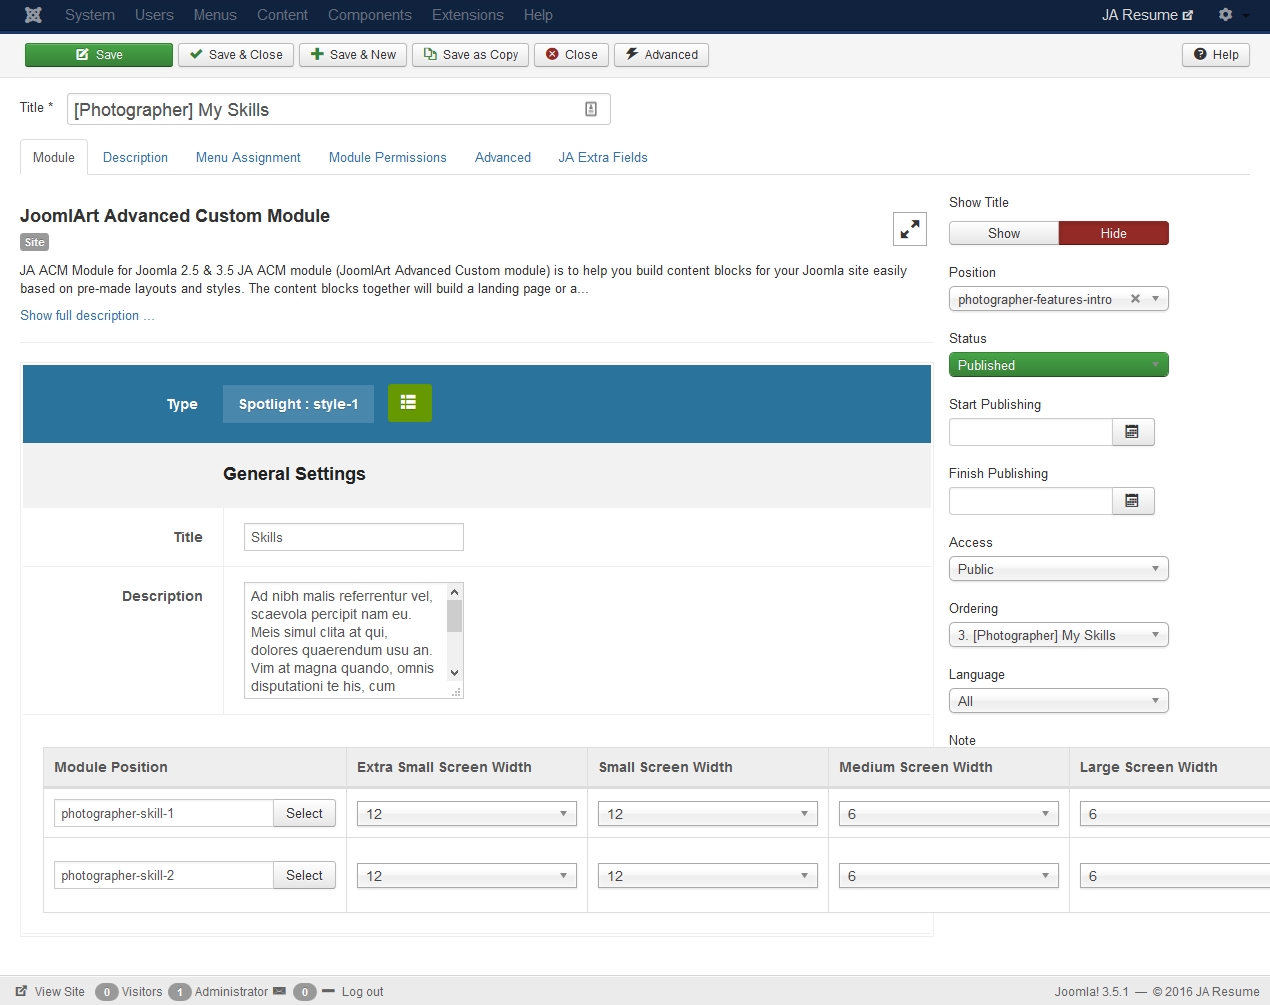
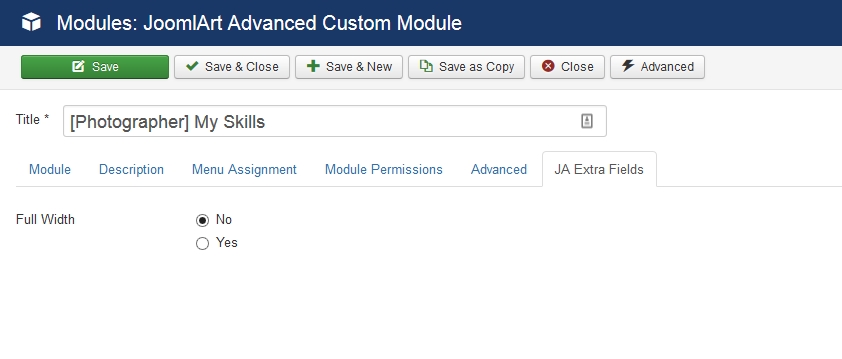
4. My Skills - JA ACM Module
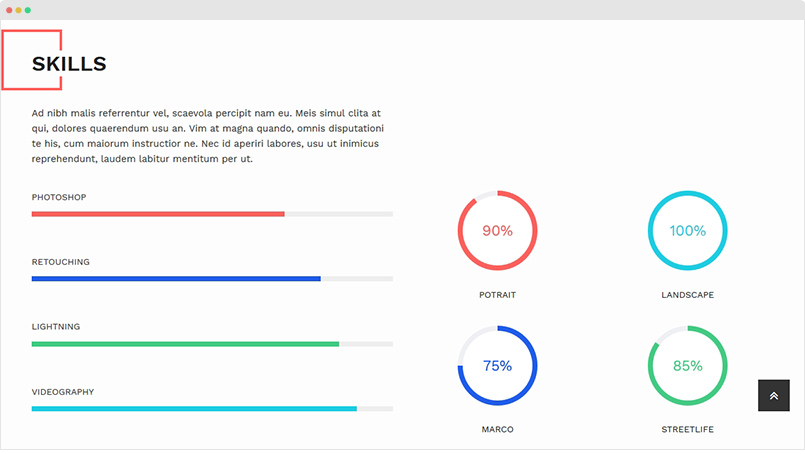
Module position: photographer-features-intro
Module Suffix: title-style-1
{":type":"ja_resume:spotlight","spotlight":{"jatools-layout-spotlight":"style-1","spotlight[acm-title]":["Skills"],"spotlight[acm-desc]":["Ad nibh malis referrentur vel, scaevola percipit nam eu. Meis simul clita at qui, dolores quaerendum usu an. Vim at magna quando, omnis disputationi te his, cum maiorum instructior ne. Nec id aperiri labores, usu ut inimicus reprehendunt, laudem labitur mentitum per ut."],"spotlight[data]":{"spotlight[data][position]":["photographer-skill-1","photographer-skill-2"],"spotlight[data][xs]":["col-xs-12","col-xs-12"],"undefined":["","","","","","","",""],"spotlight[data][sm]":["col-sm-12","col-sm-12"],"spotlight[data][md]":["col-md-6","col-md-6"],"spotlight[data][lg]":["col-lg-6","col-lg-6"],"rows":2,"cols":6,"type":"list"}}}
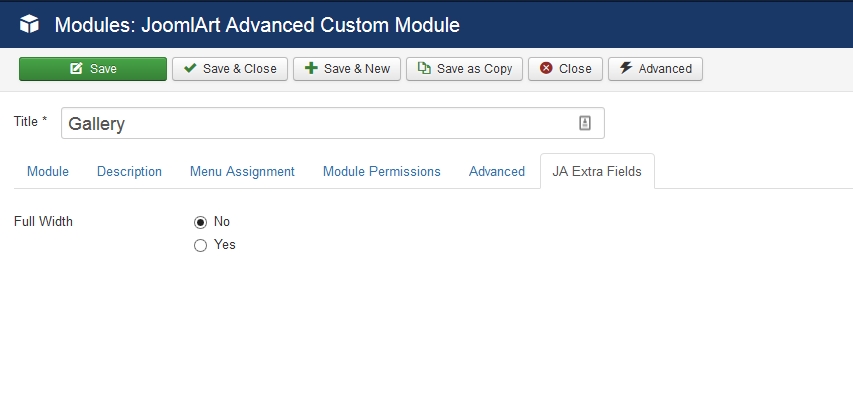
5. Gallery - JA ACM Module
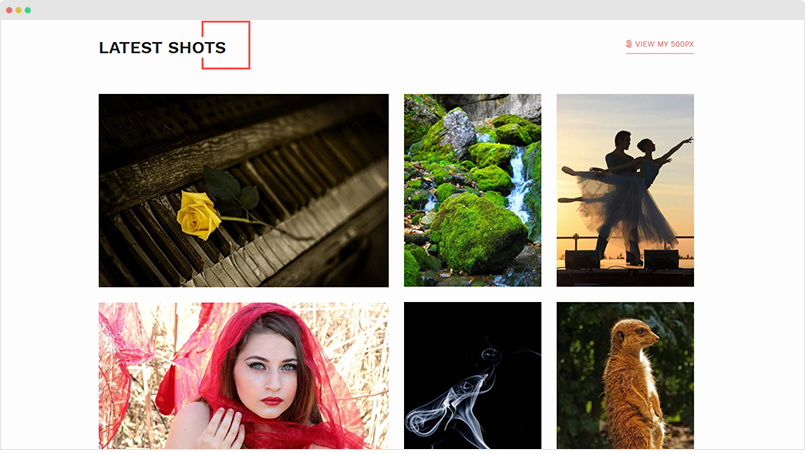
Module position: photographer-features-intro
Module Suffix: title-style-2
{":type":"ja_resume:gallery","gallery":{"jatools-layout-gallery":"style-1","isotope[acm-title]":["Latest shots"],"isotope[gallery-link-title]":["view my 500px"],"isotope[gallery-link]":["#"],"isotope[gallery-link-icon]":["fa fa-500px"],"isotope[colmb]":["2"],"isotope[coltb]":["3"],"isotope[coldt]":["4"],"isotope[gutter]":["30"],"isotope[animation]":[""],"isotope[gallery]":{"isotope[gallery][selectitem]":["2","1","1","1","1","2","2","1","1"],"undefined":["","","","","","","","",""],"isotope[gallery][img]":["images/joomlart/gallery/items-1.jpg","images/joomlart/gallery/items-2.jpg","images/joomlart/gallery/gallery-9.jpg","images/joomlart/gallery/gallery-14.png","images/joomlart/gallery/gallery-13.jpg","images/joomlart/gallery/gallery-11.jpg","images/joomlart/gallery/gallery-18.jpg","images/joomlart/gallery/gallery-15.jpg","images/joomlart/gallery/gallery-16.jpg"],"isotope[gallery][title]":["Lorem ipsum","Nullam posuere","In venenatis vel","Proin erat odio","Proin erat odio","Sed consectetur","Aliquam ornare at","Aliquam ornare at","Aliquam ornare at"],"isotope[gallery][desc]":["Lorem ipsum dolor sit amet","Nullam posuere mauris neque","","Fringilla ac ligula mollis","Fringilla ac ligula mollis","","","",""],"rows":9,"cols":5,"type":"list"}}}
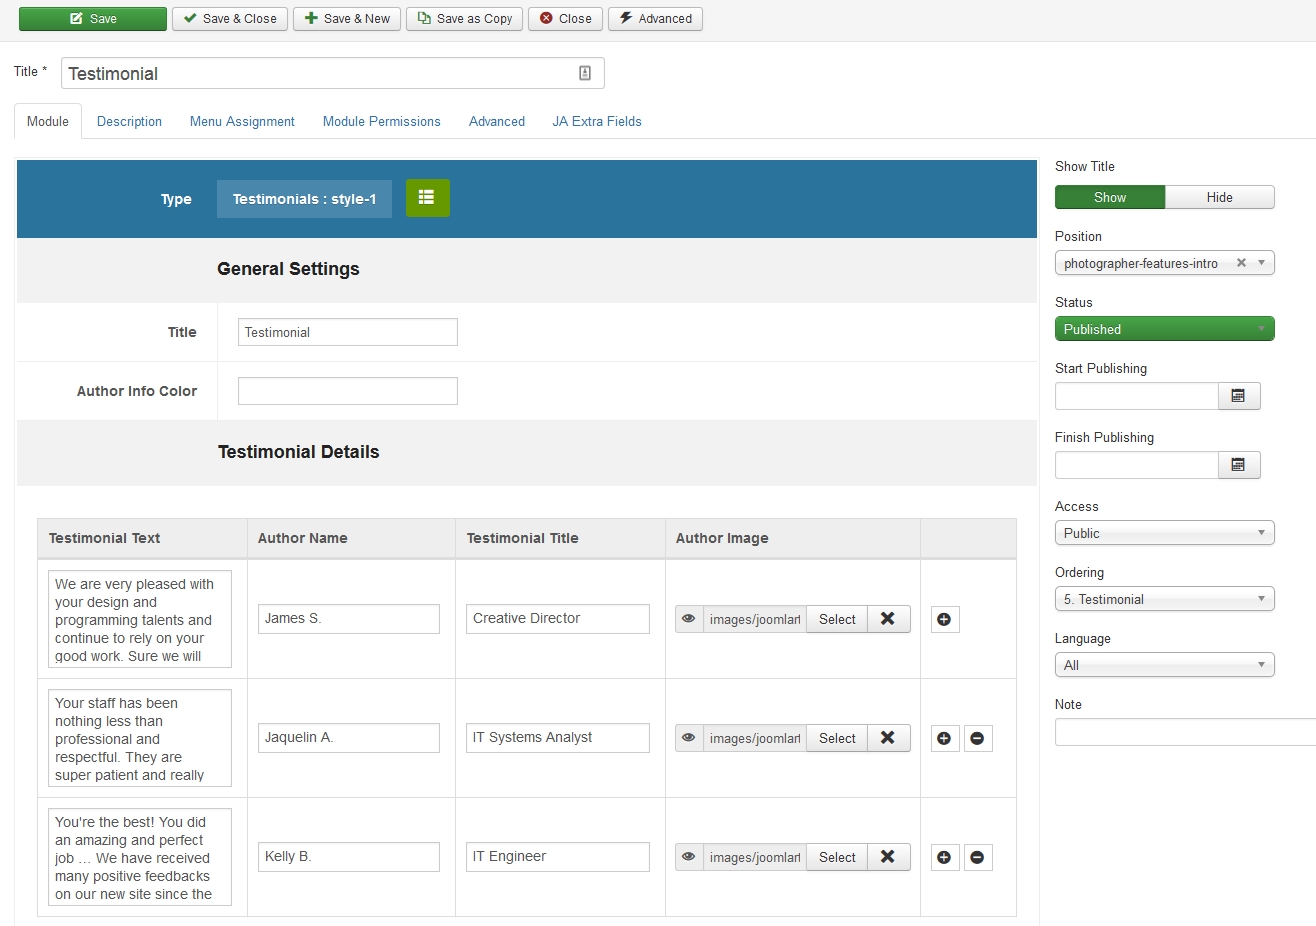
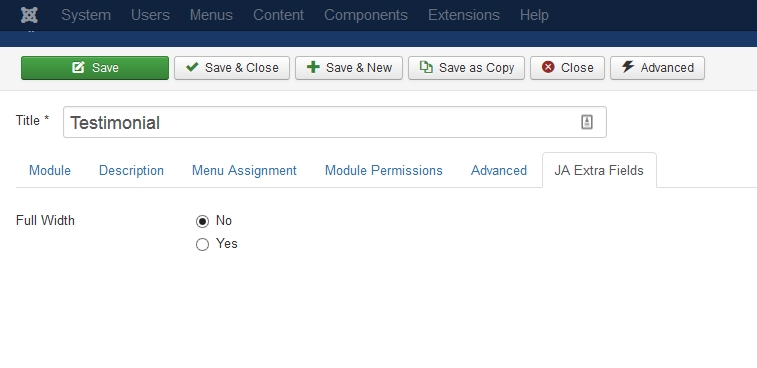
6. Testimonial - JA ACM Module
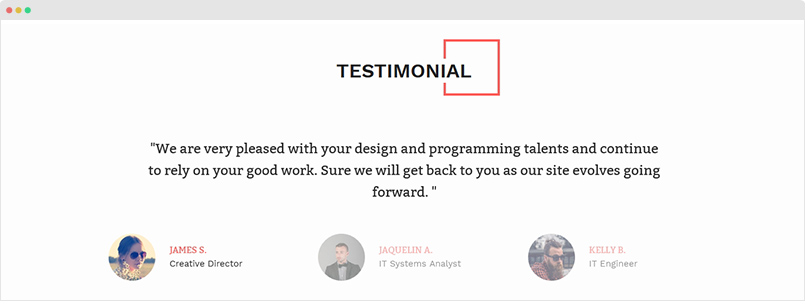
Module position: photographer-features-intro
Module Suffix: title-style-2
{":type":"ja_resume:testimonials","testimonials":{"jatools-layout-testimonials":"style-1","testimonials[acm-title]":["Testimonial"],"testimonials[author-info-color]":[""],"testimonials[data-special]":{"testimonials[data-special][testimonial-text]":["We are very pleased with your design and programming talents and continue to rely on your good work. Sure we will get back to you as our site evolves going forward. ","Your staff has been nothing less than professional and respectful. They are super patient and really listened to what I wanted. I would give you the top stars!","You're the best! You did an amazing and perfect job … We have received many positive feedbacks on our new site since the launch. Great thanks again. "],"testimonials[data-special][author-name]":["James S. ","Jaquelin A. ","Kelly B. "],"testimonials[data-special][author-title]":["Creative Director","IT Systems Analyst","IT Engineer"],"testimonials[data-special][author-img]":["images/joomlart/testimonial/items-1.jpg","images/joomlart/testimonial/items-2.jpg","images/joomlart/testimonial/items-3.jpg"],"rows":3,"cols":5,"type":"list"}}}
7. Contact
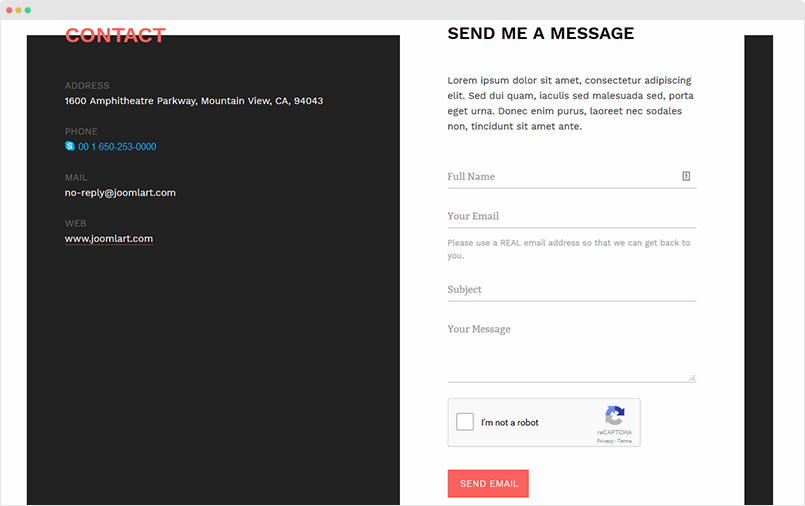
The section includes 2 content block: Contact info and Contact form. The Contact Info is using JA ACM module and the Contact Form is JA Quick Contact module. Here is the steps to create such section:
Step 1 - Create spotlight ACM module
Module position: mast-bottom
Module Suffix: NOT USED
{":type":"ja_resume:spotlight","spotlight":{"jatools-layout-spotlight":"style-1","spotlight[acm-title]":[""],"spotlight[acm-desc]":[""],"spotlight[data]":{"spotlight[data][position]":["contact-1","contact-2"],"spotlight[data][xs]":["col-xs-12","col-xs-12"],"undefined":["","","","","","","",""],"spotlight[data][sm]":["col-sm-12","col-sm-12"],"spotlight[data][md]":["col-md-6","col-md-6"],"spotlight[data][lg]":["col-lg-6","col-lg-6"],"rows":2,"cols":6,"type":"list"}}}
In the module setting, you can see that, the ACM module is loading modules from position: contact-1 and contact-2.
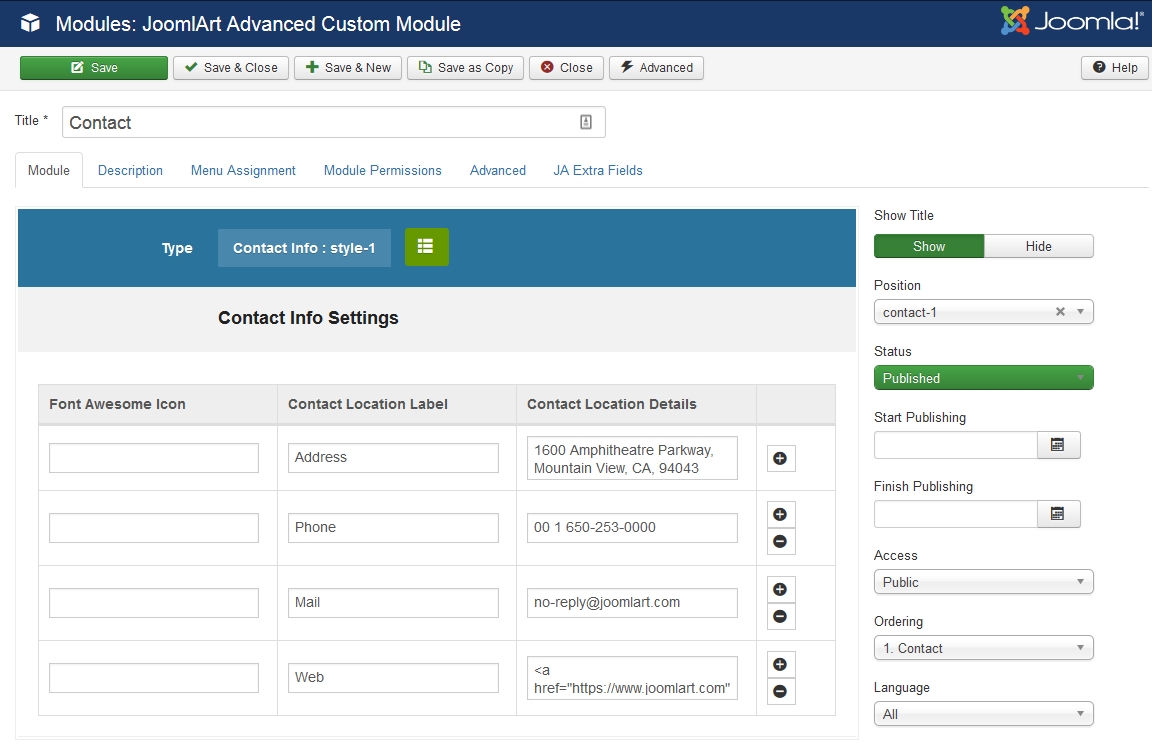
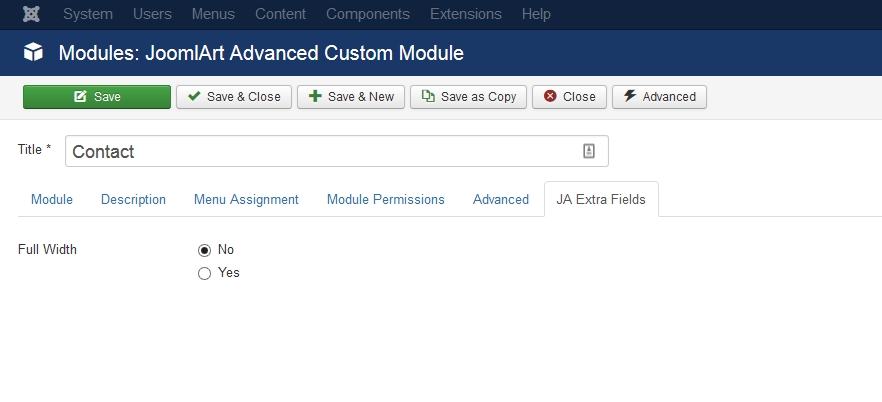
Step 2 - Create module in position "contact-1" - JA ACM Module
Module position: contact-1
Module Suffix: NOT USED
{":type":"ja_resume:contact-info","contact-info":{"jatools-layout-contact-info":"style-1","contact-info[contact-info-item]":{"contact-info[contact-info-item][contact-info-icon]":["","","",""],"contact-info[contact-info-item][contact-info-name]":["Address","Phone","Mail","Web"],"contact-info[contact-info-item][contact-info-value]":["1600 Amphitheatre Parkway, Mountain View, CA, 94043","00 1 650-253-0000","no-reply@joomlart.com","((a href=\"https://www.joomlart.com\" title=\"Joomlart\"))www.joomlart.com((/a))"],"rows":4,"cols":4,"type":"list"}}}
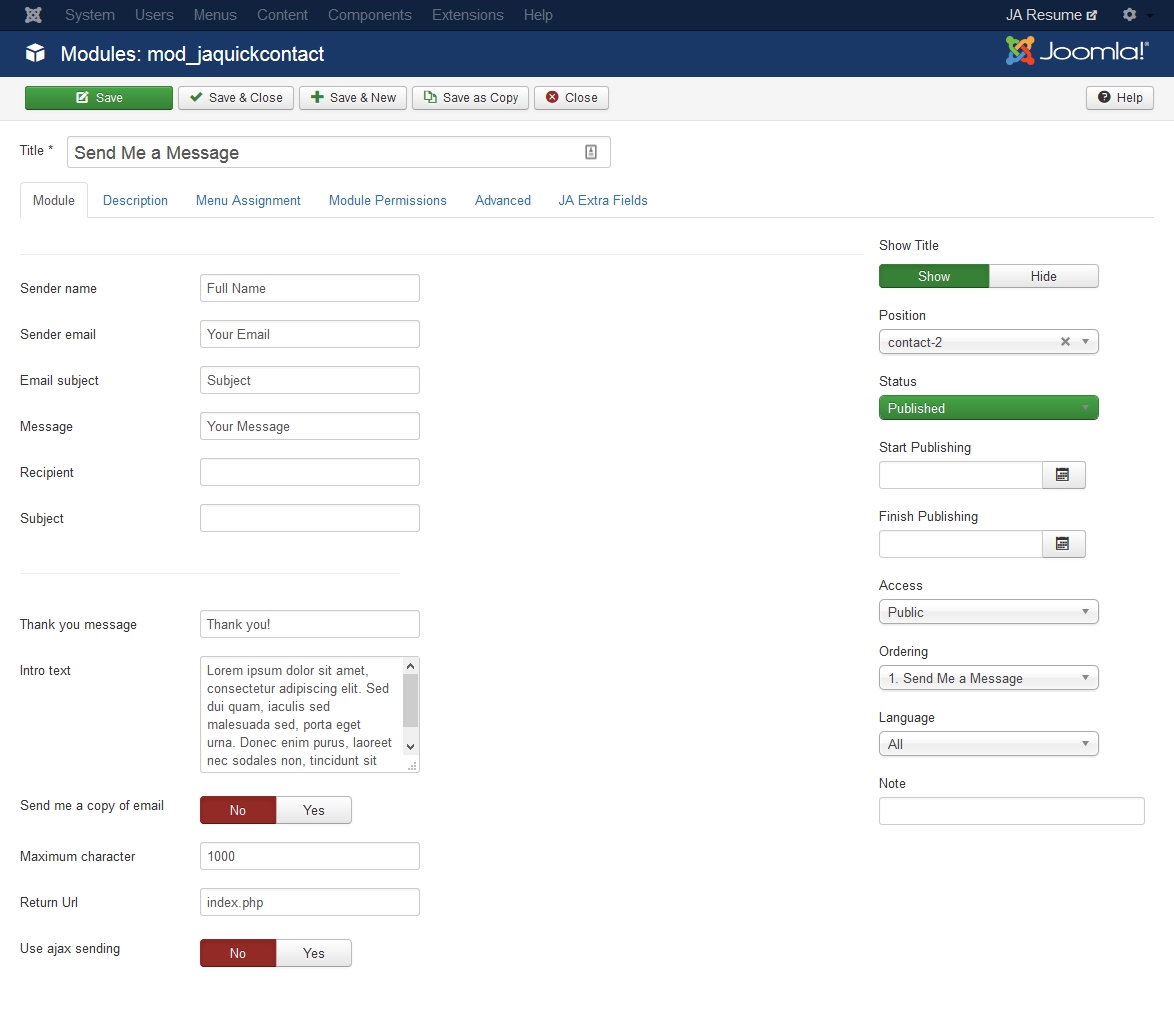
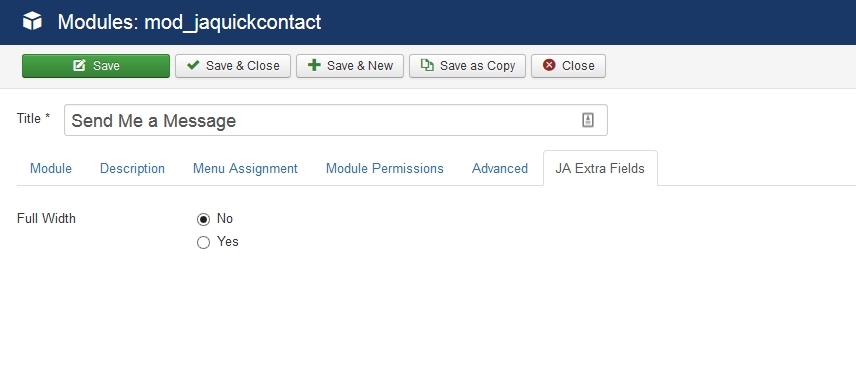
Step 3 - Create module in position "contact-2" - JA Quick Contact Module
Module position: contact-2
Module Suffix: NOT USED
Step 4 - Create Onepage Menu system
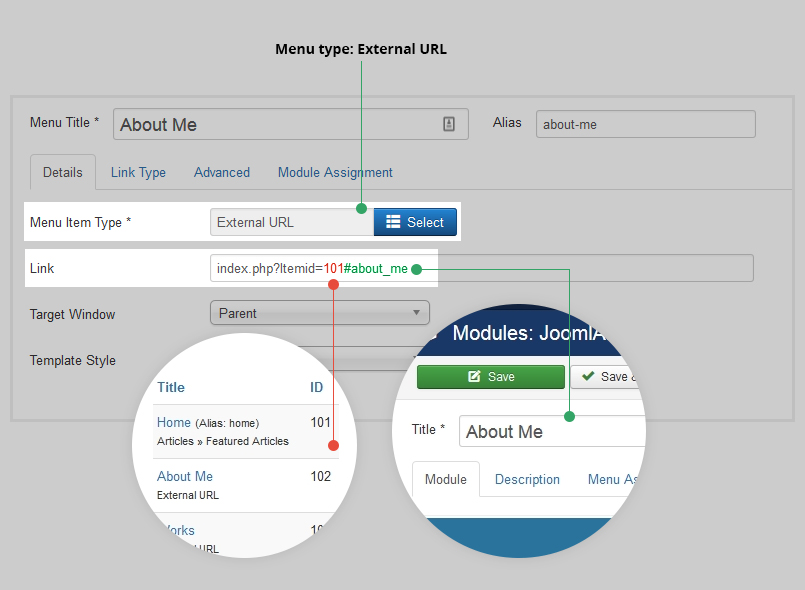
In JA Resume Demo, each home page is a one-page, each menu item is linked to a section in the page. Here is steps to create the one-page menu. For example, we will create About Me menu item that link to Biography section.

Create About Me menu item. There are 2 important notes that you have to keep in mind.
1. Menu type = External URL
2. Add link for the menu item, use format: index.php?Itemid=101#about_me
The link includes 2 parts, the first part is the link of Home menu item (default menu): index.php?Itemid=101, "101" is the Home menu id. And the second part is module name (alias) - about_me that menu navigates to when clicking on.
Do the same to create other menu items.
EasyBlog Component configuration
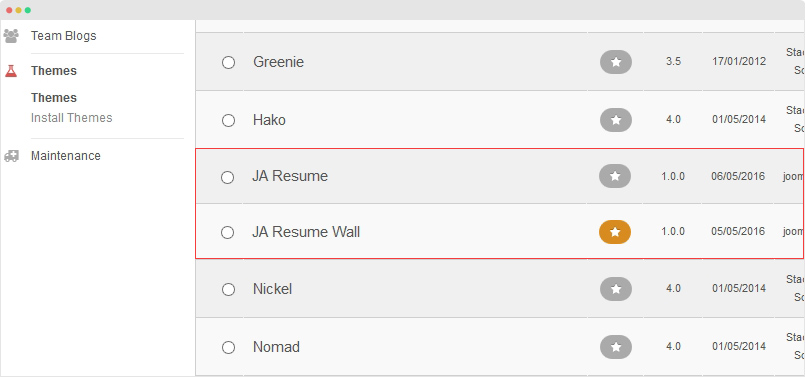
JA Resume template supports EasyBlog component, it comes with 2 custom themes: JA Resume and JA Resume Wall.
JA Resume Wall layout - JA Resume layout
Here is the instruction to create such EasyBlog pages.
1. Install EasyBlog component
EasyBlog component is commercial extension, you need to buy it and download from http://stackideas.com/, follow this link for more details about the extension.
Once you have installation package of the extension, install it via installation panel: Extensions » Manage.
2. Add JA Resume Custom Theme
In the JA Resume download page, down load the file: JA Resume Theme for EasyBlog, extract it and add to your site root folder, once done, open the folder: components\com_easyblog\themes and you will see 2 Easy custom themes: JA Resume and JA Resume Wall.
Next, go to your site admin panel » Components » EasyBlog » Themes and set JA Resume or JA Resume Wall as default Easyblog theme.
3. EasyBlog configuration
In the JA Resume Demo site, we use default settings, if you want to have same Easyblog pages as demo, you can leave the settings as it is.
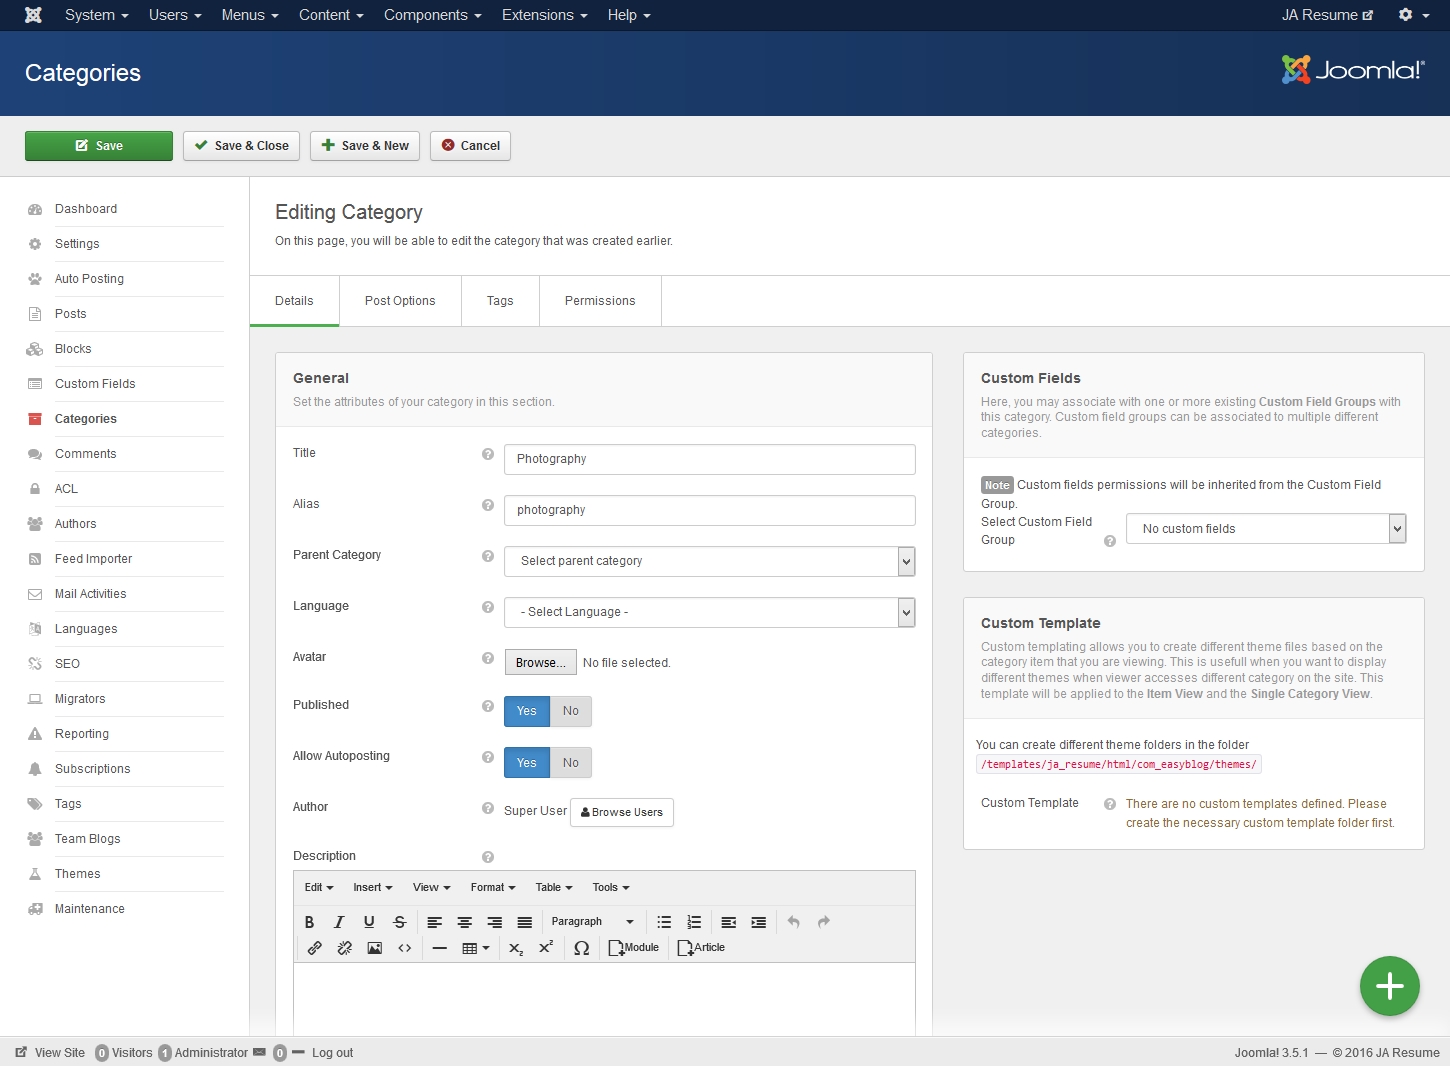
3.1 Create categories
Under the categories tab, create new category and add required information for the category. Here is list of categories created in JA Resume demo site.
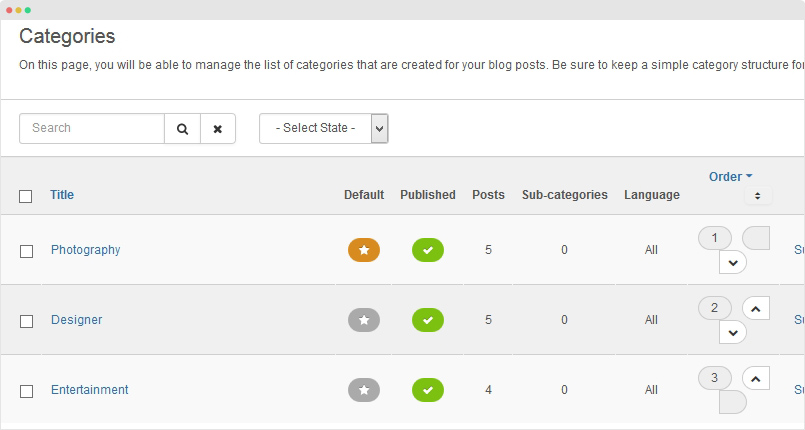
The category has same settings so we just show setting screenshots of a sample category - Photography.
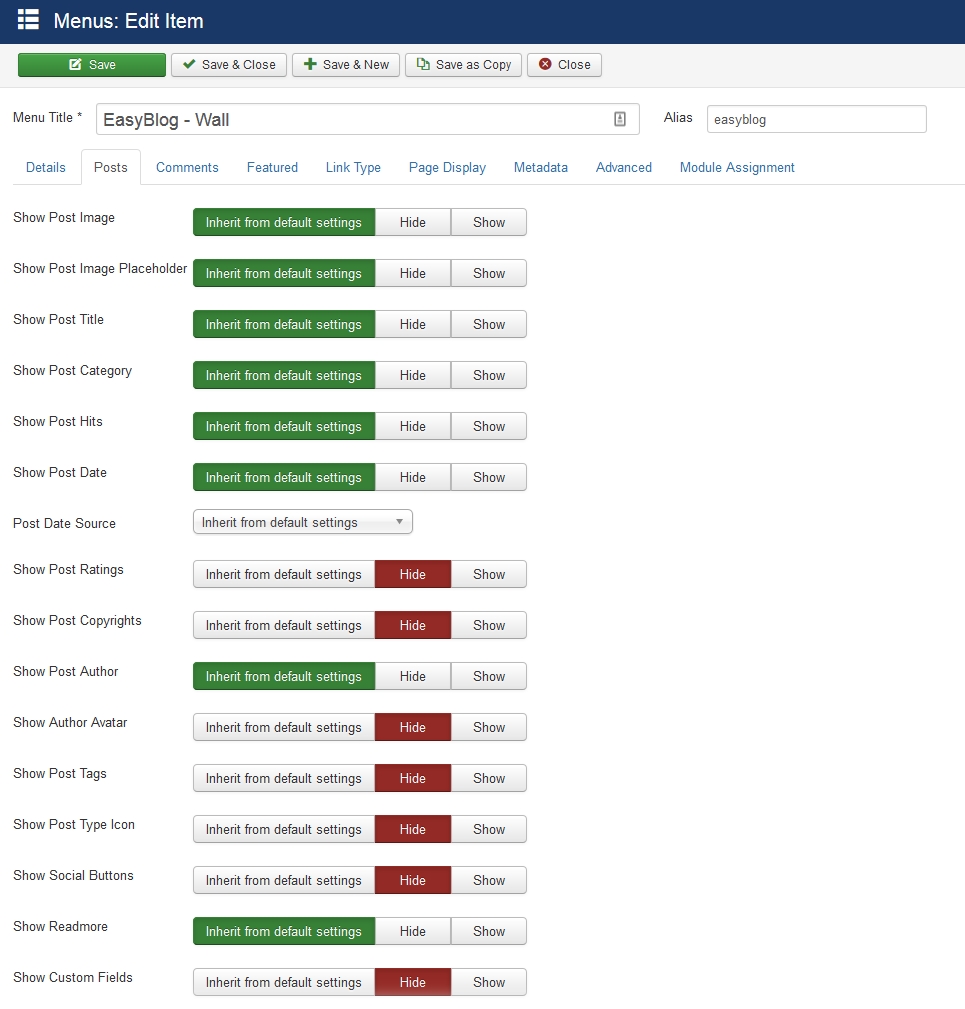
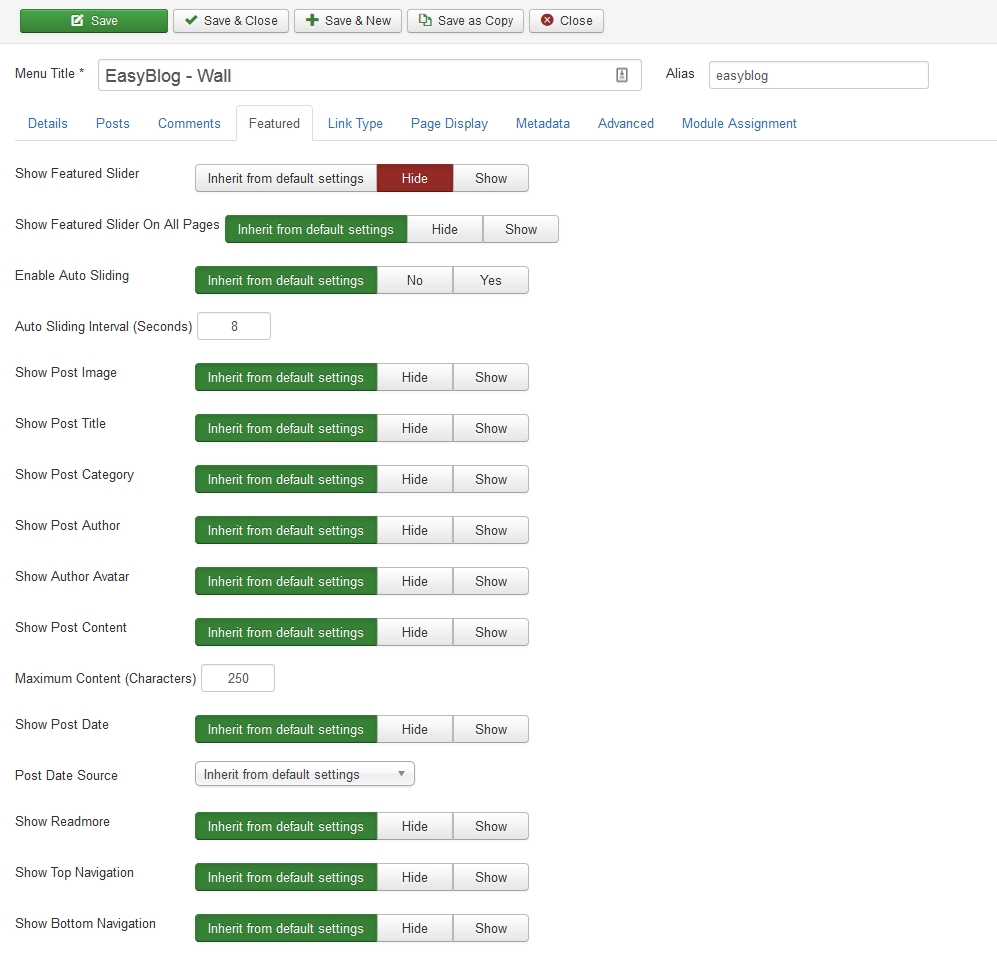
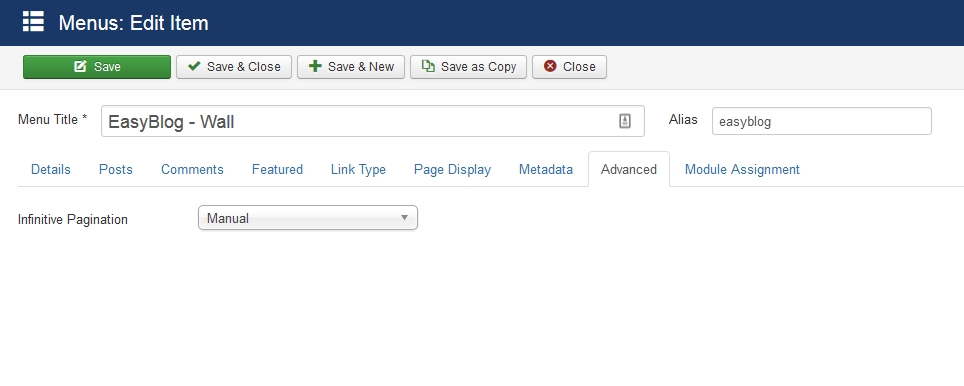
4. Create EasyBlog Menu Item
Create new menu item and select menu type: EasyBlog » (Posts) Frontpage » (Posts) Frontpage.

ACM Module Configuration instruction
JA ACM module (JoomlArt Advanced Custom module) is to help you build content blocks (Slideshow, Tabs, Testimonials, etc) for your Joomla site easily based on pre-made layouts and styles.
Create new ACM module
We built a lot of content blocks in JA Resume template based on JA ACM module. Here is the step to create a content block with JA ACM.
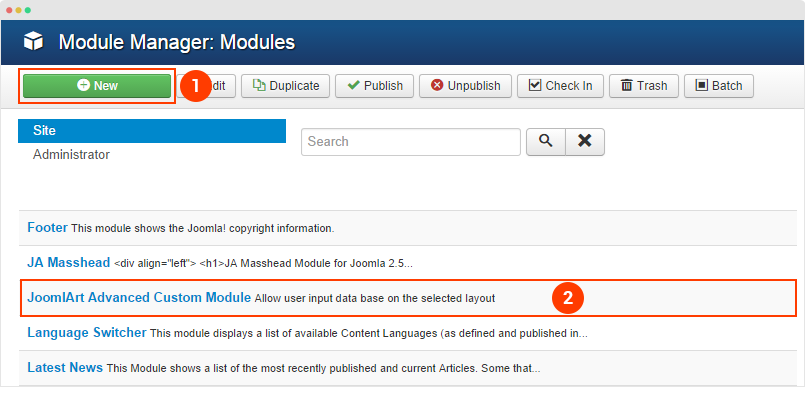
Step 1 - Create JA ACM module
From your site back-end, go to: Extensions » Module, hit the "New" button to create module then select JoomlArt Advanced Custom Module
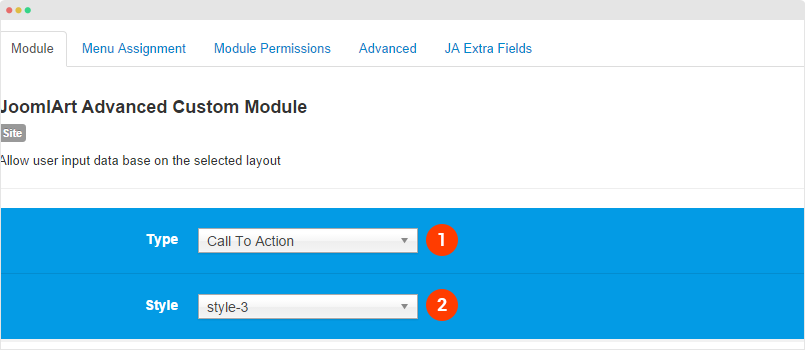
Step 2 - Select type and style
The module supports many types (12 for now, more to come), in each type, it includes multiple styles.
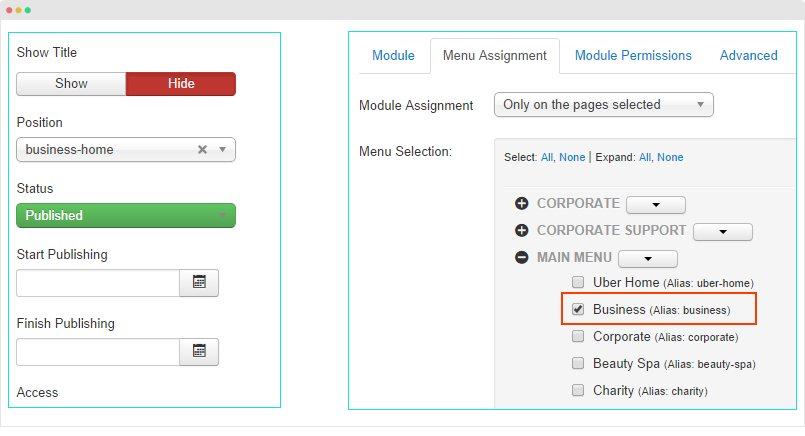
Step 3 - Select position, pages to display the module
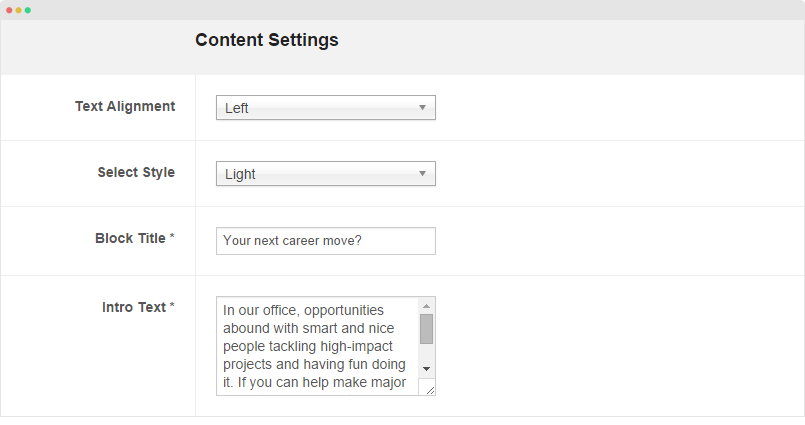
Step 4 - Edit content
Once you select type, style, you would see the corresponding fields. For each type, it includes sample data by default that help you understand the structure of content block. Now you can change setting of the fields, add content, etc.
Add Sample Data
Sample data is to quickly add content for a ACM module. You can add sample data from one JA ACM module to an other JA ACM module. In the setting panel of JA ACM module, hit the Advanced button on the top options bar then copy the sample data.
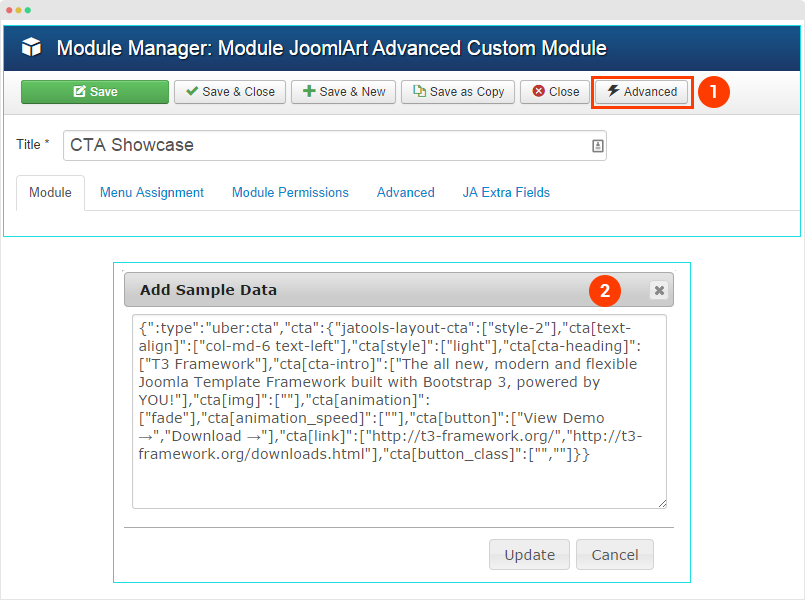
The sample data includes: type, style, settings and values in all fields of the corresponding type and style.
Here is an example of sample data
{":type":"ja_resume:features-intro","features-intro":{"jatools-layout-features-intro":"style-1","FEATURES[animation]":["1"],"FEATURES[effect-blur]":["1"],"FEATURES[acm-style]":["style-dark"],"FEATURES[position-title]":["text-left"],"FEATURES[title]":["Hi! I am cavin harris."],"FEATURES[title-time]":["0"],"FEATURES[title-speed]":["30"],"FEATURES[position]":["Photographer & Art Director"],"FEATURES[position-time]":["1000"],"FEATURES[position-speed]":["30"],"FEATURES[des]":["Sed ut perspiciatis unde omnis iste natus error sit voluptatem accusantium doloremque laudantium, totam rem aperiam, eaque ipsa quae ab illo inve veritatis et quasi architecto beatae vitae dicta sunt explicabo. "],"FEATURES[des-time]":["2000"],"FEATURES[des-speed]":["80"],"FEATURES[horizontal-position]":["center"],"FEATURES[vertical-position]":["center"],"FEATURES[image]":["images/joomlart/introduction/photographer.jpg"]}}
Configuration
Supported Layouts
JA Resume supports multiple layouts by default, in the template setting, open the "Layout" setting panel and assign layout for the template style.
Layout configuration
Once you assign layout for a template style, you can configure the layout to meet your requirements. There are 2 configuration panels: Layout Structure configuration and responsive layout configuration.
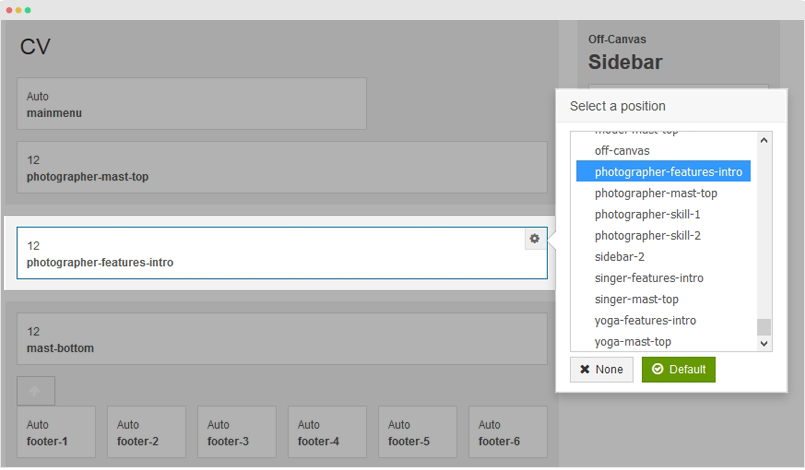
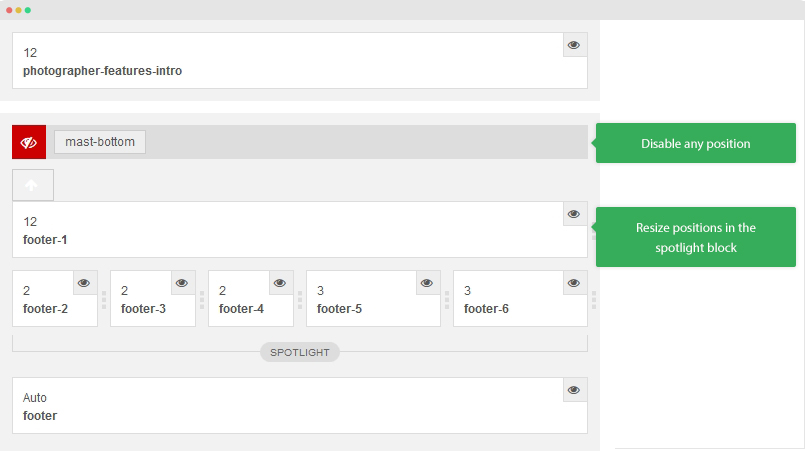
1. Layout Structure configuration
The layout structure allows you to change position for any position in the layout, configure number of positions in spotlight block.
2. Responsive Layout configuration
In the "Responsive Configuration", select the responsive layout you want to configure layout for.
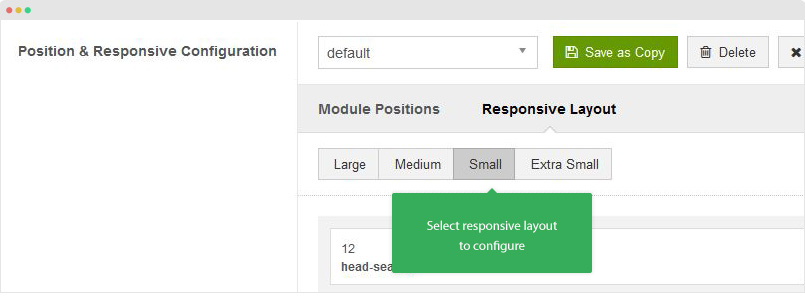
In the responsive layout configuration, you can disable any position you don't want to show in the layout, resize positions in spotlight block.
Logo Setting
![]()
The logo settings are included in the Template Setting panel and its not global settings so you can use different logo for each template style. To change the logo, open template style setting panel » Theme Setting and you would see the logo setting
![]()
Text Logo
There are 2 Logo types: Text and Image. For the Text Logo, just type the Site Name and Slogan.
The text logo is the same in all responsive layouts.
Image Logo
Browse image you want to display as your site logo. If you want to use different logo in small screens like tablet and mobile, enable the "Small Logo" option and browse logo image.
Logo Link
There are 2 options for Logo link: Default and Menu Item ID. The "Default" option will link logo to the entire site while the "Menu Item ID" allows you to set link for logo to specific menu item by adding the menu item id to the field.
2. Off-canvas and Mobile Dropdown Menu Configuration
JA Resume supports multiple menu systems: Off-canvas and mobile dropdown menu.
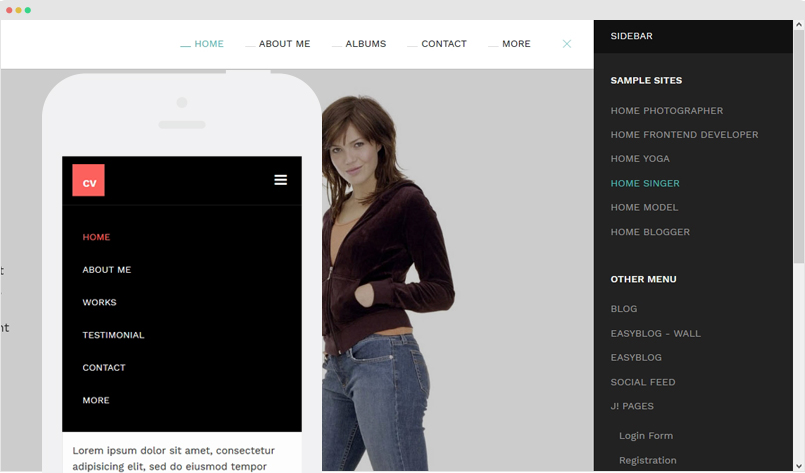
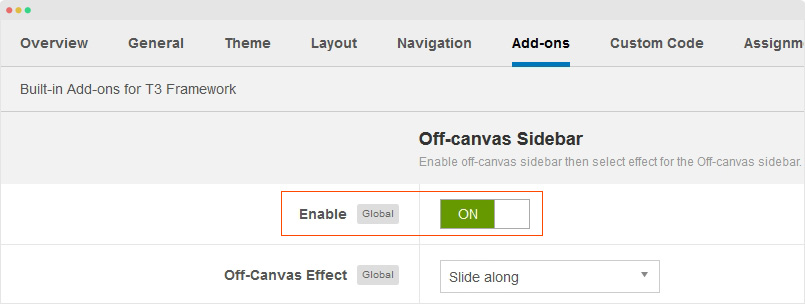
2.1 Off-canvas Sidebar
There are 2 steps to activate Off-canvas as mobile menu.
To enable Off-canvas sidebar, go to JA Resume template style » Addon-ons and enable the Off-canvas sidebar option.
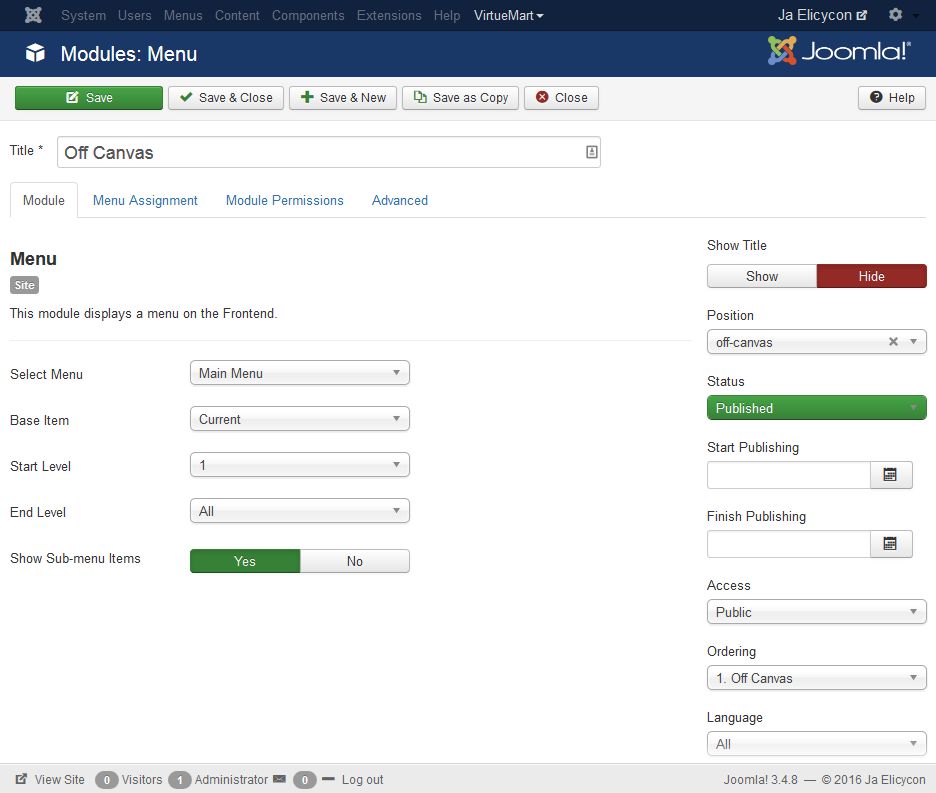
Next, create Menu module and assign to the off-canvas position. Check out the module settings below:
Module position: off-canvas
Module Suffix: NOT USED
Back-end Settings
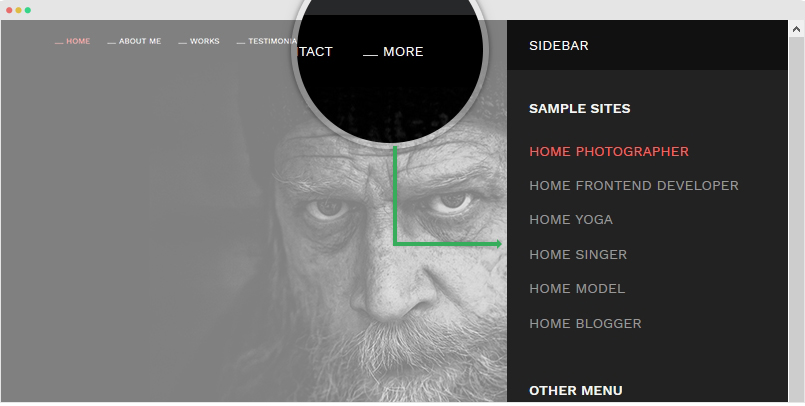
Create "More" menu item that show Off-canvas sidebar
In demo site, when you click on "More" menu item, it will show Off-canvas sidebar, this is custom function.
The custom function is based on JS code added in the file: templates\ja_resume\js\script.js, check out the JS code below:
// Full-nav click to show off-canvas menu
(function($){
  $(document).ready(function(){
    jQuery('body').on('click', function(e) {
      if (jQuery(e.target).is('a[href="#full-nav"]')){
        $('.off-canvas-toggle').trigger('tap', e);
        e.stopPropagation();
        e.preventDefault();
        return false;
      }
    });
    jQuery('.off-canvas-toggle').on('tap', function() {
		if (isMobile.tablet)
	    	jQuery('.t3-header').css( 'margin-top', (jQuery(window).scrollTop())+'px');
    });
  });
  // off click for full-nav
  $(window).load(function(){
    setTimeout(function(){
      $('a[href="#full-nav"]').off();
    },100);
  })
})(jQuery);
To have same menu item, create new menu item, select menu type: External URL and add link: #full-nav.

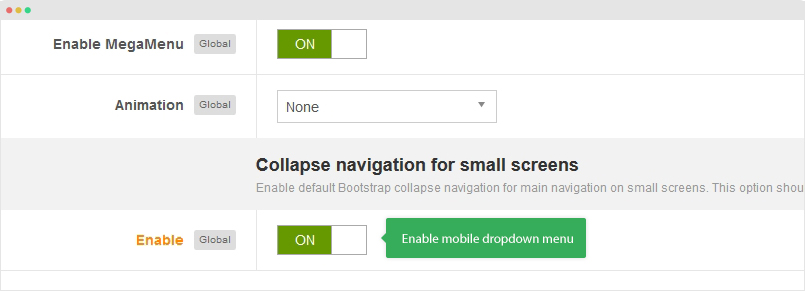
2.2 Mobile Dropdown menu
In case you don't want to use Off-canvas sidebar as mobile menu, you can use dropdown menu. Simply, open the "Navigation" setting panel and enable "Collapse navigation for small screens" option.
Footer Info modification
The footer info includes 2 sections: Copyrights and T3 footer logo.
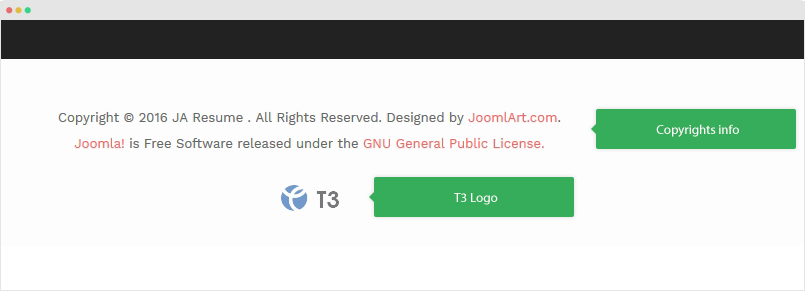
Copyrights Info modification
To change the copyrights info, open the templates/ja_resume/html/mod_footer/default.php file, find the following info and change to what you want.
<small><?php echo $lineone; ?> Designed by <a href="http://www.joomlart.com/" title="Visit Joomlart.com!" <?php echo method_exists('T3', 'isHome') && T3::isHome() ? '' : 'rel="nofollow"' ?>>JoomlArt.com</a>.</small>
Disable T3 Footer Logo
You can disable the T3 Footer Logo in the template style manager, open the General setting panel, disable the Show T3 Logo option.
![]()
Upgrade Instruction
Take a full backup
Please always make a back-up before proceeding to any of the upgrade process. In case there is any problem, you can always restore from the back-up files.
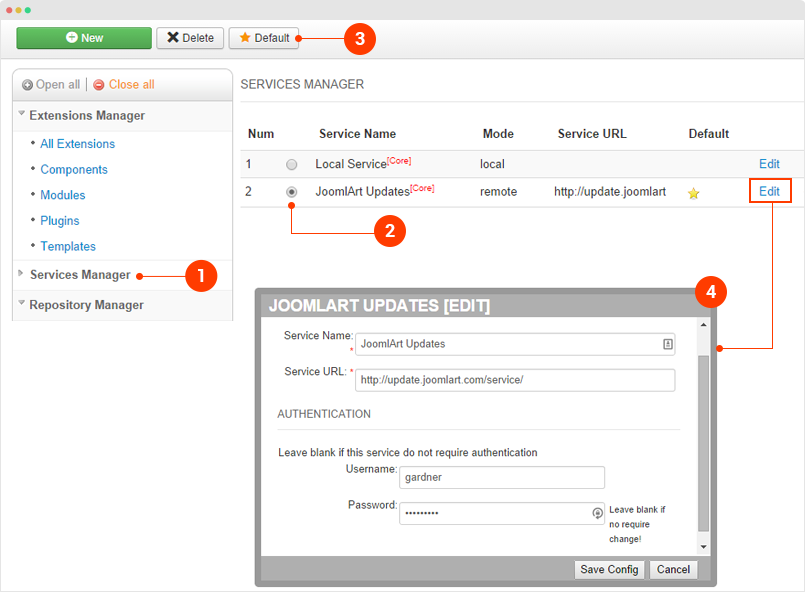
1. Set up JA Extension Manager Component
The best method to upgrade JoomlArt products is using JA Extension Manager. The FREE extension brings a new way to manage extensions: upgrade, roll back, remote install, internal repository and compare versions.
From back-end, go to: Components → JA Extension Manager then select Service Manager, now set JoomlArt as your default service. Next, hit the "Edit" button then add your Username and Password that you signed up in JoomlArt.com.
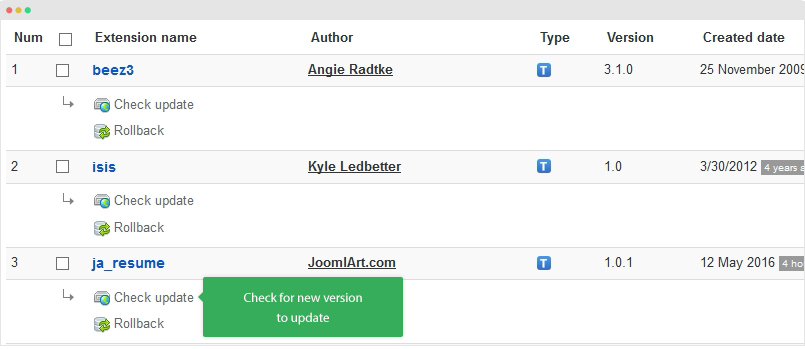
2. Upgrade JA Resume template
Step 1 - check the new version of JA Resume template. Using the filter to find the JA Resume template then hit the "Check Update" button.
Step 2 - Upgrade JA Resume template to latest version. You should compare the changes before upgrading. We only pay attention to conflicted files - files that have been modified by both user and developer. When upgrading, the conflicted files will be overridden by files in new version, that means what you customized in the files will be lost.
3. Upgrade T3 Framework and other JA extensions
Using the filter to find the extensions you want to upgrade (JoomlArt products only), hit the Check Update button to check for new version then hit the Upgrade Now to upgrade the extension to latest version.
Documentation is a WIP. If you have any specific request or feedback as well as suggestions, feel free to drop us a line in JA Resume template forum. We'll try to cover them all.