

-
AuthorPosts
-
Hung Dinh Friend
Hung Dinh
- Join date:
- September 2014
- Posts:
- 4408
- Downloads:
- 11
- Uploads:
- 189
- Thanks:
- 309
- Thanked:
- 3310 times in 3 posts
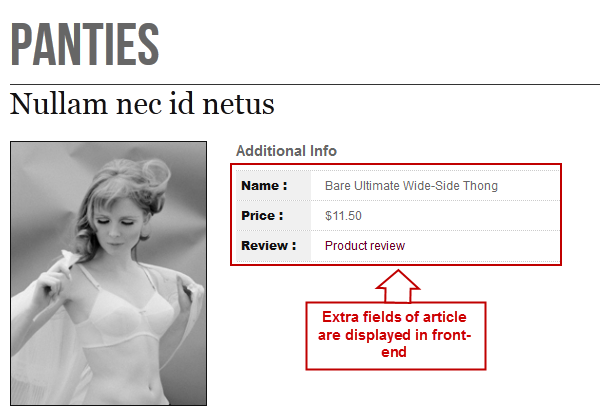
October 1, 2011 at 12:55 am #169258The plugin allows you to add extra fields into articles. The below image is an example of extra fields added to article
To add extra fields to article, please follow our below instructions.
1: Download and Install the plugin in your site
- To download the plugin, click HERE
- If you are new to Joomla!, click HERE to see the guide of Joomla! plugin installation
2: Plugin Configuration
Once the plugin is installed successfully, enable and configure the plugin.
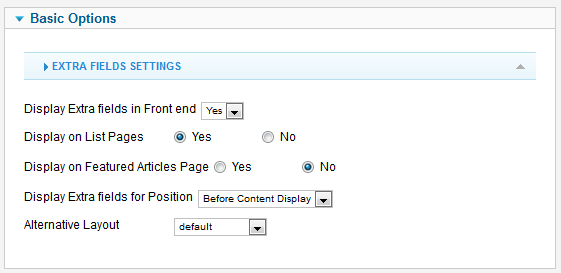
Note: You have to enable the plugin to add extra fields to article but you may don’t need to configure the plugin. There are 3 level of configuration. The first level is the configuration in plugin, the second one is the configuration in category and the third one is the configuration in article. The first level will be applied to all categories and articles incase the second and the third level are not configured.
Step 1:
Firstly, you must declare extra fields group in article.xml file that is located in:..templatesja_methyshtmljacontentextrafieldsarticle.xml
The following HTML is an example of extra fields declaration used in JA Methys J17 template
<form>
<fields name=”attribs”>
<fieldset name=”mega-params-1″ label=”Extra Fields Group 1″>
<field name=”video” type=”textarea” rows=”5″ cols=”30″ default=”” label=”video” description=”video” filter=”raw” />
</fieldset>
<fieldset name=”mega-params-2″ label=”Extra Fields Group 2″>
<field name=”name” type=”text” rows=”5″ cols=”30″ default=”” label=”name” description=”name” />
<field name=”price” type=”text” rows=”5″ cols=”30″ default=”” label=”price” description=”price” />
<field name=”review” type=”text” rows=”5″ cols=”30″ default=”” label=”review” description=”review” filter=”raw” />
</fieldset>
<fieldset name=”mega-params-3″ label=”Extra Fields Group 3″>
<field name=”test5″ type=”radio” default=”1″ label=”test5″ description=”test5″>
<option value=”0″>No</option>
<option value=”1″>Yes</option>
</field>
<field name=”test6″ type=”text” rows=”5″ cols=”30″ default=”” label=”test6″ description=”test6″ />
</fieldset>
<fieldset name=”mega-params-4″ label=”Extra Fields Group 4″>
<field name=”test7″ type=”radio” default=”1″ label=”test7″ description=”test7″>
<option value=”0″>No</option>
<option value=”1″>Yes</option>
</field>
<field name=”test8″ type=”text” rows=”5″ cols=”30″ default=”” label=”test8″ description=”test8″ />
</fieldset>
</fields>
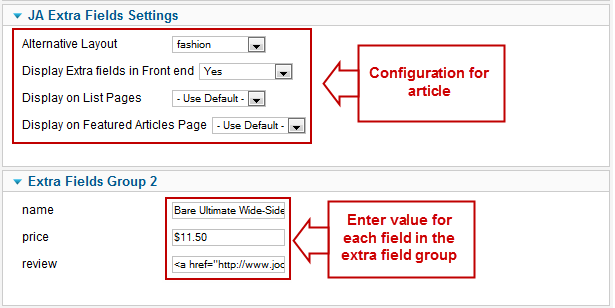
</form>Front-end appearance:
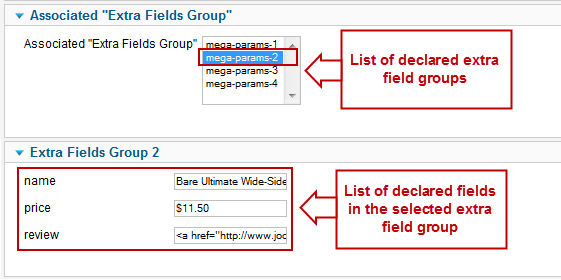
As you can see the declaration of the HTML code above, there are 4 extra field group named: mega-params-1, mega-params-2, mega-params-3, mega-params-4. Each group declares certain fields. For example, the extra field group: mega-params-2 has 3 fields named: name, price, review
Step2: Configuration for category
This one should only be configured open category and select extra fields group which you want
>> Open Associated “Extra Fields Group” tab >> Select a group which you declared in article.xml before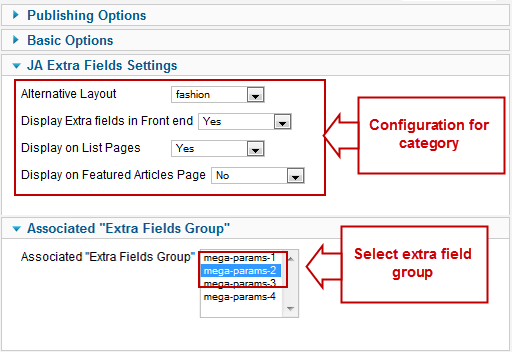
Step3: Configure for article and add value for extra fields.
Now, you can see result on our demo
-
AuthorPosts
This topic contains 1 reply, has 1 voice, and was last updated by Hung Dinh 12 years, 6 months ago.
We moved to new unified forum. Please post all new support queries in our New Forum