Sporty
Introduction
When you download templates from the JM Magento download section, you will get a zipped file. Once unzipped, you will see following folders:
- mage_ext: contains all extensions built in the template
- mage_tpl: contains the template files only
- quickstart: is a full Magento CMS version with our template already integrated to match demo
- source: contains all source files of the theme
There are two ways to install a JoomlArt Magento Theme:
- Template and Extensions installation
- Quickstart Installation
Template and Extension installation: Applicable when you have already installed a Magento instance on your server. You will need only be using the zipped files in “Extensions” and “Template” folders mentioned above.
Quickstart installation: Applicable when you need a fresh Magento with our template built in as per our demo. The zipped file in “Quickstart” folder is sufficient to fulfill the Quickstart installation.
General Installation
Magento Theme Installation Guide
Please make sure your Magento store comes ready before you integrate our themes. If your store has not been available yet, get it quickly by following Magento Installation Guide
The installation of our theme is quite simple. You just need follow steps below to get our theme ready for your Magento store:
- Upload folders skin and app from our download package to your Web server’s document root (from here on, referenced as {docroot}
- You should unzip Magento template with JM template for Magento package, then copy 2 folders skins and app to the root of your magento engine on the server.
Therefore, they will overwrite default folders skin and app in your Magento folder, you should see a directory layout like this:
index.php
js/
lib/
LICENSE.txt
media/
pear/
skin/
var/
- Open the Admin Panel of your store, and access Magento Admin area on a stage localhost: //localhost/magento/index.php/admin/, then Login your Magento Admin area.
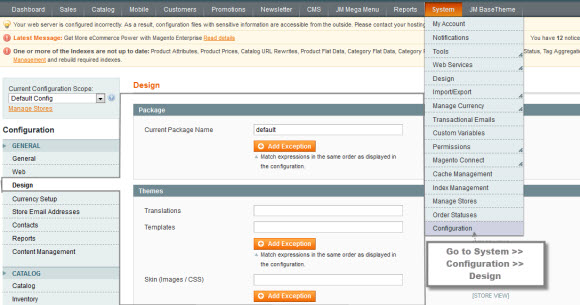
- Navigate to System>Configuration>Design as per screenshot below (Suppose that you are installing our Magento template JM Purity, follow steps below to see how to configure. For other template (i.e. jm_newtheme), you just simply replace text jm_purity with jm_newtheme.
- Fill texts to the “Package” and “Themes” sections as per screenshot below:
- You can change Header of Template as per your need, please find the following image:
- Click button “Save Config” to save your configuration


You are done! The new Magento theme is now ready to go!
JoomlArt Magento Extension -- Userguide
Please make sure your Magento store comes ready before you integrate our extensions. If your store has not been available yet, get it quickly by following Magento Installation Guide.
You just need follow steps below to get our extensions ready for your Magento store:
Upload folders skin and app from our download package to your Web server’s document root (from here on, referenced as {docroot}). These files will overwrite default folders skin and app in your Magento folder, you should see a directory layout like this:
index.php
js/
lib/
LICENSE.txt
media/
pear/
skin/
var/
- Login your Magento Admin area (ex: access Magento Admin area on a stage localhost: //localhost/magento/index.php/admin/)
- Navigate to System>Configuration
- You will see installed extension, click extension’s name tab to go to extension configuration page.
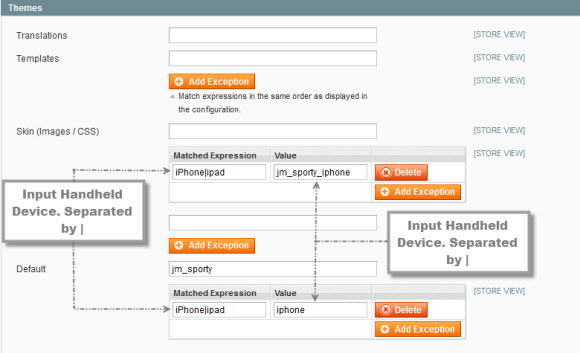
Mobile Theme setting
You can setup template for Handheld device setting by locating Themes area:
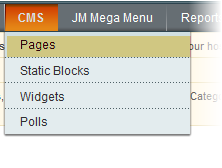
Create your own Static Block
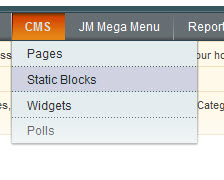
Go to Magento Admin Panel >> CMS >> Static Blocks:
Create block: E.g create “Did you know?” block
Navigate to “CMS->Static Blocks”
Click “Add new Block”
Fill the form and configure with text in italic below and click “Save Block” button:
- Title: Right module
- Identifier: right_block
- Store View: All Store Views
- Status: Enable
- Content: fill in all syntax quoted as you would like.
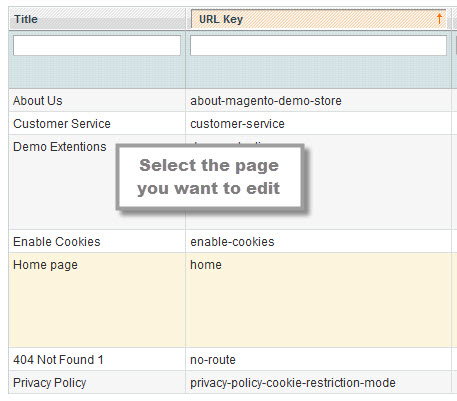
Go to CMS > Static Block > Click on the Homepage (home) row to edit the current Homepage.
In “General Information” tab, fill “Content” field with syntax quoted.- To push new static block, fill in “Layout Update XML” field in Design tab with syntax quoted below for example:
<reference name="right">
            <block type="cms/block" name="jmtabs" before="-">
                <action method="staticblock">
                    <title>[B][COLOR=Red]New block[/COLOR][/B]</title>
                    <identifier>[B][COLOR=Red]new_block[/COLOR][/B]</identifier>
                </action>

            </block>
      </reference>
Refresh your cache if needed (in System > Cache Management > Save cache settings). Refresh your Homepage to see the change applied.
QuickStart Installation
JoomlArt provides JM Quickstart package for each template which aims to ease the installation for users. It will help you save much time of installing and configuring if you plan to start your site from the beginning.
Please follow steps below:
- Download the quickstart package from JM Magento download section
- Extract and Upload the whole Quickstart package to your server. In Quickstart folder you will see the extracted folder that include all sample data
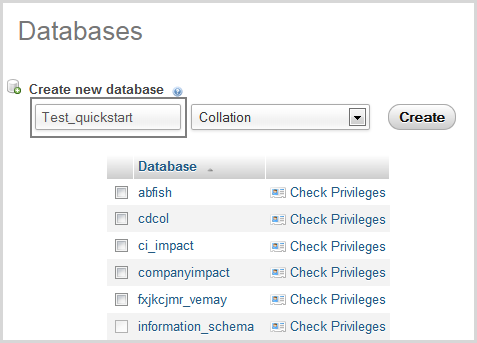
- Create a database for your Magento (using phpmyadmin)
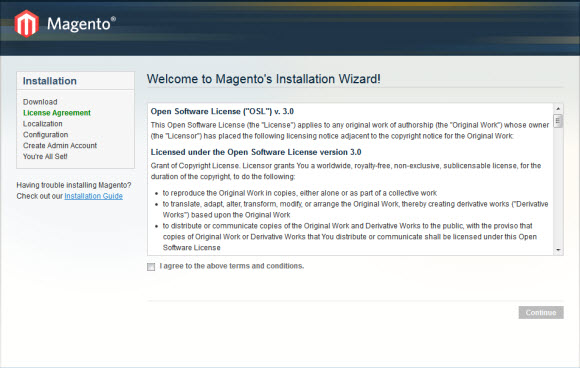
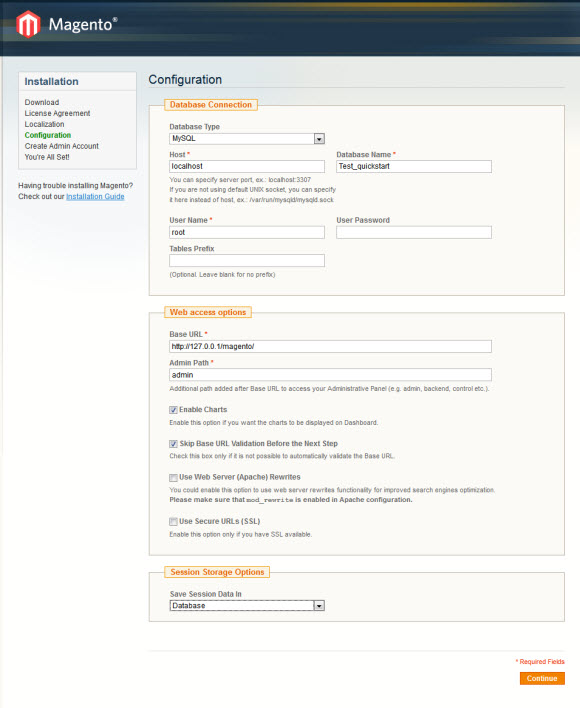
- Start installation by opening browser and navigate to your url (where the quickstart uploaded) to load default Magento installer.
- Finish installation
Important notes:
- Do not use “localhost” in URL, otherwise you could not log in your admin (you should use your local IP if installing on your computer.).
- At step 3 of installation -- Configuration page: Leave “Tables prefix” blank
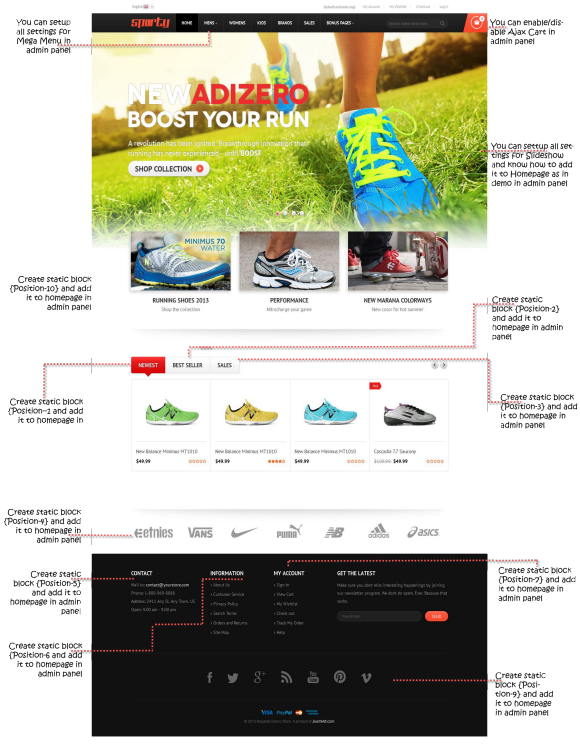
Layout and Block positions

The JM front-page has static blocks in the Theme:
You can add a new block by clicking on the Add New Block button then input the block’s content as you prefer. If you are a new user, please open guide to follow the steps to create Static Blocks
Page Configuration
Homepage
This guide will help you know how to setup one new page as Homepage in demo.
Click here for higher resolution
To config this page, please navigate to CMS >> Pages. Firstly, you must create a new page
named {Homepage} in Page Management section.
Page Information Tab:Back-end Settings- Design Tab: Back-end Settings
Paste the code below on the Content field:
PHP Code:
<reference name="mass-top">
        <block type="joomlart_jmslideshow/list" name="jmslideshow"

template="joomlart/jmslideshow/list.phtml" />
</reference>

<reference name="mass-top1">
        <block type="cms/block" name="topbanner">
           <action method="setBlockId"><block_id>position-10</block_id></action>
        </block>
</reference>

<reference name="mass-top2">
                        <block type="core/messages" name="messages" as="messages"/>
            <block type="joomlart_jmtabs/core" name="jmtabs">
                <action method="addTabs_staticblock">
                    <title>Newest</title>
                    <identifier>position-1</identifier>
                </action>
                                <action method="addTabs_staticblock">
                    <title>best seller </title>
                    <identifier>position-2</identifier>
                </action>
                <action method="addTabs_staticblock">
                    <title>Sales</title>
                    <identifier>position-3</identifier>
                </action>

            </block>
 </reference>
<reference name="content">
                        <block type="core/messages" name="messages" as="messages"/>
            <remove name="content"  />
 </reference>
  <reference name="mass-bottom">
            <block type="cms/block" name="position-4" >
                            <action method="setBlockId"><block_id>position-4</block_id></action>
                        </block>

</reference>
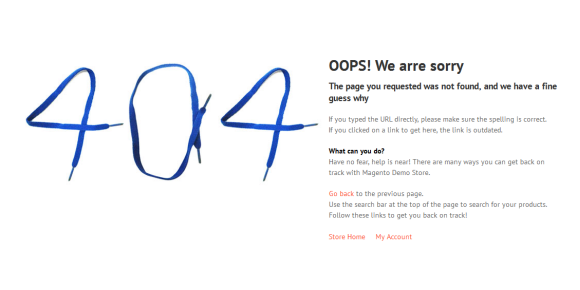
404 Page
config this page, please navigate to CMS >> Pages, then select 404 Not Found 1 page to update the settings as below:
- Page Information Tab: Back-end Settings
Paste the code below on the Content field:
PHP Code:
<div id="jm-error">
<div class="page-head-alt">
<h2>OOPS! We arre sorry</h2>
<h3>The page you requested was not found, and we have a fine guess why</h3>
</div>
<ul class="disc">
<li>If you typed the URL directly, please make sure the spelling is correct.</li>
<li>If you clicked on a link to get here, the link is outdated.</li>
</ul>
<dl><dt style="color: [URL=//www.joomlart.com/forums/usertag.php?

do=list&action=hash&hash=000]#000[/URL]">What can you do?</dt><dd>Have no fear, help is near! There

are many ways you can get back on track with Magento Demo Store.</dd><dd>
<ul class="disc">
<li><a onclick="history.go(-1);" href="#">Go back</a> to the previous page.</li>
<li>Use the search bar at the top of the page to search for your products.</li>
<li>Follow these links to get you back on track!<a style="margin-right: 20px;"

href="{{store url=""}}">Store Home</a><a href="{{store url="customer/account"}}">My Account</a></li>
</ul>
</dd></dl></div>
- Design Tab: Back-end Settings
- Metadata Tab: Back-end Settings
Front-end Appearance
How to configure static Blocks
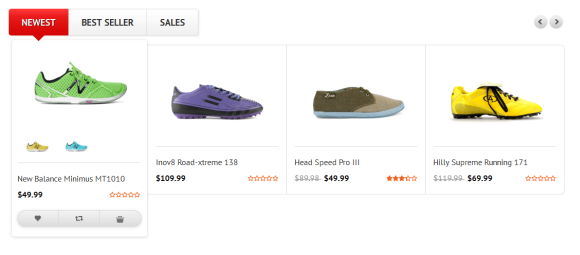
Position-1: Newest
Back-end settings as is on Demo
HTML Code:
<p>{{block type="joomlart_jmproductsslider/list" name="home.jmproductsslider" catsid="37" title="test" }}</p>
Front-end Appearance
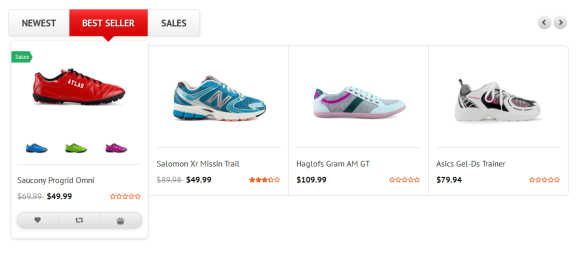
Position-2: Best Seller
Back-end settings as is on Demo
HTML Code:
<p>{{block type="joomlart_jmproductsslider/list" name="home.jmproductsslider" catsid="38" title="test" }}</p>
Front-end Appearance
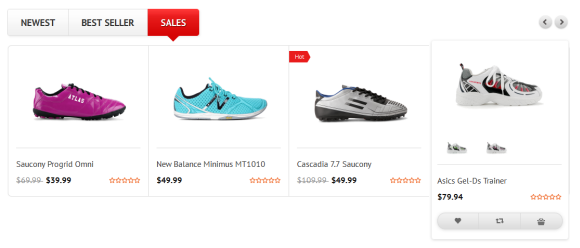
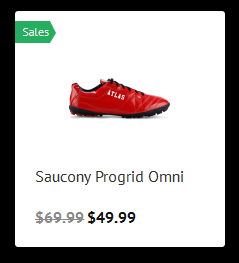
Position-3: Sales
Back-end settings as is on Demo
HTML Code:
{{block type="joomlart_jmproductsslider/list" name="home.jmproductsslider" catsid="39" title="test"" }}
Front-end Appearance
Postion-4: Company Logo
Back-end settings as is on Demo
HTML Code:
<div class=" col-4">
      <div class="block">
      <div class="block-content">
      <ul class="company-list">
      <li class="company-1"><a href="#">Company 1</a></li>
      <li class="company-2"><a href="#">Company 2</a></li>
      <li class="company-3"><a href="#">Company 3</a></li>
      <li class="company-4"><a href="#">Company 4</a></li>
      <li class="company-5"><a href="#">Company 5</a></li>
      <li class="company-6"><a href="#">Company 6</a></li>
      <li class="company-7"><a href="#">Company 7</a></li>
      </ul>
      </div>
      </div>
      </div>
To get this extension to show onto the front-page at the up top position, go to CMS > Pages>> Homepage >> In Design tab, please fill in Layout Update XML parameter -between tag as below :
PHP Code:
 <block type="cms/block" name="position-4" >
                            <action method="setBlockId"><block_id>position-4</block_id></action>
                        </block>

</reference>
Front-end Appearance

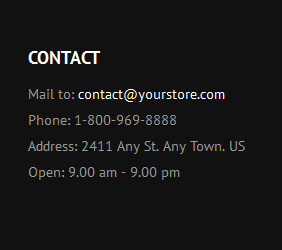
Position-5: Contact
Back-end settings as is on Demo
HTML Code
<div class="block-contact col-1">
            <div class="block block-list">
            <div class="block-title"><strong> <span>Contact</span> </strong></div>
            <div class="block-content">
            <p><span>Mail to:</span> <a href="#">[email protected]</a></p>
            <p><span>Phone:</span> 1-800-969-8888</p>
            <p><span>Address:</span> 2411 Any St. Any Town. US</p>
            <p><span>Open:</span> 9.00 am - 9.00 pm</p>
            </div>
            </div>
            </div>
Front-end Appearance
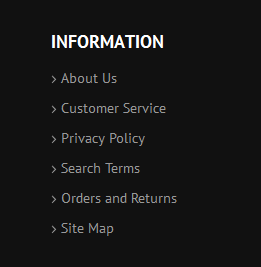
Position-6: Information
Back-end settings as is on Demo
HTML Code
<div class=" col-2">
          <div class="block block-list">
          <div class="block-title"><strong> <span>Information</span> </strong></div>
          <div class="block-content"><ol>
          <li><a title="About Us" href="{{store url="about-magento-demo-store"}}">About Us</a></li>
          <li><a title="Customer Service" href="{{store url="customer-service"}}">Customer Service</a></li>
          <li><a title="Privacy Policy" href="{{store url="privacy-policy-cookie-restriction-mode"}}">Privacy Policy</a></li>
          <li><a title="Search Terms" href="{{store url="catalogsearch/term/popular/"}}">Search Terms</a></li>
          <li><a title="Orders and Returns" href="{{store url="sales/guest/form/"}}">Orders and Returns</a></li>
          <li><a title="Site Map" href="{{store url="catalog/seo_sitemap/category/"}}">Site Map</a></li>
          </ol></div>
          </div>
          </div>
Front-end Appearance
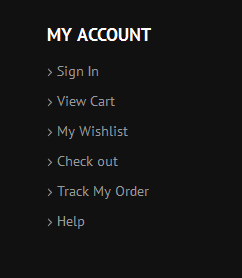
Position-7: My Account
Back-end settings as is on Demo
HTML Code
<div class=" col-3">
          <div class="block block-list">
          <div class="block-title"><strong> <span>My account</span> </strong></div>
          <div class="block-content"><ol>
          <li><a title="Sign In" href="{{store url="customer/account/login/"}}">Sign In</a></li>
          <li><a title="View Cart" href="{{store url="checkout/cart/"}}">View Cart</a></li>
          <li><a title="My Wishlist" href="{{store url="wishlist/"}}">My Wishlist</a></li>
          <li><a title="Check out" href="{{store url="checkout/"}}">Check out</a></li>
          <li><a title="Track My Order" href="{{store url="sales/guest/form/"}}">Track My Order</a></li>
          <li><a title="Help" href="{{store url="contacts/"}}">Help</a></li>
          </ol></div>
          </div>
          </div>
Front-end Appearance
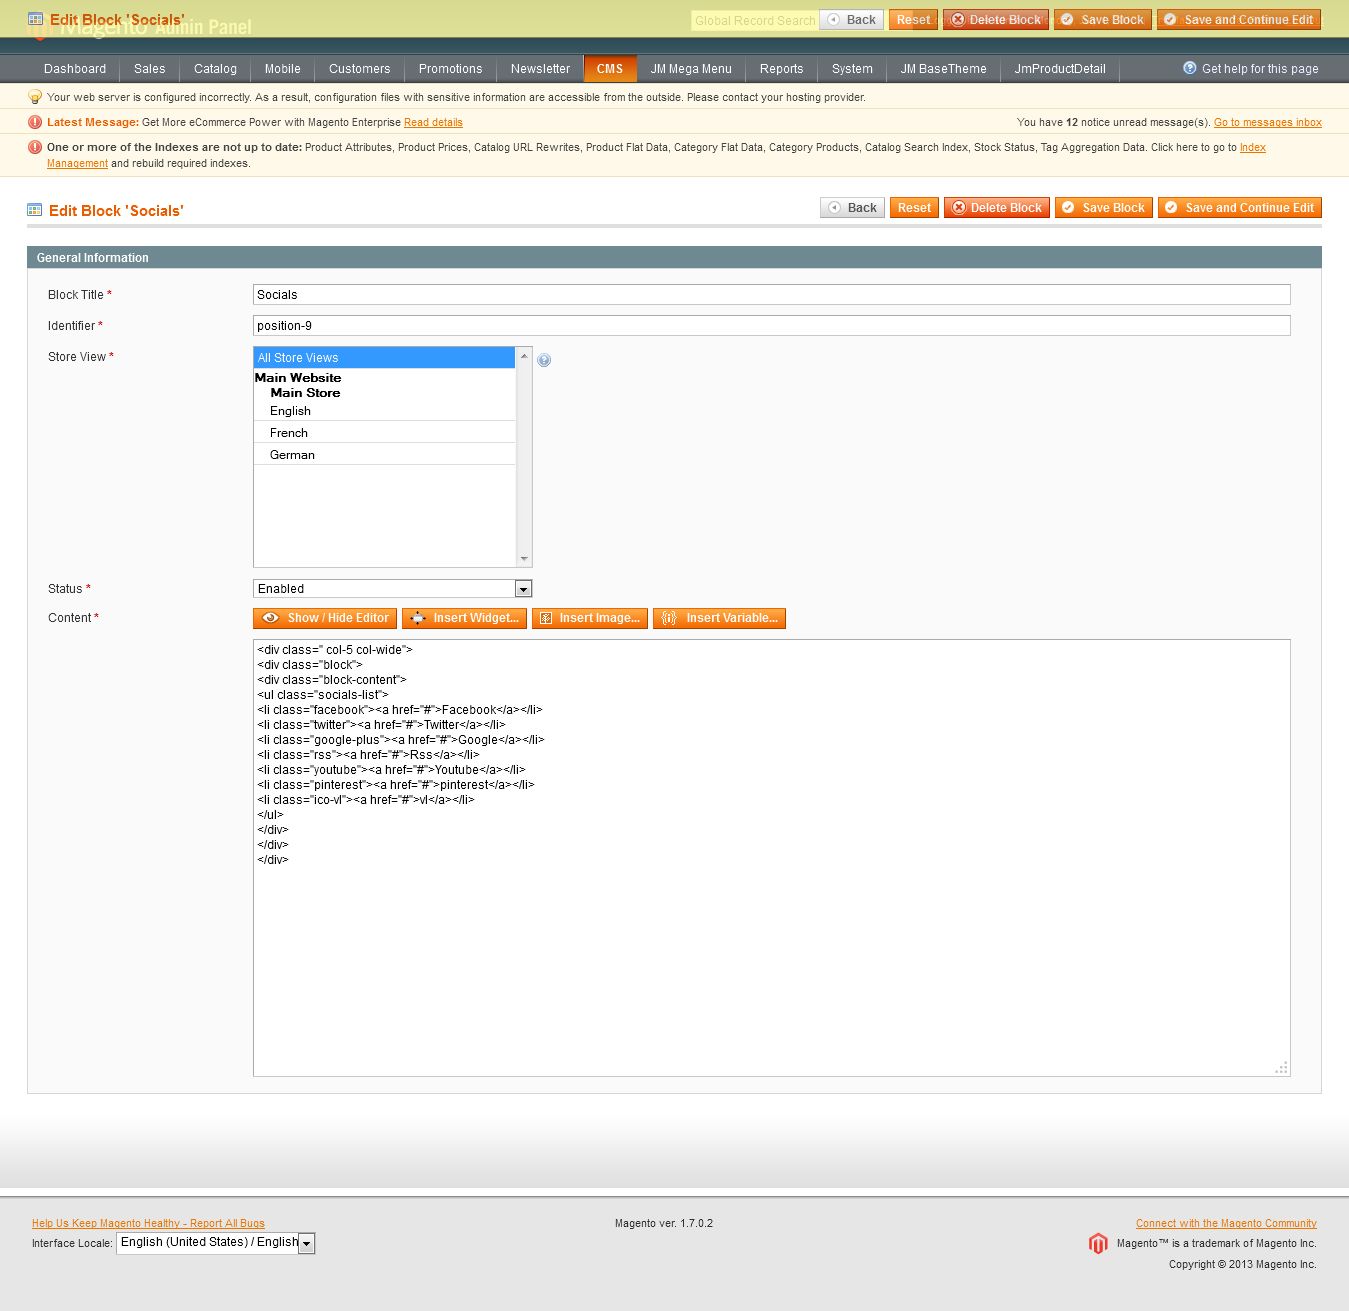
Position-9: Socials
Back-end settings as is on Demo
HTML Code
<div class=" col-5 col-wide">
      <div class="block">
      <div class="block-content">
      <ul class="socials-list">
      <li class="facebook"><a href="#">Facebook</a></li>
      <li class="twitter"><a href="#">Twitter</a></li>
      <li class="google-plus"><a href="#">Google</a></li>
      <li class="rss"><a href="#">Rss</a></li>
      <li class="youtube"><a href="#">Youtube</a></li>
      <li class="pinterest"><a href="#">pinterest</a></li>
      <li class="ico-vl"><a href="#">vl</a></li>
      </ul>
      </div>
      </div>
      </div>
Front-end Appearance

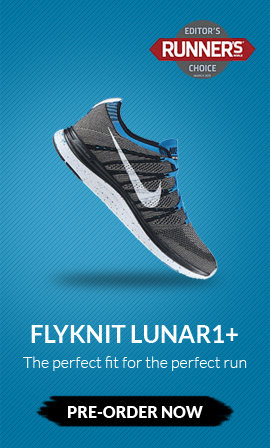
adv_product: Product Adv
Back-end settings as is on Demo
HTML Code
<p><img src="{{media url="wysiwyg/product-adv.jpg"}}" alt="" /></p>
You can change adv image in folder media/wysiwyg
Front-end Appearance
Featured-product: Featured Product
Back-end settings as is on Demo
HTML Code
<p>{{block type="joomlart_jmproducts/list" name="mega.jmproducts.list" template="joomlart/jmproducts/oneproduct.phtml" quanlity="1" title=""}}</p>
Front-end Appearance
menu-adv: Menu Adv
Back-end settings as is on Demo
HTML Code
<p><a title="Adv" href="{{config path="web/unsecure/base_url"}}running.html"><img src="{{media url="wysiwyg/menu-product-adv.png"}}" alt="" /></a></p>
Front-end Appearance

Contact_map: Contact Map
Back-end settings as is on Demo
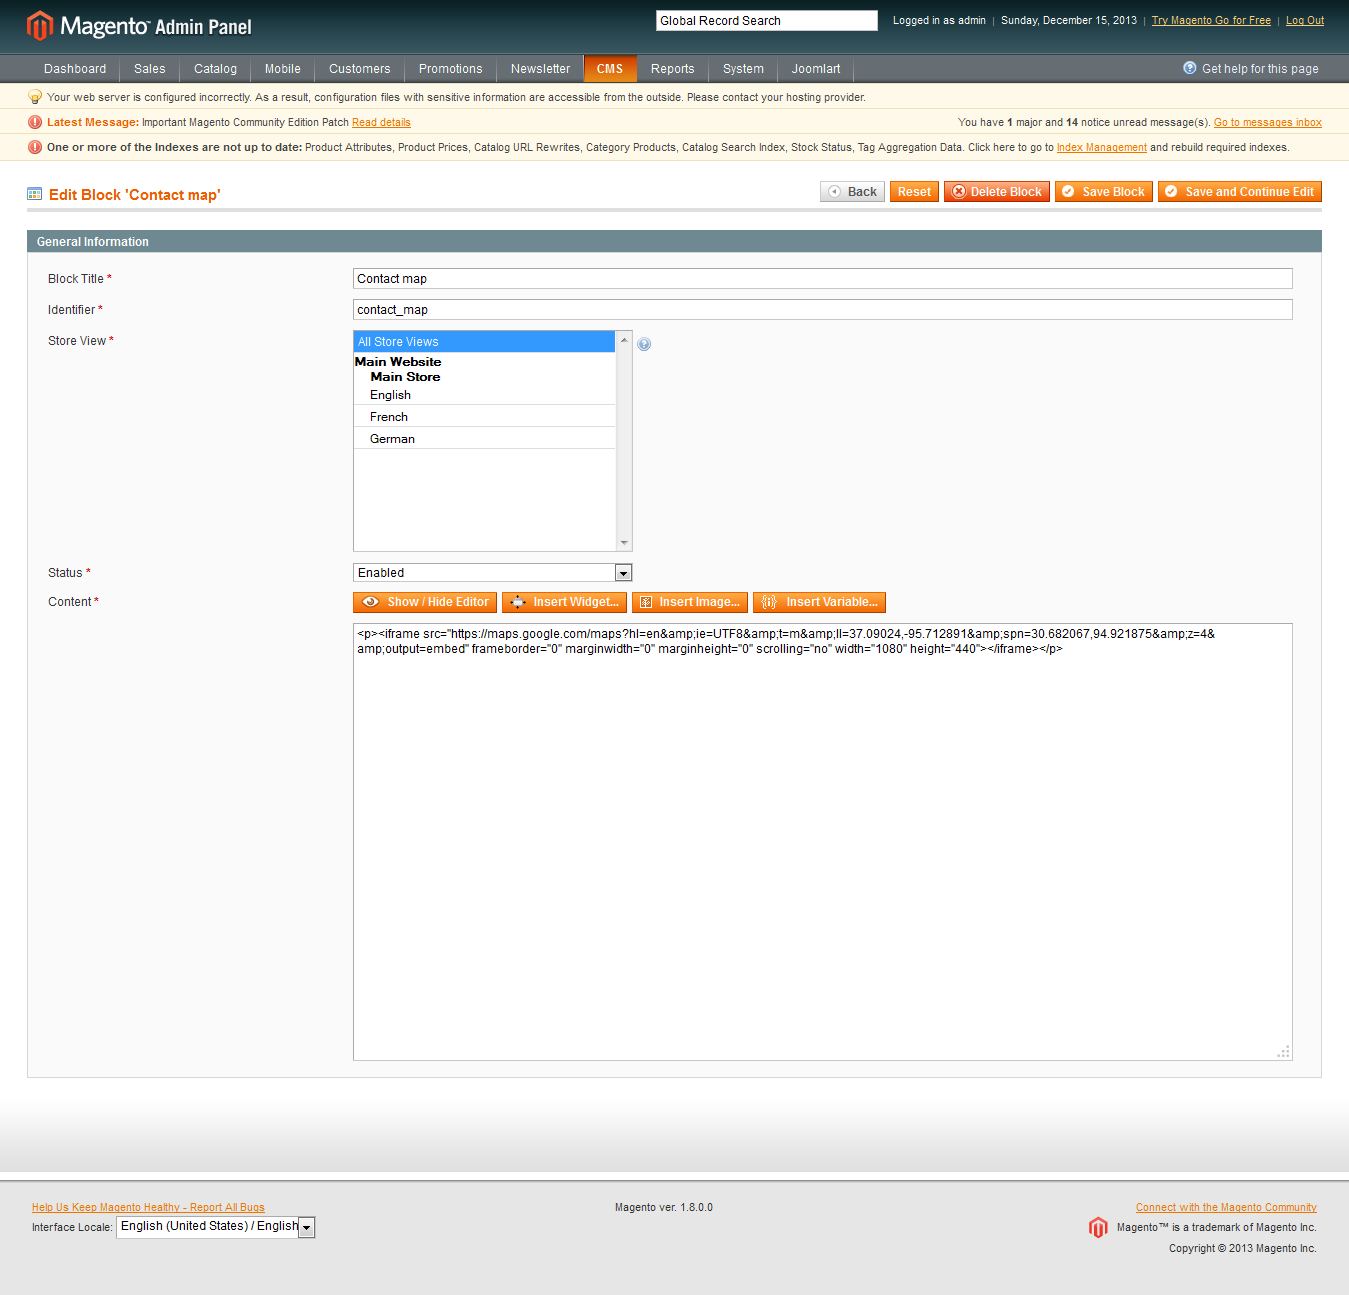
HTML Code
<p><iframe src="https://maps.google.com/maps?hl=en&ie=UTF8&t=m&ll=37.09024,-95.712891&spn=30.682067,94.921875&z=4&output=embed" frameborder="0" marginwidth="0" marginheight="0" scrolling="no" width="1080" height="440"></iframe></p>
Front-end Appearance

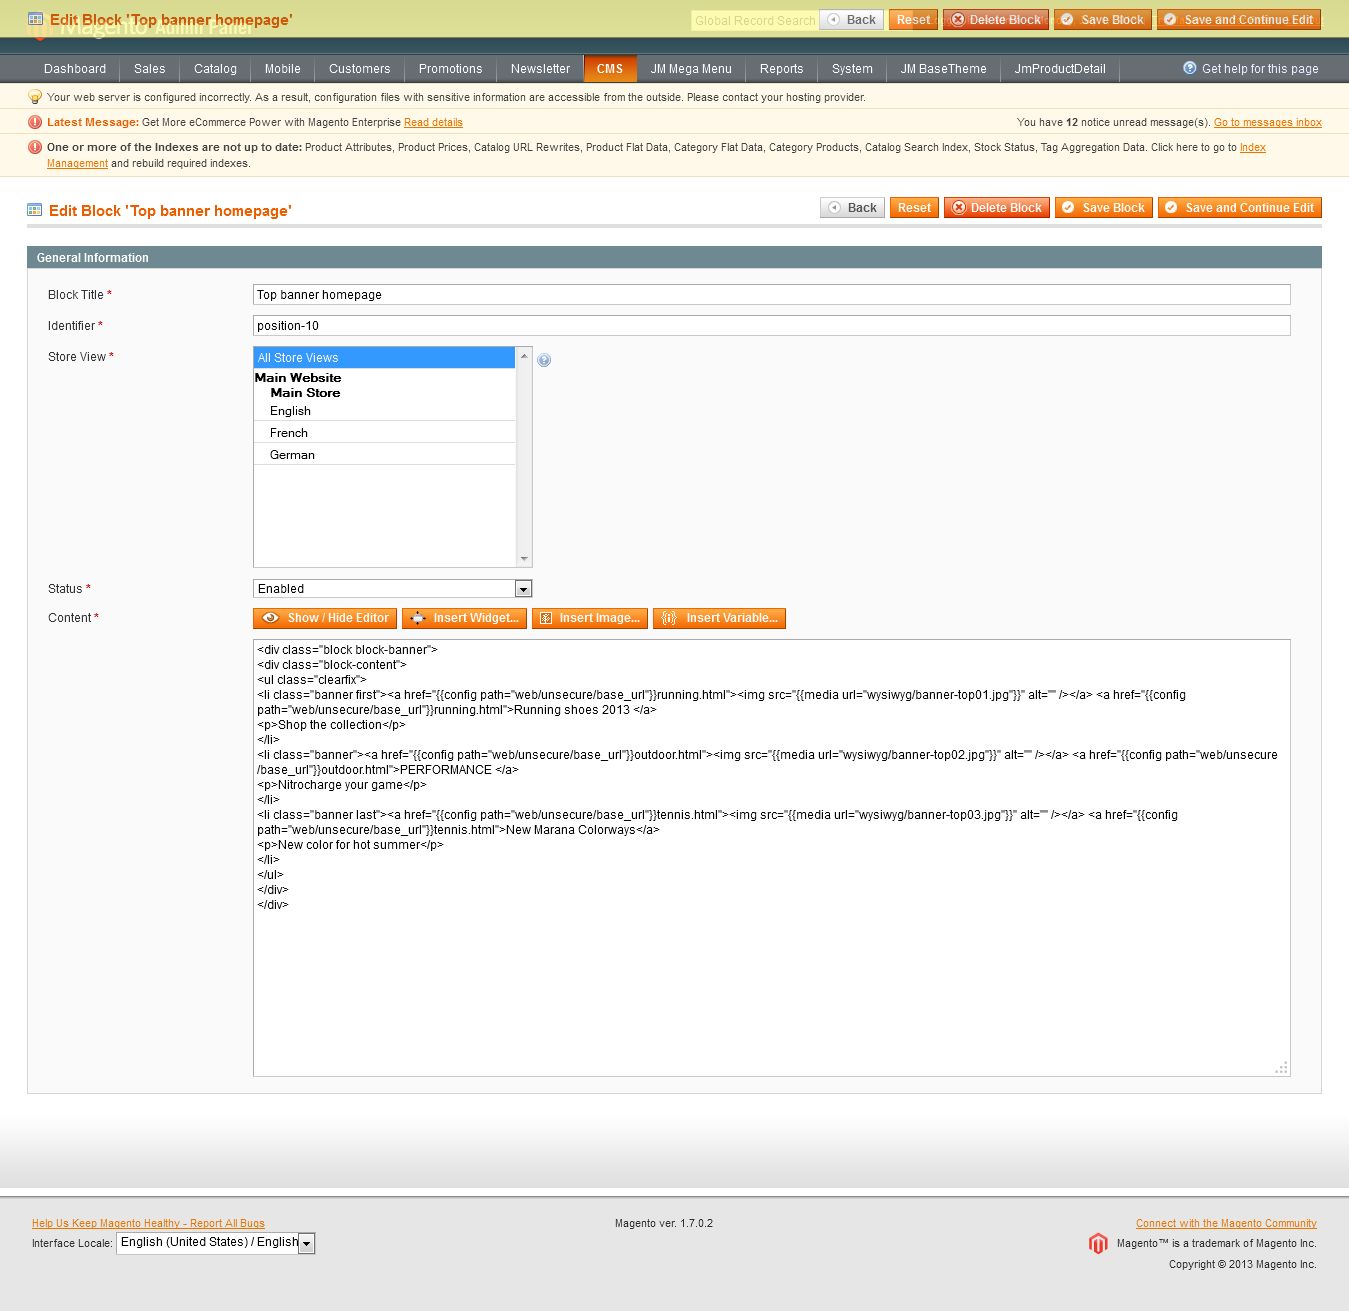
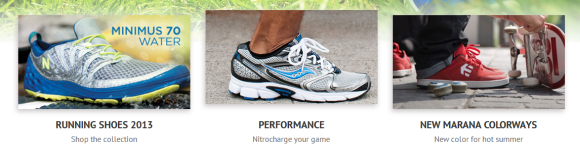
Position-10: Top banner Homepage
Back-end settings as is on Demo
HTML Code
<div class="block block-banner">
    <div class="block-content">
    <ul class="clearfix">
    <li class="banner first"><a href="{{config path="web/unsecure/base_url"}}running.html"><img src="{{media url="wysiwyg/banner-top01.jpg"}}" alt="" /></a> <a href="{{config path="web/unsecure/base_url"}}running.html">Running shoes 2013 </a><p>Shop the collection</p>
    </li>
    <li class="banner"><a href="{{config path="web/unsecure/base_url"}}outdoor.html"><img src="{{media
    url="wysiwyg/banner-top02.jpg"}}" alt="" /></a> <a href="{{config path="web/unsecure/base_url"}}outdoor.html">PERFORMANCE </a>
    <p>Nitrocharge your game</p>
    </li>
    <li class="banner last"><a href="{{config path="web/unsecure/base_url"}}tennis.html"><img src="{{media url="wysiwyg/banner-top03.jpg"}}" alt="" /></a> <a href="{{config path="web/unsecure/base_url"}}tennis.html">New Marana Colorways</a>
    <p>New color for hot summer</p>
    </li>
    </ul>
    </div>
    </div>
To get this extension to show onto the front-page at the up top position, go to CMS > Pages >> Homepage >> In Design tab, please fill in Layout Update XML parameter -between tag as below :
PHP Code:
<reference name="mass-top1">
      <block type="cms/block" name="topbanner">
      <action method="setBlockId"><block_id>position-10</block_id></action>
      </block>
      </reference>
Front-end Appearance
How to configure Extensions
Navigate to System>Configuration>JM Slideshow and configure the default criteria as
Back-end Settings as is on Demo
Update this code at Description value:
HTML Code:
[desc img="1.png" url="tennis.html"]<a href="tennis.html"><h3> <span class="text-color1">new </span><span class="text-color2">Adizero </span> <span class="text-color3">boost your run </span></h3></a><p>A revolution has been ignited. Breakthrough innovation that running has never experienced - until <strong>BOOST</strong> </p>
          [/desc]

          [desc img="2.png" url="running.html"]<a href="running.html">
          <h3> <span class="text-color1">new </span><span class="text-color2">Adizero </span>
          <span class="text-color3">boost your run </span></h3> </a><p>A revolution has been ignited.

          Breakthrough innovation that running has never experienced - until <strong>BOOST</strong> </p>
          [/desc]

          [desc img="3.png" url="outdoor.html"]<a href="outdoor.html">
          <h3> <span class="text-color1">new </span><span class="text-color2">Adizero </span>
          <span class="text-color3">boost your run </span></h3></a><p>A revolution has been ignited.

          Breakthrough innovation that running has never experienced - until <strong>BOOST</strong> </p>
          [/desc]

          [desc img="4.png" url="badminton.html"] <a href="badminton.html">
          <h3> <span class="text-color1">new </span><span class="text-color2">Adizero </span>
          <span class="text-color3">boost your run </span></h3> </a><p>A revolution has been ignited.

          Breakthrough innovation that running has never experienced - until <strong>BOOST</strong> </p>
          [/desc]
To get this extension to show onto the front-page at the up top position, go to CMS > Pages
>> Homepage >> In Design tab, please fill in Layout Update XML
parameter -between tag as below :
PHP Code:
<reference name="mass-top">
          <block type="joomlart_jmslideshow/list" name="jmslideshow" template="joomlart/jmslideshow/list.phtml" />
          </reference>
Front-end Appearance

JM Products Slider Extension
Navigate to System>Configuration>JM Products Slider to enable extension
Back-end Settings as is on Demo
blocks: Position-1, Position-2, Position-3 as a part of JM Tabs Extension.
JM Tabs Extension
Firsly, you must create 3 static blocks named “position-1”, “position-2” and “position-3” in the previous section. These 3 blocks will be used as content of JM Tabs Extension.
Navigate to System>Configuration>JM Tabs
Back-end Settings as is on Demo
To get this extension to show onto the front-page at the up top position, go to CMS > Pages >> Homepage >> In Design tab, please fill in Layout Update XML
parameter -between tag as below:
PHP Code:
<reference name="mass-top2">
                        <block type="core/messages" name="messages" as="messages"/>
                       <block type="joomlart_jmproducts/list" name="home.jmproducts.list"

template="joomlart/jmproducts/list.phtml"/>
            <block type="joomlart_jmtabs/core" name="jmtabs">
                <action method="addTabs_staticblock">
                    <title>Newest</title>
                    <identifier>position-1</identifier>
                </action>
                                <action method="addTabs_staticblock">
                    <title>best seller </title>
                    <identifier>position-2</identifier>
                </action>
                <action method="addTabs_staticblock">
                    <title>Sales</title>
                    <identifier>position-3</identifier>
                </action>

            </block>
 </reference>
JM Masshead Extension
Navigate to System>Configuration>JM Masshead to enable extension
Back-end Settings as is on Demo
This extension can be used at any position of a page. In this theme, it’s being used at the header of the categories page.
To use this extension, go to Catalog > Manage Categories >then select the page that you would like to display it on.
Back-end settings as seen on Demo
To push this module onto front-page on top, at Custom Design tab please fill in Layout Update XML
parameter as below :
PHP Code:
<reference name="mass-top3">
   <block type="joomlart_jmmasshead/core" name="jmmasshead"  >
        <action method="setData"><name>title</name><value>Hoodies Top</value></action>
         <action method="setData"><name>background</name><value>images/media/mass-head-

banner.jpg</value></action>
   </block>
</reference>
Front-end appearance

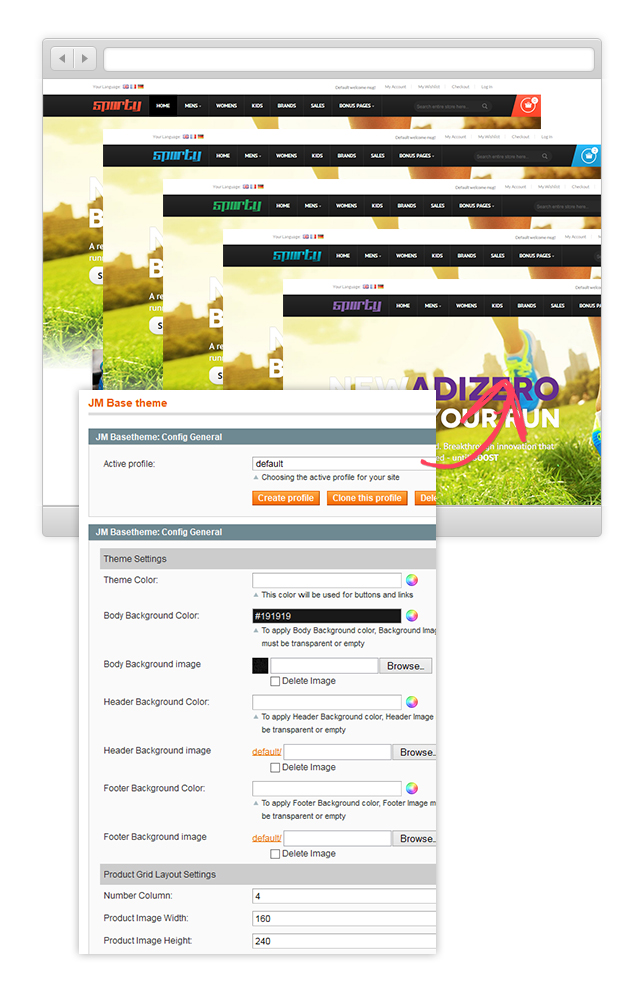
JM Base Theme Extension
Navigate to System>Configuration>JM Base Theme
Back-end Settings to enable it in Demo Base theme Admin settings allow user to customized unlimited color.
Front-end Appearance
Menu Configuration
JM Sporty uses Mega Menu. Follow the guide below to get it configured properly.To add menu items, please navigate Back-end >> JM Mega Menu >> Manage Menu Item . You must create add new Menu Group.The settings below belong to English group. Other language groups have similar settings menu item.
Home Menu
Front-end appearance

Item : Home -- Menu Back-end Settings
Men Menu
Front-end appreance:
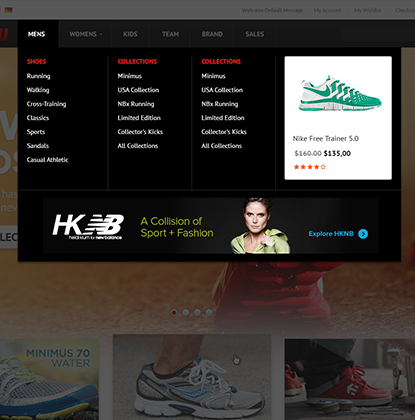
Item 1: Men Menu Back-end Settings
Item 2: Shoes Menu Back-end Settings
Item 3: Running Menu Back-end Settings
Item 4: Products Menu Back-end Settings
Item 5: adv Menu Back-end Settings
Women Menu
Front-end appreance:

Item: Women -- Menu Back-end Settings
Bonus Pages Menu
Front-end appreance:
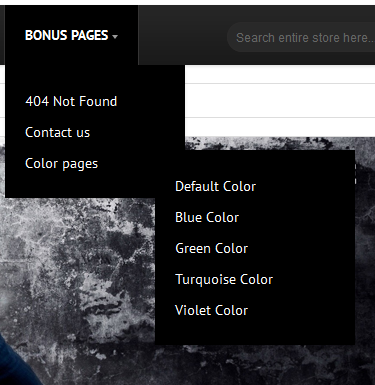
Item : Bonus Pages Item -- Menu Back-end Settings
Item : 404 Not Found Item -- Menu Back-end Settings
Responsive Configuration
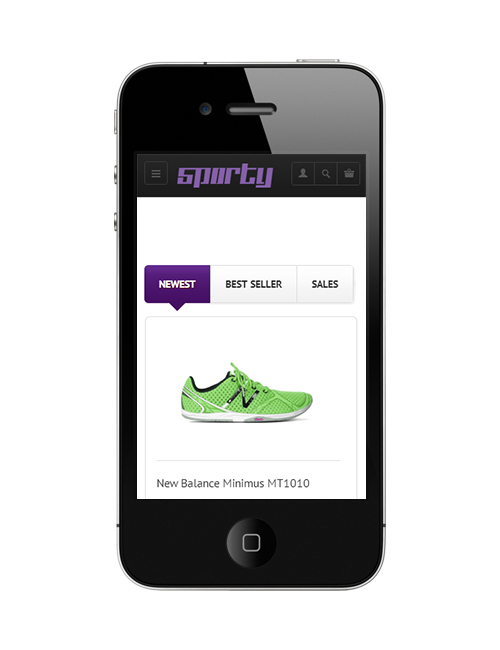
JM Sporty Magento theme is a Responsive design Magento theme, which allows JM Sporty displayed beautifully on various screen sizes and devices (mobiles and tablets). This theme has Off Canvas layouts. You can see how define it below.
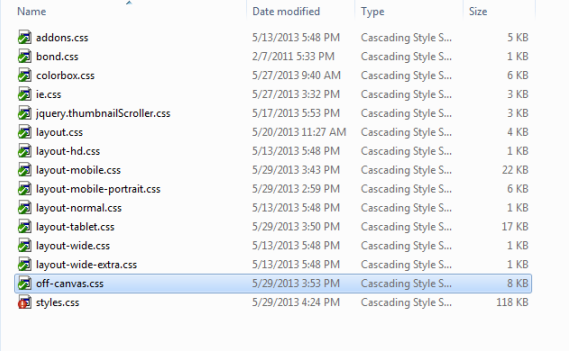
Supported Layouts
All the style files supported layouts are located in the folder:skin/frontend/default/jm_sporty/css. In this particular theme, we support 3 styles: layout in desktop, tablet and mobile .Have the style files in hand, modification for the files will need to be defined in the page.xml file located in: app/design/frontend/default/jm_sporty/layout

Open file layout.xml at the tag in this file, add this code:
PHP Code:
<action method="addCss"><stylesheet>css/off-canvas.css</stylesheet></action>
 <action method="addCss"><stylesheet>css/layout-

mobile.css</stylesheet><params>media="only screen and (max-width:719px)"</params></action>
<action method="addCss"><stylesheet>css/layout-mobile-

portrait.css</stylesheet><params>media="only screen and (max-width:479px)"</params></action>
<action method="addCss"><stylesheet>css/layout-

tablet.css</stylesheet><params>media="only screen and (min-width:720px) and (max-width:

985px)"</params></action>
<action method="addCss"><stylesheet>css/layout-

normal.css</stylesheet><params>media="only screen and (min-width:986px) and (max-width:

1235px)"</params></action>
<action method="addCss"><stylesheet>css/layout-

wide.css</stylesheet><params>media="only screen and (min-width:1236px) and (max-width:

1585px)"</params></action>
<action method="addCss"><stylesheet>css/layout-wide-

extra.css</stylesheet><params>media="only screen and (min-width:1586px) and (max-width:

1890px)"</params></action>
<action method="addCss"><stylesheet>css/layout-

hd.css</stylesheet><params>media="only screen and (min-width:1891px)"</params></action>
- When the screen width is somewhere between 479 and 1891 pixel, the themes will load the layout-tablet.css file to display as the default style file.
- When the screen width is smaller than 479 pixel, the theme will loads the layout-mobile.css
- Otherwise, the theme will load the layout.css file to display as its default style file. The
layout.css file is the style file for desktop.
How to define Offcanvas
In the folder: skin/frontend/default/jm_sporty/js, the theme defined a js file named off-canvas
It will be called in the file head.phtml at the folder app/design/frontend/default/jm_sporty/template/page/html
Open file head.phtml, add this code:
PHP Code:
<script type="text/javascript" src="<?php echo $this->getSkinUrl('js/off-canvas.js') ?>"></script>
How to define Responsive
To be short, responsive can be defined based on column.
- The layout on desktop uses 1 column, the width size of layout is 100% --> width size of each column = 50%. Hence, whenever the screen width in pixel is changed, the width of each column in pixel will also get changed accordingly.
- Tablet Layout uses 1 column, each column width is 50%.
- Mobile Layout uses 1 column, each column width is 100%.
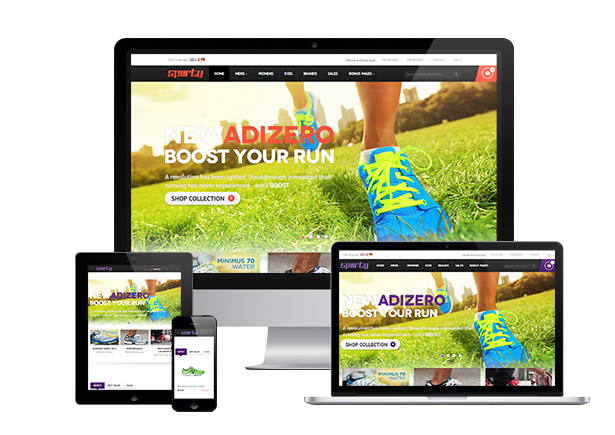
Front-end in demo
Tablet Portrait

Tablet Landscape

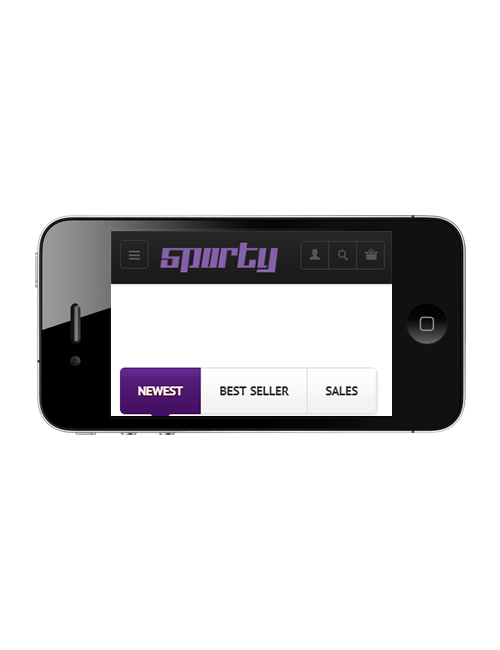
Mobile Portrait
Mobile Landscape